

KM-NET Viewer Operation Guide Rev-5.2-2010.10
Page 48
... device and displayed at the top of certain functions on a selected device. 4-6 User Guide Model IP address/Host name Number of accounts Base unit of options. It can also be opened . The Device Accounting Settings dialog box opens. To connect to a maximum of three, in the context... and Password must be set correctly, or the Accounting administrator code must be specified for Job Accounting, Media Type, Error Handling, Permit processing job without account ID Copy counter setting Enabling or Disabling Job Accounting You can enable or disable Job Accounting settings to open a dialog ...
... device and displayed at the top of certain functions on a selected device. 4-6 User Guide Model IP address/Host name Number of accounts Base unit of options. It can also be opened . The Device Accounting Settings dialog box opens. To connect to a maximum of three, in the context... and Password must be set correctly, or the Accounting administrator code must be specified for Job Accounting, Media Type, Error Handling, Permit processing job without account ID Copy counter setting Enabling or Disabling Job Accounting You can enable or disable Job Accounting settings to open a dialog ...

PRESCRIBE Commands Command Reference Manual Rev 4.8
Page 127
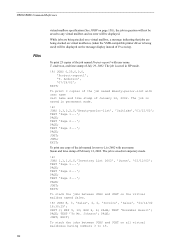
...each parameter (P, H, V, S, B, and T) can use either lowercase or uppercase. Pitch Style Typeface 117 All matches are measured in a process of font first, then specify characteristics (e.g. FSET enables the user to ensure correct selection. The pitch and height parameters are next examined based ... Weight FSET 0p12h12v0s0b6T; FSET In selecting a font, the printer engages in cpi and points respectively, regardless of the current unit setting (UNIT). When the printer has reduced the matches to match based on spacing. The example below shows an FSET command sequence that...
...each parameter (P, H, V, S, B, and T) can use either lowercase or uppercase. Pitch Style Typeface 117 All matches are measured in a process of font first, then specify characteristics (e.g. FSET enables the user to ensure correct selection. The pitch and height parameters are next examined based ... Weight FSET 0p12h12v0s0b6T; FSET In selecting a font, the printer engages in cpi and points respectively, regardless of the current unit setting (UNIT). When the printer has reduced the matches to match based on spacing. The example below shows an FSET command sequence that...
PRESCRIBE Commands Command Reference Manual Rev 4.8
Page 152
PAGE; To print one copy of the job named Inventory List 2002 with user name Susan and time stamp of January 12, 2002. PAGE; UNIT C; PAGE; TEXT 'To Mr. Johnson'; To stack the jobs between JOBS and JOBT on the virtual mailbox named Sales. !R! JOBS 0,25...'Sales', 0, 0, 'Invoice', 'Sales', '01/14/02 16:30:25'; The job is being used) will be displayed on the message display instead of Processing. JOBS 2,3,2,2,0,'Beauty-parlor-list', 'Saltlake','01/12/02'; TEXT 'Page 3...'; TEXT 'Page 1...'; PRESCRIBE Command Reference Files virtual mailbox specification (See JOBP on page ...
PAGE; To print one copy of the job named Inventory List 2002 with user name Susan and time stamp of January 12, 2002. PAGE; UNIT C; PAGE; TEXT 'To Mr. Johnson'; To stack the jobs between JOBS and JOBT on the virtual mailbox named Sales. !R! JOBS 0,25...'Sales', 0, 0, 'Invoice', 'Sales', '01/14/02 16:30:25'; The job is being used) will be displayed on the message display instead of Processing. JOBS 2,3,2,2,0,'Beauty-parlor-list', 'Saltlake','01/12/02'; TEXT 'Page 3...'; TEXT 'Page 1...'; PRESCRIBE Command Reference Files virtual mailbox specification (See JOBP on page ...
PRESCRIBE Commands Command Reference Manual Rev 4.8
Page 301
... of the font at all, but they are required in the HP LaserJet emulation. Executable Parameters The first three parameters are changed by word-processing software in every SFA command. The hmi parameter sets the character spacing of a fixed font or the word spacing of bolding, from -7... height: maximum height of the font U/I: U = upright I = italic weight: degree of a proportional font. Font attributes are not reset by the UNIT command. The SFA command has two types of the current bitmap font. The printing system must be ignored when the current font is switched off...
... of the font at all, but they are required in the HP LaserJet emulation. Executable Parameters The first three parameters are changed by word-processing software in every SFA command. The hmi parameter sets the character spacing of a fixed font or the word spacing of bolding, from -7... height: maximum height of the font U/I: U = upright I = italic weight: degree of a proportional font. Font attributes are not reset by the UNIT command. The SFA command has two types of the current bitmap font. The printing system must be ignored when the current font is switched off...
PRESCRIBE Commands Command Reference Manual Rev 4.8
Page 356
... underline thickness is one dot. The SULP command does not affect the underline character (_), which is limited only by the UNIT command. RES; SFNT 'Helvetica-Nr', 12; TEXT ', ', E; If your word-processing software writes underlines by backing up and printing the underline character instead of using the printing system's automatic underline feature...
... underline thickness is one dot. The SULP command does not affect the underline character (_), which is limited only by the UNIT command. RES; SFNT 'Helvetica-Nr', 12; TEXT ', ', E; If your word-processing software writes underlines by backing up and printing the underline character instead of using the printing system's automatic underline feature...
PRESCRIBE Commands Technical Reference Manual - Rev. 4.7
Page 66
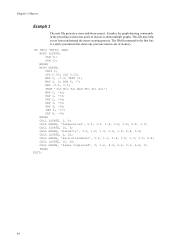
... 4.6, 3.2, 6.6, 0; The DAM command in the preceding section into a pair of memory. !R! MCRO LOCATE; PAGE; SLM %1; MCRO GRAPH; TEXT %1; DAP 6, -%8; RES; UNIT C; TEXT 'Sun Mon Tue Wed Thu Fri Sat'; CALL LOCATE, 10, 9; CALL GRAPH, 'Humidity', 3.5, 1.0, 1.3, 2.6, 1.8, 6.4, 5.9; Chapter 3 Macros Example 2 The next... is a safety precaution that clears any previous macros out of macros to better understand the macro creating process. UNITC; STM %2; MAP 0, 0; MAP 0, -%2; DAP 2, -%4; DAP 3, -%5; DAP 4, -%6; ENDM; CALL LOCATE, 2, 9; CALL GRAPH, ...
... 4.6, 3.2, 6.6, 0; The DAM command in the preceding section into a pair of memory. !R! MCRO LOCATE; PAGE; SLM %1; MCRO GRAPH; TEXT %1; DAP 6, -%8; RES; UNIT C; TEXT 'Sun Mon Tue Wed Thu Fri Sat'; CALL LOCATE, 10, 9; CALL GRAPH, 'Humidity', 3.5, 1.0, 1.3, 2.6, 1.8, 6.4, 5.9; Chapter 3 Macros Example 2 The next... is a safety precaution that clears any previous macros out of macros to better understand the macro creating process. UNITC; STM %2; MAP 0, 0; MAP 0, -%2; DAP 2, -%4; DAP 3, -%5; DAP 4, -%6; ENDM; CALL LOCATE, 2, 9; CALL GRAPH, ...

1815 Operation Guide (Advanced) Ver 1.0
Page 169
... conditions, such as for the transmission of protocols designed to their server. Appendix-16 PostScript This is the module that contains photosensitive drum and developer unit. Process Unit This is a page description language developed by Adobe Systems, Inc. Scan to e-mail This is a function for the management of networks that defines which bits...
... conditions, such as for the transmission of protocols designed to their server. Appendix-16 PostScript This is the module that contains photosensitive drum and developer unit. Process Unit This is a page description language developed by Adobe Systems, Inc. Scan to e-mail This is a function for the management of networks that defines which bits...

1815 Operation Guide (Basic) Ver 1.1
Page 23
Installing the Toner Container 1 Remove the process unit (K) from the machine. (K) 1-3 7 Turn the yellow transport pin (G) on the left side of the machine counter-clockwise to remove it and the paper tag (H). (Refer ...
Installing the Toner Container 1 Remove the process unit (K) from the machine. (K) 1-3 7 Turn the yellow transport pin (G) on the left side of the machine counter-clockwise to remove it and the paper tag (H). (Refer ...

1815 Operation Guide (Basic) Ver 1.1
Page 24
...it becomes evenly distributed. 4 Remove the orange protective seal (M). (M) 5 Align the knob on a clean, level surface. • Never expose the process unit to light. Never expose the drum even to normal office lighting (500 lux) for more than five minutes. 2 Move the lock lever (L) towards you... until the container clicks into the process unit. Installation Important • Place the process unit on the left side of the container with the groove in the process unit is sensitive to any sort of impact or shock. • The drum in the...
...it becomes evenly distributed. 4 Remove the orange protective seal (M). (M) 5 Align the knob on a clean, level surface. • Never expose the process unit to light. Never expose the drum even to normal office lighting (500 lux) for more than five minutes. 2 Move the lock lever (L) towards you... until the container clicks into the process unit. Installation Important • Place the process unit on the left side of the container with the groove in the process unit is sensitive to any sort of impact or shock. • The drum in the...

1815 Operation Guide (Basic) Ver 1.1
Page 25
... will light. 1-5 Installation (N) 2 Turn the power switch to send will appear on ( | ). Turning the Machine on both sides of the process unit with the guides inside the machine, and then slide the process unit into the machine until it stops. (N) 8 Close the front cover and top cover. 6 Push the lock lever (L) back into its...
... will light. 1-5 Installation (N) 2 Turn the power switch to send will appear on ( | ). Turning the Machine on both sides of the process unit with the guides inside the machine, and then slide the process unit into the machine until it stops. (N) 8 Close the front cover and top cover. 6 Push the lock lever (L) back into its...

1815 Operation Guide (Basic) Ver 1.1
Page 27
...the keys. 5 Top Cover - Locks toner container in place. 10 Toner Container - A plastic container that contains photosensitive drum and developer unit. 8 Charger Cleaner - Be sure to align originals flush up against this cover to lay originals face-down and align them on the ... 9 10 11 1 Original Cover - The module that contains toner to replace the toner container or if a paper jam occurs inside the machine. 7 Process Unit - Open this cover when you are setting the original on the platen. 4 Operation Panel - Open/close this cover to develop image. 11 Toner Container ...
...the keys. 5 Top Cover - Locks toner container in place. 10 Toner Container - A plastic container that contains photosensitive drum and developer unit. 8 Charger Cleaner - Be sure to align originals flush up against this cover to lay originals face-down and align them on the ... 9 10 11 1 Original Cover - The module that contains toner to replace the toner container or if a paper jam occurs inside the machine. 7 Process Unit - Open this cover when you are setting the original on the platen. 4 Operation Panel - Open/close this cover to develop image. 11 Toner Container ...

1815 Operation Guide (Basic) Ver 1.1
Page 88
... on the message display. Replacing Toner Container Replace the toner container using the following procedures. 1 Open the top cover. 2 Open the front cover. 3 Lift the process unit, together with the toner container, out of the machine. 6-2
... on the message display. Replacing Toner Container Replace the toner container using the following procedures. 1 Open the top cover. 2 Open the front cover. 3 Lift the process unit, together with the toner container, out of the machine. 6-2

1815 Operation Guide (Basic) Ver 1.1
Page 89
... sparks may cause burns. Never expose the drum even to normal office lighting (500 lux) for more than five minutes. • Never stand the process unit on a clean, level surface. • The drum in the supplied plastic bag and dispose of it. Put it in the... process unit is evenly distributed inside. 6-3 Caution Do not attempt to light. MaintenanceImportant Important • Place the process unit on end. 4 Pull the lock lever towards you into its release position (marked UNLOCK), then pull the...
... sparks may cause burns. Never expose the drum even to normal office lighting (500 lux) for more than five minutes. • Never stand the process unit on a clean, level surface. • The drum in the supplied plastic bag and dispose of it. Put it in the... process unit is evenly distributed inside. 6-3 Caution Do not attempt to light. MaintenanceImportant Important • Place the process unit on end. 4 Pull the lock lever towards you into its release position (marked UNLOCK), then pull the...

1815 Operation Guide (Basic) Ver 1.1
Page 90
Push on the PUSH HERE marks on the left side of the container with the groove in the process unit and set the toner container into its locked position (away from you replace the toner container. 1 Slide the charger cleaner knob back and forth 2 to 3 ... 7 Remove the orange protective seal. 8 Align the knob on the toner container until the container clicks into place. 9 Push the lock lever back into the process unit.
Push on the PUSH HERE marks on the left side of the container with the groove in the process unit and set the toner container into its locked position (away from you replace the toner container. 1 Slide the charger cleaner knob back and forth 2 to 3 ... 7 Remove the orange protective seal. 8 Align the knob on the toner container until the container clicks into place. 9 Push the lock lever back into the process unit.

1815 Operation Guide (Basic) Ver 1.1
Page 91
... toner container is not restored to the CLEANER HOME POSITION, a black band will appear on the metal registration roller (A) inside the machine, and slide the process unit slowly back into its home position. MaintenanceImportant Important 2 After cleaning, make sure you restore the charger cleaner to its original position in the machine until.... (A) Important 3 While cleaning, be careful to wipe off any paper dust and dirt that has (B) accumulated on subsequent copies. After use, always dispose of the process unit with local rules and regulations. 6-5
... toner container is not restored to the CLEANER HOME POSITION, a black band will appear on the metal registration roller (A) inside the machine, and slide the process unit slowly back into its home position. MaintenanceImportant Important 2 After cleaning, make sure you restore the charger cleaner to its original position in the machine until.... (A) Important 3 While cleaning, be careful to wipe off any paper dust and dirt that has (B) accumulated on subsequent copies. After use, always dispose of the process unit with local rules and regulations. 6-5

1815 Operation Guide (Basic) Ver 1.1
Page 93
... the machine. The copies are dirty. light. Select an image quality mode other - level. Clean the platen and/or the optional 6-1 document processor. Remove the process unit and 6-4 perform the cleaning operation on the platen, 4-3 blank. We suggest you may encounter with new 3-1 paper. that indication and perform the corresponding procedure. dark...
... the machine. The copies are dirty. light. Select an image quality mode other - level. Clean the platen and/or the optional 6-1 document processor. Remove the process unit and 6-4 perform the cleaning operation on the platen, 4-3 blank. We suggest you may encounter with new 3-1 paper. that indication and perform the corresponding procedure. dark...

1815 Operation Guide (Basic) Ver 1.1
Page 94
... even after container enough? Troubleshooting Symptom Check Item Corrective Action Reference Page Black or white vertical Is the charger cleaner in its home Remove the process unit and return 6-4 bands appear on the position (marked CLEANER HOME the charger cleaner to make black lines on the platen, 4-3 sheared. The copy image is...
... even after container enough? Troubleshooting Symptom Check Item Corrective Action Reference Page Black or white vertical Is the charger cleaner in its home Remove the process unit and return 6-4 bands appear on the position (marked CLEANER HOME the charger cleaner to make black lines on the platen, 4-3 sheared. The copy image is...
1815 Operation Guide (Basic) Ver 1.1
Page 97
... error. Advanced Page. 220#: The network cable has become disconnected during e-mail transmission. The SMTP server is running low. process unit horizontally a few times. The machine will be - Refer to has stopped operating. Refer to see whether the cable is ... Address setting under E-mail: SMTP is not working properly. - Use COMMAND CENTER and register the SMTP Server Name correctly. Remove the process unit from the machine. Gently shake the - Troubleshooting Message Send error. #### Toner low. Waiting to Chapter 6 in Advanced Operation Guide,...
... error. Advanced Page. 220#: The network cable has become disconnected during e-mail transmission. The SMTP server is running low. process unit horizontally a few times. The machine will be - Refer to has stopped operating. Refer to see whether the cable is ... Address setting under E-mail: SMTP is not working properly. - Use COMMAND CENTER and register the SMTP Server Name correctly. Remove the process unit from the machine. Gently shake the - Troubleshooting Message Send error. #### Toner low. Waiting to Chapter 6 in Advanced Operation Guide,...

1815 Operation Guide (Basic) Ver 1.1
Page 99
Open the top cover. 2 Open the front cover. 3 Take the process unit out of the machine. 4 If the leading edge of the process unit with the guides inside the machine, and slide the process unit all , perform the Cassette procedure. If the paper has been fed to the rear of the machine but the leading edge... is not visible, perform the Face-up Tray procedure. 5 Set the process unit into the machine until it out towards you. Troubleshooting MP Tray and Inside Machine Note 1 If there are any printouts on both sides of the...
Open the top cover. 2 Open the front cover. 3 Take the process unit out of the machine. 4 If the leading edge of the process unit with the guides inside the machine, and slide the process unit all , perform the Cassette procedure. If the paper has been fed to the rear of the machine but the leading edge... is not visible, perform the Face-up Tray procedure. 5 Set the process unit into the machine until it out towards you. Troubleshooting MP Tray and Inside Machine Note 1 If there are any printouts on both sides of the...

1815 Operation Guide (Basic) Ver 1.1
Page 110
... ...7-8 Paper stopper ...3-2, 3-3 Paper width guide ...3-2 Photo mode ...4-2 Power cord ...3-8 Power switch ...3-9 Precautions for use ...xi Printer cable ...3-7 Printer driver ...4-17 Printing ...4-17 Printing functions Appendix-2 Process unit ...1-3 R Registration roller ...6-4 Release button ...3-2 Resolution ...Appendix-2 S Scanning ...4-13 Scanning functions Appendix-2 Setting originals ...5-2 Sleep mode ...4-12 Socket ...5-5 Specifications ...Appendix-1 Standard zoom ...4-6 Stopper extension lock ...3-3 Subnet...
... ...7-8 Paper stopper ...3-2, 3-3 Paper width guide ...3-2 Photo mode ...4-2 Power cord ...3-8 Power switch ...3-9 Precautions for use ...xi Printer cable ...3-7 Printer driver ...4-17 Printing ...4-17 Printing functions Appendix-2 Process unit ...1-3 R Registration roller ...6-4 Release button ...3-2 Resolution ...Appendix-2 S Scanning ...4-13 Scanning functions Appendix-2 Setting originals ...5-2 Sleep mode ...4-12 Socket ...5-5 Specifications ...Appendix-1 Standard zoom ...4-6 Stopper extension lock ...3-3 Subnet...


