FS-1900 Operation Guide Rev-1.1
Page 99
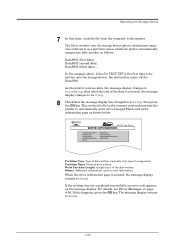
...above, if the file TEST.TXT is the first data to Ready. Write Partition Length. This writes the file to the memory card and instructs the printer to automatically print out a CompactFlash card write information page as error information. Type of the data is printed, the message display returns to.... 8 Check that the message display has changed to Ready. 1-85 The message display returns to Waiting, then press the GO key. FS-1900 Page Printer WRITE INFORMATION Partition Type. Length (size) of data written. For details, see Error Messages on the message display. As the...
...above, if the file TEST.TXT is the first data to Ready. Write Partition Length. This writes the file to the memory card and instructs the printer to automatically print out a CompactFlash card write information page as error information. Type of the data is printed, the message display returns to.... 8 Check that the message display has changed to Ready. 1-85 The message display returns to Waiting, then press the GO key. FS-1900 Page Printer WRITE INFORMATION Partition Type. Length (size) of data written. For details, see Error Messages on the message display. As the...

FS-1900 Operation Guide Rev-1.1
Page 178
The Properties dialog box will open. Click the Device Settings tab. 3 Enter the total memory size installed to the printer (up to 144 MB) in the Memory box. 4 Click the OK button to Settings then click Printers. 2 Right click the Kyocera Mita FS-1900 KX icon, and click Properties. B-8 Expanding the Printer Memory Adjusting the Memory on the Printer Driver After you install the additional memory to the printer, follow the instructions below to set the printer driver so that the printer can use the memories efficiently. 1 Click the Windows Start button, point to close the window.
The Properties dialog box will open. Click the Device Settings tab. 3 Enter the total memory size installed to the printer (up to 144 MB) in the Memory box. 4 Click the OK button to Settings then click Printers. 2 Right click the Kyocera Mita FS-1900 KX icon, and click Properties. B-8 Expanding the Printer Memory Adjusting the Memory on the Printer Driver After you install the additional memory to the printer, follow the instructions below to set the printer driver so that the printer can use the memories efficiently. 1 Click the Windows Start button, point to close the window.

FS-1900 Operation Guide Rev-1.1
Page 233
Confirming the Installation After you restart the printer, follow the instructions below to make sure if the printer driver has been installed correctly. 1 Click the Windows Start button, point Setting, and click Printers to make sure the Kyocera Mita FS-1900 KX icon has been added to restart the computer. Installing the Printer Driver 14 Click the Finish button to the Printers window. 1-6
Confirming the Installation After you restart the printer, follow the instructions below to make sure if the printer driver has been installed correctly. 1 Click the Windows Start button, point Setting, and click Printers to make sure the Kyocera Mita FS-1900 KX icon has been added to restart the computer. Installing the Printer Driver 14 Click the Finish button to the Printers window. 1-6

