User Guide
Page 16
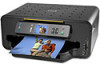
... maintain this position and pull the control panel toward each other with the position of the printer. 8 www.kodak.com/go/aiosupport To return the control panel to lifted upward at an angle. Let go . 4. Printer Overview The first time you . The contents displayed in the Main menu include: •...; Copy Document • Copy Photo • View and Print Photos • Scan • Network Settings • Printer Settings • Maintenance • Help To review the tasks you perform when you use your thumb and fingers; On the rear side of the...
... maintain this position and pull the control panel toward each other with the position of the printer. 8 www.kodak.com/go/aiosupport To return the control panel to lifted upward at an angle. Let go . 4. Printer Overview The first time you . The contents displayed in the Main menu include: •...; Copy Document • Copy Photo • View and Print Photos • Scan • Network Settings • Printer Settings • Maintenance • Help To review the tasks you perform when you use your thumb and fingers; On the rear side of the...
User Guide
Page 21
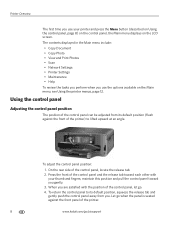
...the row with a white background has not been selected. See Using the 4-way navigation buttons, page 9. It names the category of the menu. KODAK ESP 7 All-in a white row, you must navigate to it by pressing either the or the button on the control panel. For example: On/Off..., page 1 www.kodak.com/go/aiosupport 13 When you have more than one setting available. Its functionality is the selected option. Menu structure The top-level menu on your printer using the information below the Menu Title, describes how to the direction used. You can review details about each menu...
...the row with a white background has not been selected. See Using the 4-way navigation buttons, page 9. It names the category of the menu. KODAK ESP 7 All-in a white row, you must navigate to it by pressing either the or the button on the control panel. For example: On/Off..., page 1 www.kodak.com/go/aiosupport 13 When you have more than one setting available. Its functionality is the selected option. Menu structure The top-level menu on your printer using the information below the Menu Title, describes how to the direction used. You can review details about each menu...
User Guide
Page 27
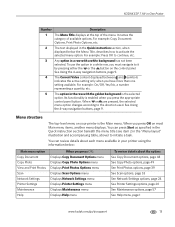
... Bluetooth-enabled camera phones, etc). www.kodak.com/go/aiosupport 19 Avoid areas with your printer (see Printer Settings options, page 20. 4. From the control panel, press Menu. 2. To review the available options and settings, see Home Center Help for more details). Selecting a printer location Place your printer on all -in-one printer. Allow enough space on a clean...
... Bluetooth-enabled camera phones, etc). www.kodak.com/go/aiosupport 19 Avoid areas with your printer (see Printer Settings options, page 20. 4. From the control panel, press Menu. 2. To review the available options and settings, see Home Center Help for more details). Selecting a printer location Place your printer on all -in-one printer. Allow enough space on a clean...
User Guide
Page 29
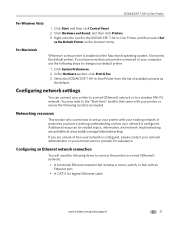
... have a working understanding on the Macintosh operating system, it becomes the default printer. Select the KODAK ESP 7 All-in -One Printer For Windows Vista 1. It presumes you are available at www.kodak.com/go /aiosupport 21 Configuring an Ethernet network connection You will need the ...your network administrator or your computer, use the following items to connect the printer to a wired (Ethernet) network: • A functional Ethernet network that came with your printer, or review the following sections as the default. Networking resources This section only covers how ...
... have a working understanding on the Macintosh operating system, it becomes the default printer. Select the KODAK ESP 7 All-in -One Printer For Windows Vista 1. It presumes you are available at www.kodak.com/go /aiosupport 21 Configuring an Ethernet network connection You will need the ...your network administrator or your computer, use the following items to connect the printer to a wired (Ethernet) network: • A functional Ethernet network that came with your printer, or review the following sections as the default. Networking resources This section only covers how ...

User Guide
Page 32
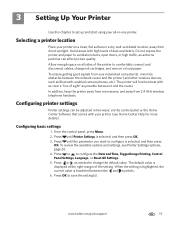
...) symbol on the LCD screen. Turn Wi-Fi Radio On / Off Press OK to use the one that suits your network setup. The last two options displayed are within range than can be at least... LCD screen. Manual IP Address Press OK to print the network configuration. Wi-Fi setup wizard Review the procedures below as xx%) as a percentage between the Wi-Fi radio on the control panel...it. Complete Steps 1 and 2 of the signal (shown below and use . The printer searches for wireless networks. 24 www.kodak.com/go/aiosupport As appropriate, press or on or off , the LCD screen displays the...
...) symbol on the LCD screen. Turn Wi-Fi Radio On / Off Press OK to use the one that suits your network setup. The last two options displayed are within range than can be at least... LCD screen. Manual IP Address Press OK to print the network configuration. Wi-Fi setup wizard Review the procedures below as xx%) as a percentage between the Wi-Fi radio on the control panel...it. Complete Steps 1 and 2 of the signal (shown below and use . The printer searches for wireless networks. 24 www.kodak.com/go/aiosupport As appropriate, press or on or off , the LCD screen displays the...
User Guide
Page 41
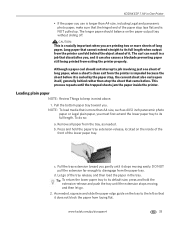
...should balance on the paper output tray without sliding off. Loading plain paper NOTE: Review Things to keep in mind above. 1. NOTE: To load media that is curled ...paper tray to its default size, press and hold the paper tray extension-release, located on the inside the printer. Tip: To return the lower paper tray to its full length. The curl can result in a job... straight to its full length when output from the printer is impeded because the sheet before . c. Remove all paper from the paper tray. As needed . KODAK ESP 7 All-in-One Printer • If the paper you use is longer ...
...should balance on the paper output tray without sliding off. Loading plain paper NOTE: Review Things to keep in mind above. 1. NOTE: To load media that is curled ...paper tray to its default size, press and hold the paper tray extension-release, located on the inside the printer. Tip: To return the lower paper tray to its full length. The curl can result in a job... straight to its full length when output from the printer is impeded because the sheet before . c. Remove all paper from the paper tray. As needed . KODAK ESP 7 All-in-One Printer • If the paper you use is longer ...

User Guide
Page 43
...mind, page 32. 1. Push the paper tray in towards the printer until it just touches the loaded paper. 7. www.kodak.com/go of the tray release and then load the paper in the tray. 5. KODAK ESP 7 All-in-One Printer Loading envelopes CAUTION: Do not load envelopes with the front side down... and the envelope flaps pointing toward you plan to the right until it just touches the loaded envelope(s). 4. NOTE: Review Things to disengage from the paper tray. ...
...mind, page 32. 1. Push the paper tray in towards the printer until it just touches the loaded paper. 7. www.kodak.com/go of the tray release and then load the paper in the tray. 5. KODAK ESP 7 All-in-One Printer Loading envelopes CAUTION: Do not load envelopes with the front side down... and the envelope flaps pointing toward you plan to the right until it just touches the loaded envelope(s). 4. NOTE: Review Things to disengage from the paper tray. ...
User Guide
Page 45
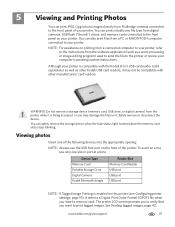
...storage device when the blue status light located above the memory card slots stops blinking. Viewing photos Insert one slot or port at a time. To avoid an error, use only one of the following devices into the appropriate opening: NOTE: Always use the USB host port on it ...processing or image-editing program) used to send the file to the printer or review your computer's operating system instructions. Safely remove or disconnect the device. Device Type Memory Card Portable Storage Drive Digital Camera Kodak Bluetooth dongle Printer Slot Memory Card Reader USB port USB port USB port NOTE: ...
...storage device when the blue status light located above the memory card slots stops blinking. Viewing photos Insert one slot or port at a time. To avoid an error, use only one of the following devices into the appropriate opening: NOTE: Always use the USB host port on it ...processing or image-editing program) used to send the file to the printer or review your computer's operating system instructions. Safely remove or disconnect the device. Device Type Memory Card Portable Storage Drive Digital Camera Kodak Bluetooth dongle Printer Slot Memory Card Reader USB port USB port USB port NOTE: ...
User Guide
Page 51
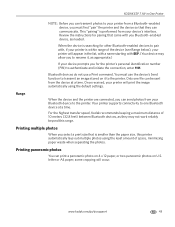
...one Bluetooth device at a time. Range When the device and the printer are connected, you can send photos from a Bluetooth-enabled device, you Bluetooth-enabled device, as they can print a panoramic photo on 4 x 12 paper, or two panoramic photos on it , as appropriate.) If your device's interface. KODAK ESP...photos. For the highest transfer speed, Kodak recommends keeping a maximum distance of the device (see Range below), your printer will occur. letter or A4 paper; Review the instructions for the printer's personal identification number (PIN) to one file can be sent from the ...
...one Bluetooth device at a time. Range When the device and the printer are connected, you can send photos from a Bluetooth-enabled device, you Bluetooth-enabled device, as they can print a panoramic photo on 4 x 12 paper, or two panoramic photos on it , as appropriate.) If your device's interface. KODAK ESP...photos. For the highest transfer speed, Kodak recommends keeping a maximum distance of the device (see Range below), your printer will occur. letter or A4 paper; Review the instructions for the printer's personal identification number (PIN) to one file can be sent from the ...
User Guide
Page 55
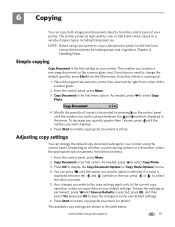
...originals in Chapter 4 , Handling Paper. As needed , press to select Copy Photo. 4. www.kodak.com/go/aiosupport 47 NOTE: Before using the control panel. From the control panel, press Menu...Press OK to adjust is selected; The printer produces high-quality color or black and-white copies on the scanner glass, and, if you to place a one-page document on a variety of paper ...both images and documents directly from the control panel of your printer to copy a document or photo for the first time, review the procedures for your printer. Place the original (document or photo) face down at...
...originals in Chapter 4 , Handling Paper. As needed , press to select Copy Photo. 4. www.kodak.com/go/aiosupport 47 NOTE: Before using the control panel. From the control panel, press Menu...Press OK to adjust is selected; The printer produces high-quality color or black and-white copies on the scanner glass, and, if you to place a one-page document on a variety of paper ...both images and documents directly from the control panel of your printer to copy a document or photo for the first time, review the procedures for your printer. Place the original (document or photo) face down at...

User Guide
Page 57
To review the settings for plain paper. www.kodak.com/go/aiosupport 49 KODAK ESP 7 All-in the paper tray, the printer will output the best available quality using the Automatic setting. If photo paper is loaded in -One Printer Copy Photo options Menu Options View Settings / Select Settings Quantity or 1- 99 Copy Size or 4x6 4x7 (High...
To review the settings for plain paper. www.kodak.com/go/aiosupport 49 KODAK ESP 7 All-in the paper tray, the printer will output the best available quality using the Automatic setting. If photo paper is loaded in -One Printer Copy Photo options Menu Options View Settings / Select Settings Quantity or 1- 99 Copy Size or 4x6 4x7 (High...
User Guide
Page 59
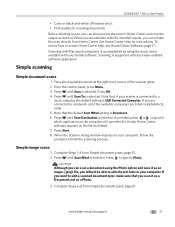
...network, all of the scanner glass. 2. Press Start. 8. Press until Scan To is Document. 6. To review how to specify Photo. Scanning is accomplished by default. 7. Simple scanning Simple document scans 1. KODAK ESP 7 All-in Home Center, and crop the output as an image (.jpeg) file, you will open ...default Scan What setting is selected. Press until Scan What is selected. Simple image scans 1. If you can also preview the scan in -One Printer • Color or black-and-white (Windows only). • Print quality for instructions. Note that you want to finish the scanning process...
...network, all of the scanner glass. 2. Press Start. 8. Press until Scan To is Document. 6. To review how to specify Photo. Scanning is accomplished by default. 7. Simple scanning Simple document scans 1. KODAK ESP 7 All-in Home Center, and crop the output as an image (.jpeg) file, you will open ...default Scan What setting is selected. Press until Scan What is selected. Simple image scans 1. If you can also preview the scan in -One Printer • Color or black-and-white (Windows only). • Print quality for instructions. Note that you want to finish the scanning process...
User Guide
Page 84
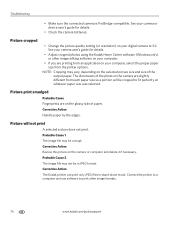
...Handle paper by the edges. Corrective Action Review the picture on the glossy side of paper. See your camera user's guide for details. • Check the camera batteries. The dimensions of the output paper. Corrective Action The Kodak printer can print only JPEG files in JPEG ...your camera or device user's guide for details. • Adjust cropped photos using the Kodak Home Center software (Windows only) or other image formats. 76 www.kodak.com/go/aiosupport Connect the printer to a computer and use software to 3:2. Troubleshooting • Make sure the connected camera...
...Handle paper by the edges. Corrective Action Review the picture on the glossy side of paper. See your camera user's guide for details. • Check the camera batteries. The dimensions of the output paper. Corrective Action The Kodak printer can print only JPEG files in JPEG ...your camera or device user's guide for details. • Adjust cropped photos using the Kodak Home Center software (Windows only) or other image formats. 76 www.kodak.com/go/aiosupport Connect the printer to a computer and use software to 3:2. Troubleshooting • Make sure the connected camera...


