
User Manual
Page 1
KODAK EASYSHARE CX4200 Digital Camera User's Guide Visit Kodak on the World Wide Web at www.kodak.com
KODAK EASYSHARE CX4200 Digital Camera User's Guide Visit Kodak on the World Wide Web at www.kodak.com

User Manual
Page 2
P/N 6B8082 Eastman Kodak Company 343 State Street Rochester, New York 14650 © Eastman Kodak Company, 2002 Kodak and EasyShare are trademarks of Eastman Kodak Company.
P/N 6B8082 Eastman Kodak Company 343 State Street Rochester, New York 14650 © Eastman Kodak Company, 2002 Kodak and EasyShare are trademarks of Eastman Kodak Company.
User Manual
Page 5
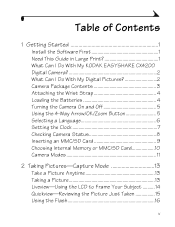
... 1 Getting Started 1 Install the Software First 1 Need This Guide in Large Print 1 What Can I Do With My KODAK EASYSHARE CX4200 Digital Camera 2 What Can I Do With My Digital Pictures 2 Camera Package Contents 3 Attaching the Wrist Strap 4 Loading the Batteries 4 Turning the Camera On and Off 5 Using the 4-Way Arrow/OK/Zoom Button 5 Selecting a Language 6 Setting the Clock 7 Checking...
... 1 Getting Started 1 Install the Software First 1 Need This Guide in Large Print 1 What Can I Do With My KODAK EASYSHARE CX4200 Digital Camera 2 What Can I Do With My Digital Pictures 2 Camera Package Contents 3 Attaching the Wrist Strap 4 Loading the Batteries 4 Turning the Camera On and Off 5 Using the 4-Way Arrow/OK/Zoom Button 5 Selecting a Language 6 Setting the Clock 7 Checking...

User Manual
Page 7
...Quantity Default 38 Turning Off Quickview 39 Turning On Liveview 39 Setting Video Out 40 Formatting Memory or MMC/SD Card 41 Viewing Camera Information 42 6 Installing the Software 43 System Requirements 43 Install the Software 45 7 Connecting to the Computer 47 Important-Before ...48 Printing from an MMC/SD Card 48 8 Using the KODAK EASYSHARE Camera Dock II ..49 Camera Dock Package Contents 49 Installing the Camera Insert 50 Connecting the Camera Dock 51 Installing the Battery Pack in the Camera 52 Docking the Camera 53 Charging the Battery Pack 54 Transferring Pictures 55 vii
...Quantity Default 38 Turning Off Quickview 39 Turning On Liveview 39 Setting Video Out 40 Formatting Memory or MMC/SD Card 41 Viewing Camera Information 42 6 Installing the Software 43 System Requirements 43 Install the Software 45 7 Connecting to the Computer 47 Important-Before ...48 Printing from an MMC/SD Card 48 8 Using the KODAK EASYSHARE Camera Dock II ..49 Camera Dock Package Contents 49 Installing the Camera Insert 50 Connecting the Camera Dock 51 Installing the Battery Pack in the Camera 52 Docking the Camera 53 Charging the Battery Pack 54 Transferring Pictures 55 vii

User Manual
Page 9
... a large print version of this User's Guide: 1 Go to http://www.kodak.com/go/cx4200support. 2 Under Explore EasyShare, click Service and Support. 3 Under Manuals/Guides, View PDF, click your computer before you connect the camera to the computer or attempt to transfer pictures. On MACINTOSH OS X: m With... the User's Guide open ; m In the Print window, select Fit to 200%. 1 Getting Started Install the Software First It is important to install the KODAK EASYSHARE Software on your language...
... a large print version of this User's Guide: 1 Go to http://www.kodak.com/go/cx4200support. 2 Under Explore EasyShare, click Service and Support. 3 Under Manuals/Guides, View PDF, click your computer before you connect the camera to the computer or attempt to transfer pictures. On MACINTOSH OS X: m With... the User's Guide open ; m In the Print window, select Fit to 200%. 1 Getting Started Install the Software First It is important to install the KODAK EASYSHARE Software on your language...
User Manual
Page 10
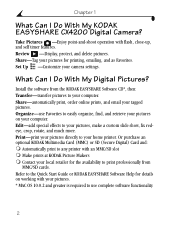
... MAC OS 10.0.2 and greater is required to use Favorites to your pictures for the availability to print professionally from the KODAK EASYSHARE Software CD*, then: Transfer-transfer pictures to your computer. Share-Tag your pictures, make a custom slide show, fix ... What Can I Do With My Digital Pictures? Or purchase an optional KODAK Multimedia Card (MMC) or SD (Secure Digital) Card and: m Automatically print to your camera settings. Install the software from MMC/SD cards. What Can I Do With My KODAK EASYSHARE CX4200 Digital Camera? Share-automatically print, order online ...
... MAC OS 10.0.2 and greater is required to use Favorites to your pictures for the availability to print professionally from the KODAK EASYSHARE Software CD*, then: Transfer-transfer pictures to your computer. Share-Tag your pictures, make a custom slide show, fix ... What Can I Do With My Digital Pictures? Or purchase an optional KODAK Multimedia Card (MMC) or SD (Secure Digital) Card and: m Automatically print to your camera settings. Install the software from MMC/SD cards. What Can I Do With My KODAK EASYSHARE CX4200 Digital Camera? Share-automatically print, order online ...

User Manual
Page 11
...; See page 52 for viewing pictures on television) Also included but not shown: 2 KODAK Digital Camera Batteries, AA or a KODAK CRV3 Lithium battery; and Quick Start Guide. Chapter 1 Camera Package Contents 1 2 4 3 5 1 Camera 4 2 Wrist Strap 5 3 Custom Camera Insert* USB cable Video Cable (for details about purchasing and using the Camera Dock. 3 Check retail box for contents listing. *The custom...
...; See page 52 for viewing pictures on television) Also included but not shown: 2 KODAK Digital Camera Batteries, AA or a KODAK CRV3 Lithium battery; and Quick Start Guide. Chapter 1 Camera Package Contents 1 2 4 3 5 1 Camera 4 2 Wrist Strap 5 3 Custom Camera Insert* USB cable Video Cable (for details about purchasing and using the Camera Dock. 3 Check retail box for contents listing. *The custom...

User Manual
Page 12
Loading the Batteries Two KODAK Digital Camera Batteries or one KODAK CRV3 Lithium Battery is included with your camera was packaged with a KODAK EASYSHARE Camera Dock II, see page 52 for the types of the strap through the wrist strap post. 2 Thread the long end of...not use in your camera. * If your camera.* 1 Turn off the camera. 2 On the bottom of the camera, slide the battery door and lift to open. 3 Insert two KODAK Digital Camera Batteries, AA, or KODAK CRV3 battery, as shown. 4 Close the battery door. See page 83 for details on using the KODAK EASYSHARE Ni-MH Rechargeable Battery...
Loading the Batteries Two KODAK Digital Camera Batteries or one KODAK CRV3 Lithium Battery is included with your camera was packaged with a KODAK EASYSHARE Camera Dock II, see page 52 for the types of the strap through the wrist strap post. 2 Thread the long end of...not use in your camera. * If your camera.* 1 Turn off the camera. 2 On the bottom of the camera, slide the battery door and lift to open. 3 Insert two KODAK Digital Camera Batteries, AA, or KODAK CRV3 battery, as shown. 4 Close the battery door. See page 83 for details on using the KODAK EASYSHARE Ni-MH Rechargeable Battery...

User Manual
Page 15
... update the camera clock when you connect the camera. See the KODAK EASYSHARE Software Help for an extended time. to adjust the settings. 5 Press the OK button to accept the changes. 6 Press the Menu button to step 4. NOTE: Depending on , go to turn on the camera or if ... then press the OK button. The date format is removed for details. 7 If this is the first time the camera has been turned on your computer operating system, KODAK EASYSHARE Software may allow your computer to move through the fields. The setting remains until you change it. Chapter 1 Setting...
... update the camera clock when you connect the camera. See the KODAK EASYSHARE Software Help for an extended time. to adjust the settings. 5 Press the OK button to accept the changes. 6 Press the Menu button to step 4. NOTE: Depending on , go to turn on the camera or if ... then press the OK button. The date format is removed for details. 7 If this is the first time the camera has been turned on your computer operating system, KODAK EASYSHARE Software may allow your computer to move through the fields. The setting remains until you change it. Chapter 1 Setting...

User Manual
Page 43
...the email icon appears with the picture. 4 To remove a selection, highlight a checked address and press the OK button. See the KODAK EASYSHARE Software Help for details. Emailing Tagged Pictures When you transfer the tagged pictures to your computer, then copy up to 32 email addresses... to the camera's internal memory. Chapter 4 Tagging Pictures for Emailing First, use KODAK EASYSHARE Software to create an email address book on address books and emailing. 35 Selected addresses are saved...
...the email icon appears with the picture. 4 To remove a selection, highlight a checked address and press the OK button. See the KODAK EASYSHARE Software Help for details. Emailing Tagged Pictures When you transfer the tagged pictures to your computer, then copy up to 32 email addresses... to the camera's internal memory. Chapter 4 Tagging Pictures for Emailing First, use KODAK EASYSHARE Software to create an email address book on address books and emailing. 35 Selected addresses are saved...

User Manual
Page 44
Using Favorites on Your Computer See the KODAK EASYSHARE Software Help for details on retrieving and organizing Favorites on your computer. 36 The Favorite icon appears with the picture. 3 To remove the tag, press the OK button again. 4 Press the Share button to return to Capture mode. Chapter 4 Tagging Pictures as Favorites Share 1 Locate a picture, then press the Share button. 2 Highlight Favorite , then press the OK button.
Using Favorites on Your Computer See the KODAK EASYSHARE Software Help for details on retrieving and organizing Favorites on your computer. 36 The Favorite icon appears with the picture. 3 To remove the tag, press the OK button again. 4 Press the Share button to return to Capture mode. Chapter 4 Tagging Pictures as Favorites Share 1 Locate a picture, then press the Share button. 2 Highlight Favorite , then press the OK button.

User Manual
Page 53
...45 If you have already connected, disconnect the camera or Camera Dock before you proceed. 1 Before you begin, close all software applications that contains the CD). CAUTION: Do not install the KODAK EASYSHARE Software with the camera or Camera Dock connected to load incorrectly. Chapter 6 ...Install the Software For information on the software applications included on your computer. 2 Place the KODAK EASYSHARE Software CD into the CD drive. 3 Load the...
...45 If you have already connected, disconnect the camera or Camera Dock before you proceed. 1 Before you begin, close all software applications that contains the CD). CAUTION: Do not install the KODAK EASYSHARE Software with the camera or Camera Dock connected to load incorrectly. Chapter 6 ...Install the Software For information on the software applications included on your computer. 2 Place the KODAK EASYSHARE Software CD into the CD drive. 3 Load the...

User Manual
Page 55
...labeled USB port on your pictures from the KODAK EASYSHARE Software CD BEFORE you connect the camera or Camera Dock to the computer. See page 51 for your pictures. See your KODAK retail dealer or visit our Web site at http://www.kodak.com/go/cx4200accessories. 47 NOTE: You ...Before You Connect Install the software from the camera to the computer using either the camera alone or the optional KODAK EASYSHARE Camera Dock or Camera Dock II. Connecting to the Computer You can also use a KODAK SD Multimedia Card Reader-Writer to transfer your camera; Connecting With the USB Cable 1 Turn...
...labeled USB port on your pictures from the KODAK EASYSHARE Software CD BEFORE you connect the camera or Camera Dock to the computer. See page 51 for your pictures. See your KODAK retail dealer or visit our Web site at http://www.kodak.com/go/cx4200accessories. 47 NOTE: You ...Before You Connect Install the software from the camera to the computer using either the camera alone or the optional KODAK EASYSHARE Camera Dock or Camera Dock II. Connecting to the Computer You can also use a KODAK SD Multimedia Card Reader-Writer to transfer your camera; Connecting With the USB Cable 1 Turn...

User Manual
Page 56
...For details on printing pictures from your own prints at a KODAK Picture Maker with an MMC/SD slot. m Make your computer, and ordering prints online, see the Quick Start Guide or the KODAK EASYSHARE Software Help. Printing Pictures from Your Computer For details on ...transferring pictures, see the Quick Start Guide or the KODAK EASYSHARE Software Help. Chapter 7 Transferring Pictures to print professionally from MMC/SD cards...
...For details on printing pictures from your own prints at a KODAK Picture Maker with an MMC/SD slot. m Make your computer, and ordering prints online, see the Quick Start Guide or the KODAK EASYSHARE Software Help. Printing Pictures from Your Computer For details on ...transferring pictures, see the Quick Start Guide or the KODAK EASYSHARE Software Help. Chapter 7 Transferring Pictures to print professionally from MMC/SD cards...

User Manual
Page 57
CAUTION: Do not use the Digital Camera AC Adapter, 3-Volt with your camera, you can purchase one pictured. 3 Universal insert 4 KODAK EASYSHARE Ni-MH Rechargeable 1 Battery Pack 5 Quick Start Guide (not shown) If a Camera Dock was not included with a KODAK EASYSHARE Camera Dock; Camera Dock Package Contents 2 3 4 1 Camera Dock 2 AC power adapter, 7-Volt Some AC adapters may be different from the one...
CAUTION: Do not use the Digital Camera AC Adapter, 3-Volt with your camera, you can purchase one pictured. 3 Universal insert 4 KODAK EASYSHARE Ni-MH Rechargeable 1 Battery Pack 5 Quick Start Guide (not shown) If a Camera Dock was not included with a KODAK EASYSHARE Camera Dock; Camera Dock Package Contents 2 3 4 1 Camera Dock 2 AC power adapter, 7-Volt Some AC adapters may be different from the one...

User Manual
Page 58
...Installing the Camera Insert KODAK EASYSHARE digital cameras are packaged with a custom camera insert, which is included with the Camera Dock II. The universal insert works with your camera, use the universal insert that is used to perfectly fit the camera to the Camera Dock. 1 Place the front tabs on the custom insert into the slots in the Camera Dock ... place. If You Do Not Have the Custom Insert If you do not have the custom insert that was included with all KODAK EASYSHARE cameras, but it does not fit the cameras perfectly. To order a custom camera insert visit our Web site at http://www...
...Installing the Camera Insert KODAK EASYSHARE digital cameras are packaged with a custom camera insert, which is included with the Camera Dock II. The universal insert works with your camera, use the universal insert that is used to perfectly fit the camera to the Camera Dock. 1 Place the front tabs on the custom insert into the slots in the Camera Dock ... place. If You Do Not Have the Custom Insert If you do not have the custom insert that was included with all KODAK EASYSHARE cameras, but it does not fit the cameras perfectly. To order a custom camera insert visit our Web site at http://www...

User Manual
Page 59
... to your computer and to an external power source. Other adapters may have additional plugs. Chapter 8 Connecting the Camera Dock After the KODAK EASYSHARE Software is NOT in the Camera Dock when you are connecting to power and the computer. 1 Plug the labeled ( ) end of the USB cable 1 into the labeled USB port on...
... to your computer and to an external power source. Other adapters may have additional plugs. Chapter 8 Connecting the Camera Dock After the KODAK EASYSHARE Software is NOT in the Camera Dock when you are connecting to power and the computer. 1 Plug the labeled ( ) end of the USB cable 1 into the labeled USB port on...

User Manual
Page 61
... Power/Transfer light glows green when the camera is now powered by the Camera Dock instead of the camera batteries. Connector cover 3 Place the camera in the camera, the Camera Dock immediately begins charging (see page 54). 53 NOTE: If the KODAK EASYSHARE Ni-MH Rechargeable Battery Pack is in the Camera Dock and push down to the computer...
... Power/Transfer light glows green when the camera is now powered by the Camera Dock instead of the camera batteries. Connector cover 3 Place the camera in the camera, the Camera Dock immediately begins charging (see page 54). 53 NOTE: If the KODAK EASYSHARE Ni-MH Rechargeable Battery Pack is in the Camera Dock and push down to the computer...

User Manual
Page 62
... to maintain the full charge. m The three green charging lights monitor the charging status: Charging Lights on the camera. Chapter 8 Charging the Battery Pack The Battery Pack is not charged when you receive it. 1 Turn off (see page 53). If you ...installed in the camera (see page 52). 3 Place the camera in the Camera Dock with any other type of batteries, rechargable or not, no charging takes place. 54 m Charging begins immediately. NOTE: The Camera Dock only charges the provided KODAK EASYSHARE Ni-MH Rechargeable Battery Pack. If the camera is left in the Camera Dock (see...
... to maintain the full charge. m The three green charging lights monitor the charging status: Charging Lights on the camera. Chapter 8 Charging the Battery Pack The Battery Pack is not charged when you receive it. 1 Turn off (see page 53). If you ...installed in the camera (see page 52). 3 Place the camera in the Camera Dock with any other type of batteries, rechargable or not, no charging takes place. 54 m Charging begins immediately. NOTE: The Camera Dock only charges the provided KODAK EASYSHARE Ni-MH Rechargeable Battery Pack. If the camera is left in the Camera Dock (see...

User Manual
Page 63
... NOTE: When your pictures, see the Quick Start Guide or the KODAK EASYSHARE Software Help. Eight minutes after the transfer is complete, the Camera Dock resumes charging as necessary. Remove the camera from your camera to the Camera Dock. The camera can be on transferring, organizing, printing, emailing, and editing your pictures are transferring. 3 For details on...
... NOTE: When your pictures, see the Quick Start Guide or the KODAK EASYSHARE Software Help. Eight minutes after the transfer is complete, the Camera Dock resumes charging as necessary. Remove the camera from your camera to the Camera Dock. The camera can be on transferring, organizing, printing, emailing, and editing your pictures are transferring. 3 For details on...


