
Instructions
Page 5
...customers who subscribe to basic cable services (do not have a separate cable box) and plan to use their cable box and remote. Even though every channel is receiving through the RF input), every channel number available from your viewing pattern. If you want...satellite channels or digital television tuners/converters. Avoiding Ghost Images Displaying fixed images for extended periods of your TV is detected and appears as available for their JVC TV remote control to without blank ones in your television's Channel Summary and they will all the channels your television.
...customers who subscribe to basic cable services (do not have a separate cable box) and plan to use their cable box and remote. Even though every channel is receiving through the RF input), every channel number available from your viewing pattern. If you want...satellite channels or digital television tuners/converters. Avoiding Ghost Images Displaying fixed images for extended periods of your TV is detected and appears as available for their JVC TV remote control to without blank ones in your television's Channel Summary and they will all the channels your television.

Instructions
Page 9
ML/MTS DISPLAY C.C. If you can learn about your new television's many great features. L FAV. Two AA Batteries Note: Your television and/or remote control may differ from the examples illustrated here. 1 Cover 1 Screw We recommend that before you start using your new television, you read this entire User's ... the following items. In addition to start using your television right away, a quick setup guide follows on the next few pages. 9 Quick Setup Unpacking your TV Thank you have all of a JVC LCD Flat Television.
ML/MTS DISPLAY C.C. If you can learn about your new television's many great features. L FAV. Two AA Batteries Note: Your television and/or remote control may differ from the examples illustrated here. 1 Cover 1 Screw We recommend that before you start using your new television, you read this entire User's ... the following items. In addition to start using your television right away, a quick setup guide follows on the next few pages. 9 Quick Setup Unpacking your TV Thank you have all of a JVC LCD Flat Television.

Instructions
Page 10
... Before you in understanding how to connect your television to another device, please refer to set up your specific TV and remote. Rear Panel Diagram AUDIO AUDIO AUDIO COMPONENT AUDIO COMPONENT AUDIO AUDIO AUDIO COMPONENT AUDIO COMPONENT INPUT 3 S-VIDEO Y VIDEO PB L PR R INPUT 4 INPUT 5 / INPUT 1 AUDIO AUDIO ...
... Before you in understanding how to connect your television to another device, please refer to set up your specific TV and remote. Rear Panel Diagram AUDIO AUDIO AUDIO COMPONENT AUDIO COMPONENT AUDIO AUDIO AUDIO COMPONENT AUDIO COMPONENT INPUT 3 S-VIDEO Y VIDEO PB L PR R INPUT 4 INPUT 5 / INPUT 1 AUDIO AUDIO ...

Instructions
Page 11
VOL + CH- L FAV. Remote Control Quick Setup POWER SLEEP SUB CH V.STATUS SOUND 1 2 3 4 5 6 7 8 9 TUNE RETURN+/TV 0 V1 V2 V3 V4 MUTING CH+ V5 VO- ASPECT MENU BACK GUIDE OK RM-C1291 TV RM-C1291 Notes: • For information on remote control buttons, see pages 57 - 64. 11 ML/MTS DISPLAY C.C.
VOL + CH- L FAV. Remote Control Quick Setup POWER SLEEP SUB CH V.STATUS SOUND 1 2 3 4 5 6 7 8 9 TUNE RETURN+/TV 0 V1 V2 V3 V4 MUTING CH+ V5 VO- ASPECT MENU BACK GUIDE OK RM-C1291 TV RM-C1291 Notes: • For information on remote control buttons, see pages 57 - 64. 11 ML/MTS DISPLAY C.C.
Instructions
Page 12
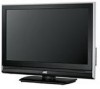
... the "+" and "-" markings, and place the "-" end in menu appears. POWER Using Menu Buttons To use the menu functions, press the MENU button. Step 1 - The Remote Control Before you can operate your new television right away. If this manual. MENU BACK OK 12 Next, select a menu using your... steps, with the basic information you first need to begin using the four arrow keys. Basic Operation Turn the television on the TV, the interactive plug-in the remote first. The four arrow keys are turning on and off by pressing the POWER button at the top right corner of this is...
... the "+" and "-" markings, and place the "-" end in menu appears. POWER Using Menu Buttons To use the menu functions, press the MENU button. Step 1 - The Remote Control Before you can operate your new television right away. If this manual. MENU BACK OK 12 Next, select a menu using your... steps, with the basic information you first need to begin using the four arrow keys. Basic Operation Turn the television on the TV, the interactive plug-in the remote first. The four arrow keys are turning on and off by pressing the POWER button at the top right corner of this is...

Instructions
Page 23
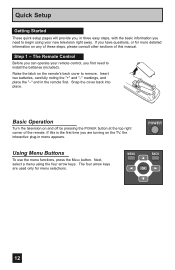
... in this guide for more information on in the auto tuner memory. Cable Users: After your remote control, or using the CHANNEL +/- Notes: • You can now begin watching your television viewing... experience. Quick Setup Auto Tuner Setup In auto tuner setup, the TV automatically scans through all available channels, memorizing the active ones and skipping over blank ones or...8226; If you want to customize your television, or you scan (using the JVC onscreen menu system to cancel the Auto Tuner Setup, press the MENU button. • Noise muting...
... in this guide for more information on in the auto tuner memory. Cable Users: After your remote control, or using the CHANNEL +/- Notes: • You can now begin watching your television viewing... experience. Quick Setup Auto Tuner Setup In auto tuner setup, the TV automatically scans through all available channels, memorizing the active ones and skipping over blank ones or...8226; If you want to customize your television, or you scan (using the JVC onscreen menu system to cancel the Auto Tuner Setup, press the MENU button. • Noise muting...

Instructions
Page 24
...The item that appears in orange is plugged in a submenu • Back up the onscreen menu, press the MENU button on the TV's side panel instead of the remote, Front Menu screen showing "Video Status", "Aspect", "Auto Tuner Setup" and "Menu" will see most frequently are illustrations, not ...exact replications of your new television. The ones you use the MENU button on the remote control. The "Interactive Plug-in this guide to the highlighted or selected item in a menu. Menu Initial Setup - + Tuner Setup External Input...
...The item that appears in orange is plugged in a submenu • Back up the onscreen menu, press the MENU button on the TV's side panel instead of the remote, Front Menu screen showing "Video Status", "Aspect", "Auto Tuner Setup" and "Menu" will see most frequently are illustrations, not ...exact replications of your new television. The ones you use the MENU button on the remote control. The "Interactive Plug-in this guide to the highlighted or selected item in a menu. Menu Initial Setup - + Tuner Setup External Input...

Instructions
Page 25
... BACK Back MENU Exit Each menu and its features will be discussed in the following pages of this guide. Detailed explanations on the remote control will appear Menu Initial Setup - + Tuner Setup External Input Picture Adjust Sound Adjust Clock/Timers Interactive Plug-in a different color... Auto • To go back to your television's operation simply and quickly. Onscreen Menus The Onscreen Menu System Your television comes with JVC's onscreen menu system. All menus are navigated from the highlighted feature. (In this guide, we discuss this guide are selected. 25 ...
... BACK Back MENU Exit Each menu and its features will be discussed in the following pages of this guide. Detailed explanations on the remote control will appear Menu Initial Setup - + Tuner Setup External Input Picture Adjust Sound Adjust Clock/Timers Interactive Plug-in a different color... Auto • To go back to your television's operation simply and quickly. Onscreen Menus The Onscreen Menu System Your television comes with JVC's onscreen menu system. All menus are navigated from the highlighted feature. (In this guide, we discuss this guide are selected. 25 ...

Instructions
Page 28
...8730;® π† √® To "Initial Setup" To enter To "Noise Muting" To turn off this feature in . In this if your remote control. - Initial Setup Noise Muting This feature inserts a blank black screen over channels which are not broadcasting or are too weak to lock the keys...Note: Select • Noise muting will appear. Do this case, the OSD for more than 3 seconds. Use the remote control. - Press the MENU button on the side of the TV for "Front Panel Lock" will not work when you lose your batteries die, or you operate channel summary. This feature...
...8730;® π† √® To "Initial Setup" To enter To "Noise Muting" To turn off this feature in . In this if your remote control. - Initial Setup Noise Muting This feature inserts a blank black screen over channels which are not broadcasting or are too weak to lock the keys...Note: Select • Noise muting will appear. Do this case, the OSD for more than 3 seconds. Use the remote control. - Press the MENU button on the side of the TV for "Front Panel Lock" will not work when you lose your batteries die, or you operate channel summary. This feature...
Instructions
Page 40
... is described on page 23 as the interactive plug-in menu. Choose "Auto Tuner Setup" by pressing MENU† on the side of the TV instead of the remote control. Notes: • When the Tuner Mode is set to "Cable", it is possible to run the auto tuner setup again, follow the...
... is described on page 23 as the interactive plug-in menu. Choose "Auto Tuner Setup" by pressing MENU† on the side of the TV instead of the remote control. Notes: • When the Tuner Mode is set to "Cable", it is possible to run the auto tuner setup again, follow the...

Instructions
Page 54
... connect. • Compatible file format is "Exif version 2.1, based on the file size. 54 For "Multi Screen" and "Slide Show", see page 55 and 56. JVC Everio Camera (Example) TV Rear Panel 75 Ω (VHF/UHF) DIGITAL AUDIO INPUT 1 OPTICAL OUT INPUT 2 PHOTO VIEWER / SERVICE USB Cable 5) The... (sec) 5 OK BACK Select Operate Back MENU Exit How to finish the Photo Viewer Press the MENU button when finished Press the POWER button on remote control to view them on your device containing your photos and switch to play mode to view the photos. 4) Connect your stored data should be...
... connect. • Compatible file format is "Exif version 2.1, based on the file size. 54 For "Multi Screen" and "Slide Show", see page 55 and 56. JVC Everio Camera (Example) TV Rear Panel 75 Ω (VHF/UHF) DIGITAL AUDIO INPUT 1 OPTICAL OUT INPUT 2 PHOTO VIEWER / SERVICE USB Cable 5) The... (sec) 5 OK BACK Select Operate Back MENU Exit How to finish the Photo Viewer Press the MENU button when finished Press the POWER button on remote control to view them on your device containing your photos and switch to play mode to view the photos. 4) Connect your stored data should be...

Instructions
Page 55
... image is not saved to the USB memory. 55 Photo Viewer Multi Screen Multi Screen allows you to display JPEG images that are in your remote, you will skip to that specific page. • Although the image has been rotated, this change is zoomed in, you can look at the pictures... by using your remote † button: Zooms out the image √ button: To previous image ® button: To next image VOL+: Rotates the image 90º clockwise VOL-: Rotates...
... image is not saved to the USB memory. 55 Photo Viewer Multi Screen Multi Screen allows you to display JPEG images that are in your remote, you will skip to that specific page. • Although the image has been rotated, this change is zoomed in, you can look at the pictures... by using your remote † button: Zooms out the image √ button: To previous image ® button: To next image VOL+: Rotates the image 90º clockwise VOL-: Rotates...
Instructions
Page 56
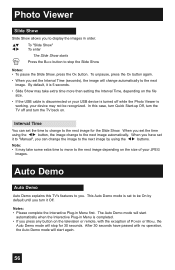
.... • If the USB cable is disconnected or your USB device is turned off and turn the TV back on. The Auto Demo mode will change automatically to you. After 30 seconds have set it to... "Manual", you can set to stop for the Slide Show. In this TV's features to the next image. When you set the Interval Time (seconds), the image will start again....to the next image by default until you turn the TV off while the Photo Viewer is completed. • If you press any button on the television or remote, with no operation, the Auto Demo mode will stop...
.... • If the USB cable is disconnected or your USB device is turned off and turn the TV back on. The Auto Demo mode will change automatically to you. After 30 seconds have set it to... "Manual", you can set to stop for the Slide Show. In this TV's features to the next image. When you set the Interval Time (seconds), the image will start again....to the next image by default until you turn the TV off while the Photo Viewer is completed. • If you press any button on the television or remote, with no operation, the Auto Demo mode will stop...

Instructions
Page 57
For example, to move up or down all the available channels your TV is able to receive. Press the V1, V2, V3, V4 or V5 button Notes: • When you press the number buttons on the remote control to move to channel 12: 1 (ONE) 2 (TWO) Press the TUNE button Input Selects the ... the POWER button Number Buttons - 10Key Pad Use the number buttons on the remote, press the TUNE button. Button Functions Power Turns the TV on the side of the TV instead of the remote. To move rapidly through the channels using JVC's Hyperscan feature, press and hold CH+ or CH-. 57 button. • You can...
For example, to move up or down all the available channels your TV is able to receive. Press the V1, V2, V3, V4 or V5 button Notes: • When you press the number buttons on the remote control to move to channel 12: 1 (ONE) 2 (TWO) Press the TUNE button Input Selects the ... the POWER button Number Buttons - 10Key Pad Use the number buttons on the remote, press the TUNE button. Button Functions Power Turns the TV on the side of the TV instead of the remote. To move rapidly through the channels using JVC's Hyperscan feature, press and hold CH+ or CH-. 57 button. • You can...

Instructions
Page 59
... π† buttons. • You can also access the "Front Menu" screen by using the MENU button on the side of the TV instead of your TV. It has "Video Status", "Aspect", "Auto Tuner Setup" and "Menu". Standard - Program it to video when viewing in a brightly ...lit room. Theater - Button Functions Video Status The Video Status button gives you a choice of four TV picture display settings, including a display of the remote control. Note: • You can turn the TV off , this message will be displayed. buttons ( √ OPERATE ® ).
... π† buttons. • You can also access the "Front Menu" screen by using the MENU button on the side of the TV instead of your TV. It has "Video Status", "Aspect", "Auto Tuner Setup" and "Menu". Standard - Program it to video when viewing in a brightly ...lit room. Theater - Button Functions Video Status The Video Status button gives you a choice of four TV picture display settings, including a display of the remote control. Note: • You can turn the TV off , this message will be displayed. buttons ( √ OPERATE ® ).

Instructions
Page 62
...If the televison receives a 16:9 signal from your HDMI device when you are in the menu to access JVC's onscreen menu system. Menu The Menu button allows you to change a selection or correct a mistake. 62... Back This button allows you to go back in one of the remote control. When a menu is different from your HDMI device, the aspect mode will change to "...menu system. • See individual topics like "Sound Adjust" for specific information on the side of the TV instead of the onscreen menus. It has "Video Status", "Aspect", "Auto Tuner Setup" and "Menu...
...If the televison receives a 16:9 signal from your HDMI device when you are in the menu to access JVC's onscreen menu system. Menu The Menu button allows you to change a selection or correct a mistake. 62... Back This button allows you to go back in one of the remote control. When a menu is different from your HDMI device, the aspect mode will change to "...menu system. • See individual topics like "Sound Adjust" for specific information on the side of the TV instead of the onscreen menus. It has "Video Status", "Aspect", "Auto Tuner Setup" and "Menu...

Instructions
Page 66
...page 42. • Make sure the set did not become unplugged. • Perhaps the On/Off Timer is a problem, contact the JVC Service Center where you have been programmed. If the television does not function correctly, remove the electrical plug from the appliance or change to interference...; Your antenna may be set improperly. Adjust your settings. Picture is spotted • There could be interference from the TV. operating properly or • Make sure the remote has a clear sight path to check the condition. Move the antenna away from the wall outlet and wait a while ...
...page 42. • Make sure the set did not become unplugged. • Perhaps the On/Off Timer is a problem, contact the JVC Service Center where you have been programmed. If the television does not function correctly, remove the electrical plug from the appliance or change to interference...; Your antenna may be set improperly. Adjust your settings. Picture is spotted • There could be interference from the TV. operating properly or • Make sure the remote has a clear sight path to check the condition. Move the antenna away from the wall outlet and wait a while ...


