

Instruction Manual
Page 1
... on your Android phone or iPhone. LST1584-001A GY-HM890U / GY-HM890CHU GY-HM850U / GY-HM850CHU Serial No. HD MEMORY CARD CAMERA RECORDER GY-HM890U/GY-HM890E GY-HM890CHU/GY-HM890CHE GY-HM850U/GY-HM850E GY-HM850CHU/GY-HM850CHE INSTRUCTIONS In this JVC product. which means the shipping destination. (U: for...GY-HM890U/GY-HM890E. .. The lens is described without prior notice. The specifications and appearance of the INSTRUCTIONS from the following before getting started: Thank you can view the Mobile User Guide using the browser on the body. Retain this manual...
... on your Android phone or iPhone. LST1584-001A GY-HM890U / GY-HM890CHU GY-HM850U / GY-HM850CHU Serial No. HD MEMORY CARD CAMERA RECORDER GY-HM890U/GY-HM890E GY-HM890CHU/GY-HM890CHE GY-HM850U/GY-HM850E GY-HM850CHU/GY-HM850CHE INSTRUCTIONS In this JVC product. which means the shipping destination. (U: for...GY-HM890U/GY-HM890E. .. The lens is described without prior notice. The specifications and appearance of the INSTRUCTIONS from the following before getting started: Thank you can view the Mobile User Guide using the browser on the body. Retain this manual...

Instruction Manual
Page 5
... modifications, data given in accordance with Part 15 of the FCC Rules. Changes or modifications not approved by JVC KENWOOD could void the user's authority to radio communications. This device complies with the instruction manual, may cause undesired operation. POUR CANADA ATTENTION RISQUE D'ELECTROCUTION NE PAS OUVRIR ATTENTION: POUR EVITER TOUT RISQUE...
... modifications, data given in accordance with Part 15 of the FCC Rules. Changes or modifications not approved by JVC KENWOOD could void the user's authority to radio communications. This device complies with the instruction manual, may cause undesired operation. POUR CANADA ATTENTION RISQUE D'ELECTROCUTION NE PAS OUVRIR ATTENTION: POUR EVITER TOUT RISQUE...

Instruction Manual
Page 12
...in addition to support high-resolution video recording. Images from the wide end to manual focusing. Two SDHC/SDXC Card Slots for network distribution. In addition to the ...(960x540: MOV, 480x270: MOV, 1440x1080: AVCHD) recording function that are also available. JVC's Proprietary FALCONBRID HighQuality Imaging Engine The FALCONBRID high-quality imaging engine omits unnecessary processing through ...using separate rings. 4-position ND Filter This camera recorder incorporates three types of the GY-HM700 series, this camera recorder also supports various file formats, such as AVCHD and...
...in addition to support high-resolution video recording. Images from the wide end to manual focusing. Two SDHC/SDXC Card Slots for network distribution. In addition to the ...(960x540: MOV, 480x270: MOV, 1440x1080: AVCHD) recording function that are also available. JVC's Proprietary FALCONBRID HighQuality Imaging Engine The FALCONBRID high-quality imaging engine omits unnecessary processing through ...using separate rings. 4-position ND Filter This camera recorder incorporates three types of the GY-HM700 series, this camera recorder also supports various file formats, such as AVCHD and...
Instruction Manual
Page 14
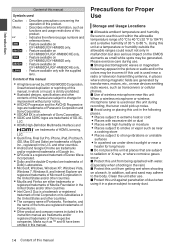
... and Safari are generated by JVC KENWOOD Corporation. o Avoid using it in places where strong magnetic fields are trademarks of 35 % to the body. o Protect this unit from getting wet when shooting on GY-HM850U/GY-HM850E only. In addition, salt and sand may be generated. Introduction Content of this manual Symbols used near a radio...
... and Safari are generated by JVC KENWOOD Corporation. o Avoid using it in places where strong magnetic fields are trademarks of 35 % to the body. o Protect this unit from getting wet when shooting on GY-HM850U/GY-HM850E only. In addition, salt and sand may be generated. Introduction Content of this manual Symbols used near a radio...

Instruction Manual
Page 16
.... Please back up in recording failure or data loss. o Do not dismantle or modify the SD card. Do not use oil-based pens. In this manual. The data is being removed. Be careful not to write on the SD cards. o Inserting the SD card incorrectly may result in red when data...
.... Please back up in recording failure or data loss. o Do not dismantle or modify the SD card. Do not use oil-based pens. In this manual. The data is being removed. Be careful not to write on the SD cards. o Inserting the SD card incorrectly may result in red when data...

Instruction Manual
Page 24
... (BNC) (A P78 [Synchronizing the Time Code with an External Time Code Generator] ) G LCD Cover Lock Release Knob G HI JKL M N * GY-HM890U/GY-HM890E/GY-HM890CHU/GYHM890CHE is used in the illustration here. Introduction LCD Monitor Side Terminal Section BA C A D E P B F O C .. A [HD...[Adjusting the LCD Monitor] ) C [LCD BRIGHT +/-] LCD Display Brightness Adjustment Button (A P39 [Adjusting the LCD Monitor] ) D [AUDIO SELECT CH-1/CH-2 AUTO/MANUAL] Selection Switch (A P69 [Audio Recording] ) E [TC DISPLAY] TC/UB Display Switch (A P72 [Time Code and User's Bit] ) (A P73 [Setting Time ...
... (BNC) (A P78 [Synchronizing the Time Code with an External Time Code Generator] ) G LCD Cover Lock Release Knob G HI JKL M N * GY-HM890U/GY-HM890E/GY-HM890CHU/GYHM890CHE is used in the illustration here. Introduction LCD Monitor Side Terminal Section BA C A D E P B F O C .. A [HD...[Adjusting the LCD Monitor] ) C [LCD BRIGHT +/-] LCD Display Brightness Adjustment Button (A P39 [Adjusting the LCD Monitor] ) D [AUDIO SELECT CH-1/CH-2 AUTO/MANUAL] Selection Switch (A P69 [Audio Recording] ) E [TC DISPLAY] TC/UB Display Switch (A P72 [Time Code and User's Bit] ) (A P73 [Setting Time ...

Instruction Manual
Page 25
... before using this terminal, make sure that the Battery Adapter C is not properly attached, the camera recorder may fall and cause injuries. 0 Check the instruction manual provided with the SDI input are output during shooting and playback. Introduction .. B Accessory Connection Terminal A B Terminal for audio signals. 0 Input audio signals are output during...
... before using this terminal, make sure that the Battery Adapter C is not properly attached, the camera recorder may fall and cause injuries. 0 Check the instruction manual provided with the SDI input are output during shooting and playback. Introduction .. B Accessory Connection Terminal A B Terminal for audio signals. 0 Input audio signals are output during...

Instruction Manual
Page 26
...C Focus Ring (A P53 [Focus Operation F] ) D Zoom Ring (A P52 [Zoom Operation] ) To operate zoom with the zoom lever at the grip, set the [ZOOM SERVO/ MANUAL] switch H to the camera's [LENS] connection terminal. N [IRIS] Iris Momentary Button When the [IRIS A/M] mode switch M is set the [IRIS A/M] mode switch M to ...zoom lever L on the lens, or the handle zoom lever c on this unit 0 When using a separately sold zoom servo unit, set the [ZOOM SERVO/MANUAL] switch 8 to "SERVO". (A P52 [Using the Zoom Lever at the Grip] ) M [IRIS A/M] Iris Mode Switch Switches the mode of Functions to User...
...C Focus Ring (A P53 [Focus Operation F] ) D Zoom Ring (A P52 [Zoom Operation] ) To operate zoom with the zoom lever at the grip, set the [ZOOM SERVO/ MANUAL] switch H to the camera's [LENS] connection terminal. N [IRIS] Iris Momentary Button When the [IRIS A/M] mode switch M is set the [IRIS A/M] mode switch M to ...zoom lever L on the lens, or the handle zoom lever c on this unit 0 When using a separately sold zoom servo unit, set the [ZOOM SERVO/MANUAL] switch 8 to "SERVO". (A P52 [Using the Zoom Lever at the Grip] ) M [IRIS A/M] Iris Mode Switch Switches the mode of Functions to User...

Instruction Manual
Page 27
... +9dB +12dB +3dB +18dB 0dB ALC LEVEL GAMMA LEVEL GAMMA KNEEPOINT AUTO KNEE WHITE BALANCE MANUAL PRESET FAW AW A AW B WHITE PAINT R B PAINT AUTO WHITE CALL TALLY PREVIEW IRIS AUTO MANUAL MASTER BLACK CLOSE OPEN Remote Control Unit RM-LP25U/RM-LP55U/ RM-LP20G Mount Converter 2/3 Zoom...+12dB +3dB +18dB 0dB ALC LEVEL GAMMA LEVEL GAMMA KNEEPOINT AUTO KNEE WHITE BALANCE MANUAL PRESET FAW AW A AW B WHITE PAINT R B PAINT AUTO WHITE CALL TALLY PREVIEW IRIS AUTO MANUAL MASTER BLACK CLOSE OPEN Monitor Remote Control Unit RM-LP25U/RM-LP55U/ RM-LP20G TALLY...
... +9dB +12dB +3dB +18dB 0dB ALC LEVEL GAMMA LEVEL GAMMA KNEEPOINT AUTO KNEE WHITE BALANCE MANUAL PRESET FAW AW A AW B WHITE PAINT R B PAINT AUTO WHITE CALL TALLY PREVIEW IRIS AUTO MANUAL MASTER BLACK CLOSE OPEN Remote Control Unit RM-LP25U/RM-LP55U/ RM-LP20G Mount Converter 2/3 Zoom...+12dB +3dB +18dB 0dB ALC LEVEL GAMMA LEVEL GAMMA KNEEPOINT AUTO KNEE WHITE BALANCE MANUAL PRESET FAW AW A AW B WHITE PAINT R B PAINT AUTO WHITE CALL TALLY PREVIEW IRIS AUTO MANUAL MASTER BLACK CLOSE OPEN Monitor Remote Control Unit RM-LP25U/RM-LP55U/ RM-LP20G TALLY...

Instruction Manual
Page 31
... happens, set the [POWER ON/OFF] switch to "ON" to display the [Initial Setting] screen, then set the [POWER ON/OFF] switch to the [instruction manual] of the recommended batteries. Memo : 0 If the guide pins are not using the built-in rechargeable battery. 0 When power is used . 2 Slide the battery in...
... happens, set the [POWER ON/OFF] switch to "ON" to display the [Initial Setting] screen, then set the [POWER ON/OFF] switch to the [instruction manual] of the recommended batteries. Memo : 0 If the guide pins are not using the built-in rechargeable battery. 0 When power is used . 2 Slide the battery in...

Instruction Manual
Page 41
... maximum position. Memo : 0 The iris is not clear when zoomed to obtain an appropriate video level. 2, 10 1 .. Siemens Star Chart 4 3, 8 6, 9 2 1 Set the [ZOOM SERVO/MANUAL] switch to "MANUAL". 2 Press and hold down the [IRIS] button, and press the [F.f] back focus button until the indicator lamp lights up (approx. 1.5 seconds). 3 Turn the zoom...
... maximum position. Memo : 0 The iris is not clear when zoomed to obtain an appropriate video level. 2, 10 1 .. Siemens Star Chart 4 3, 8 6, 9 2 1 Set the [ZOOM SERVO/MANUAL] switch to "MANUAL". 2 Press and hold down the [IRIS] button, and press the [F.f] back focus button until the indicator lamp lights up (approx. 1.5 seconds). 3 Turn the zoom...

Instruction Manual
Page 48
... ([REC] button, [RET] button, back focus button, [IRIS A/M] switch, [IRIS] button, grip zoom lever, [ZOOM SERVO/MANUAL] switch, zoom ring, iris ring, focus ring) 0 [MONITOR] adjustment knob 0 Grip zoom lever/handle zoom lever 0 [ZOOM SERVO/MANUAL] switch 0 [FIX/VAR/OFF] zoom speed switch 0 [REC/10] button (side operation panel) 0 [AWB/9] button (lens...
... ([REC] button, [RET] button, back focus button, [IRIS A/M] switch, [IRIS] button, grip zoom lever, [ZOOM SERVO/MANUAL] switch, zoom ring, iris ring, focus ring) 0 [MONITOR] adjustment knob 0 Grip zoom lever/handle zoom lever 0 [ZOOM SERVO/MANUAL] switch 0 [FIX/VAR/OFF] zoom speed switch 0 [REC/10] button (side operation panel) 0 [AWB/9] button (lens...
Instruction Manual
Page 49
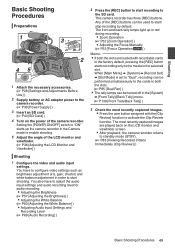
... to start shooting. Setting the [POWER ON/OFF] switch to "ON" starts up in red during recording. 0 Zoom Operation (A P52 [Zoom Operation] ) 0 Adjusting the Focus Manually (A P53 [Focus Operation F] ) Memo : 0 If both the slots. (A P85 [Dual Rec] ) 0 The tally lamps can be performed simultaneously to the cards in order to standby...
... to start shooting. Setting the [POWER ON/OFF] switch to "ON" starts up in red during recording. 0 Zoom Operation (A P52 [Zoom Operation] ) 0 Adjusting the Focus Manually (A P53 [Focus Operation F] ) Memo : 0 If both the slots. (A P85 [Dual Rec] ) 0 The tally lamps can be performed simultaneously to the cards in order to standby...

Instruction Manual
Page 52
... "VAR" will change the zoom speed according to the pressure applied on the lever. 3 Press the zoom lever at the Grip 1 Set the [ZOOM SERVO/MANUAL] switch to "SERVO". 2 Press the zoom lever to zoom. 0 The zoom speed changes according to the extent the zoom lever is being pushed. 0 Zooms into... : 0 When the [FIX/VAR/OFF] zoom speed switch is set to "OFF", the zoom lever at the Lens Section 1 Set the [ZOOM SERVO/MANUAL] switch to "MANUAL". Zoom ratio: 1x to 20x (optical zoom only) Zooming can adjust the preferred angle of view. Shooting Zoom Operation Adjusts the angle of view by...
... "VAR" will change the zoom speed according to the pressure applied on the lever. 3 Press the zoom lever at the Grip 1 Set the [ZOOM SERVO/MANUAL] switch to "SERVO". 2 Press the zoom lever to zoom. 0 The zoom speed changes according to the extent the zoom lever is being pushed. 0 Zooms into... : 0 When the [FIX/VAR/OFF] zoom speed switch is set to "OFF", the zoom lever at the Lens Section 1 Set the [ZOOM SERVO/MANUAL] switch to "MANUAL". Zoom ratio: 1x to 20x (optical zoom only) Zooming can adjust the preferred angle of view. Shooting Zoom Operation Adjusts the angle of view by...

Instruction Manual
Page 53
... for more than 1 second. 0 The current zoom position will be set to "Off", the d icon will cancel the recall. .. Focus Operation F Adjusting Focus Manually 1 Set the [AUTO FOCUS/11] switch to "OFF". Memo : 0 Using the Focus Assist or Expanded Focus function makes it easier to focus. (A P55 [Focus...Preset Zoom1", "Preset Zoom2", or "Preset Zoom3" function and release within 1 second. 0 The camera recorder zooms to the stored zoom position. The manual focus icon d appears on the lens or the user button assigned with the "One Push Focus" function switches the camera recorder to the One-push...
... for more than 1 second. 0 The current zoom position will be set to "Off", the d icon will cancel the recall. .. Focus Operation F Adjusting Focus Manually 1 Set the [AUTO FOCUS/11] switch to "OFF". Memo : 0 Using the Focus Assist or Expanded Focus function makes it easier to focus. (A P55 [Focus...Preset Zoom1", "Preset Zoom2", or "Preset Zoom3" function and release within 1 second. 0 The camera recorder zooms to the stored zoom position. The manual focus icon d appears on the lens or the user button assigned with the "One Push Focus" function switches the camera recorder to the One-push...

Instruction Manual
Page 54
...area on the focusing speed. Turning the focus ring during Push Auto Focus. 0 "One Push Focus" is complete, the camera recorder returns to the Manual Focus mode automatically. 0 One Push Auto Focus functions with emphasis on the left , center, right, or near the selected area. ---- 00: 00... to other user buttons. (A P42 [Assignment of Functions to User Buttons] ) Setting to Auto Focus Temporarily (Push Auto Focus) 0 In the Manual Focus mode, the camera recorder switches temporarily to the Autofocus mode and automatically adjusts the focus when you take a shot with the [RET] button on...
...area on the focusing speed. Turning the focus ring during Push Auto Focus. 0 "One Push Focus" is complete, the camera recorder returns to the Manual Focus mode automatically. 0 One Push Auto Focus functions with emphasis on the left , center, right, or near the selected area. ---- 00: 00... to other user buttons. (A P42 [Assignment of Functions to User Buttons] ) Setting to Auto Focus Temporarily (Push Auto Focus) 0 In the Manual Focus mode, the camera recorder switches temporarily to the Autofocus mode and automatically adjusts the focus when you take a shot with the [RET] button on...

Instruction Manual
Page 57
... of the face using Iris, Gain, Shutter speed and ND filter according to the brightness of the items (Iris, Gain and Shutter Speed) can be manually adjusted. (A P58 [Adjusting the Iris] ) (A P59 [Setting the Gain] ) (A P60 [Setting the Electronic Shutter] ) Memo : 0 If Iris, Gain and Shutter Speed are ...AUTO] item in the [Camera Function] menu. (A P113 [FULL AUTO Item] ) Adjusting the Brightness Manually When the [FULL AUTO] switch is set to "ON", Iris, Gain, Shutter speed and ND filter are manually adjusted, the [AE Level] setting is set to "OFF", some or all of the object to confirm...
... of the face using Iris, Gain, Shutter speed and ND filter according to the brightness of the items (Iris, Gain and Shutter Speed) can be manually adjusted. (A P58 [Adjusting the Iris] ) (A P59 [Setting the Gain] ) (A P60 [Setting the Electronic Shutter] ) Memo : 0 If Iris, Gain and Shutter Speed are ...AUTO] item in the [Camera Function] menu. (A P113 [FULL AUTO Item] ) Adjusting the Brightness Manually When the [FULL AUTO] switch is set to "ON", Iris, Gain, Shutter speed and ND filter are manually adjusted, the [AE Level] setting is set to "OFF", some or all of the object to confirm...

Instruction Manual
Page 58
...Auto Iris (Automatic Adjustment) Mode The iris is disabled. 0 The iris open F-number of image becomes focused as well. The camera recorder switches to the Manual Iris mode, and the a icon on the screen disappears. 2 Turn the iris ring on the camera recorder to "ON" to "M". In this case, .... 0 Even while in the menu. (A P109 [ AE Speed ] ) 58 Adjusting the Iris Increase The subject appears darker. Memo : 0 Even while in the Manual Focus mode, pressing the [IRIS] button on the lens or the user button assigned with the [One Push Iris] function switches the camera recorder to...
...Auto Iris (Automatic Adjustment) Mode The iris is disabled. 0 The iris open F-number of image becomes focused as well. The camera recorder switches to the Manual Iris mode, and the a icon on the screen disappears. 2 Turn the iris ring on the camera recorder to "ON" to "M". In this case, .... 0 Even while in the menu. (A P109 [ AE Speed ] ) 58 Adjusting the Iris Increase The subject appears darker. Memo : 0 Even while in the Manual Focus mode, pressing the [IRIS] button on the lens or the user button assigned with the [One Push Iris] function switches the camera recorder to...

Instruction Manual
Page 59
...recorder is in [Camera Function] B [GAIN L], [GAIN M], and [GAIN H] to the brightness of the subject. Manual Gain Mode (Manual Gain Switching) 0 Select the gain level of the iris has been exceeded. In this phenomenon occurs, the Fnumber on.... You can switch to the Auto Gain mode by setting the items in the Manual Iris mode, press and hold the [IRIS] button on the lens to change the gain value of each position ...in the Manual Iris mode, press the [IRIS] button on the screen turns gray to the brightness of the...
...recorder is in [Camera Function] B [GAIN L], [GAIN M], and [GAIN H] to the brightness of the subject. Manual Gain Mode (Manual Gain Switching) 0 Select the gain level of the iris has been exceeded. In this phenomenon occurs, the Fnumber on.... You can switch to the Auto Gain mode by setting the items in the Manual Iris mode, press and hold the [IRIS] button on the lens to change the gain value of each position ...in the Manual Iris mode, press the [IRIS] button on the screen turns gray to the brightness of the...

Instruction Manual
Page 60
...Set button (center of the formatting confirmation screen 0 When selecting a face using face detection 0 When selecting a photometry area with [Spot Meter] set to "Manual" 60 Setting the Electronic Shutter Electronic shutter can change the shutter speed (time for each shooting frame) using [Camera Function] B [Shutter] menu. Memo ... button) to 25p(XHQ), 25p(UHQ), 25p(HQ), 24p(XHQ), 24p(UHQ), or 24p(HQ), and set the shutter speed. Manual Shutter Mode (Manual Shutter Switching) Use the Set button (R) to switch between the shutter modes and the cross-shaped button (JK) to the video format...
...Set button (center of the formatting confirmation screen 0 When selecting a face using face detection 0 When selecting a photometry area with [Spot Meter] set to "Manual" 60 Setting the Electronic Shutter Electronic shutter can change the shutter speed (time for each shooting frame) using [Camera Function] B [Shutter] menu. Memo ... button) to 25p(XHQ), 25p(UHQ), 25p(HQ), 24p(XHQ), 24p(UHQ), or 24p(HQ), and set the shutter speed. Manual Shutter Mode (Manual Shutter Switching) Use the Set button (R) to switch between the shutter modes and the cross-shaped button (JK) to the video format...


