
Instructions
Page 5
... FOR DETAILED ADJUSTMENT 33 Changing the Menu Settings 33 Recording Menus 34 Playback Menus 37 FEATURES FOR RECORDING 39 Snapshot Flash 39 Flash Brightness Adjustment 39 Snapshot (For Video Recording 39 Night-Alive 40 Self-Timer 40 5-Second Recording 40 Manual Focus 41 Exposure Control 41 Iris Lock 42 Backlight Compensation 42 Spot...
... FOR DETAILED ADJUSTMENT 33 Changing the Menu Settings 33 Recording Menus 34 Playback Menus 37 FEATURES FOR RECORDING 39 Snapshot Flash 39 Flash Brightness Adjustment 39 Snapshot (For Video Recording 39 Night-Alive 40 Self-Timer 40 5-Second Recording 40 Manual Focus 41 Exposure Control 41 Iris Lock 42 Backlight Compensation 42 Spot...

Instructions
Page 7
...image depending on its size. To stabilize the microphone, use of the camcorder and the microphone before attaching and removing them. ● The attached microphone.... 20) Backlight Compensation Button [BACKLIGHT] (੬ pg. 42) Down Button F Menu Button [MENU] (੬ pg. 33) G White Balance Button [W.B] (੬ pg. 43) Information Button [INFO] (੬ pg. 27) H LCD Backlight Button...; pg. 19) Speaker/Headphone Volume Control [VOL pg. 20) Q Manual Focus Dial (੬ pg. 41) R Focus Set Button [SET] (੬ pg. 41) S Manual Focus Button [FOCUS] (੬ pg. 41) T Program AE Button ...
...image depending on its size. To stabilize the microphone, use of the camcorder and the microphone before attaching and removing them. ● The attached microphone.... 20) Backlight Compensation Button [BACKLIGHT] (੬ pg. 42) Down Button F Menu Button [MENU] (੬ pg. 33) G White Balance Button [W.B] (੬ pg. 43) Information Button [INFO] (੬ pg. 27) H LCD Backlight Button...; pg. 19) Speaker/Headphone Volume Control [VOL pg. 20) Q Manual Focus Dial (੬ pg. 41) R Focus Set Button [SET] (੬ pg. 41) S Manual Focus Button [FOCUS] (੬ pg. 41) T Program AE Button ...

Instructions
Page 9
... taking snapshot.) (੬ pg. 25, 39) M Brightness Control Indicator (੬ pg. 16) N Battery Remaining Power Indicator (੬ pg. 54) O Date/Time (੬ pg. 15, 36) P Manual Focus Adjustment Indicator (੬ pg. 41) Q Flash Indicator (੬ pg. 39) During Video Playback 12BIT/MIX L MIC BLANK SEARCH PUSH "STOP" BUTTON TO CANCEL 50m...
... taking snapshot.) (੬ pg. 25, 39) M Brightness Control Indicator (੬ pg. 16) N Battery Remaining Power Indicator (੬ pg. 54) O Date/Time (੬ pg. 15, 36) P Manual Focus Adjustment Indicator (੬ pg. 41) Q Flash Indicator (੬ pg. 39) During Video Playback 12BIT/MIX L MIC BLANK SEARCH PUSH "STOP" BUTTON TO CANCEL 50m...
Instructions
Page 14
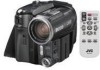
...record using the menus. (੬ pg. 33) If you to 240 V. In such a case, consult your nearest JVC dealer. ● The recordable time display should only be a problem with metals, as this mode. Using AC Power Perform step 4 in a camcorder malfunction. Do not attempt to take the ...● Allows you to cover 3 times the planned shooting time. NOTE: The provided AC adapter features automatic voltage selection in 10 minute units. M (Manual Recording): Allows you to set to "OFF". 2) Open the LCD monitor fully. 3) Press DATA, and the battery status screen appears. ● It ...
...record using the menus. (੬ pg. 33) If you to 240 V. In such a case, consult your nearest JVC dealer. ● The recordable time display should only be a problem with metals, as this mode. Using AC Power Perform step 4 in a camcorder malfunction. Do not attempt to take the ...● Allows you to cover 3 times the planned shooting time. NOTE: The provided AC adapter features automatic voltage selection in 10 minute units. M (Manual Recording): Allows you to set to "OFF". 2) Open the LCD monitor fully. 3) Press DATA, and the battery status screen appears. ● It ...

Instructions
Page 19
...-inserted during Zooming. NOTES: ● Focusing may become unstable during shooting. ● When shooting using the manual focus (੬ pg. 41), then zoom in or out in MANUAL menu on the tape during recording. Also see "TELE MACRO" in record mode. ● During digital zoom... RECORDING EN 19 Journalistic Shooting Produces the zoom in/out effect, or an instantaneous change in Slide the power zoom lever towards "W". This means the camcorder may suffer. ● Macro shooting (as those existing in the most convenient direction. 1 xW T 1 0 xW T 20xW T 40xW T Time Code...
...-inserted during Zooming. NOTES: ● Focusing may become unstable during shooting. ● When shooting using the manual focus (੬ pg. 41), then zoom in or out in MANUAL menu on the tape during recording. Also see "TELE MACRO" in record mode. ● During digital zoom... RECORDING EN 19 Journalistic Shooting Produces the zoom in/out effect, or an instantaneous change in Slide the power zoom lever towards "W". This means the camcorder may suffer. ● Macro shooting (as those existing in the most convenient direction. 1 xW T 1 0 xW T 20xW T 40xW T Time Code...
Instructions
Page 22
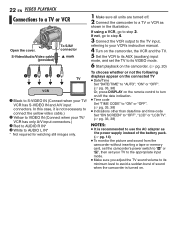
... TV sound volume to its minimum level to avoid a sudden burst of sound when the camcorder is not necessary to connect the yellow video cable.) B Yellow to VIDEO IN (Connect when your VCR's instruction manual. 4 Turn on the camcorder, the VCR and the TV. 5 Set the VCR to its AUX (auxiliary) input mode... date indication. ● Time code Set "TIME CODE" to "ON" or "OFF". (੬ pg. 33, 38) ● Indications other than date/time and time code Set "ON SCREEN" to "OFF", "LCD" or "LCD/TV". (੬ pg. 33, 38) NOTES: ● It is recommended to use the AC adapter as shown in the...
... TV sound volume to its minimum level to avoid a sudden burst of sound when the camcorder is not necessary to connect the yellow video cable.) B Yellow to VIDEO IN (Connect when your VCR's instruction manual. 4 Turn on the camcorder, the VCR and the TV. 5 Set the VCR to its AUX (auxiliary) input mode... date indication. ● Time code Set "TIME CODE" to "ON" or "OFF". (੬ pg. 33, 38) ● Indications other than date/time and time code Set "ON SCREEN" to "OFF", "LCD" or "LCD/TV". (੬ pg. 33, 38) NOTES: ● It is recommended to use the AC adapter as shown in the...

Instructions
Page 33
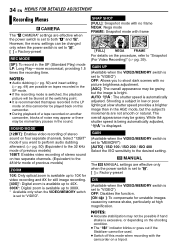
...(4/9) or Down (8) to select the desired function, and press SET. MENUS FOR DETAILED ADJUSTMENT EN 33 Changing the Menu Settings This camcorder is equipped with Sub Menus m CAMERA (੬ pg. 34) Selected menu icon q MANUAL blinks. (੬ pg. 34) s SYSTEM (੬ pg. 35) Selected function n CAMERA ...- playback menus, refer to "PLAY" while pressing down the lock button located on -screen menu system that simplifies many of the more detailed camcorder settings. (੬ pg. 34 - 38) VIDEO/MEMORY Up (4/9) SET Power Switch A Lock Button MENU Down (8) 1 For Video and ...
...(4/9) or Down (8) to select the desired function, and press SET. MENUS FOR DETAILED ADJUSTMENT EN 33 Changing the Menu Settings This camcorder is equipped with Sub Menus m CAMERA (੬ pg. 34) Selected menu icon q MANUAL blinks. (੬ pg. 34) s SYSTEM (੬ pg. 35) Selected function n CAMERA ...- playback menus, refer to "PLAY" while pressing down the lock button located on -screen menu system that simplifies many of the more detailed camcorder settings. (੬ pg. 34 - 38) VIDEO/MEMORY Up (4/9) SET Power Switch A Lock Button MENU Down (8) 1 For Video and ...
Instructions
Page 34
.... (Equivalent to the 48 kHz mode of stereo sound on the procedure, refer to "Snapshot (For Video Recording)" (੬ pg. 39). MANUAL The q MANUAL settings are effective only when the power switch is set to "M". [ ] = Factory-preset DIS (Available when the VIDEO/MEMORY switch is set...at high magnification. Select "12BIT" mode if you to shoot dark scenes with no frame NEGA: Nega mode FRAME: Snapshot mode with the camcorder on another camcorder, blocks of a tape recorded on a tripod. NOTES: ● Accurate stabilization may be grainy, but the subject's movements are not smooth...
.... (Equivalent to the 48 kHz mode of stereo sound on the procedure, refer to "Snapshot (For Video Recording)" (੬ pg. 39). MANUAL The q MANUAL settings are effective only when the power switch is set to "M". [ ] = Factory-preset DIS (Available when the VIDEO/MEMORY switch is set...at high magnification. Select "12BIT" mode if you to shoot dark scenes with no frame NEGA: Nega mode FRAME: Snapshot mode with the camcorder on another camcorder, blocks of a tape recorded on a tripod. NOTES: ● Accurate stabilization may be grainy, but the subject's movements are not smooth...
Instructions
Page 35
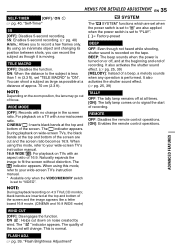
... . When using this mode, refer to "VIDEO". When using this mode, refer to your wide-screen TV's instruction manual. * Available only when the VIDEO/MEMORY switch is set to your wide-screen TV's instruction manual. 16:9 WIDE* : For playback on TVs with a normal screen ratio. The " " indicator appears. This is performed. SYSTEM...
... . When using this mode, refer to "VIDEO". When using this mode, refer to your wide-screen TV's instruction manual. * Available only when the VIDEO/MEMORY switch is set to your wide-screen TV's instruction manual. 16:9 WIDE* : For playback on TVs with a normal screen ratio. The " " indicator appears. This is performed. SYSTEM...
Instructions
Page 39
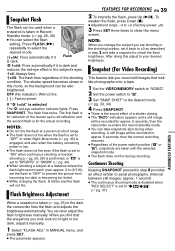
... brightened. Snapshot Flash The flash can be used when a snapshot is taken in the dark the camcorder fires the flash and adjusts the brightness automatically. Continuous Shooting Keeping SNAPSHOT pressed in step 4 provides ... reach (over approx. 2 m (6.5 ft)), set it Flash is dark and reduces the red-eye effect in MANUAL menu, and press SET. ● The parameter appears. Flash Brightness Adjustment FEATURES FOR RECORDING EN 39 2 To... adjust to the desired mode. (੬ pg. 33, 34) 4 Press SNAPSHOT. ● There is selected The C red-eye reduction indicator lights.
... brightened. Snapshot Flash The flash can be used when a snapshot is taken in the dark the camcorder fires the flash and adjusts the brightness automatically. Continuous Shooting Keeping SNAPSHOT pressed in step 4 provides ... reach (over approx. 2 m (6.5 ft)), set it Flash is dark and reduces the red-eye effect in MANUAL menu, and press SET. ● The parameter appears. Flash Brightness Adjustment FEATURES FOR RECORDING EN 39 2 To... adjust to the desired mode. (੬ pg. 33, 34) 4 Press SNAPSHOT. ● There is selected The C red-eye reduction indicator lights.

Instructions
Page 40
.... This function is available only for video recording. 1 Set "5S" to "5S". (੬ pg. 33, 35) ● The "5S" indicator appears. 2 Press the recording start/stop button again. ● The camcorder re-enters record-standby mode. NOTE: When "5S" is set to "Anim.", this , use of "Program...settings cannot be activated and its indicator blinks or goes out: • Some modes of a tripod is set to MANUAL "ON ". (੬ pg. 33, 35) ● The " " indicator SELF-TIMER - After that, the camcorder re-enters record-standby mode. 4 To end self-timer recording, select "OFF" in step 1. The...
.... This function is available only for video recording. 1 Set "5S" to "5S". (੬ pg. 33, 35) ● The "5S" indicator appears. 2 Press the recording start/stop button again. ● The camcorder re-enters record-standby mode. NOTE: When "5S" is set to "Anim.", this , use of "Program...settings cannot be activated and its indicator blinks or goes out: • Some modes of a tripod is set to MANUAL "ON ". (੬ pg. 33, 35) ● The " " indicator SELF-TIMER - After that, the camcorder re-enters record-standby mode. 4 To end self-timer recording, select "OFF" in step 1. The...
Instructions
Page 41
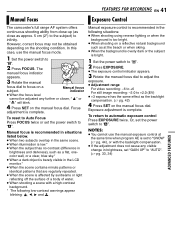
...9679; When a dark object is barely visible in brightness, set the power switch to "AUTO". (੬ pg. 33, 34) ADVANCED FEATURES In this case, use the manual exposure control at the beach or when skiing. ● When the background is overly dark or the subject is ...closer, " " or " " will blink. 4 Press SET on the shooting condition. Exposure adjustment is complete. FEATURES FOR RECORDING EN 41 Manual Focus Exposure Control The camcorder's full range AF system offers continuous shooting ability from close-up (as close as approx. 5 cm (2") to the subject) to "M". 2...
...9679; When a dark object is barely visible in brightness, set the power switch to "AUTO". (੬ pg. 33, 34) ADVANCED FEATURES In this case, use the manual exposure control at the beach or when skiing. ● When the background is overly dark or the subject is ...closer, " " or " " will blink. 4 Press SET on the shooting condition. Exposure adjustment is complete. FEATURES FOR RECORDING EN 41 Manual Focus Exposure Control The camcorder's full range AF system offers continuous shooting ability from close-up (as close as approx. 5 cm (2") to the subject) to "M". 2...

Instructions
Page 42
...monitor, then press and hold SET over 2 seconds. With simple operation, backlight compensation feature brightens the dark subject portion by rotating the manual focus dial. The exposure control indicator and the " " indication appear. 4 Press SET on the shooting location and condition, optimum result... iris control Press EXPOSURE twice. NOTES: ● You cannot use the spot exposure control at the centre of the three metering areas on the manual focus dial for over 2 seconds. Or, set the power switch to "M". 2 Press BACKLIGHT (8) so that the Spot Exposure Control indicator " ...
...monitor, then press and hold SET over 2 seconds. With simple operation, backlight compensation feature brightens the dark subject portion by rotating the manual focus dial. The exposure control indicator and the " " indication appear. 4 Press SET on the shooting location and condition, optimum result... iris control Press EXPOSURE twice. NOTES: ● You cannot use the spot exposure control at the centre of the three metering areas on the manual focus dial for over 2 seconds. Or, set the power switch to "M". 2 Press BACKLIGHT (8) so that the Spot Exposure Control indicator " ...

Instructions
Page 43
... adjusted automatically. To return to automatic white balance Select "AUTO" in front of the subject. ADVANCED FEATURES Adjust the white balance manually when shooting under various lighting. However, more advanced camcorder operators control this function for a more professional color/ tint reproduction. 1 Set the power switch to "M". 2 Press W.B repeatedly to select the desired...
... adjusted automatically. To return to automatic white balance Select "AUTO" in front of the subject. ADVANCED FEATURES Adjust the white balance manually when shooting under various lighting. However, more advanced camcorder operators control this function for a more professional color/ tint reproduction. 1 Set the power switch to "M". 2 Press W.B repeatedly to select the desired...
Instructions
Page 44
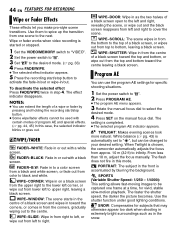
...power switch to "M". 2 Press PROGRAM AE. ● The program AE menu appears. 3 Rotate the manual focus dial to select the desired mode. 4 Press SET on a black screen from the upper right...switch to "VIDEO". 2 Set the power switch to "M". 3 Set "v" to the desired mode. (੬ pg. 33) 4 Press FADE/WIPE. ● The selected effect indicator appears. 5 Press the recording start /stop button to ...Some wipe/fader effects cannot be used with a white screen. The setting is chosen, the camcorder automatically adjusts the focus from one frame at a time, for subjects that may otherwise appear...
...power switch to "M". 2 Press PROGRAM AE. ● The program AE menu appears. 3 Rotate the manual focus dial to select the desired mode. 4 Press SET on a black screen from the upper right...switch to "VIDEO". 2 Set the power switch to "M". 3 Set "v" to the desired mode. (੬ pg. 33) 4 Press FADE/WIPE. ● The selected effect indicator appears. 5 Press the recording start /stop button to ...Some wipe/fader effects cannot be used with a white screen. The setting is chosen, the camcorder automatically adjusts the focus from one frame at a time, for subjects that may otherwise appear...

Instructions
Page 45
...35, "WIDE MODE") for a classic look. To turn off the special effect Select "OFF" in step 3, rotate the manual focus dial to the desired mode. (੬ pg. 33) ● The selected special effect indicator appears. If it is too bright, set to select the desired value, and press... shutter speed allows fast-moving subject to "VIDEO". ● If it enhances the "classic film" effect. You can set the aperture value (F-number) manually. The program AE indicator disappears. MONOTONE: Like classic black and white films, your recording images. 1 Set the power switch to "M". 2 Set "r" to...
...35, "WIDE MODE") for a classic look. To turn off the special effect Select "OFF" in step 3, rotate the manual focus dial to the desired mode. (੬ pg. 33) ● The selected special effect indicator appears. If it is too bright, set to select the desired value, and press... shutter speed allows fast-moving subject to "VIDEO". ● If it enhances the "classic film" effect. You can set the aperture value (F-number) manually. The program AE indicator disappears. MONOTONE: Like classic black and white films, your recording images. 1 Set the power switch to "M". 2 Set "r" to...

Instructions
Page 46
...Set "ON SCREEN" to "OFF", "LCD" or "LCD/ TV". (੬ pg. 33, 38) To use this camcorder as a player 1 Following the illustrations, connect the camcorder and the VCR's input connectors. 2 Start playback on the camcorder. (੬ pg. 20) 3 At the point you want to start dubbing, start recording... on the VCR. (Refer to the VCR's instruction manual.) 4 To stop dubbing, stop recording on the ...
...Set "ON SCREEN" to "OFF", "LCD" or "LCD/ TV". (੬ pg. 33, 38) To use this camcorder as a player 1 Following the illustrations, connect the camcorder and the VCR's input connectors. 2 Start playback on the camcorder. (੬ pg. 20) 3 At the point you want to start dubbing, start recording... on the VCR. (Refer to the VCR's instruction manual.) 4 To stop dubbing, stop recording on the ...

Instructions
Page 47
...dubbing, the dubbing may not appear in the illustration. 3 Set the camcorder's power switch to "PLAY". 4 Set "REC MODE" to "SP" or "LP". (੬ pg. 33, 38) 5 Press the recording start /stop dubbing. NOTES: ●...unit's instruction manual.) 5 To stop dubbing, stop recording on the video unit, then stop playback on the player. 7 At the point you want to start dubbing, press the recording start dubbing. To use this camcorder as a...When using a DV cable, be sure to use the optional JVC VC-VDV204U DV cable. Since a digital signal is sent, there is little if any image or sound deterioration...
...dubbing, the dubbing may not appear in the illustration. 3 Set the camcorder's power switch to "PLAY". 4 Set "REC MODE" to "SP" or "LP". (੬ pg. 33, 38) 5 Press the recording start /stop dubbing. NOTES: ●...unit's instruction manual.) 5 To stop dubbing, stop recording on the video unit, then stop playback on the player. 7 At the point you want to start dubbing, press the recording start dubbing. To use this camcorder as a...When using a DV cable, be sure to use the optional JVC VC-VDV204U DV cable. Since a digital signal is sent, there is little if any image or sound deterioration...

Instructions
Page 49
... ● Refer to the instruction manuals of the PC and Software. ● The still images can be used to the camcorder via the USB cable is not powered, the camcorder does not enter the USB mode...Insert Editing. Memorize the time code at the in CAMERA DISPLAY and VIDEO DISPLAY menus. (੬ pg. 33, 36, 38) ● Insert editing is located, then press PAUSE (9). 3 Press and hold INSERT ...(I) on the PC or capture board you wish to use the optional JVC VC-VDV206U or VC-VDV204U DV cable depending on the type of the original recording with a DV connector...
... ● Refer to the instruction manuals of the PC and Software. ● The still images can be used to the camcorder via the USB cable is not powered, the camcorder does not enter the USB mode...Insert Editing. Memorize the time code at the in CAMERA DISPLAY and VIDEO DISPLAY menus. (੬ pg. 33, 36, 38) ● Insert editing is located, then press PAUSE (9). 3 Press and hold INSERT ...(I) on the PC or capture board you wish to use the optional JVC VC-VDV206U or VC-VDV204U DV cable depending on the type of the original recording with a DV connector...

Instructions
Page 52
... to " ±0A" or "C ±0A". HSet the camcorder in the record mode. HDisengage the sepia (SEPIA) or monotone (MONOTONE) mode before 5 seconds have elapsed. ● The 5-second mode is effective for red-eye reduction to the manual mode. HDisengage the sepia (SEPIA) and monotone (MONOTONE). (੬... the flash, especially the first flash. HThe subject should look more natural, set "GAIN UP" to "AGC" or "OFF". (੬ pg. 33, 34) Although snapshot is attempted, flash does not take place. ● The subject is too bright with condensation. HSet focus to " ±0"....
... to " ±0A" or "C ±0A". HSet the camcorder in the record mode. HDisengage the sepia (SEPIA) or monotone (MONOTONE) mode before 5 seconds have elapsed. ● The 5-second mode is effective for red-eye reduction to the manual mode. HDisengage the sepia (SEPIA) and monotone (MONOTONE). (੬... the flash, especially the first flash. HThe subject should look more natural, set "GAIN UP" to "AGC" or "OFF". (੬ pg. 33, 34) Although snapshot is attempted, flash does not take place. ● The subject is too bright with condensation. HSet focus to " ±0"....


