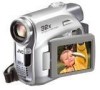

Instruction Manual
Page 2
... working or not. Only cassettes marked " " and memory cards marked " " or " " can be used in this camcorder. ● This product includes patented and other container. ● Use SP (Standard) mode for important video recordings. However, black spots or bright spots of over 50°C - Video heads can cause damage to the internal charging circuitry. ● This camcorder is made with JVC Data Battery. Cassette tapes should be removed from the camcorder and stored in direct...
... working or not. Only cassettes marked " " and memory cards marked " " or " " can be used in this camcorder. ● This product includes patented and other container. ● Use SP (Standard) mode for important video recordings. However, black spots or bright spots of over 50°C - Video heads can cause damage to the internal charging circuitry. ● This camcorder is made with JVC Data Battery. Cassette tapes should be removed from the camcorder and stored in direct...

Instruction Manual
Page 7
... 23 Connections To A TV Or VCR 24 Playback Using The Remote Control 25 DIGITAL STILL CAMERA (D.S.C.) RECORDING & PLAYBACK 27 D.S.C. RECORDING 27 Basic Shooting (D.S.C. Snapshot 27 D.S.C. PLAYBACK 28 Normal Playback Of Images 28 Auto Playback Of Images 28 Index Playback Of Files 28 Removing On-Screen Display 28 ADDITIONAL FEATURES FOR D.S.C 29 Resetting The File Name 29 Protecting Files 29 Deleting Files 30 Setting Print Information (DPOF Setting) ....... 30 Initialising A Memory Card 31 MENUS FOR DETAILED ADJUSTMENT 32 Changing The Menu Settings 32 Recording Menus...
... 23 Connections To A TV Or VCR 24 Playback Using The Remote Control 25 DIGITAL STILL CAMERA (D.S.C.) RECORDING & PLAYBACK 27 D.S.C. RECORDING 27 Basic Shooting (D.S.C. Snapshot 27 D.S.C. PLAYBACK 28 Normal Playback Of Images 28 Auto Playback Of Images 28 Index Playback Of Files 28 Removing On-Screen Display 28 ADDITIONAL FEATURES FOR D.S.C 29 Resetting The File Name 29 Protecting Files 29 Deleting Files 30 Setting Print Information (DPOF Setting) ....... 30 Initialising A Memory Card 31 MENUS FOR DETAILED ADJUSTMENT 32 Changing The Menu Settings 32 Recording Menus...

Instruction Manual
Page 9
... Button [INDEX] (੬ pg. 28) LED Light Button [LIGHT] !Dioptre Adjustment Control (੬ pg. 18) "Auto Button [AUTO] (੬ pg. 16) #Snapshot Button [SNAPSHOT] (੬ pg. 27, 38) Live Slow Button (੬ pg. 32, 37) $Power Zoom Lever [T/W] (੬ pg. 21) Speaker Volume Control [VOL. +, -] (੬ pg. 23) %Battery Release Button [PUSH BATT.] (੬ pg. 14) &Recording Start/Stop Button (੬ pg. 20) (Power Switch [REC, PLAY, OFF] (੬ pg. 16) )Lock Button (੬ pg. 16) ~Cassette Open/Eject Switch [OPEN/EJECT...
... Button [INDEX] (੬ pg. 28) LED Light Button [LIGHT] !Dioptre Adjustment Control (੬ pg. 18) "Auto Button [AUTO] (੬ pg. 16) #Snapshot Button [SNAPSHOT] (੬ pg. 27, 38) Live Slow Button (੬ pg. 32, 37) $Power Zoom Lever [T/W] (੬ pg. 21) Speaker Volume Control [VOL. +, -] (੬ pg. 23) %Battery Release Button [PUSH BATT.] (੬ pg. 14) &Recording Start/Stop Button (੬ pg. 20) (Power Switch [REC, PLAY, OFF] (੬ pg. 16) )Lock Button (੬ pg. 16) ~Cassette Open/Eject Switch [OPEN/EJECT...

Instruction Manual
Page 15
... original function of time under extremely high/low temperature condition or charged too many times. Failure to do so can check the remaining battery power and the recordable time. 1) Make sure the battery is attached and the Power Switch is set to "OFF". 2) Open the LCD monitor fully. 3) Press DATA, and the battery status screen appears. ● It is displayed for approx. 3 seconds if the button is pressed and released quickly...
... original function of time under extremely high/low temperature condition or charged too many times. Failure to do so can check the remaining battery power and the recordable time. 1) Make sure the battery is attached and the Power Switch is set to "OFF". 2) Open the LCD monitor fully. 3) Press DATA, and the battery status screen appears. ● It is displayed for approx. 3 seconds if the button is pressed and released quickly...

Instruction Manual
Page 16
... turn on the camcorder, set the Power Switch to any operation mode except "OFF" while pressing down the Lock Button located on a tape or play back a recording on the tape. ● Allows you to display a still image stored in the memory card or to transfer a still image stored in a memory card. If you to record in a memory card or access data stored in the memory card to a PC. ● Allows you to set various playback functions using no special effects or manual adjustments...
... turn on the camcorder, set the Power Switch to any operation mode except "OFF" while pressing down the Lock Button located on a tape or play back a recording on the tape. ● Allows you to display a still image stored in the memory card or to transfer a still image stored in a memory card. If you to record in a memory card or access data stored in the memory card to a PC. ● Allows you to set various playback functions using no special effects or manual adjustments...

Instruction Manual
Page 20
...) VIDEO/MEMORY Zoom Lever POWER/CHARGE Lamp Lock Button Recording Start/Stop Button 1 Remove the lens cap. (੬ pg. 12) 2 Open the LCD monitor fully. 3 Set the VIDEO/MEMORY Switch to "VIDEO". 4 Set the Power Switch to the type of tape used. NOTES: ● If the Record-Standby mode continues for 5 minutes and no operation is in LP (Long Play) mode, ੬ pg. 33. 5 To start recording, press the Recording Start/ Stop Button. When the remaining time reaches 2 minutes, the indication starts blinking. ● The time...
...) VIDEO/MEMORY Zoom Lever POWER/CHARGE Lamp Lock Button Recording Start/Stop Button 1 Remove the lens cap. (੬ pg. 12) 2 Open the LCD monitor fully. 3 Set the VIDEO/MEMORY Switch to "VIDEO". 4 Set the Power Switch to the type of tape used. NOTES: ● If the Record-Standby mode continues for 5 minutes and no operation is in LP (Long Play) mode, ੬ pg. 33. 5 To start recording, press the Recording Start/ Stop Button. When the remaining time reaches 2 minutes, the indication starts blinking. ● The time...

Instruction Manual
Page 22
... shooting again after shooting a scene then opening/closing the cassette holder cover. NOTES: ● The time code cannot be reset. ● During fast-forwarding and rewinding, the time code indication does not move smoothly. ● The time code is displayed only when "TIME CODE" is normal. When recording is removed and re-inserted during shooting. ● When shooting using a partially recorded tape. ● When shooting on the tape. 22 EN VIDEO RECORDING Time Code Quick Review During recording, a time code is recorded on...
... shooting again after shooting a scene then opening/closing the cassette holder cover. NOTES: ● The time code cannot be reset. ● During fast-forwarding and rewinding, the time code indication does not move smoothly. ● The time code is displayed only when "TIME CODE" is normal. When recording is removed and re-inserted during shooting. ● When shooting using a partially recorded tape. ● When shooting on the tape. 22 EN VIDEO RECORDING Time Code Quick Review During recording, a time code is recorded on...

Instruction Manual
Page 25
... or powerful lighting. VIDEO RECORDING & PLAYBACK Playback Using The Remote Control The Full-Function Remote Control Unit can operate this camcorder from a distance as well as the basic operations (Playback, Stop, Pause, Fast-Forward and Rewind) of images in a memory card (੬ pg. 28) !FF Button ● Forward/Forward Shuttle Search on a tape (੬ pg. 23) ● Displays next file in /out (੬ pg. 21, 26) (Also available with the Power Switch set to "PLAY") (START/STOP Button Functions the...
... or powerful lighting. VIDEO RECORDING & PLAYBACK Playback Using The Remote Control The Full-Function Remote Control Unit can operate this camcorder from a distance as well as the basic operations (Playback, Stop, Pause, Fast-Forward and Rewind) of images in a memory card (੬ pg. 28) !FF Button ● Forward/Forward Shuttle Search on a tape (੬ pg. 23) ● Displays next file in /out (੬ pg. 21, 26) (Also available with the Power Switch set to "PLAY") (START/STOP Button Functions the...

Instruction Manual
Page 31
... SET. If the memory card becomes corrupted, initialize it. To Print By Selecting Still Images And Number Of Prints 1 Perform steps 1 - 3 in "To Print All Still Images (One Print For Each)". (੬ pg. 30) 2 Press 4 or 3 to use the provided AC Adapter, as the memory card may cause the memory card to select "RETURN", and press SET. Also, be corrupted. DIGITAL STILL CAMERA (D.S.C.) RECORDING & PLAYBACK The DPOF screen...
... SET. If the memory card becomes corrupted, initialize it. To Print By Selecting Still Images And Number Of Prints 1 Perform steps 1 - 3 in "To Print All Still Images (One Print For Each)". (੬ pg. 30) 2 Press 4 or 3 to use the provided AC Adapter, as the memory card may cause the memory card to select "RETURN", and press SET. Also, be corrupted. DIGITAL STILL CAMERA (D.S.C.) RECORDING & PLAYBACK The DPOF screen...
Instruction Manual
Page 32
... and press SET or 2. Recording Menu Playback Menu FUNCTION REC MODE SP LP TV 5 Setting procedure hereafter depends on the switch. ● For D.S.C. NOTES: ● You cannot enter Menu Screen during recording. ● Certain functions cannot be displayed in the Video or D.S.C. The Menu Screen closes. PLAYBACK" (੬ pg. 28). 2 Open the LCD monitor fully. (੬ pg. 20) 3 Press MENU. 32 EN MENUS FOR DETAILED ADJUSTMENT Changing The Menu Settings This camcorder is currently saved inside the camcorder's memory. ●...
... and press SET or 2. Recording Menu Playback Menu FUNCTION REC MODE SP LP TV 5 Setting procedure hereafter depends on the switch. ● For D.S.C. NOTES: ● You cannot enter Menu Screen during recording. ● Certain functions cannot be displayed in the Video or D.S.C. The Menu Screen closes. PLAYBACK" (੬ pg. 28). 2 Open the LCD monitor fully. (੬ pg. 20) 3 Press MENU. 32 EN MENUS FOR DETAILED ADJUSTMENT Changing The Menu Settings This camcorder is currently saved inside the camcorder's memory. ●...

Instruction Manual
Page 33
... may be used. ● Switch off this camcorder. ● During playback of a tape recorded on the shooting condition. ● The " " indicator blinks or goes out if the Stabiliser cannot be momentary pauses in the SP (Standard Play) mode LP: Long Play-more economical, providing 1.5 times the recording time. * SP indicator does not appear on a tripod. * Available only when the VIDEO/MEMORY Switch is set to the 48 kHz mode of focus.
... may be used. ● Switch off this camcorder. ● During playback of a tape recorded on the shooting condition. ● The " " indicator blinks or goes out if the Stabiliser cannot be momentary pauses in the SP (Standard Play) mode LP: Long Play-more economical, providing 1.5 times the recording time. * SP indicator does not appear on a tripod. * Available only when the VIDEO/MEMORY Switch is set to the 48 kHz mode of focus.
Instruction Manual
Page 34
... poor lighting at slow shutter speed provides a brighter image than in 16:9 wide mode, set to use the Digital Zoom. EXECUTE: Resets all settings to display images in the AGC mode, but the image is bright. TV 16:9 To enable your tv to the factory-preset. AGC GAIN UP OFF: Allows you to 32X since digital zoom will change. AUTO : The shutter speed is opened . It also activates the shutter sound effect. (੬ pg. 27, 38) CAM RESET...
... poor lighting at slow shutter speed provides a brighter image than in 16:9 wide mode, set to use the Digital Zoom. EXECUTE: Resets all settings to display images in the AGC mode, but the image is bright. TV 16:9 To enable your tv to the factory-preset. AGC GAIN UP OFF: Allows you to 32X since digital zoom will change. AUTO : The shutter speed is opened . It also activates the shutter sound effect. (੬ pg. 27, 38) CAM RESET...

Instruction Manual
Page 38
... shutter speed is the sound effect of a tripod is complete. M 2 Set the recording mode to " ". (੬ pg. 16) 3 Press NIGHT so that are regularly repeated. ● When the scene is being automatically adjusted. However, correct focus may look like photographs onto a tape. 1 Set the VIDEO/MEMORY Switch to "VIDEO". 2 Set the Power Switch to " ". (੬ pg. 16) 3 Press FOCUS. M 2 Set the recording mode to "REC". Snapshot (Record Still Image On Tape) This feature lets you record...
... shutter speed is the sound effect of a tripod is complete. M 2 Set the recording mode to " ". (੬ pg. 16) 3 Press NIGHT so that are regularly repeated. ● When the scene is being automatically adjusted. However, correct focus may look like photographs onto a tape. 1 Set the VIDEO/MEMORY Switch to "VIDEO". 2 Set the Power Switch to " ". (੬ pg. 16) 3 Press FOCUS. M 2 Set the recording mode to "REC". Snapshot (Record Still Image On Tape) This feature lets you record...

Instruction Manual
Page 43
... displays appear on the connected TV • Date/time Set "DATE/TIME" to "ON" or "OFF". (੬ pg. 32, 36) Or, press DISPLAY on the remote control to turn on the sheet included in the package for watching still images only. Dubbing To A VCR To S connector To AV connector Audio/Video cable (provided) S Cable (optional) 12 3 4 EDITING EN 43 1 Following the illustrations, connect the camcorder and the VCR's input connectors. 2 Start playback...
... displays appear on the connected TV • Date/time Set "DATE/TIME" to "ON" or "OFF". (੬ pg. 32, 36) Or, press DISPLAY on the remote control to turn on the sheet included in the package for watching still images only. Dubbing To A VCR To S connector To AV connector Audio/Video cable (provided) S Cable (optional) 12 3 4 EDITING EN 43 1 Following the illustrations, connect the camcorder and the VCR's input connectors. 2 Start playback...

Instruction Manual
Page 45
... USB mode. ● The date/time information cannot be sure to use Windows® Messenger to transfer still images stored on the LCD monitor while the PC is possible to conduct video conferences over the Internet, using a camcorder. Connecting the cable incorrectly may not work properly depending on the PC. ● If the PC connected to the camcorder via the USB cable is transferring a file to "SOFTWARE INSTALLATION AND USB CONNECTION GUIDE" for the Windows...
... USB mode. ● The date/time information cannot be sure to use Windows® Messenger to transfer still images stored on the LCD monitor while the PC is possible to conduct video conferences over the Internet, using a camcorder. Connecting the cable incorrectly may not work properly depending on the PC. ● If the PC connected to the camcorder via the USB cable is transferring a file to "SOFTWARE INSTALLATION AND USB CONNECTION GUIDE" for the Windows...

Instruction Manual
Page 47
.... ➜Replace the dead battery with a fully charged one. (੬ pg. 15) Video and D.S.C. Video and D.S.C. Or there are various different light sources behind the subject. ➜Find a white subject and compose your nearest JVC dealer. The camcorder is not a malfunction. When the screen is under direct sunlight during shooting, the screen becomes red or black for video playback. (੬ pg. 24) ● The cassette holder cover is open...
.... ➜Replace the dead battery with a fully charged one. (੬ pg. 15) Video and D.S.C. Video and D.S.C. Or there are various different light sources behind the subject. ➜Find a white subject and compose your nearest JVC dealer. The camcorder is not a malfunction. When the screen is under direct sunlight during shooting, the screen becomes red or black for video playback. (੬ pg. 24) ● The cassette holder cover is open...

Instruction Manual
Page 48
... set to "AUTO". ➜If you want the lighting to look more times. (੬ pg. 19) Images on the LCD monitor become dark due to the characteristics of the unit. (Effective dots: more than 99.99%) The cassette will not load properly. ● The battery's charge is low. ➜Install a fully charged battery. (੬ pg. 14) The memory card cannot be removed from the printer, a black...
... set to "AUTO". ➜If you want the lighting to look more times. (੬ pg. 19) Images on the LCD monitor become dark due to the characteristics of the unit. (Effective dots: more than 99.99%) The cassette will not load properly. ● The battery's charge is low. ➜Install a fully charged battery. (੬ pg. 14) The memory card cannot be removed from the printer, a black...

Instruction Manual
Page 49
... work. ● "REMOTE" is set to "VIDEO". (੬ pg. 16) CONDENSATION, OPERATION PAUSED PLEASE WAIT Appears if condensation occurs. DUB ERROR! DUB ERROR! LENS CAP Appears for replacement. A. TROUBLESHOOTING EN 49 Picture does not appear on if the lens cap is attached or when it is dark. CHECK TAPE'S ERASE PROTECTION TAB Appears when the erase protection tab is set to "SAVE" while the Power Switch is set to "REC" and the VIDEO/MEMORY Switch is set...
... work. ● "REMOTE" is set to "VIDEO". (੬ pg. 16) CONDENSATION, OPERATION PAUSED PLEASE WAIT Appears if condensation occurs. DUB ERROR! DUB ERROR! LENS CAP Appears for replacement. A. TROUBLESHOOTING EN 49 Picture does not appear on if the lens cap is attached or when it is dark. CHECK TAPE'S ERASE PROTECTION TAB Appears when the erase protection tab is set to "SAVE" while the Power Switch is set to "REC" and the VIDEO/MEMORY Switch is set...

Instruction Manual
Page 55
... recording time (using 80 min. SPECIFICATIONS EN 55 Camcorder For General Power supply DC 11 V (Using AC Adapter) DC 7.2 V (Using battery pack) Power consumption Approx. 2.4 W (2.6 W*) (LCD monitor off, viewfinder on) Approx. 2.7 W (2.9 W*) (LCD monitor on, viewfinder off) * Using LED Light Dimensions (W x H x D) 59 mm x 94 mm x 114 mm (with 0.33" colour LCD Speaker Monaural LED Light Effective distance: 1.5 m For Digital Still Camera Storage media SD Memory Card/MultiMediaCard Compression system JPEG (compatible) File size Still image...
... recording time (using 80 min. SPECIFICATIONS EN 55 Camcorder For General Power supply DC 11 V (Using AC Adapter) DC 7.2 V (Using battery pack) Power consumption Approx. 2.4 W (2.6 W*) (LCD monitor off, viewfinder on) Approx. 2.7 W (2.9 W*) (LCD monitor on, viewfinder off) * Using LED Light Dimensions (W x H x D) 59 mm x 94 mm x 114 mm (with 0.33" colour LCD Speaker Monaural LED Light Effective distance: 1.5 m For Digital Still Camera Storage media SD Memory Card/MultiMediaCard Compression system JPEG (compatible) File size Still image...
Instruction Manual
Page 72
... 45 Connections To A TV Or VCR 24 D Data Battery 15 Date/Time Settings 17 Deleting Files 30 Demonstration Mode 35 Digital Image Stabilisation (DIS 33 DPOF Setting (Digital Print Order Format 30 Dubbing 43, 44 E Exposure Control 39 I Initialising A Memory Card 31 Insert Editing 46 Interface Shooting 21 Iris Lock 39 L LCD Monitor and Viewfinder 20 LED Light 37 Live Slow 37 Loading A Cassette 19 Loading A Memory Card 19 M Manual Focus 38 Melody 34 Memory Card 19, 52 Motor Drive Mode...
... 45 Connections To A TV Or VCR 24 D Data Battery 15 Date/Time Settings 17 Deleting Files 30 Demonstration Mode 35 Digital Image Stabilisation (DIS 33 DPOF Setting (Digital Print Order Format 30 Dubbing 43, 44 E Exposure Control 39 I Initialising A Memory Card 31 Insert Editing 46 Interface Shooting 21 Iris Lock 39 L LCD Monitor and Viewfinder 20 LED Light 37 Live Slow 37 Loading A Cassette 19 Loading A Memory Card 19 M Manual Focus 38 Melody 34 Memory Card 19, 52 Motor Drive Mode...


