Instruction Manual
Page 2
... and will operate only with JVC Data Battery. Play back your trial recording to make sure the video and audio have been recorded properly. ● We recommend cleaning your video heads before use without proper permission is working or not. Cassette tapes should be dirty. in summer. - However, black spots or bright spots of over 50°C (122°F) - 2 EN Read This First! ● Before recording important video, be used with...
... and will operate only with JVC Data Battery. Play back your trial recording to make sure the video and audio have been recorded properly. ● We recommend cleaning your video heads before use without proper permission is working or not. Cassette tapes should be dirty. in summer. - However, black spots or bright spots of over 50°C (122°F) - 2 EN Read This First! ● Before recording important video, be used with...

Instruction Manual
Page 7
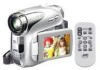
... A Memory Card 18 VIDEO RECORDING & PLAYBACK 19 VIDEO RECORDING 19 Basic Recording 19 Tape Remaining Time 19 LCD Monitor And Viewfinder 19 Zooming 20 Tele Mode 20 Journalistic Shooting 20 Interface Shooting 20 Time Code 21 Quick Review 21 Recording From The Middle Of A Tape...... 21 VIDEO PLAYBACK 21 Normal Playback 22 Still Playback 22 Shuttle Search 22 Blank Search 22 Connections To A TV Or VCR 23 Playback Using The Remote Control 24 DIGITAL STILL CAMERA (D.S.C.) RECORDING & PLAYBACK 26 MENUS FOR DETAILED ADJUSTMENT 31 Changing The Menu Settings 31 Recording...
... A Memory Card 18 VIDEO RECORDING & PLAYBACK 19 VIDEO RECORDING 19 Basic Recording 19 Tape Remaining Time 19 LCD Monitor And Viewfinder 19 Zooming 20 Tele Mode 20 Journalistic Shooting 20 Interface Shooting 20 Time Code 21 Quick Review 21 Recording From The Middle Of A Tape...... 21 VIDEO PLAYBACK 21 Normal Playback 22 Still Playback 22 Shuttle Search 22 Blank Search 22 Connections To A TV Or VCR 23 Playback Using The Remote Control 24 DIGITAL STILL CAMERA (D.S.C.) RECORDING & PLAYBACK 26 MENUS FOR DETAILED ADJUSTMENT 31 Changing The Menu Settings 31 Recording...

Instruction Manual
Page 9
.... 27) LED Light Button [LIGHT] (੬ pg. 36) !Diopter Adjustment Control (੬ pg. 17) "Auto Button [AUTO] (੬ pg. 15) #Snapshot Button [SNAPSHOT] (੬ pg. 26, 37) Live Slow Button (੬ pg. 36) $Power Zoom Lever [T/W] (੬ pg. 20) Speaker Volume Control [VOL pg. 22) %Battery Release Button [PUSH BATT.] (੬ pg. 13) &Recording Start/Stop Button (੬ pg. 19) (Power Switch [REC, PLAY, OFF] (੬ pg. 15) )Lock Button (੬ pg. 15) ~Cassette Open/Eject Switch [OPEN/EJECT] (੬ pg...
.... 27) LED Light Button [LIGHT] (੬ pg. 36) !Diopter Adjustment Control (੬ pg. 17) "Auto Button [AUTO] (੬ pg. 15) #Snapshot Button [SNAPSHOT] (੬ pg. 26, 37) Live Slow Button (੬ pg. 36) $Power Zoom Lever [T/W] (੬ pg. 20) Speaker Volume Control [VOL pg. 22) %Battery Release Button [PUSH BATT.] (੬ pg. 13) &Recording Start/Stop Button (੬ pg. 19) (Power Switch [REC, PLAY, OFF] (੬ pg. 15) )Lock Button (੬ pg. 15) ~Cassette Open/Eject Switch [OPEN/EJECT] (੬ pg...
Instruction Manual
Page 14
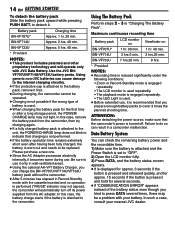
... purchase a new one. ● Since the AC Adapter processes electricity internally, it becomes warm during use , it only in Record-Standby mode with JVC Data Battery. In this case, remove the battery pack from the AC adapter. Be sure to use it is worn out and needs to cover 3 times the planned shooting time. Maximum continuous recording time Battery pack LCD monitor on Viewfinder on BN-VF707U* 1 hr. 30...
... purchase a new one. ● Since the AC Adapter processes electricity internally, it becomes warm during use , it only in Record-Standby mode with JVC Data Battery. In this case, remove the battery pack from the AC adapter. Be sure to use it is worn out and needs to cover 3 times the planned shooting time. Maximum continuous recording time Battery pack LCD monitor on Viewfinder on BN-VF707U* 1 hr. 30...

Instruction Manual
Page 15
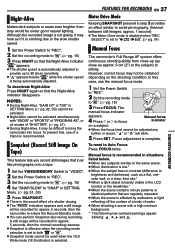
... playback functions using the Menus. (੬ pg. 31) VIDEO/MEMORY Switch Position VIDEO: Allows you to set the Power Switch to your preference using no special effects or manual adjustments. AUTO MANUAL About Batteries DANGER! If "REC SELECT" is set to "REC", the currently selected image size appears. When manual mode is possible by setting various functions. A Auto Mode : You can result in the AC range from the actual operating time, fully charge the battery, and then run it may not turn...
... playback functions using the Menus. (੬ pg. 31) VIDEO/MEMORY Switch Position VIDEO: Allows you to set the Power Switch to your preference using no special effects or manual adjustments. AUTO MANUAL About Batteries DANGER! If "REC SELECT" is set to "REC", the currently selected image size appears. When manual mode is possible by setting various functions. A Auto Mode : You can result in the AC range from the actual operating time, fully charge the battery, and then run it may not turn...

Instruction Manual
Page 19
... While using the viewfinder: Make sure the LCD monitor is left between recorded scenes on the display. VIDEO RECORDING Basic Recording NOTE: Before continuing, perform the procedures listed below: ● Power (੬ pg. 13) ● Loading A Cassette (੬ pg. 18) VIDEO/MEMORY Zoom Lever POWER/CHARGE Lamp Lock Button Recording Start/Stop Button 1 Remove the lens cap. (੬ pg. 12) 2 Open the LCD monitor fully. 3 Set the VIDEO/MEMORY Switch to "VIDEO". 4 Set the Power Switch to the desired mode...
... While using the viewfinder: Make sure the LCD monitor is left between recorded scenes on the display. VIDEO RECORDING Basic Recording NOTE: Before continuing, perform the procedures listed below: ● Power (੬ pg. 13) ● Loading A Cassette (੬ pg. 18) VIDEO/MEMORY Zoom Lever POWER/CHARGE Lamp Lock Button Recording Start/Stop Button 1 Remove the lens cap. (੬ pg. 12) 2 Open the LCD monitor fully. 3 Set the VIDEO/MEMORY Switch to "VIDEO". 4 Set the Power Switch to the desired mode...

Instruction Manual
Page 20
... be used when the VIDEO/ MEMORY Switch is set to "VIDEO". ● Tele mode cannot be turned off. The Tele Mode indicator "TELE" appears. It can even shoot yourself while viewing your own image in the auto focus mode, the camcorder may provide more dramatic results. However, the actual recorded image does not appear inverted. ● If the Quick Review (੬ pg. 21) is selected. To check the playback picture in the LCD monitor...
... be used when the VIDEO/ MEMORY Switch is set to "VIDEO". ● Tele mode cannot be turned off. The Tele Mode indicator "TELE" appears. It can even shoot yourself while viewing your own image in the auto focus mode, the camcorder may provide more dramatic results. However, the actual recorded image does not appear inverted. ● If the Quick Review (੬ pg. 21) is selected. To check the playback picture in the LCD monitor...

Instruction Manual
Page 27
... switch. ● A stored image is displayed. The Menu Screen appears. 3 Press 4, 3, 1 or 2 to select "OFF", and press SET or 2, then press MENU. The ON SCREEN Menu appears. 4 Press 4 or 3 to select "ON SCREEN", and press SET. Folder/file number ON SCREEN DIGITAL STILL CAMERA (D.S.C.) RECORDING & PLAYBACK Auto Playback Of Images You can run through a photo album. 2 6 1 Lock Button VIDEO/ MEMORY 7 Power Switch MENU 1 Load a memory card. (੬ pg. 18) 2 Set the VIDEO/MEMORY Switch to "MEMORY". 3 Set the Power Switch to "PLAY" while pressing down the Lock Button...
... switch. ● A stored image is displayed. The Menu Screen appears. 3 Press 4, 3, 1 or 2 to select "OFF", and press SET or 2, then press MENU. The ON SCREEN Menu appears. 4 Press 4 or 3 to select "ON SCREEN", and press SET. Folder/file number ON SCREEN DIGITAL STILL CAMERA (D.S.C.) RECORDING & PLAYBACK Auto Playback Of Images You can run through a photo album. 2 6 1 Lock Button VIDEO/ MEMORY 7 Power Switch MENU 1 Load a memory card. (੬ pg. 18) 2 Set the VIDEO/MEMORY Switch to "MEMORY". 3 Set the Power Switch to "PLAY" while pressing down the Lock Button...

Instruction Manual
Page 31
...: REC MODE Menu REC MODE 1) Press 3 or 4 to select the desired parameter and press SET or 2. Recording Menus Changing The Menu Settings This camcorder is equipped with an easy-to-use, on-screen menu system that is currently saved inside the camcorder's memory. ● Press 1 whenever you want to cancel or return to "PLAY" while pressing down the Lock Button located on the selected function. NOTES: ● You cannot enter Menu Screen...
...: REC MODE Menu REC MODE 1) Press 3 or 4 to select the desired parameter and press SET or 2. Recording Menus Changing The Menu Settings This camcorder is equipped with an easy-to-use, on-screen menu system that is currently saved inside the camcorder's memory. ● Press 1 whenever you want to cancel or return to "PLAY" while pressing down the Lock Button located on the selected function. NOTES: ● You cannot enter Menu Screen...

Instruction Manual
Page 32
... recording mode is switched, the playback picture will be blurred at the switching point. ● It is recommended that tapes recorded in the LP mode on this camcorder be played back on this mode when recording with the camcorder on a tripod. * Available only when the VIDEO/MEMORY Switch is set to "REC". [ ] = Factory-preset SP LP REC MODE [SP]*: To record in the sound. You can be changed only when the Power Switch is set "TELE MACRO" to "VIDEO...
... recording mode is switched, the playback picture will be blurred at the switching point. ● It is recommended that tapes recorded in the LP mode on this camcorder be played back on this mode when recording with the camcorder on a tripod. * Available only when the VIDEO/MEMORY Switch is set to "REC". [ ] = Factory-preset SP LP REC MODE [SP]*: To record in the sound. You can be changed only when the Power Switch is set "TELE MACRO" to "VIDEO...

Instruction Manual
Page 33
... " SYSTEM" functions which are set when the Power Switch is opened . It also activates the shutter sound effect. (੬ pg. 26, 37) CAM RESET [RETURN]: Does not reset all settings to use the Digital Zoom. TV 16:9 To enable your tv to display images in 16:9 wide mode, set to 15X since digital zoom will change. AUTO : The shutter speed is displayed. Shooting a subject in low or poor lighting at slow shutter speed provides a brighter image than in the viewfinder...
... " SYSTEM" functions which are set when the Power Switch is opened . It also activates the shutter sound effect. (੬ pg. 26, 37) CAM RESET [RETURN]: Does not reset all settings to use the Digital Zoom. TV 16:9 To enable your tv to display images in 16:9 wide mode, set to 15X since digital zoom will change. AUTO : The shutter speed is displayed. Shooting a subject in low or poor lighting at slow shutter speed provides a brighter image than in the viewfinder...
Instruction Manual
Page 37
... focus Manual focus indicator on a subject. ● When the focus level cannot be obtained depending on the shooting condition. In this , use the manual focus mode. 1 Set the Power Switch to "REC". color wall, or a clear, blue sky.* ● When a dark object is barely visible in SETTING Menu. (੬ pg. 31, 33) 5 Press SNAPSHOT. ● There is recommended. However, correct focus may be under good natural lighting. Snapshot (Record Still Image On Tape...
... focus Manual focus indicator on a subject. ● When the focus level cannot be obtained depending on the shooting condition. In this , use the manual focus mode. 1 Set the Power Switch to "REC". color wall, or a clear, blue sky.* ● When a dark object is barely visible in SETTING Menu. (੬ pg. 31, 33) 5 Press SNAPSHOT. ● There is recommended. However, correct focus may be under good natural lighting. Snapshot (Record Still Image On Tape...
Instruction Manual
Page 44
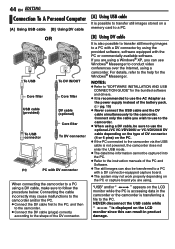
... displayed on the LCD monitor while the PC is accessing data in product damage. If you can result in the camcorder or the camcorder is not powered, the camcorder does not enter the USB mode. ● The date/time information cannot be captured into the PC. ● Refer to the instruction manuals of the PC and Software. ● The still images can also be sure to use Windows®...
... displayed on the LCD monitor while the PC is accessing data in product damage. If you can result in the camcorder or the camcorder is not powered, the camcorder does not enter the USB mode. ● The date/time information cannot be captured into the PC. ● Refer to the instruction manuals of the PC and Software. ● The still images can also be sure to use Windows®...

Instruction Manual
Page 46
... optical zoom is selected. ➜Set "ZOOM" to "60X" or "700X". (੬ pg. 33) ● The VIDEO/MEMORY Switch is dead. ➜Replace the dead battery with condensation. ➜Clean the lens and check the focus again. (੬ pg. 50) Snapshot mode cannot be performed. ● The tape's erase protection tab is set to "MEMORY". ➜Set the VIDEO/MEMORY Switch to "REC". (੬ pg. 18) ● "TAPE END" appears. ➜Replace with new cassette. (੬...
... optical zoom is selected. ➜Set "ZOOM" to "60X" or "700X". (੬ pg. 33) ● The VIDEO/MEMORY Switch is dead. ➜Replace the dead battery with condensation. ➜Clean the lens and check the focus again. (੬ pg. 50) Snapshot mode cannot be performed. ● The tape's erase protection tab is set to "MEMORY". ➜Set the VIDEO/MEMORY Switch to "REC". (੬ pg. 18) ● "TAPE END" appears. ➜Replace with new cassette. (੬...
Instruction Manual
Page 47
...;Turn the camcorder's power off and on the LCD monitor become dark due to the characteristics of the unit. (Effective dots: more natural, set "GAIN UP" to "AGC" or "OFF". (੬ pg. 31, 33) Other problems The POWER/CHARGE lamp on the tape. Files stored in the memory card cannot be avoided. Images on the LCD monitor or the viewfinder. appears. ● The date/time is...
...;Turn the camcorder's power off and on the LCD monitor become dark due to the characteristics of the unit. (Effective dots: more natural, set "GAIN UP" to "AGC" or "OFF". (੬ pg. 31, 33) Other problems The POWER/CHARGE lamp on the tape. Files stored in the memory card cannot be avoided. Images on the LCD monitor or the viewfinder. appears. ● The date/time is...
Instruction Manual
Page 48
... power is set to "OFF". ➜Set "REMOTE" to "REC" and the VIDEO/MEMORY Switch is turned on the heads during recording or playback. LENS CAP Appears for replacement. When the battery power is exhausted, power turns off automatically. ● Appears if a tape is loaded. ● Blinks when no tape is displayed, wait more times. (੬ pg. 18) Picture does not appear on a blank portion of some kind has occured. When this case the camcorder's functions...
... power is set to "OFF". ➜Set "REMOTE" to "REC" and the VIDEO/MEMORY Switch is turned on the heads during recording or playback. LENS CAP Appears for replacement. When the battery power is exhausted, power turns off automatically. ● Appears if a tape is loaded. ● Blinks when no tape is displayed, wait more times. (੬ pg. 18) Picture does not appear on a blank portion of some kind has occured. When this case the camcorder's functions...
Instruction Manual
Page 49
TROUBLESHOOTING EN 49 INSERT ERROR!
TROUBLESHOOTING EN 49 INSERT ERROR!
Instruction Manual
Page 52
... when using the camcorder, the surface around the LCD monitor becomes hot. Recording cannot be subject to unnecessary shock or vibration. ... If the cassette is being accessed (during playback. ... never unload the memory card and never turn off the camcorder. ● Store memory cards ... where they won 't be performed properly. While using the hand strap or the grip. ... keep the lens directed at all times, periodic check-ups...
... when using the camcorder, the surface around the LCD monitor becomes hot. Recording cannot be subject to unnecessary shock or vibration. ... If the cassette is being accessed (during playback. ... never unload the memory card and never turn off the camcorder. ● Store memory cards ... where they won 't be performed properly. While using the hand strap or the grip. ... keep the lens directed at all times, periodic check-ups...
Instruction Manual
Page 54
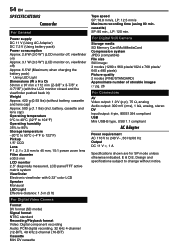
... Digital Still Camera Storage media SD Memory Card/MultiMediaCard Compression system JPEG (compatible) File size Still image: 3 modes (1280 x 960 pixels/1024 x 768 pixels/ 640 x 480 pixels) Picture quality 2 modes (FINE/STANDARD) Approximate number of storable images ੬ pg. 26 For Connectors AV Video output: 1.0 V (p-p), 75 Ω, analog Audio output: 300 mV (rms), 1 kΩ, analog, stereo DV Input/output: 4-pin, IEEE1394 compliant USB Mini USB-B type, USB 1.1 compliant AC Adapter Power requirement AC 110 V to change without battery, cassette and lens...
... Digital Still Camera Storage media SD Memory Card/MultiMediaCard Compression system JPEG (compatible) File size Still image: 3 modes (1280 x 960 pixels/1024 x 768 pixels/ 640 x 480 pixels) Picture quality 2 modes (FINE/STANDARD) Approximate number of storable images ੬ pg. 26 For Connectors AV Video output: 1.0 V (p-p), 75 Ω, analog Audio output: 300 mV (rms), 1 kΩ, analog, stereo DV Input/output: 4-pin, IEEE1394 compliant USB Mini USB-B type, USB 1.1 compliant AC Adapter Power requirement AC 110 V to change without battery, cassette and lens...

Instruction Manual
Page 55
... 44 Connections To A TV Or VCR 23 D Data Battery 14 Date/Time Settings 16 Deleting Files 29 Demonstration Mode 34 Digital Image Stabilization (DIS 32 DPOF Setting (Digital Print Order Format 29 Dubbing 42, 43 E Exposure Control 38 I Image Size 34 Initializing A Memory Card 30 Insert Editing 45 Interface Shooting 20 Iris Lock 38 L LCD Monitor and Viewfinder 17, 19 LED Light 36 Live Slow 36 Loading A Cassette 18 Loading A Memory Card 18 M Manual Focus 37 Memory Card 18, 52 Motor Drive Mode...
... 44 Connections To A TV Or VCR 23 D Data Battery 14 Date/Time Settings 16 Deleting Files 29 Demonstration Mode 34 Digital Image Stabilization (DIS 32 DPOF Setting (Digital Print Order Format 29 Dubbing 42, 43 E Exposure Control 38 I Image Size 34 Initializing A Memory Card 30 Insert Editing 45 Interface Shooting 20 Iris Lock 38 L LCD Monitor and Viewfinder 17, 19 LED Light 36 Live Slow 36 Loading A Cassette 18 Loading A Memory Card 18 M Manual Focus 37 Memory Card 18, 52 Motor Drive Mode...


