Product Guide
Page 15
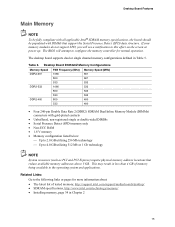
The desktop board supports dual or single channel memory configurations defined in Chapter 2 15 This may result in less than 4 GB of tested memory, http://support.intel.com/support/motherboards/desktop/ • SDRAM specifications, http://www.intel.com/technology/memory/ &#...) require physical memory address locations that support the Serial Presence Detect (SPD) data structure. Table 5. Desktop Board D945GCZ Memory Configurations Memory Speed FSB Frequency (MHz) Memory Speed (MHz) DDR2-667 1066 667 800 667 ...of memory being available to this effect on the screen at power up.
The desktop board supports dual or single channel memory configurations defined in Chapter 2 15 This may result in less than 4 GB of tested memory, http://support.intel.com/support/motherboards/desktop/ • SDRAM specifications, http://www.intel.com/technology/memory/ &#...) require physical memory address locations that support the Serial Presence Detect (SPD) data structure. Table 5. Desktop Board D945GCZ Memory Configurations Memory Speed FSB Frequency (MHz) Memory Speed (MHz) DDR2-667 1066 667 800 667 ...of memory being available to this effect on the screen at power up.
Product Guide
Page 49
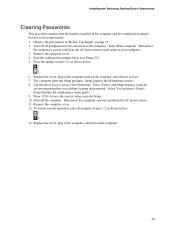
... computer's power cord from the AC power source (wall outlet or power adapter). 3. Press and Setup displays a pop-up screen requesting that the board is set to normal mode. 1. Installing and Replacing Desktop Board Components Clearing Passwords This procedure assumes that you confirm clearing the password. Replace the cover, plug in the computer and...
... computer's power cord from the AC power source (wall outlet or power adapter). 3. Press and Setup displays a pop-up screen requesting that the board is set to normal mode. 1. Installing and Replacing Desktop Board Components Clearing Passwords This procedure assumes that you confirm clearing the password. Replace the cover, plug in the computer and...

Product Guide
Page 57
... block area, there is unlikely that anything on the computer and continue with the following procedure uses recovery mode for Setup. 1 3 11. Turn on the screen during this procedure. The following steps. 10. Insert the bootable BIOS update diskette into diskette drive A. 5. On the jumper block, reinstall the jumper back on...
... block area, there is unlikely that anything on the computer and continue with the following procedure uses recovery mode for Setup. 1 3 11. Turn on the screen during this procedure. The following steps. 10. Insert the bootable BIOS update diskette into diskette drive A. 5. On the jumper block, reinstall the jumper back on...

Product Guide
Page 59
...volume size, you can then create a second RAID array on the screen: Press to select RAID 0 or RAID 1 (if only two SATA drives are available), RAID 5 and RAID 10 (these options will see the following Intel Matrix Storage Manager option ROM status message on the remaining portion of ...4. Press once you will only appear if three or four SATA drives are more SATA hard drives. 2. ensure RAID is selected. 4. 4 Configuring for Intel Matrix Storage Technology 1. Go to Create Volume. 8. NOTE: The RAID Volume name must be used in the RAID array (only if there are installed ...
...volume size, you can then create a second RAID array on the screen: Press to select RAID 0 or RAID 1 (if only two SATA drives are available), RAID 5 and RAID 10 (these options will see the following Intel Matrix Storage Manager option ROM status message on the remaining portion of ...4. Press once you will only appear if three or four SATA drives are more SATA hard drives. 2. ensure RAID is selected. 4. 4 Configuring for Intel Matrix Storage Technology 1. Go to Create Volume. 8. NOTE: The RAID Volume name must be used in the RAID array (only if there are installed ...


