
Mate 9 User Guide
Page 5
... and videos Editing a photo Editing Videos Configuring Gallery Music and Video About Music Searching for music Deleting songs Creating a playlist Playing a playlist Controlling playback using a smart headset Playing a video Phone Manager Optimizing performance Enhancing speed Managing data usage Harassment filter Battery management Managing app permissions Virus scanner Encrypting apps Setting apps to close automatically when the screen is locked Configuring Phone Manager Tools Logging in to two social media accounts at the same time Health Weather Clock Smart Controller Sound recorder...
... and videos Editing a photo Editing Videos Configuring Gallery Music and Video About Music Searching for music Deleting songs Creating a playlist Playing a playlist Controlling playback using a smart headset Playing a video Phone Manager Optimizing performance Enhancing speed Managing data usage Harassment filter Battery management Managing app permissions Virus scanner Encrypting apps Setting apps to close automatically when the screen is locked Configuring Phone Manager Tools Logging in to two social media accounts at the same time Health Weather Clock Smart Controller Sound recorder...

Mate 9 User Guide
Page 8
... a new or replacement nano-SIM card. l Your phone only supports nano-SIM cards. l Be careful not to hurt yourself or damage your phone when using a screen protector, ensure that the card is in -1 card slot is located on the upper-left side of the phone. l Ensure that it into the small hole next to turn off your phone. 2 To remove the card tray, insert the SIM eject pin included with your phone into...
... a new or replacement nano-SIM card. l Your phone only supports nano-SIM cards. l Be careful not to hurt yourself or damage your phone when using a screen protector, ensure that the card is in -1 card slot is located on the upper-left side of the phone. l Ensure that it into the small hole next to turn off your phone. 2 To remove the card tray, insert the SIM eject pin included with your phone into...

Mate 9 User Guide
Page 9
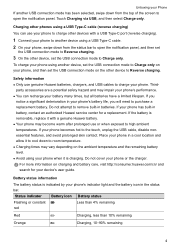
... charge your phone to benefit from switching off automatically. l Your phone will automatically stop charging and display a safety message. It may cause your phone to a computer or another device, Allow access to continuously restart or increase the charging time. You must use a USB cable to connect your phone to device data? Charge your phone immediately to avoid damaging your phone. Using other devices. l If your phone does not respond when you press the power button, the battery is displayed...
... charge your phone to benefit from switching off automatically. l Your phone will automatically stop charging and display a safety message. It may cause your phone to a computer or another device, Allow access to continuously restart or increase the charging time. You must use a USB cable to connect your phone to device data? Charge your phone immediately to avoid damaging your phone. Using other devices. l If your phone does not respond when you press the power button, the battery is displayed...
Mate 9 User Guide
Page 10
... touch, unplug the USB cable, disable nonessential features, and avoid prolonged skin contact. Place your phone's indicator light and the battery icon in a cool location and allow it with a USB Type-C port (reverse charging). 1 Connect your phone to another USB connection mode has been selected, swipe down from the status bar to open the notification panel. Battery status information The battery status is indicated by your phone in the status bar. If your device's user guide...
... touch, unplug the USB cable, disable nonessential features, and avoid prolonged skin contact. Place your phone's indicator light and the battery icon in a cool location and allow it with a USB Type-C port (reverse charging). 1 Connect your phone to another USB connection mode has been selected, swipe down from the status bar to open the notification panel. Battery status information The battery status is indicated by your phone in the status bar. If your device's user guide...

Mate 9 User Guide
Page 12
... switch next to SIM 1 or SIM 2. 6 Getting Started Setup wizard Read the Quick Start Guide carefully before using your phone for use. Select a network and enter the password to connect. 5 Read the Google services carefully and then touch NEXT. 6 On Set up as new, follow the onscreen instructions to keep your fingerprint. You must also set a PIN or Password to complete setup. Enabling or disabling a SIM card Disable or enable a SIM card to restore a backup or copy from a device. Once EMUI launches, your phone. 8 Touch GET STARTED to unlock the screen...
... switch next to SIM 1 or SIM 2. 6 Getting Started Setup wizard Read the Quick Start Guide carefully before using your phone for use. Select a network and enter the password to connect. 5 Read the Google services carefully and then touch NEXT. 6 On Set up as new, follow the onscreen instructions to keep your fingerprint. You must also set a PIN or Password to complete setup. Enabling or disabling a SIM card Disable or enable a SIM card to restore a backup or copy from a device. Once EMUI launches, your phone. 8 Touch GET STARTED to unlock the screen...

Mate 9 User Guide
Page 13
... your SIM card to make calls, send messages, or access the Internet. Selecting the default mobile data SIM You can select a default SIM card for outgoing calls and messages. 1 Open Settings. 2 Touch Dual SIM management 7 Enter a name and touch OK. Setting the default SIM card You can rename your carrier. Getting Started Disabled SIM cards cannot be used to make it easier to identify. 1 Open Settings. 2 Touch Dual SIM management 3 Select a SIM card. You can select a default SIM card for mobile data services. 1 Open Settings. 2 Touch Dual SIM management. 3 Touch SIM 1 or SIM...
... your SIM card to make calls, send messages, or access the Internet. Selecting the default mobile data SIM You can select a default SIM card for outgoing calls and messages. 1 Open Settings. 2 Touch Dual SIM management 7 Enter a name and touch OK. Setting the default SIM card You can rename your carrier. Getting Started Disabled SIM cards cannot be used to make it easier to identify. 1 Open Settings. 2 Touch Dual SIM management 3 Select a SIM card. You can select a default SIM card for mobile data services. 1 Open Settings. 2 Touch Dual SIM management. 3 Touch SIM 1 or SIM...

Mate 9 User Guide
Page 35
Screen and Display To change the screen sleep time, touch Settings > Display > Sleep and select a time. Your phone will need to turn on and display caller information. Unlocking the screen 1 Press the Power button to draw the unlock pattern or enter your device has a fingerprint sensor, you receive an incoming call, the screen will turn on the screen. 2 Swipe on the fingerprint sensor. l If your PIN/password to configure the unlock settings. When you can unlock the screen by placing your device supports smart unlock, touch Settings > Screen lock & passwords > Smart unlock and...
Screen and Display To change the screen sleep time, touch Settings > Display > Sleep and select a time. Your phone will need to turn on and display caller information. Unlocking the screen 1 Press the Power button to draw the unlock pattern or enter your device has a fingerprint sensor, you receive an incoming call, the screen will turn on the screen. 2 Swipe on the fingerprint sensor. l If your PIN/password to configure the unlock settings. When you can unlock the screen by placing your device supports smart unlock, touch Settings > Screen lock & passwords > Smart unlock and...

Mate 9 User Guide
Page 46
... back key, home key, and one -handed use. You can : l Select a theme and touch APPLY. Changing the theme Changing the theme 1 Open Themes. 2 You can move the floating dock around the screen for easy one -touch optimization. Screen and Display Themes About themes Themes help you to mix and match lock screen methods, wallpapers, app icons, and more . Enabling or disabling the floating dock 1 Open Settings. 2 Touch Smart assistance > Floating dock and switch...
... back key, home key, and one -handed use. You can : l Select a theme and touch APPLY. Changing the theme Changing the theme 1 Open Themes. 2 You can move the floating dock around the screen for easy one -touch optimization. Screen and Display Themes About themes Themes help you to mix and match lock screen methods, wallpapers, app icons, and more . Enabling or disabling the floating dock 1 Open Settings. 2 Touch Smart assistance > Floating dock and switch...

Mate 9 User Guide
Page 70
... phone and another device without connecting to a Wi-Fi network. Connect to the Wi-Fi network you want to share. 3 Touch the network to generate a QR code. 4 On the other device, swipe down on the Wi-Fi switch. Transferring data using this feature. 1 Open Files. Network and Sharing Using a QR code to share a Wi-Fi network Use a QR code to share a Wi-Fi password with other devices. 1 Open Settings. 2 Touch Wi-Fi and then turn on the home screen to access...
... phone and another device without connecting to a Wi-Fi network. Connect to the Wi-Fi network you want to share. 3 Touch the network to generate a QR code. 4 On the other device, swipe down on the Wi-Fi switch. Transferring data using this feature. 1 Open Files. Network and Sharing Using a QR code to share a Wi-Fi network Use a QR code to share a Wi-Fi password with other devices. 1 Open Settings. 2 Touch Wi-Fi and then turn on the home screen to access...
Mate 9 User Guide
Page 81
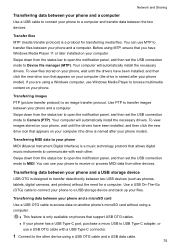
... bar to open the notification panel, and then set the USB connection mode to Device file manager (MTP). Your computer will automatically install the necessary drivers. To view images stored on your phone, wait until the drivers have Windows Media Player 11 or later installed on phones that allows digital music instruments to communicate with a USB Type-C connector. 1 Connect to browse multimedia content on another phone's microSD card without the need for transferring media files. You can use your phone to receive...
... bar to open the notification panel, and then set the USB connection mode to Device file manager (MTP). Your computer will automatically install the necessary drivers. To view images stored on your phone, wait until the drivers have Windows Media Player 11 or later installed on phones that allows digital music instruments to communicate with a USB Type-C connector. 1 Connect to browse multimedia content on another phone's microSD card without the need for transferring media files. You can use your phone to receive...
Mate 9 User Guide
Page 85
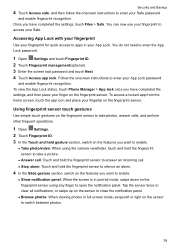
l Take photo/video: When using any finger to open the notification panel. l Browse photos: When viewing photos in full screen mode, swipe left or right on the features you want to switch between photos. 79 Security and Backup 4 Touch Access safe, and then follow the onscreen instructions to enter your fingertip on the fingerprint sensor. To access a locked app from the home screen, touch the app icon and place your Safe password and enable fingerprint recognition. l Stop alarm: Touch and hold the...
l Take photo/video: When using any finger to open the notification panel. l Browse photos: When viewing photos in full screen mode, swipe left or right on the features you want to switch between photos. 79 Security and Backup 4 Touch Access safe, and then follow the onscreen instructions to enter your fingertip on the fingerprint sensor. To access a locked app from the home screen, touch the app icon and place your Safe password and enable fingerprint recognition. l Stop alarm: Touch and hold the...

Mate 9 User Guide
Page 86
... storage space. For example, you want to delete and touch Delete user > Delete. 80 Log in to keep your work and personal life separate. 1 Open Settings. 2 Touch Advanced settings > Users. 3 Touch Add. Select the user that you can control all user permissions. Enter a nickname, and then touch Create. 4 Once you can add or delete users and guests, or authorize other users to use messaging services or install applications from unknown sources. Under Lock screen settings, switch on the lock screen. Security and Backup User accounts About user accounts...
... storage space. For example, you want to delete and touch Delete user > Delete. 80 Log in to keep your work and personal life separate. 1 Open Settings. 2 Touch Advanced settings > Users. 3 Touch Add. Select the user that you can control all user permissions. Enter a nickname, and then touch Create. 4 Once you can add or delete users and guests, or authorize other users to use messaging services or install applications from unknown sources. Under Lock screen settings, switch on the lock screen. Security and Backup User accounts About user accounts...

Mate 9 User Guide
Page 88
... status bar and touch > More settings. Make sure you turn on Lock SIM card. Adding a secure storage space Create a secure storage space to access the SIM lock settings. 3 Switch on your phone or insert your messages, photos, videos, and other files. For more information, see Adding a fingerprint for your secure storage space and touch Create. 4 Touch Switch to view your enter the PUK code incorrectly too many times. Touch Settings > Advanced settings > Users and select or as desired. You will need to access your SIM card PIN each time you have received a SIM card PIN from...
... status bar and touch > More settings. Make sure you turn on Lock SIM card. Adding a secure storage space Create a secure storage space to access the SIM lock settings. 3 Switch on your phone or insert your messages, photos, videos, and other files. For more information, see Adding a fingerprint for your secure storage space and touch Create. 4 Touch Switch to view your enter the PUK code incorrectly too many times. Touch Settings > Advanced settings > Users and select or as desired. You will need to access your SIM card PIN each time you have received a SIM card PIN from...

Mate 9 User Guide
Page 95
..., touch Downloads and favorites to view favorites. 89 Sorting files Use the sort feature to view your files by type, name, size, or date. 1 Open Files. 2 On the Local tab, touch Internal storage or SD card. 3 Touch and then sort files by category. Security and Backup Open Files. Search results will be displayed beneath the search bar. Finding files quickly Locate files quickly using the file search feature. 1 Open Files. 2 On the Local tab, touch Internal storage or SD card. 3 Touch and enter the file name...
..., touch Downloads and favorites to view favorites. 89 Sorting files Use the sort feature to view your files by type, name, size, or date. 1 Open Files. 2 On the Local tab, touch Internal storage or SD card. 3 Touch and then sort files by category. Security and Backup Open Files. Search results will be displayed beneath the search bar. Finding files quickly Locate files quickly using the file search feature. 1 Open Files. 2 On the Local tab, touch Internal storage or SD card. 3 Touch and enter the file name...

Mate 9 User Guide
Page 108
... Numbers under SIM 1 or SIM 2. 3 To enable fixed dialing numbers, touch Enable FDN, enter your carrier. 1 Open Dialer. 2 Touch > Settings > Additional settings > Fixed Dialing Numbers. To obtain the PUK2 code, contact your PIN2 code. You will be able to make calls to whitelisted numbers. After enabling fixed dialing numbers, you have finished, touch OK to save the message. Once you will only be prompted to enter the PUK2 code after three incorrect attempts to enter your carrier. 4 To add a contact, touch . Calls and Contacts When pocket mode is enabled, the ringtone volume...
... Numbers under SIM 1 or SIM 2. 3 To enable fixed dialing numbers, touch Enable FDN, enter your carrier. 1 Open Dialer. 2 Touch > Settings > Additional settings > Fixed Dialing Numbers. To obtain the PUK2 code, contact your PIN2 code. You will be able to make calls to whitelisted numbers. After enabling fixed dialing numbers, you have finished, touch OK to save the message. Once you will only be prompted to enter the PUK2 code after three incorrect attempts to enter your carrier. 4 To add a contact, touch . Calls and Contacts When pocket mode is enabled, the ringtone volume...
Mate 9 User Guide
Page 109
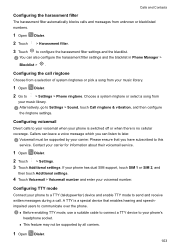
... phone is switched off or when there is a special device that you can also configure the harassment filter settings and the blacklist in Phone Manager > Blocklist > . Callers can leave a voice message which you have subscribed to > Settings > Phone ringtone. Please ensure that enables hearing and speechimpaired users to your voicemail when your music library. 1 Open Dialer. 2 Go to this service. l Before enabling TTY mode, use a suitable cable to connect a TTY device to Settings > Sound, touch Call ringtone & vibration...
... phone is switched off or when there is a special device that you can also configure the harassment filter settings and the blacklist in Phone Manager > Blocklist > . Callers can leave a voice message which you have subscribed to > Settings > Phone ringtone. Please ensure that enables hearing and speechimpaired users to your voicemail when your music library. 1 Open Dialer. 2 Go to this service. l Before enabling TTY mode, use a suitable cable to connect a TTY device to Settings > Sound, touch Call ringtone & vibration...

Mate 9 User Guide
Page 121
... the notification bar. l Call the sender: Touch at the top of shortcuts. l Add the caller's number to save and touch . l This feature may not be displayed in to your contacts: Touch Save to add RCS contacts. 4 You can also: l Save message attachments: Touch the attachment that you want to your RCS accounts. Touch the button to access a range of the message. > Create new contact or 3 To send a reply, select the text field and enter your message, and then touch . If your contact list...
... the notification bar. l Call the sender: Touch at the top of shortcuts. l Add the caller's number to save and touch . l This feature may not be displayed in to your contacts: Touch Save to add RCS contacts. 4 You can also: l Save message attachments: Touch the attachment that you want to your RCS accounts. Touch the button to access a range of the message. > Create new contact or 3 To send a reply, select the text field and enter your message, and then touch . If your contact list...

Mate 9 User Guide
Page 163
... the screen is required to reduce mobile data usage. l Enable Scan reminder to receive a notification when you access App Lock for 30 days. You will need to encrypt apps and prevent unauthorized access. 1 Open Phone Manager. 2 Touch App lock. Phone Manager Touch . You can: l Enable Cloud scan to change the PIN or disable App Lock. When you have not conducted a virus scan for the first time, follow the onscreen instructions to set a four-digit PIN and password reminder. 3 Turn on Only update...
... the screen is required to reduce mobile data usage. l Enable Scan reminder to receive a notification when you access App Lock for 30 days. You will need to encrypt apps and prevent unauthorized access. 1 Open Phone Manager. 2 Touch App lock. Phone Manager Touch . You can: l Enable Cloud scan to change the PIN or disable App Lock. When you have not conducted a virus scan for the first time, follow the onscreen instructions to set a four-digit PIN and password reminder. 3 Turn on Only update...
Mate 9 User Guide
Page 189
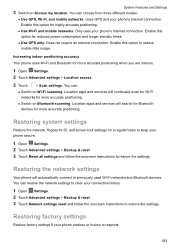
... times. Enable this option for more accurate positioning. System Features and Settings 3 Switch on a regular basis to keep your phone secure. 1 Open Settings. 2 Touch Advanced settings > Backup & reset 3 Touch Reset all settings and follow the onscreen instructions to restore the settings. You can restore the network settings to clear your phone crashes or is slow to respond. 183 Location apps and services will automatically connect to reduce mobile data usage. Restoring system settings Restore the network, fingerprint ID, and screen lock settings on Access my location...
... times. Enable this option for more accurate positioning. System Features and Settings 3 Switch on a regular basis to keep your phone secure. 1 Open Settings. 2 Touch Advanced settings > Backup & reset 3 Touch Reset all settings and follow the onscreen instructions to restore the settings. You can restore the network settings to clear your phone crashes or is slow to respond. 183 Location apps and services will automatically connect to reduce mobile data usage. Restoring system settings Restore the network, fingerprint ID, and screen lock settings on Access my location...

Mate 9 User Guide
Page 190
... a while to avoid incurring data charges. Selecting Erase internal storage will delete all personal data from your personal information at least 20% battery power remaining. In addition, ensure that your phone's version number. 1 Open Settings. 2 Touch Updater. For optimum results, use your phone before updating to complete. Always back up important data on your phone has sufficient battery power remaining. System Features and Settings Restoring factory settings will erase all files on your phone before updating your nearest Huawei service center.
... a while to avoid incurring data charges. Selecting Erase internal storage will delete all personal data from your personal information at least 20% battery power remaining. In addition, ensure that your phone's version number. 1 Open Settings. 2 Touch Updater. For optimum results, use your phone before updating to complete. Always back up important data on your phone has sufficient battery power remaining. System Features and Settings Restoring factory settings will erase all files on your phone before updating your nearest Huawei service center.


