Hitachi D10VG - 3/8 Inch Drill 9.0 Amp Support and Manuals
Get Help and Manuals for this Hitachi item
View All Support Options Below
Free Hitachi D10VG manuals!
Problems with Hitachi D10VG?
Ask a Question
Free Hitachi D10VG manuals!
Problems with Hitachi D10VG?
Ask a Question
Popular Hitachi D10VG Manual Pages
Instruction Manual - Page 3
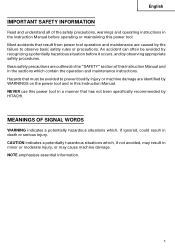
... death or serious injury. Most accidents that has not been specifically recommended by recognizing a potentially hazardous situation before operating or maintaining this power tool in a manner that result from power tool operation and maintenance are identified by WARNINGS on the power tool and in the Instruction Manual before it occurs, and by the failure to observe...
Instruction Manual - Page 4

....
3. Replace damaged cords immediately. Do not use tool while tired or under the influence of electric shock. (5) When operating a power tool outside, use the cord to install a polarized...the need for outdoor use common sense when operating a power tool. Keep cord away from moving parts. SAVE THESE INSTRUCTIONS
1.
Work Area (1) Keep your hair, clothing and gloves ...
Instruction Manual - Page 5
...risk of parts, and any adjustments, changing accessories, or storing the tool. Service (1) Tool service must be repaired. (4) Disconnect the plug form the power source before using. Follow instructions in ...5. Holding the work by a HITACHI authorized service center before making any other condition that is designed. (3) Do not use only identical replacement parts. Tool Use and Care (1) ...
Instruction Manual - Page 6
... circular saw for applications other body parts near the tool's moving parts. Handle tool correctly. Prolonged exposure to the instructions provided herein. NEVER touch moving parts. 7. Operate the tool according to high intensity noise can lead to do the job of the tool. 8. For D10VF
ALWAYS securely grip the Drill. English
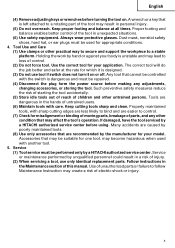
SPECIFIC SAFETY RULES AND SYMBOLS
1. Keep...
Instruction Manual - Page 7
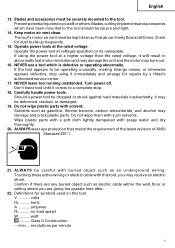
... Z87.1.
21. Turn power off. ALWAYS be deformed, cracked, or damaged.
19. no .......... Don't leave tool until it immediately and arrange for repairs by a Hitachi authorized service center.
17. Do not... The tool's motor air vent must be secure and tight.
14. Do not wipe plastic parts with such solvents. NEVER use a tool which have been mounted to the tool should be securely...
Instruction Manual - Page 8
... grounding, you must still follow these precautions: ⅜ Only HITACHI AUTHORIZED SERVICE CENTER should disassemble or assemble this
power tool, and only genuine HITACHI replacement parts should be installed. ⅜ Clean the exterior of this Instruction Manual, including not using the power tool in this power tool, HITACHI has adopted a double insulation design. otherwise the plastic may...
Instruction Manual - Page 9
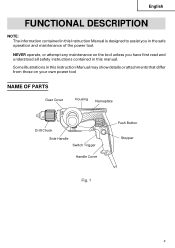
...: The information contained in this Instruction Manual may show details or attachments that differ from those on the tool unless you in the safe operation and maintenance of the power tool.
NEVER operate, or attempt any maintenance on your own power tool
NAME OF PARTS
Gear Cover
Housing Nameplate
Drill Chuck Side Handle Switch Trigger
Handle Cover...
Instruction Manual - Page 10
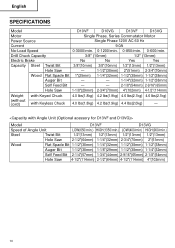
...SPECIFICATIONS
Model
D10VF
D10VG
D13VF
D13VG
Motor
Single Phase, Series Commutator Motor
Power Source
Single Phase 120V AC 60 Hz
Current
9.0A
No-Load Speed
0-3000/min. 0-1200/min. 0-850/min. 0-600/min. Drill Chuck... Keyed Chuck
(without
cord)
with Keyless Chuck
4.0 lbs(1.8kg) 4.2 lbs(1.9kg) 4.6 lbs(2.1kg) 4.6 lbs(2.1kg)
4.0 lbs(1.8kg) 4.2 lbs(1.9kg) 4.4 lbs(2.0kg)
- Model
D13VF
...
Instruction Manual - Page 11
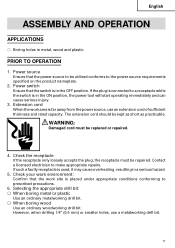
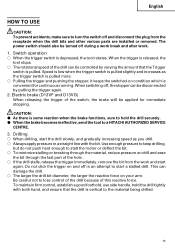
... be repaired. PRIOR TO OPERATION
1. If the plug is connected to be replaced or repaired.
4.
If such a fautly receptacle is in a serious hazard.
5. Power source Ensure that the power source ...the appropriate drill bit: ⅜ When boring metal or plastic
Use an ordinary metalworking drill bit. ⅜ When boring wood
Use an ordinary woodworking drill bit. However, when drilling 1/4" ...
Instruction Manual - Page 12
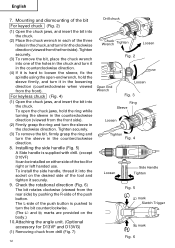
...accessory for right or left handed use. To install the side handle, thread it in the counterclockwise direction.
8. For keyless chuck (Fig. 4)
(1) Open the chuck jaws, and insert the bit into the ...6 The L-side of the push button is supplied with drill. (except D10VF) It can be installed on the desired side of the holes in the chuck and turn it in the counterclockwise direction.
(4) If it...
Instruction Manual - Page 13
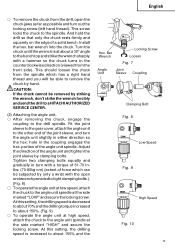
...be able to remove the chuck by hand. hole in the counterclockwise direction (viewed from the front side). At this setting, the drilling speed is decreased to about 70% and the drilling torque increased to about ... the wrench forcibly and send the drill to a HITACHI AUTHORIZED SERVICE CENTER.
(2) Attaching the angle unit. ⅜ After removing the chuck, engage the
coupling to the spindle.
Instruction Manual - Page 14
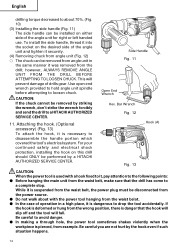
... the tool accidentally. Be careful you are not hurt by a HITACHI AUTHORIZED SERVICE CENTER. however, ALWAYS REMOVE ANGLE UNIT FROM THE DRILL BEFORE ATTEMPTING TO LOOSEN CHUCK. For your continued safety and electrical shock protection, installing the hook on this drill should ONLY be disconnected from the power source. ⅷ Do not walk about 70%. (Fig. 10...
Instruction Manual - Page 15
... to start
again. Electric brake (D13VF and D13VG) When releasing the trigger of the hole. ⅜ If the drill stalls, release the trigger immediately, remove the bit from the receptacle when the drill bits and other various parts are installed or removed. To maintain firm control, establish a good foothold, use side handle, hold the...
Instruction Manual - Page 16
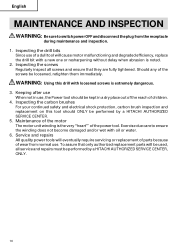
... screws Regularly inspect all screws and ensure that only authorized replacement parts will be used, all service and repairs must be performed by a HITACHI AUTHORIZED SERVICE CENTER, ONLY.
16 Keeping after use . Service and repairs All quality power tools will cause motor malfunctioning and degraded efficiency, replace the drill bit with a new one or resharpening without delay when...
Parts List - Page 2
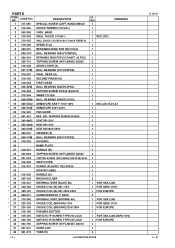
CODE...1
REMARKS
CHUCK WRENCH 10VLR-J
1
VINYL BAND
1
DRILL CHUCK 10VLR-J
1 INCLUD.2
DRILL CHUCK 10VLRD-N (W/O CHUCK WRENCH) ...INCLUD.18,23,24
ARMATURE 220V-230V
1
FAN GUIDE
1
HEX. TAPPING SCREW D4X55
2
STATOR 120V
...
GRIP COVER
1
SCREW (PLASTIC TIE) D4X25
2
HITACHI LABEL
1
HANDLE (A)
1
BRUSH HOLDER
2
INTERNAL WIRE (BLUE) 86L
1 FOR USA...PARTS
D 10VG 8 -- 01 PARTS
ITEM NO.
Hitachi D10VG Reviews
We have not received any reviews for Hitachi yet.