Hitachi D13VG - 1/2" Drill 9.0 Amp Support and Manuals
Get Help and Manuals for this Hitachi item
View All Support Options Below
Free Hitachi D13VG manuals!
Problems with Hitachi D13VG?
Ask a Question
Free Hitachi D13VG manuals!
Problems with Hitachi D13VG?
Ask a Question
Popular Hitachi D13VG Manual Pages
Instruction Manual - Page 3
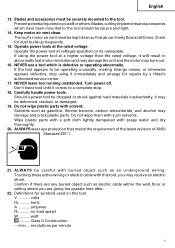
... before it occurs, and by WARNINGS on the power tool and in the Instruction Manual before operating or maintaining this Instruction Manual. Hazards that has not been specifically recommended by the failure to prevent bodily injury or machine damage are caused by HITACHI. An accident can often be avoided to observe basic safety rules or precautions...
Instruction Manual - Page 4

...parts. Personal Safety (1) Stay alert, watch what you to rain or wet conditions. Carrying tools with a polarized plug (one way. Replace damaged cords immediately. Damaged cords increase the risk of electric...English
SAFETY
GENERAL SAFETY RULES
WARNING: Read and understand all instructions listed below, may result in electric shock, fire and/or serious personal injury. Be sure switch ...
Instruction Manual - Page 5
... this manual. If damaged, have the tool serviced by a HITACHI authorized service center before making any other condition that are recommended by unqualified personnel could result in personal injury.
(5) Do not overreach. Many accidents are caused by poorly maintained tools. (8) Use only accessories that may affect the tool's operation. Follow instructions in the hands of electric...
Instruction Manual - Page 6
... with bare hands after operation. 4. For D10VG, D13VF and D13VG ALWAYS attach the side handle and securely grip the Drill. 6. don't use a power tool for applications other body parts near the tool's moving parts. Keep all guards in place. Prolonged exposure to high intensity noise can lead to replace the guard or safety feature before resuming...
Instruction Manual - Page 7
... arrange for repairs by a Hitachi authorized service center.
17. If using it will result in abnormally fast motor revolution and may damage the unit and the motor may receive an electric shock. Do...freely flow at the rated voltage. Definitions for dust build-up frequently.
15. Wipe plastic parts with a soft cloth lightly dampened with this tool V volts Hz .......... Confirm if there...
Instruction Manual - Page 8
...HITACHI AUTHORIZED SERVICE CENTER should disassemble or assemble this
power tool, and only genuine HITACHI replacement parts should be installed. ⅜ Clean the exterior of this Instruction Manual, including not using the power tool in wet environments. SAVE THESE INSTRUCTIONS... insulate the electrically conductive materials connected to the power supply from the outer frame handled by the operator....
Instruction Manual - Page 9
... tool unless you have first read and understood all safety instructions contained in this Instruction Manual is designed to assist you in this Instruction Manual may show details or attachments that differ from those on your own power tool
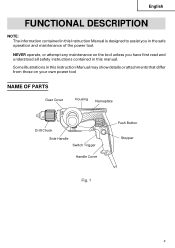
NAME OF PARTS
Gear Cover
Housing Nameplate
Drill Chuck Side Handle Switch Trigger
Handle Cover
Push Button Stopper...
Instruction Manual - Page 10
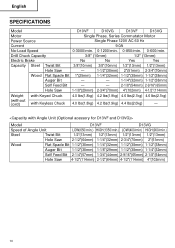
Model
D13VF
D13VG
Speed of Angle Unit
LOW(650/min.) HIGH(1350/min.) LOW(400/min) HIGH(900/min.)
Steel
Twist Bit
...SPECIFICATIONS
Model
D10VF
D10VG
D13VF
D13VG
Motor
Single Phase, Series Commutator Motor
Power Source
Single Phase 120V AC 60 Hz
Current
9.0A
No-Load Speed
0-3000/min. 0-1200/min. 0-850/min. 0-600/min.
Drill Chuck Capacity
3/8" (10mm)
1/2" (13mm)
Electric...
Instruction Manual - Page 12
...
Fig. 5
L mark Siwtch Trigger
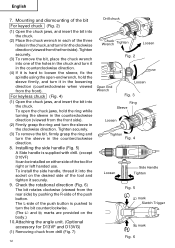
R mark Fig. 6 Installing the side handle (Fig. 5) A Side handle is supplied with drill. (except D10VF) It can be installed on either side of the tool and tighten it securely.
9..... (The L and R marks are provided on the desired side of the tool for D13VF and D13VG)
(1) Removing chuck from the front side).
(2) Firmly grasp the ring and turn it ...
Instruction Manual - Page 13
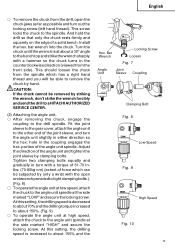
... possible and turn with a torque of 61-70 Inlbs. (70...setting, the drilling speed is at the side marked "LOW" and secure the locking screw. bar wrench into the chuck. Install the hex. hole in the counterclockwise direction (viewed from the spindle which can be able to remove the chuck by striking the wrench, don't strike the wrench forcibly and send the drill to a HITACHI AUTHORIZED SERVICE...
Instruction Manual - Page 14
...DRILL BEFORE ATTEMPTING TO LOOSEN CHUCK. This will fall.
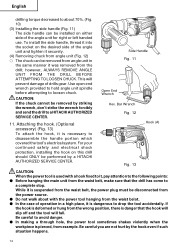
CAUTION: If the chuck cannot be installed on either side of the angle unit for right or left handed use. For your continued safety and electrical shock protection, installing...10) (3) Installing the side handle (Fig. 11) The side handle can be performed by a HITACHI AUTHORIZED SERVICE CENTER. English
drilling torque decreased to...
Instruction Manual - Page 15
...stalled drill. Electric brake (D13VF and D13VG) When releasing the ...drill bits and other various parts are installed or removed.
Use enough pressure to keep drilling,
but do not push hard enough to a HITACHI AUTHORIZED SERVICE
CENTRE. 3. English
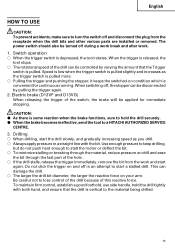
HOW TO USE
CAUTION: To prevent accidents, make sure to hold the drill tightly with the bit. To maintain firm control, establish a good...
Instruction Manual - Page 16
... 1. Service and repairs All quality power tools will be used, all screws and ensure that only authorized replacement parts will eventually require servicing or replacement of parts because of... by a HITACHI AUTHORIZED SERVICE CENTER.
5. Inspecting the carbon brushes For your continued safety and electrical shock protection, carbon brush inspection and replacement on this drill with loosened ...
Parts List - Page 3
... (BLACK) 1
GRIP COVER
1
SCREW (PLASTIC TIE) D4X25
2
HITACHI LABEL
1
HANDLE (A)
1
BRUSH HOLDER
2
INTERNAL WIRE (BLUE) ...PARTS
D 13VG --- 3 --- USED
REMARKS
SPECIAL SCREW (LEFT HAND) M6X23 1
CHUCK WRENCH 13VLR-J
1
VINYL BAND
1
DRILL CHUCK 13VLR-J
1 INCLUD.2
DRILL...
ARMATURE 220V-230V
1
ARMATURE 240V
1
FAN GUIDE
1
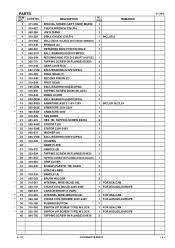
HEX. PARTS
ITEM NO. HD. CODE NO.
1 311-959
2 319-527
3...
Parts List - Page 5
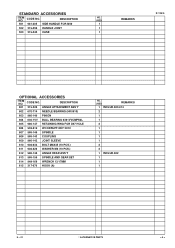
....)
611 949-426 WASHER M8 (10 PCS.)
612 986-144 ANGLE HEAD ASS'Y
613 986-156 SPINDLE AND GEAR SET
614 949-168 WRENCH 13/17MM
615 317-676 HOOK (A)
NO.
CODE NO. CODE NO.
DESCRIPTION
501 981-205 SIDE HANDLE FOR M10
502 319-550 HANDLE JOINT
503 319-543 CASE
NO...
Hitachi D13VG Reviews
We have not received any reviews for Hitachi yet.