Owners Guide
Page 1
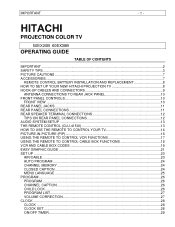
... REAR PANEL CONNECTIONS 11 REAR SPEAKER TERMINAL CONNECTIONS 12 TIPS ON REAR PANEL CONNECTIONS 12 AUDIO SYSTEM SETUP ...13 THE REMOTE CONTROL (CLU-415UI 13 HOW TO USE THE REMOTE TO CONTROL YOUR TV 14 PICTURE-IN-PICTURE (PIP 16 USING THE REMOTE TO CONTROL VCR FUNCTIONS 17 USING THE REMOTE TO CONTROL CABLE BOX FUNCTIONS 18 VCR AND CABLE BOX CODES 19 EASY GRAPHIC GUIDE ...21 SET UP ...23 AIR/CABLE ...23 AUTO PROGRAM ...24 CHANNEL MEMORY...24 CLOSED CAPTION ...24 MENU LANGUAGE ...25 PROGRAM ...26 PROGRAM ...26 CHANNEL CAPTION...26 CHILD LOCK ...26 PROGRAM LIST...27 VOLUME...
... REAR PANEL CONNECTIONS 11 REAR SPEAKER TERMINAL CONNECTIONS 12 TIPS ON REAR PANEL CONNECTIONS 12 AUDIO SYSTEM SETUP ...13 THE REMOTE CONTROL (CLU-415UI 13 HOW TO USE THE REMOTE TO CONTROL YOUR TV 14 PICTURE-IN-PICTURE (PIP 16 USING THE REMOTE TO CONTROL VCR FUNCTIONS 17 USING THE REMOTE TO CONTROL CABLE BOX FUNCTIONS 18 VCR AND CABLE BOX CODES 19 EASY GRAPHIC GUIDE ...21 SET UP ...23 AIR/CABLE ...23 AUTO PROGRAM ...24 CHANNEL MEMORY...24 CLOSED CAPTION ...24 MENU LANGUAGE ...25 PROGRAM ...26 PROGRAM ...26 CHANNEL CAPTION...26 CHILD LOCK ...26 PROGRAM LIST...27 VOLUME...
Owners Guide
Page 2
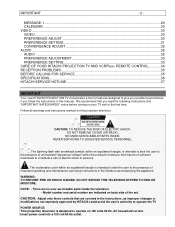
... this manual. CAUTION: TO REDUCE THE RISK OF ELECTRIC SHOCK, DO NOT REMOVE COVER (OR BACK). Insert power cord into a 120 volt 60 Hz outlet. MESSAGE-1 ...29 CALENDAR ...30 VIDEO ...30 VIDEO...30 PREFERENCE ADJUST...30 PREFERENCE SETTING ...31 CONVERGENCE ADJUST 32 AUDIO ...32 AUDIO ...32 PREFERENCE ADJUSTMENT 33 PREFERENCE SETTING ...33 CARE OF YOUR HITACHI PROJECTION TV AND VCRPlus+ REMOTE CONTROL 34 RECEPTION PROBLEMS...35 BEFORE CALLING FOR SERVICE 35 SPECIFICATIONS...36 HITACHI SERVICE...
... this manual. CAUTION: TO REDUCE THE RISK OF ELECTRIC SHOCK, DO NOT REMOVE COVER (OR BACK). Insert power cord into a 120 volt 60 Hz outlet. MESSAGE-1 ...29 CALENDAR ...30 VIDEO ...30 VIDEO...30 PREFERENCE ADJUST...30 PREFERENCE SETTING ...31 CONVERGENCE ADJUST 32 AUDIO ...32 AUDIO ...32 PREFERENCE ADJUSTMENT 33 PREFERENCE SETTING ...33 CARE OF YOUR HITACHI PROJECTION TV AND VCRPlus+ REMOTE CONTROL 34 RECEPTION PROBLEMS...35 BEFORE CALLING FOR SERVICE 35 SPECIFICATIONS...36 HITACHI SERVICE...
Owners Guide
Page 3
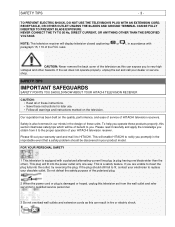
... warranty card and mail it to the proper operation of benefit to qualified service personnel. 3 Do not overload wall outlets and extension cords as this section illustrates safety tips which will display television closed captioning ( or ), in fire or electric shock. SAFETY TIPS IMPORTANT SAFEGUARDS SAFETY POINTS YOU SHOULD KNOW ABOUT YOUR HITACHI TELEVISION RECEIVER CAUTION: • Read all warnings and instructions...
... warranty card and mail it to the proper operation of benefit to qualified service personnel. 3 Do not overload wall outlets and extension cords as this section illustrates safety tips which will display television closed captioning ( or ), in fire or electric shock. SAFETY TIPS IMPORTANT SAFEGUARDS SAFETY POINTS YOU SHOULD KNOW ABOUT YOUR HITACHI TELEVISION RECEIVER CAUTION: • Read all warnings and instructions...
Owners Guide
Page 4
... attempt to service this television set , unplug it from the wall outlet before cleaning. Wall or shelf mounting should follow the manufacturer's instructions, and should use a mounting kit approved by the manufacturer, or sold with care. PROTECTION AND LOCATION OF YOUR SET 12 Do not use liquid cleaners or aerosol cleaners. Do not use this television near water, for cleaning. 11-1 Do...
... attempt to service this television set , unplug it from the wall outlet before cleaning. Wall or shelf mounting should follow the manufacturer's instructions, and should use a mounting kit approved by the manufacturer, or sold with care. PROTECTION AND LOCATION OF YOUR SET 12 Do not use liquid cleaners or aerosol cleaners. Do not use this television near water, for cleaning. 11-1 Do...
Owners Guide
Page 5
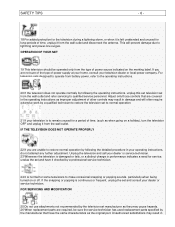
... grounding electrode. When installing an outside antenna system should not be located in the vicinity of the set when high humidity persists. 15 The television has slots, or openings in particular, specifies that provides guidelines for television with them might be fatal. ANTENNA GROUNDING DIAGRAM AS PER NATIONAL ELECTRICAL CODE INSTRUCTIONS . 16-2 Note to protect from touching such power lines or circuits as...
... grounding electrode. When installing an outside antenna system should not be located in the vicinity of the set when high humidity persists. 15 The television has slots, or openings in particular, specifies that provides guidelines for television with them might be fatal. ANTENNA GROUNDING DIAGRAM AS PER NATIONAL ELECTRICAL CODE INSTRUCTIONS . 16-2 Note to protect from touching such power lines or circuits as...
Owners Guide
Page 6
... the antenna. FOR SERVICING AND MODIFICATION 25 Do not use attachments not recommended by the television set manufacturer as the original part. IF THE TELEVISION DOES NOT OPERATE PROPERLY 22 If you are unable to make occasional snapping or popping sounds, particularly when being turned on or off. If the snapping or popping is to remain unused for a period of power supply...
... the antenna. FOR SERVICING AND MODIFICATION 25 Do not use attachments not recommended by the television set manufacturer as the original part. IF THE TELEVISION DOES NOT OPERATE PROPERLY 22 If you are unable to make occasional snapping or popping sounds, particularly when being turned on or off. If the snapping or popping is to remain unused for a period of power supply...
Owners Guide
Page 8
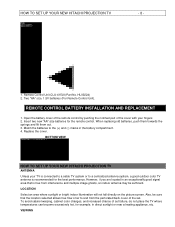
..., be sufficient. FOLIOHG2 1. BOTTOM VIEW FOLIOHG2 HOW TO SET UP YOUR NEW HITACHI PROJECTION TV ANTENNA Unless your fingers 2. LOCATION Select an area where sunlight or bright indoor illumination will not fall directly on the picture screen. REMOTE CONTROL BATTERY INSTALLATION AND REPLACEMENT 1. HOW TO SET UP YOUR NEW HITACHI PROJECTION TV - 8 - Open the battery cover of the remote control by pushing the notched part of the set failure, do not place the...
..., be sufficient. FOLIOHG2 1. BOTTOM VIEW FOLIOHG2 HOW TO SET UP YOUR NEW HITACHI PROJECTION TV ANTENNA Unless your fingers 2. LOCATION Select an area where sunlight or bright indoor illumination will not fall directly on the picture screen. REMOTE CONTROL BATTERY INSTALLATION AND REPLACEMENT 1. HOW TO SET UP YOUR NEW HITACHI PROJECTION TV - 8 - Open the battery cover of the remote control by pushing the notched part of the set failure, do not place the...
Owners Guide
Page 10
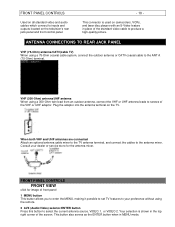
... PANEL CONTROLS Used on all standard video and audio cables which connect to the antenna mixer. FRONT PANEL CONTROLS FRONT VIEW click for the antenna mixer. This connector is shown in MENU mode. When both VHF and UHF antennas are connected Attach an optional antenna cable mixer to the TV antenna terminal, and connect the cables to inputs and outputs located on the TV. Consult your preference without using the remote. 2 AVX (Audio/Video) selector/ENTER button Press this button to produce a high...
... PANEL CONTROLS Used on all standard video and audio cables which connect to the antenna mixer. FRONT PANEL CONTROLS FRONT VIEW click for the antenna mixer. This connector is shown in MENU mode. When both VHF and UHF antennas are connected Attach an optional antenna cable mixer to the TV antenna terminal, and connect the cables to inputs and outputs located on the TV. Consult your preference without using the remote. 2 AVX (Audio/Video) selector/ENTER button Press this button to produce a high...
Owners Guide
Page 11
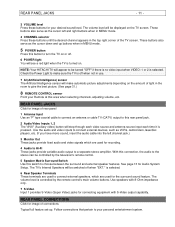
... channels, adjusting volume, etc. Use the audio and video inputs to connect external devices, such as the cursor left channel jack.) 3 Monitor Out These jacks provide fixed audio and video signals which are used for the surround sound feature. With this connection, the audio to the stereo can be controlled by the television's remote control. 5 Speaker Matrix Surround Switch Use this button to turn the TV on the amount of the TV screen. REAR PANEL CONNECTIONS Click for Audio System Setup. The TV's Internal Speakers will be switched off . 6 POWER light...
... channels, adjusting volume, etc. Use the audio and video inputs to connect external devices, such as the cursor left channel jack.) 3 Monitor Out These jacks provide fixed audio and video signals which are used for the surround sound feature. With this connection, the audio to the stereo can be controlled by the television's remote control. 5 Speaker Matrix Surround Switch Use this button to turn the TV on the amount of the TV screen. REAR PANEL CONNECTIONS Click for Audio System Setup. The TV's Internal Speakers will be switched off . 6 POWER light...
Owners Guide
Page 12
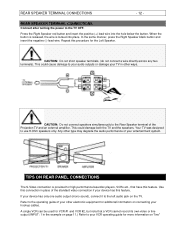
... sound), connect it to the operating guide of the standard video connection if your hookup cables. TIPS ON REAR PANEL CONNECTIONS The S-Video connection is locked into the hole below the button. Use this feature. If your TV in place of your other electronic equipment for high performance laserdisc players, VCRs etc., that a VCR cannot record its own video or line output (INPUT: 1 in the example on "line" REAR SPEAKER TERMINAL CONNECTIONS - 12 - Press the Right Speaker red button...
... sound), connect it to the operating guide of the standard video connection if your hookup cables. TIPS ON REAR PANEL CONNECTIONS The S-Video connection is locked into the hole below the button. Use this feature. If your TV in place of your other electronic equipment for high performance laserdisc players, VCRs etc., that a VCR cannot record its own video or line output (INPUT: 1 in the example on "line" REAR SPEAKER TERMINAL CONNECTIONS - 12 - Press the Right Speaker red button...
Owners Guide
Page 13
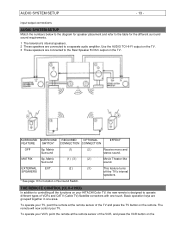
... Theater-like sound. Matrix (1) (2 ) Receive mono and Surround stereo sound. input-output connections. MATRIX Sp. Basic operation keys are connected to a separate audio amplifier. THE REMOTE CONTROL (CLU-415UI) In addition to operate different types of the VCR, and press the VCR button on your TV, point the remote at the remote sensor of VCRs and CATV (Cable TV)/Satellite converters with one area. To operate your HITACHI Color TV, the new remote is designed...
... Theater-like sound. Matrix (1) (2 ) Receive mono and Surround stereo sound. input-output connections. MATRIX Sp. Basic operation keys are connected to a separate audio amplifier. THE REMOTE CONTROL (CLU-415UI) In addition to operate different types of the VCR, and press the VCR button on your TV, point the remote at the remote sensor of VCRs and CATV (Cable TV)/Satellite converters with one area. To operate your HITACHI Color TV, the new remote is designed...
Owners Guide
Page 14
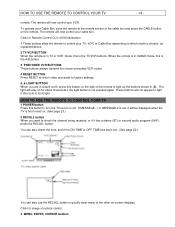
... first turned on. (See page 23.) 2 RECALL button When you are in a dark room, press this is the A/B button. 3 PRECODED VCR BUTTONS These buttons always transmit the chosen precoded VCR codes. 4 RESET BUTTON Press RESET to return video and audio to factory settings. 5, 6 LIGHT BUTTON When you want to light up the buttons shown in CABLE mode, this button to quickly clear many of remote control. 3 MENU, ENTER, CURSOR buttons HOW TO USE THE REMOTE TO CONTROL YOUR TV - 14...
... first turned on. (See page 23.) 2 RECALL button When you are in a dark room, press this is the A/B button. 3 PRECODED VCR BUTTONS These buttons always transmit the chosen precoded VCR codes. 4 RESET BUTTON Press RESET to return video and audio to factory settings. 5, 6 LIGHT BUTTON When you want to light up the buttons shown in CABLE mode, this button to quickly clear many of remote control. 3 MENU, ENTER, CURSOR buttons HOW TO USE THE REMOTE TO CONTROL YOUR TV - 14...
Owners Guide
Page 15
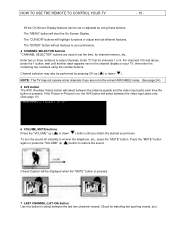
... "VOLUME" up ( ) or down ( ). Enter "0" first for channels 1 to select channels. The "MENU" button will highlight functions or adjust and set different features. Channel selection may not receive some channels if you obtain the desired sound level. To turn the sound off instantly to the channel display on , the AVX button will select between the antenna signals and the video input jacks each time the button is pressed. 7 LAST CHANNEL (LST-CH) button Use this button...
... "VOLUME" up ( ) or down ( ). Enter "0" first for channels 1 to select channels. The "MENU" button will highlight functions or adjust and set different features. Channel selection may not receive some channels if you obtain the desired sound level. To turn the sound off instantly to the channel display on , the AVX button will select between the antenna signals and the video input jacks each time the button is pressed. 7 LAST CHANNEL (LST-CH) button Use this button...
Owners Guide
Page 16
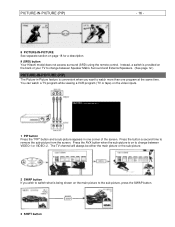
... video inputs. The TV channel will always be either the main picture or the sub-picture. 2 SWAP button If you want to watch a TV program while viewing a VCR program (TV or tape) on to change between VIDEO:1 or VIDEO: 2. Press the button a second time to remove the sub-picture from the screen. You can watch more than one corner of your TV to change between Speaker Matrix Surround and External Speakers. (See page 12.) PICTURE-IN-PICTURE (PIP...
... video inputs. The TV channel will always be either the main picture or the sub-picture. 2 SWAP button If you want to watch a TV program while viewing a VCR program (TV or tape) on to change between VIDEO:1 or VIDEO: 2. Press the button a second time to remove the sub-picture from the screen. You can watch more than one corner of your TV to change between Speaker Matrix Surround and External Speakers. (See page 12.) PICTURE-IN-PICTURE (PIP...
Owners Guide
Page 23
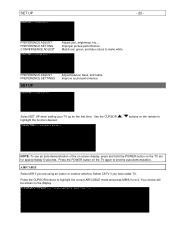
... correct AIR/CABLE mode and press MENU to make white PREFERENCE ADJUST PREFERENCE SETTINGS SET UP FOLIOHG2 Adjust balance, bass, and treble Improve sound performance. Select SET UP when setting your TV up for approximately 5 seconds. Select CATV if you are using an indoor or outdoor antenna. FOLIOHG2 Improper picture performance Match red, green, and blue colors to exit. FOLIOHG2 NOTE: To see an auto-demonstration of the on-screen display, press...
... correct AIR/CABLE mode and press MENU to make white PREFERENCE ADJUST PREFERENCE SETTINGS SET UP FOLIOHG2 Adjust balance, bass, and treble Improve sound performance. Select SET UP when setting your TV up for approximately 5 seconds. Select CATV if you are using an indoor or outdoor antenna. FOLIOHG2 Improper picture performance Match red, green, and blue colors to exit. FOLIOHG2 NOTE: To see an auto-demonstration of the on-screen display, press...

Owners Guide
Page 25
... function will not be displayed if the DISPLAY is in the "ON" or "OFF" mode. (Certain models only.) MENU LANGUAGE This feature will be in yellow. Your choice for additional information such as FOLIOHG2 or . MODE: C.C. (Closed Caption) is not set. This information covers the entire screen and viewing the TV program is sometimes used for a second language (may not be in red. MODE: TEXT is for the...
... function will not be displayed if the DISPLAY is in the "ON" or "OFF" mode. (Certain models only.) MENU LANGUAGE This feature will be in yellow. Your choice for additional information such as FOLIOHG2 or . MODE: C.C. (Closed Caption) is not set. This information covers the entire screen and viewing the TV program is sometimes used for a second language (may not be in red. MODE: TEXT is for the...
Owners Guide
Page 30
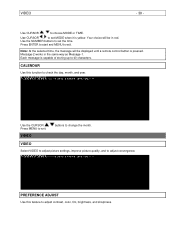
... - Press ENTER to start and MENU to adjust convergence. VIDEO buttons to adjust contrast, color, tint, brightness, and sharpness. FOLIOHG2 PREFERENCE ADJUST Use this function to set MODE when it is pressed. Use CURSOR , to choose MODE or TIME. Use CURSOR , to set the time. Use the NUMBER buttons to check the day, month, and year. Note: At the selected time, the message will be displayed until a remote control button is yellow. Message-2 works in red. Your choice will be...
... - Press ENTER to start and MENU to adjust convergence. VIDEO buttons to adjust contrast, color, tint, brightness, and sharpness. FOLIOHG2 PREFERENCE ADJUST Use this function to set MODE when it is pressed. Use CURSOR , to choose MODE or TIME. Use CURSOR , to set the time. Use the NUMBER buttons to check the day, month, and year. Note: At the selected time, the message will be displayed until a remote control button is yellow. Message-2 works in red. Your choice will be...
Owners Guide
Page 31
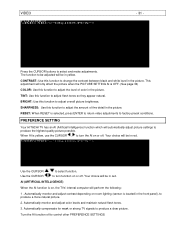
... TVs' internal computer will automatically adjust picture settings to adjust the level of fine detail in red. This adjustment will be adjusted will only affect the picture when the PICTURE SETTING AI is yellow, use the CURSOR , to control other PREFERENCE SETTINGS. Turn the AI function off . When AI is OFF. (See page 34) COLOR: Use this function to factory preset conditions. Press the CURSOR buttons to adjust overall picture brightness. Automatically monitor and adjust...
... TVs' internal computer will automatically adjust picture settings to adjust the level of fine detail in red. This adjustment will be adjusted will only affect the picture when the PICTURE SETTING AI is yellow, use the CURSOR , to control other PREFERENCE SETTINGS. Turn the AI function off . When AI is OFF. (See page 34) COLOR: Use this function to factory preset conditions. Press the CURSOR buttons to adjust overall picture brightness. Automatically monitor and adjust...
Owners Guide
Page 32
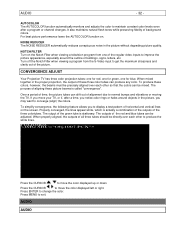
... a program or channel changes. For best picture performance leave the AUTOCOLOR function on the Notch Filter when viewing a television program from the S-Video input to get the maximum sharpness and clarity out of horizontal and vertical lines on the screen. When mixed together in the proper proportion, the output of all three tubes should be mixed. CONVERGENCE ADJUST Your Projection TV has three color projection tubes: one for red, one for blue. AUDIO - 32 - The output...
... a program or channel changes. For best picture performance leave the AUTOCOLOR function on the Notch Filter when viewing a television program from the S-Video input to get the maximum sharpness and clarity out of horizontal and vertical lines on the screen. When mixed together in the proper proportion, the output of all three tubes should be mixed. CONVERGENCE ADJUST Your Projection TV has three color projection tubes: one for red, one for blue. AUDIO - 32 - The output...
Owners Guide
Page 34
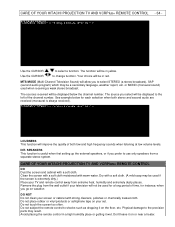
... outlet if your set. or MONO (monaural sound) used if the screen is useful when first setting up the external speakers, or if you go on or near a heater. CARE OF YOUR HITACHI PROJECTION TV AND VCRPlus+ REMOTE CONTROL DO Dust the screen and cabinet with warm water. Remove the plug from a separate stereo system. Physical damage to the precision parts may be used when receiving a weak stereo...
... outlet if your set. or MONO (monaural sound) used if the screen is useful when first setting up the external speakers, or if you go on or near a heater. CARE OF YOUR HITACHI PROJECTION TV AND VCRPlus+ REMOTE CONTROL DO Dust the screen and cabinet with warm water. Remove the plug from a separate stereo system. Physical damage to the precision parts may be used when receiving a weak stereo...


