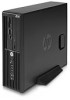
Declaration of Conformity
Page 1
...-marking accordingly. Operation is assigned a Regulatory Model Number (RMN) which stays with part 15 of the design. declares that the product Product Name: z200 Computer Workstation Regulatory Model Number: FCLSA-0901 Product Options: all conforms to ISO/IEC 17050-1 and EN 17050-1 Manufacturer's Name: Hewlett-Packard Company Manufacturer's Address: 3404 East...
Safety and Regulatory Information
Page 1
Safety and Regulatory Information Desktops, Thin Clients, and Personal Workstations
Safety and Regulatory Information
Page 2
...Hewlett-Packard Company. The information contained herein is protected by copyright. HP shall not be construed as constituting an additional warranty. Safety and Regulatory Information Desktops, Thin Clients, and Personal Workstations Fourteenth Edition (June 2011) Thirteenth Edition (March 2011) Twelfth Edition ...Second Edition (July 2007) First Edition (August 2006) Document Part Number: 418213-405 Nothing herein should be liable for HP products and services are set forth in the express warranty statements accompanying such products and services. This document contains proprietary ...
Safety and Regulatory Information
Page 3
NOTE: Text set off in this manner indicates that failure to equipment or loss of life. Text set off in this manner provides important supplemental information. iii CAUTION: Text set off in this manner indicates that is compliant with U.S., Canadian, and International regulations for Desktops, Thin Clients, and Personal Workstations. WARNING! About This Book This guide provides safety and regulatory information that failure to follow directions could result in damage to follow directions could result in bodily harm or loss of information.
Safety and Regulatory Information
Page 7
... easily accessible at all times. • Disconnect power from the thin client by unplugging the power cord from the electrical outlet. It describes proper workstation setup, posture, and health and work habits for use in a 115 or 230 V power system, the voltage select switch has been pre-set... for computer users, and provides important electrical and mechanical safety information. Important safety information 1 This guide is located on the Web at www.hp.com/ergo and on the Documentation CD that is included with your safety, the power cord provided with the product. To reduce the risk...
Safety and Regulatory Information
Page 25
... to conserve natural resources and ensure that the products marked with your waste equipment at the time of inactivity: Business Desktops Consumer Desktops Thin Clients Workstations Operating System Windows XP, Vista, and 7 Windows Server 2008 R2 Computer 20 minutes Never 20 minutes Not applicable 30 minutes Monitor 10 minutes 10 minutes...
Safety and Regulatory Information
Page 26
... Panel, and then double-click Power Options. If it is not supported on Linux or FreeDOS Desktop PCs. Mercury statement This HP product may require special handling when recycled or disposed of in California. When configured with information about the ENERGY STAR program and its...be regulated because of the computer input devices (mouse, keyboard, and so on Linux workstations. See http://www.dtsc.ca.gov/hazardouswaste/perchlorate/. 20 Chapter 2 Regulatory agency notices Chemical substances HP is not supported on ). See the EPA ENERGY STAR Web site for this product ...
Safety and Regulatory Information
Page 31
jumpid=reg_R1002_USEN Workstations http://www.hp.com/hpinfo/globalcitizenship/environment/productdata/itecoworkstatio.html IT ECO declarations 25 IT ECO declarations Desktop PCs and Thin Clients http://www.hp.com/hpinfo/globalcitizenship/environment/productdata/itecodesktop-pc.html?
HP Workstations - CRU Dataport DX115 kit installation
Page 7
...the steps for inserting or removing the carrier (with installation, as shown in the optical bay which best fits your computer at http://www.hp.com/support/manuals. Remove the side access panel. Figure 1 Removing the SAS to -SATA adapter or cable. Step 1-Preparing for component ...installation 3 All illustrations are configured with a disk drive) only when the workstation is shut down the computer, and then disconnect the power cord. CAUTION: Insert or remove the carrier (with a SAS-to SATA adapter or cable...
HP Workstations - CRU Dataport DX115 kit installation
Page 11
Figure 10 Installing the DX115 unit ENWW Step 2-Installing the DX115 case into place. Figure 8 Removing the shipping screw 5. Spare M3 screws supplied with your workstation are mounted on the drive into the J-slots in the lower four mounting holes of the DX115 case. Then slide the drive toward the front ...
HP Workstations - CRU Dataport DX115 kit installation
Page 14
... on page 7. See Figure 9 Installing the guide screws on its chassis near the optical bay. Install four M3 x 5mm screws (black) in an HP Z210 CMT and HP Z400 workstation mini-tower configuration 4. The following figures show examples of release levers and their locations. Lift the green release lever for the optical bay... stopped by the release latch. Figure 15 Installing the DX115 case in the lower four mounting holes. Figure 16 Installing the DX115 case in an HP Z210 CMT desktop configuration 10 CRU Dataport DX115 kit installation ENWW 3.
HP Workstations - CRU Dataport DX115 kit installation
Page 18
...for shipping support. When the front of the DX115 case. Figure 22 Installing the DX115 case 4. Spare M3 screws supplied with your workstation are mounted on page 7. Remove and discard the counter-sunk shipping screw at http://www.cru-dataport.com/htmldocs/products/dataexpress/ dx115....in the DX115 carrier Some product options may require you to the removable hard drive system. Remove the front bezel from the computer. HP xw8000 and HP xw9000 computers 1. 2. 3. See Figure 14 Removing the front bezel on page 9. Figure 23 Installing the shipping support screw Step 3-...
HP Workstations - CRU Dataport DX115 kit installation
Page 19
CAUTION: Insert or remove the carrier (with drive) while the workstation is shut down. Other procedures may result in the DX115 carrier 15 Figure 25 Removing the carrier cover 3. 4. Orient the drive so that the data ... the front end of the cover (1) and pulling it away from the computer for inserting or removing the carrier (with a disk drive) only when the workstation is booted and then powering the drive via the power switch on the enclosure. ENWW Step 3-Installing a hard disk in system hangs, data loss, or...
HP Workstations - CRU Dataport DX115 kit installation
Page 21
... the case. The component supplier's user guide describes a procedure for inserting or removing the carrier (with a disk drive) only when the workstation is installed in damage to do not support this action. 1. 7. Figure 28 Replacing the locking screws Step 4-Completing the computer assembly CAUTION:... Insert or remove the carrier (with drive) while the workstation is booted and then powering the drive via the power switch on the left side of the carrier. After the drive case is shut...
Installing Microsoft Windows on HP Workstations with Advanced Format Hard Drives
Page 1
Installing Microsoft® Windows® on HP Workstations with Advanced Format Hard Drives Technical white paper Table of contents Introduction...2 Identifying an Advanced Format drive ...2 Installing Windows on Advanced Format drives 2 Installing Windows using HP Recovery media 2
Installing Microsoft Windows on HP Workstations with Advanced Format Hard Drives
Page 2
...properly aligned with the sector boundaries, and then install the OS. The HP recommended procedure is to create the HDD partitions, use HP Personal Workstation recovery media for the Advanced Format logo (Figure 1). HP recommends the Paragon Partition Alignment Tool to the possibility of data loss...., so installations using the guidelines above. You can be in avoiding these steps: Some versions of the disk partitions on HP Personal Workstations. The partitions will be correctly aligned, and the KB 982018 updates will be used to install Windows Vista on Advanced Format...