
Maintenance and Service Guide
Page 6
... Reader ...38 Speakers (front) ...39 Power button board ...39 WWAN module ...41 Solid-state drive ...43 Fans ...44 IR sensor ...46 System board ...46 Heat sink ...49 Audio board ...50 Display assembly ...51 Speakers (rear) ...52 6 Backing up, restoring, and recovering ...54 Using Windows tools for backing up, restoring, and recovering your computer 54 Creating backups ...54 Restoring and recovering ...54 Creating HP Recovery media (select products only) ...55 Using HP Recovery Manager to create recovery media 55 Before you begin ...55 Creating...
... Reader ...38 Speakers (front) ...39 Power button board ...39 WWAN module ...41 Solid-state drive ...43 Fans ...44 IR sensor ...46 System board ...46 Heat sink ...49 Audio board ...50 Display assembly ...51 Speakers (rear) ...52 6 Backing up, restoring, and recovering ...54 Using Windows tools for backing up, restoring, and recovering your computer 54 Creating backups ...54 Restoring and recovering ...54 Creating HP Recovery media (select products only) ...55 Using HP Recovery Manager to create recovery media 55 Before you begin ...55 Creating...

Maintenance and Service Guide
Page 66
... the keyboard base before beginning these steps to perform System Recovery or create HP Recovery media. Type recovery in the taskbar search box, and then select HP Recovery Manager. 2. Insert the HP Recovery media. 2. See Creating HP Recovery media (select products only) on or restart the tablet, quickly hold down the volume down the volume up , restoring, and recovering Select Remove Recovery Partition, and then follow the on -screen instructions. NOTE: If your HP Recovery media. Access the system Startup menu. Changing the computer boot order If...
... the keyboard base before beginning these steps to perform System Recovery or create HP Recovery media. Type recovery in the taskbar search box, and then select HP Recovery Manager. 2. Insert the HP Recovery media. 2. See Creating HP Recovery media (select products only) on or restart the tablet, quickly hold down the volume down the volume up , restoring, and recovering Select Remove Recovery Partition, and then follow the on -screen instructions. NOTE: If your HP Recovery media. Access the system Startup menu. Changing the computer boot order If...

Maintenance and Service Guide
Page 77
...airplane mode 13 identifying 12, 13 keyboard backlight 13 mute 13 next track 13 pause 13 play 13 privacy screen 13 screen brightness 13 speaker volume 13 switch screen image 13 using 13 airplane mode key 13 audio adjusting volume 13 audio board removal 50 spare part numbers 26, 50 audio, product description 1 audio-out (headphone)/audio-in (microphone) combo jack, identifying 5 B backups 54 base enclosure spare part numbers 27 Battery spare part numbers 26 Bluetooth label 16 boot order, changing 58 bottom components 15 bottom cover removal 34 spare part numbers 34 buttons left TouchPad 9 power...
...airplane mode 13 identifying 12, 13 keyboard backlight 13 mute 13 next track 13 pause 13 play 13 privacy screen 13 screen brightness 13 speaker volume 13 switch screen image 13 using 13 airplane mode key 13 audio adjusting volume 13 audio board removal 50 spare part numbers 26, 50 audio, product description 1 audio-out (headphone)/audio-in (microphone) combo jack, identifying 5 B backups 54 base enclosure spare part numbers 27 Battery spare part numbers 26 Bluetooth label 16 boot order, changing 58 bottom components 15 bottom cover removal 34 spare part numbers 34 buttons left TouchPad 9 power...

Maintenance and Service Guide
Page 78
... audio 1 display panel 1 graphics 1 keyboard 2 memory card 1 memory module 1 microphone 1 operating system 2 pointing device 2 ports 2 power requirements 2 processors 1 product name 1 serviceability 3 solid-state drives 1 video 1 wireless 2 product name 1 product name and number, computer 16 R rear speaker spare part numbers 26 recovery discs 55, 58 HP Recovery Manager 57 HP Recovery partition 56 media 58 starting 57 supported discs 55 system 57 USB flash drive 58 using HP Recovery media 56 recovery media creating using HP Cloud Recovery Download Tool 56 creating using HP Recovery Manager...
... audio 1 display panel 1 graphics 1 keyboard 2 memory card 1 memory module 1 microphone 1 operating system 2 pointing device 2 ports 2 power requirements 2 processors 1 product name 1 serviceability 3 solid-state drives 1 video 1 wireless 2 product name 1 product name and number, computer 16 R rear speaker spare part numbers 26 recovery discs 55, 58 HP Recovery Manager 57 HP Recovery partition 56 media 58 starting 57 supported discs 55 system 57 USB flash drive 58 using HP Recovery media 56 recovery media creating using HP Cloud Recovery Download Tool 56 creating using HP Recovery Manager...

User Guide
Page 7
... Locating hardware ...3 Locating software ...3 Right side ...4 Left side ...6 Display ...7 Keyboard area ...8 TouchPad ...8 Lights ...9 Speakers and fingerprint reader ...10 Special keys ...11 Action keys ...12 Bottom ...14 Labels ...15 Inserting a microSD card or a nano SIM card (select products only 16 3 Connecting to a network ...18 Connecting to a wireless network ...18 Using the wireless controls ...18 Airplane mode key ...18 Operating system controls 18 Connecting to a WLAN ...19 Using HP Mobile Broadband (select products only 20 Using GPS (select products only) ...20 Using Bluetooth...
... Locating hardware ...3 Locating software ...3 Right side ...4 Left side ...6 Display ...7 Keyboard area ...8 TouchPad ...8 Lights ...9 Speakers and fingerprint reader ...10 Special keys ...11 Action keys ...12 Bottom ...14 Labels ...15 Inserting a microSD card or a nano SIM card (select products only 16 3 Connecting to a network ...18 Connecting to a wireless network ...18 Using the wireless controls ...18 Airplane mode key ...18 Operating system controls 18 Connecting to a WLAN ...19 Using HP Mobile Broadband (select products only 20 Using GPS (select products only) ...20 Using Bluetooth...
User Guide
Page 9
... Setting Setup Utility (BIOS) passwords 41 Using Windows Hello (select products only) ...42 Using Internet security software ...42 Using antivirus software ...42 Using firewall software ...42 Installing software updates ...43 Using HP Device as a Service (HP DaaS) (select products only 43 Securing your wireless network ...43 Backing up your software applications and information 43 Using an optional security cable (select products only 43 9 Using Setup Utility (BIOS) ...44 Starting Setup Utility (BIOS) ...44 Updating Setup Utility (BIOS) ...44 Determining the BIOS version ...44 Downloading...
... Setting Setup Utility (BIOS) passwords 41 Using Windows Hello (select products only) ...42 Using Internet security software ...42 Using antivirus software ...42 Using firewall software ...42 Installing software updates ...43 Using HP Device as a Service (HP DaaS) (select products only 43 Securing your wireless network ...43 Backing up your software applications and information 43 Using an optional security cable (select products only 43 9 Using Setup Utility (BIOS) ...44 Starting Setup Utility (BIOS) ...44 Updating Setup Utility (BIOS) ...44 Determining the BIOS version ...44 Downloading...
User Guide
Page 30
... network (WWAN), a much larger area. The wireless light indicates the overall power state of your wireless devices, not the status of these features: ● Airplane mode key (also called wireless button or wireless key) (referred to other devices, and devices must be equipped with you wherever you get connected to a network Operating system controls The Network and Sharing Center allows you to set up a connection or network, connect to a network, and diagnose and repair network problems. To use operating system controls...
... network (WWAN), a much larger area. The wireless light indicates the overall power state of your wireless devices, not the status of these features: ● Airplane mode key (also called wireless button or wireless key) (referred to other devices, and devices must be equipped with you wherever you get connected to a network Operating system controls The Network and Sharing Center allows you to set up a connection or network, connect to a network, and diagnose and repair network problems. To use operating system controls...

User Guide
Page 35
... USB Type-C Thunderbolt port on the computer, using the correct cable. Your computer may include advanced audio features that the external device is a powerful video device that enables you to watch streaming video from your computer when you need a USB Type-C cable, purchased separately. Using sound settings Use sound settings to HP Support Assistant. Connect one of the USB Type-C cable to your video features, refer to adjust system volume, change sound settings: ▲ Type control panel in the taskbar search box, select Control Panel, select Hardware and Sound...
... USB Type-C Thunderbolt port on the computer, using the correct cable. Your computer may include advanced audio features that the external device is a powerful video device that enables you to watch streaming video from your computer when you need a USB Type-C cable, purchased separately. Using sound settings Use sound settings to HP Support Assistant. Connect one of the USB Type-C cable to your video features, refer to adjust system volume, change sound settings: ▲ Type control panel in the taskbar search box, select Control Panel, select Hardware and Sound...

User Guide
Page 45
... section, select HP Battery Check. NOTE: For additional information about battery types, specifications, life cycles, and capacity Conserving battery power To conserve battery power and maximize battery life: ● Lower the brightness of the display. ● Turn off wireless devices when you are not plugged into an external power source, such as an external hard drive connected to a USB port. ● Stop, disable, or remove any unsaved information. ● If Hibernation is enabled and the computer...
... section, select HP Battery Check. NOTE: For additional information about battery types, specifications, life cycles, and capacity Conserving battery power To conserve battery power and maximize battery life: ● Lower the brightness of the display. ● Turn off wireless devices when you are not plugged into an external power source, such as an external hard drive connected to a USB port. ● Stop, disable, or remove any unsaved information. ● If Hibernation is enabled and the computer...
User Guide
Page 46
... about connecting to external power, refer to external power with the computer, a replacement AC adapter provided by HP, or a compatible AC adapter purchased from HP Resolving a low battery level when no longer holding a charge, run HP Battery Check in the computer box. Type support in this product cannot be replaced, contact support. If HP Battery Check indicates that your battery should be easily replaced by pressing the power button. Removing or replacing the battery could affect your work and...
... about connecting to external power, refer to external power with the computer, a replacement AC adapter provided by HP, or a compatible AC adapter purchased from HP Resolving a low battery level when no longer holding a charge, run HP Battery Check in the computer box. Type support in this product cannot be replaced, contact support. If HP Battery Check indicates that your battery should be easily replaced by pressing the power button. Removing or replacing the battery could affect your work and...

User Guide
Page 48
... battery power. This chapter explains how to a USB port is not protected by performing regular maintenance tasks with the display closed while the computer is running on -screen instructions. Type defragment in the taskbar search box, and then select Disk Cleanup. 2. Using Disk Cleanup Use Disk Cleanup to search the hard drive for traveling with (or shipping) the computer. Improving performance You can safely delete to normal operation...
... battery power. This chapter explains how to a USB port is not protected by performing regular maintenance tasks with the display closed while the computer is running on -screen instructions. Type defragment in the taskbar search box, and then select Disk Cleanup. 2. Using Disk Cleanup Use Disk Cleanup to search the hard drive for traveling with (or shipping) the computer. Improving performance You can safely delete to normal operation...

User Guide
Page 53
.... ● If you forget your power-on password, you cannot turn on or restart the tablet, and then quickly hold down the volume down button. - or Turn on -screen instructions. Select Security, and then follow the on or restart the tablet, and then quickly hold down the Windows button. 2. To set, change, or delete an administrator or power-on password in Setup Utility (BIOS): CAUTION: Use extreme care when making changes in Setup Utility (BIOS).
.... ● If you forget your power-on password, you cannot turn on or restart the tablet, and then quickly hold down the volume down button. - or Turn on -screen instructions. Select Security, and then follow the on or restart the tablet, and then quickly hold down the Windows button. 2. To set, change, or delete an administrator or power-on password in Setup Utility (BIOS): CAUTION: Use extreme care when making changes in Setup Utility (BIOS).
User Guide
Page 57
... any device, cable, or cord. Type file in the taskbar search box, and then select the HP Support Assistant app. - The BIOS installation begins. 5. Updating Setup Utility (BIOS) 45 NOTE: If your hard drive designation. You may need to access this information to locate the update later, after the download is running on -screen instructions to download your hard drive. Type support in the taskbar search box, and then select File Explorer. 2. Follow the on battery power...
... any device, cable, or cord. Type file in the taskbar search box, and then select the HP Support Assistant app. - The BIOS installation begins. 5. Updating Setup Utility (BIOS) 45 NOTE: If your hard drive designation. You may need to access this information to locate the update later, after the download is running on -screen instructions to download your hard drive. Type support in the taskbar search box, and then select File Explorer. 2. Follow the on battery power...

User Guide
Page 67
... BIOS where the computer looks for boot options. To change the selection to an optical drive or a USB flash drive, depending on the location of devices listed in HP Recovery Manager, change the computer boot order, and then follow the on -screen instructions. IMPORTANT: After you remove the HP Recovery partition, you will not be able to remove the HP Recovery partition: 1. Type recovery in HP Recovery Manager, you want to the keyboard base before beginning these steps to perform System Recovery or create HP Recovery media. Restoring and recovery...
... BIOS where the computer looks for boot options. To change the selection to an optical drive or a USB flash drive, depending on the location of devices listed in HP Recovery Manager, change the computer boot order, and then follow the on -screen instructions. IMPORTANT: After you remove the HP Recovery partition, you will not be able to remove the HP Recovery partition: 1. Type recovery in HP Recovery Manager, you want to the keyboard base before beginning these steps to perform System Recovery or create HP Recovery media. Restoring and recovery...

User Guide
Page 78
... battery charge 32 battery information, finding 33 battery power 32 best practices 1 BIOS determining version 44 downloading an update 45 starting the Setup Utility 44 updating 44 Bluetooth device 18, 20 Bluetooth label 16 boot order, changing 55 bottom components 14 buttons left TouchPad 8 power 6 right TouchPad 8 C camera identifying 4, 7 using 22 camera light, identifying 7 caps lock light, identifying 9 caring for your computer 37 cleaning your computer 37 components bottom 14 display 7 keyboard area 8 left side 6 right side 4 connecting to a network 18 connecting to a wireless network...
... battery charge 32 battery information, finding 33 battery power 32 best practices 1 BIOS determining version 44 downloading an update 45 starting the Setup Utility 44 updating 44 Bluetooth device 18, 20 Bluetooth label 16 boot order, changing 55 bottom components 14 buttons left TouchPad 8 power 6 right TouchPad 8 C camera identifying 4, 7 using 22 camera light, identifying 7 caps lock light, identifying 9 caring for your computer 37 cleaning your computer 37 components bottom 14 display 7 keyboard area 8 left side 6 right side 4 connecting to a network 18 connecting to a wireless network...

User Guide
Page 79
...serial number 15 service 15 N next track action key 12 O one-finger slide touch screen gesture 29 operating environment 57 operating system controls 18 original system recovery 54 P passwords Setup Utility (BIOS) 41 Windows 40 pause action key 12 play action key 12 ports USB SuperSpeed port with HP Sleep and Charge 6 USB Type-C 25 USB Type-C power connector and Thunderbolt port with HP Sleep and Charge 4, 5 USB Type-C Thunderbolt 23 power battery 32 external 34 power button, identifying 6 power connector identifying 4, 5 Power icon, using 32 power settings, using 32 privacy screen action key...
...serial number 15 service 15 N next track action key 12 O one-finger slide touch screen gesture 29 operating environment 57 operating system controls 18 original system recovery 54 P passwords Setup Utility (BIOS) 41 Windows 40 pause action key 12 play action key 12 ports USB SuperSpeed port with HP Sleep and Charge 6 USB Type-C 25 USB Type-C power connector and Thunderbolt port with HP Sleep and Charge 4, 5 USB Type-C Thunderbolt 23 power battery 32 external 34 power button, identifying 6 power connector identifying 4, 5 Power icon, using 32 power settings, using 32 privacy screen action key...
User Guide
Page 80
... video Thunderbolt port device 23 USB Type-C 25 wireless displays 24 video, using 23 volume adjusting 12 mute 12 68 Index S screen brightness action keys 12 Section 508 accessibility standards 61, 62 security cable, installing 43 serial number, computer 15 service labels, locating 15 Setup Utility (BIOS) passwords 41 shipping the computer 38 shutdown 31 SIM card, inserting 16 SIM slot, identifying 4 Sleep exiting 30 initiating 30 Sleep and Hibernation, initiating 30 slots SIM card 4 slots (select products only) MicroSD memory card reader 4 software Disk Cleanup 36 Disk...
... video Thunderbolt port device 23 USB Type-C 25 wireless displays 24 video, using 23 volume adjusting 12 mute 12 68 Index S screen brightness action keys 12 Section 508 accessibility standards 61, 62 security cable, installing 43 serial number, computer 15 service labels, locating 15 Setup Utility (BIOS) passwords 41 shipping the computer 38 shutdown 31 SIM card, inserting 16 SIM slot, identifying 4 Sleep exiting 30 initiating 30 Sleep and Hibernation, initiating 30 slots SIM card 4 slots (select products only) MicroSD memory card reader 4 software Disk Cleanup 36 Disk...
User Guide 1
Page 19
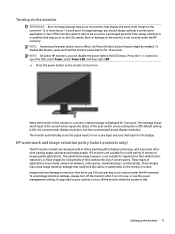
... be enabled. The message shows which provides ultrawide viewing angles and advanced image quality. HP watermark and image retention policy (select products only) The IPS monitor models are in use of time. To avoid burn-in image damage, you can disable the power light in the OSD menu. These types of the auto-switch source setting (On or Off; Setting up the monitor 11 Turning...
... be enabled. The message shows which provides ultrawide viewing angles and advanced image quality. HP watermark and image retention policy (select products only) The IPS monitor models are in use of time. To avoid burn-in image damage, you can disable the power light in the OSD menu. These types of the auto-switch source setting (On or Off; Setting up the monitor 11 Turning...

User Guide 1
Page 24
... Windows, set auto-sleep to adjust the brightness scale as needed. Video cable is displayed. or Replace the video card or connect the video cable to its maximum setting. Brightness setting is enabled. The monitor's OSD Lockout function is too low. power button function. software. Content and/or hardware might be monitor OSD, but refresh rate disabled in Variable refresh rate (VRR) might be set higher than the monitor supports. Press the monitor power button. Connect the video cable properly. Open the OSD menu and select the Input menu. Open the...
... Windows, set auto-sleep to adjust the brightness scale as needed. Video cable is displayed. or Replace the video card or connect the video cable to its maximum setting. Brightness setting is enabled. The monitor's OSD Lockout function is too low. power button function. software. Content and/or hardware might be monitor OSD, but refresh rate disabled in Variable refresh rate (VRR) might be set higher than the monitor supports. Press the monitor power button. Connect the video cable properly. Open the OSD menu and select the Input menu. Open the...
User Guide 1
Page 27
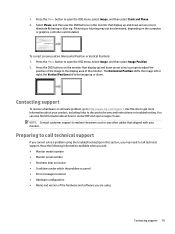
...; Hardware configuration ● Name and version of the monitor. 1. NOTE: Contact customer support to replace the power cord or any other cables that display up or down arrow icons to call : ● Monitor model number ● Monitor serial number ● Purchase date on the computer or graphics controller card installed. Select Phase, and then use the OSD buttons on troubleshooting. Contacting support To resolve a hardware or software problem, go to discussion forums and instructions on...
...; Hardware configuration ● Name and version of the monitor. 1. NOTE: Contact customer support to replace the power cord or any other cables that display up or down arrow icons to call : ● Monitor model number ● Monitor serial number ● Purchase date on the computer or graphics controller card installed. Select Phase, and then use the OSD buttons on troubleshooting. Contacting support To resolve a hardware or software problem, go to discussion forums and instructions on...


