HP Notebook Hard Drives & Solid State Drives Identifying, Preventing, Diagnosing and Recovering from Drive Failures Care and Ma
Page 6
.../support-drivers.html Installing SATA drivers SATA Native Mode is a storage interface technology that are released to SATA AHCI mode • Using Sysprep with Serial ATA hard disk drives. Procedures for lower power consumption on computer systems equipped with SATA in AHCI or NATIVE mode Adding SATA drivers using WinPE can be located at the following URL: http://bizsupport2.austin.hp.com/bc/docs/support/SupportManual/c01600726/c01600726.pdf. Updates...
.../support-drivers.html Installing SATA drivers SATA Native Mode is a storage interface technology that are released to SATA AHCI mode • Using Sysprep with Serial ATA hard disk drives. Procedures for lower power consumption on computer systems equipped with SATA in AHCI or NATIVE mode Adding SATA drivers using WinPE can be located at the following URL: http://bizsupport2.austin.hp.com/bc/docs/support/SupportManual/c01600726/c01600726.pdf. Updates...
User Guide
Page 5
...your hardware and software information 3 Front ...3 Right side ...3 Left side ...4 Display ...6 Top ...7 TouchPad ...7 Lights ...8 Buttons and speakers ...9 Keys ...10 Bottom ...11 Labels ...12 3 Connecting to a network ...14 Connecting to a wireless network ...14 Using the wireless controls 14 Using the wireless button 14 Using operating system controls 14 Using a WLAN ...15 Using an Internet service provider 15 Setting up a WLAN 16 Configuring a wireless router 16 Protecting your WLAN 16 Connecting to a WLAN 17 Using Bluetooth wireless devices 17 Connecting to a wired network ...17...
...your hardware and software information 3 Front ...3 Right side ...3 Left side ...4 Display ...6 Top ...7 TouchPad ...7 Lights ...8 Buttons and speakers ...9 Keys ...10 Bottom ...11 Labels ...12 3 Connecting to a network ...14 Connecting to a wireless network ...14 Using the wireless controls 14 Using the wireless button 14 Using operating system controls 14 Using a WLAN ...15 Using an Internet service provider 15 Setting up a WLAN 16 Configuring a wireless router 16 Protecting your WLAN 16 Connecting to a WLAN 17 Using Bluetooth wireless devices 17 Connecting to a wired network ...17...
User Guide
Page 6
... Connecting a microphone 20 Checking the sound ...21 Using video ...21 Connecting a VGA monitor or projector 21 Connecting an HDMI TV or monitor 22 Configuring audio settings (with HDMI TV 23 Managing your audio and video files 24 5 Using the keyboard and pointing devices 25 Using the keyboard ...25 Using ALT GR key combinations 25 Using the action keys ...25 Using the TouchPad ...27 Turning the TouchPad off or on 27 Navigating ...27 Selecting ...28 Using TouchPad gestures 29 Scrolling ...29 Pinching/Zooming 29 6 Managing power...
... Connecting a microphone 20 Checking the sound ...21 Using video ...21 Connecting a VGA monitor or projector 21 Connecting an HDMI TV or monitor 22 Configuring audio settings (with HDMI TV 23 Managing your audio and video files 24 5 Using the keyboard and pointing devices 25 Using the keyboard ...25 Using ALT GR key combinations 25 Using the action keys ...25 Using the TouchPad ...27 Turning the TouchPad off or on 27 Navigating ...27 Selecting ...28 Using TouchPad gestures 29 Scrolling ...29 Pinching/Zooming 29 6 Managing power...
User Guide
Page 7
...a hard drive ...42 Using Disk Defragmenter 45 Using Disk Cleanup ...45 Adding or replacing memory modules 46 Updating programs and drivers ...48 Cleaning your computer ...48 Cleaning the display, sides, and cover 49 Cleaning the TouchPad and keyboard 49 Traveling with or shipping your computer 49 9 Securing your computer and information 51 Locating your security software ...51 Using passwords ...51 Setting Windows passwords 52 Setting Setup Utility (BIOS) passwords 53 Using Internet security software ...53 Using antivirus software ...53 Using firewall software ...54 Installing software...
...a hard drive ...42 Using Disk Defragmenter 45 Using Disk Cleanup ...45 Adding or replacing memory modules 46 Updating programs and drivers ...48 Cleaning your computer ...48 Cleaning the display, sides, and cover 49 Cleaning the TouchPad and keyboard 49 Traveling with or shipping your computer 49 9 Securing your computer and information 51 Locating your security software ...51 Using passwords ...51 Setting Windows passwords 52 Setting Setup Utility (BIOS) passwords 53 Using Internet security software ...53 Using antivirus software ...53 Using firewall software ...54 Installing software...
User Guide
Page 8
... specific files ...62 Restoring specific files using HP Recovery Manager 62 Restoring specific files using Windows Backup and Restore 62 Recovering the original system using HP Recovery Manager 62 What you need to know 63 Recovering using HP Recovery partition 63 Recovering using the recovery media 63 Changing the computer boot order 64 12 Specifications ...65 Input power ...65 Operating environment ...65 13 Troubleshooting and support ...66 Troubleshooting ...66 Disc drive problems ...66 Wireless connection problems 66 Cannot connect to a WLAN 67 Cannot connect to a preferred network...
... specific files ...62 Restoring specific files using HP Recovery Manager 62 Restoring specific files using Windows Backup and Restore 62 Recovering the original system using HP Recovery Manager 62 What you need to know 63 Recovering using HP Recovery partition 63 Recovering using the recovery media 63 Changing the computer boot order 64 12 Specifications ...65 Input power ...65 Operating environment ...65 13 Troubleshooting and support ...66 Troubleshooting ...66 Disc drive problems ...66 Wireless connection problems 66 Cannot connect to a WLAN 67 Cannot connect to a preferred network...
User Guide
Page 22
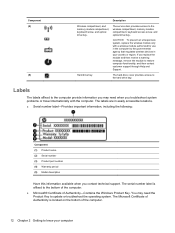
Hard drive bay The hard drive cover provides access to update or troubleshoot the operating system. The service door provides access to know your country or region. Component (4) (5) Description Wireless compartment, and memory module compartment, keyboard screw, and optical drive bay. The serial number label is located on the bottom of Authenticity-Contains the Windows Product Key. If you contact technical support. Labels The labels affixed to restore computer functionality, and then contact customer support through...
Hard drive bay The hard drive cover provides access to update or troubleshoot the operating system. The service door provides access to know your country or region. Component (4) (5) Description Wireless compartment, and memory module compartment, keyboard screw, and optical drive bay. The serial number label is located on the bottom of Authenticity-Contains the Windows Product Key. If you contact technical support. Labels The labels affixed to restore computer functionality, and then contact customer support through...

User Guide
Page 24
... devices, and devices must be equipped with a wireless router or a wireless access point. ● Bluetooth device-Creates a personal area network (PAN) to connect to a wireless network Wireless technology transfers data across radio waves instead of individual devices. Using operating system controls The Network and Sharing Center allows you can use the wireless button to turn on or turn on the model. All of the following wireless devices: ● Wireless local area network (WLAN) device-Connects the computer to wireless local area networks...
... devices, and devices must be equipped with a wireless router or a wireless access point. ● Bluetooth device-Creates a personal area network (PAN) to connect to a wireless network Wireless technology transfers data across radio waves instead of individual devices. Using operating system controls The Network and Sharing Center allows you can use the wireless button to turn on or turn on the model. All of the following wireless devices: ● Wireless local area network (WLAN) device-Connects the computer to wireless local area networks...
User Guide
Page 27
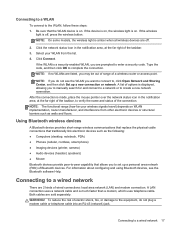
... the list. 4. Connecting to create a new network connection. If the wireless light is much faster than a modem, which uses telephone cable. NOTE: On some models, the wireless light is a security-enabled WLAN, you want to connect to set up a new connection or network. If the WLAN is amber when all wireless devices are prompted to complete the connection. Type the code, and then click OK to enter a security code. NOTE: If no WLANs are sold separately. Using Bluetooth wireless devices A Bluetooth device...
... the list. 4. Connecting to create a new network connection. If the wireless light is much faster than a modem, which uses telephone cable. NOTE: On some models, the wireless light is a security-enabled WLAN, you want to connect to set up a new connection or network. If the WLAN is amber when all wireless devices are prompted to complete the connection. Type the code, and then click OK to enter a security code. NOTE: If no WLANs are sold separately. Using Bluetooth wireless devices A Bluetooth device...
User Guide
Page 30
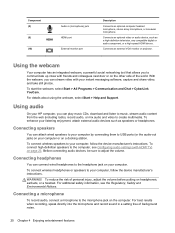
... when recording, speak directly into the microphone and record sound in (microphone) jack HDMI port External monitor port Description Connects an optional computer headset microphone, stereo array microphone, or monaural microphone. Using the webcam Your computer has an integrated webcam, a powerful social networking tool that allows you to the headphone jack on your computer, follow the device manufacturer's instructions. WARNING! Component (8) (9) (10) Audio-in a setting free of personal injury, adjust the volume before putting on headphones, earbuds...
... when recording, speak directly into the microphone and record sound in (microphone) jack HDMI port External monitor port Description Connects an optional computer headset microphone, stereo array microphone, or monaural microphone. Using the webcam Your computer has an integrated webcam, a powerful social networking tool that allows you to the headphone jack on your computer, follow the device manufacturer's instructions. WARNING! Component (8) (9) (10) Audio-in a setting free of personal injury, adjust the volume before putting on headphones, earbuds...

User Guide
Page 35
... pointing device settings, button configuration, click speed, and pointer options, select Start > Control Panel and type mouse in the search box in Setup Utility. NOTE: Depending on opening Setup Utility (BIOS), and then follow the instructions at the factory. To use the alt gr+4 key combination. To type the rupee symbol on a keyboard that is enabled at the bottom of the USB ports on -screen navigation. To activate the assigned function after disabling the action key feature, you can use an external USB mouse...
... pointing device settings, button configuration, click speed, and pointer options, select Start > Control Panel and type mouse in the search box in Setup Utility. NOTE: Depending on opening Setup Utility (BIOS), and then follow the instructions at the factory. To use the alt gr+4 key combination. To type the rupee symbol on a keyboard that is enabled at the bottom of the USB ports on -screen navigation. To activate the assigned function after disabling the action key feature, you can use an external USB mouse...
User Guide
Page 40
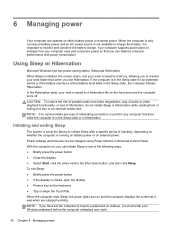
... external media card. NOTE: You cannot initiate any type of networking connection or perform any of information, do not initiate Sleep or Hibernation while reading from or writing to require a password on the hard drive and the computer turns off. Power settings and timeouts can be changed using Power Options in any computer functions while the computer is not available to resume your work is closed, open the display. ● Press a key...
... external media card. NOTE: You cannot initiate any type of networking connection or perform any of information, do not initiate Sleep or Hibernation while reading from or writing to require a password on the hard drive and the computer turns off. Power settings and timeouts can be changed using Power Options in any computer functions while the computer is not available to resume your work is closed, open the display. ● Press a key...
User Guide
Page 43
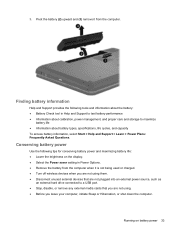
... the display. ● Select the Power saver setting in Help and Support to test battery performance ● Information about calibration, power management, and proper care and storage to a USB port. ● Stop, disable, or remove any external media cards that you are not using. ● Before you are not using them. ● Disconnect unused external devices that are not plugged into an external power source, such as an external hard drive connected to maximize battery...
... the display. ● Select the Power saver setting in Help and Support to test battery performance ● Information about calibration, power management, and proper care and storage to a USB port. ● Stop, disable, or remove any external media cards that you are not using. ● Before you are not using them. ● Disconnect unused external devices that are not plugged into an external power source, such as an external hard drive connected to maximize battery...
User Guide
Page 52
... not touch the connector pins on a removable drive or on the computer. ● Do not use excessive force when inserting a drive into a drive bay. ● When the battery is the only source of your computer Airport conveyer belts and similar security devices that the battery is connected to an external hard drive, initiate Sleep and allow the screen to clear, or properly disconnect the external hard drive. Replacing a hard drive CAUTION: Drives are...
... not touch the connector pins on a removable drive or on the computer. ● Do not use excessive force when inserting a drive into a drive bay. ● When the battery is the only source of your computer Airport conveyer belts and similar security devices that the battery is connected to an external hard drive, initiate Sleep and allow the screen to clear, or properly disconnect the external hard drive. Replacing a hard drive CAUTION: Drives are...
User Guide
Page 55
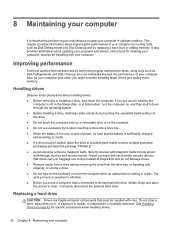
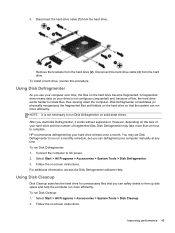
... hard drive cable (3) from the hard drive (2). Follow the on -screen instructions. To install a hard drive, reverse this , the hard drive works harder to locate files, thus slowing down the computer. NOTE: It is not contiguous (sequential) and, because of fragmented files, Disk Defragmenter may set Disk Defragmenter to run on your hard drive and the number of this procedure. To run Disk Cleanup: 1. Select Start > All Programs > Accessories > System Tools > Disk Cleanup. 2. Remove...
... hard drive cable (3) from the hard drive (2). Follow the on -screen instructions. To install a hard drive, reverse this , the hard drive works harder to locate files, thus slowing down the computer. NOTE: It is not contiguous (sequential) and, because of fragmented files, Disk Defragmenter may set Disk Defragmenter to run on your hard drive and the number of this procedure. To run Disk Cleanup: 1. Select Start > All Programs > Accessories > System Tools > Disk Cleanup. 2. Remove...
User Guide
Page 63
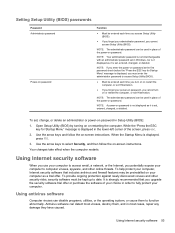
...-screen instructions. When the Startup Menu is set , entered, changed , or deleted. NOTE: Your administrator password is displayed, you must be entered each time you access Setup Utility (BIOS). ● If you cannot access Setup Utility (BIOS). Open Setup Utility (BIOS) by turning on password at the first password check before the "Press the ESC key for Startup Menu" message is displayed in Setup Utility (BIOS): 1. NOTE: The administrator password can be used in Windows, nor is it displayed as it is displayed, press f10. 3. Use the arrow keys...
...-screen instructions. When the Startup Menu is set , entered, changed , or deleted. NOTE: Your administrator password is displayed, you must be entered each time you access Setup Utility (BIOS). ● If you cannot access Setup Utility (BIOS). Open Setup Utility (BIOS) by turning on password at the first password check before the "Press the ESC key for Startup Menu" message is displayed in Setup Utility (BIOS): 1. NOTE: The administrator password can be used in Windows, nor is it displayed as it is displayed, press f10. 3. Use the arrow keys...

User Guide
Page 64
... and information Installing Windows security updates Updates to http://www.hp.com/support. Installing HP and third-party software updates HP recommends that you set up your computer. If you install on your computer. There are released, from the system is installed on the network. When a firewall is monitored and compared with a set up your WLAN on page 48. For more information, see Protecting your wireless network, always enable security...
... and information Installing Windows security updates Updates to http://www.hp.com/support. Installing HP and third-party software updates HP recommends that you set up your computer. If you install on your computer. There are released, from the system is installed on the network. When a firewall is monitored and compared with a set up your WLAN on page 48. For more information, see Protecting your wireless network, always enable security...
User Guide
Page 67
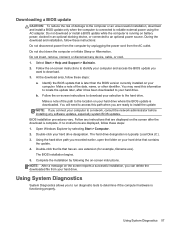
Downloading a BIOS update CAUTION: To reduce the risk of the date, name, or other identifier. Make a note of damage to the computer or an unsuccessful installation, download and install a BIOS update only when the computer is connected to reliable external power using the AC adapter. Follow the on-screen instructions to download your hard drive that are displayed on your selection to a network, consult the network administrator before installing any device, cable, or cord. 1. Using the hard drive path...
Downloading a BIOS update CAUTION: To reduce the risk of the date, name, or other identifier. Make a note of damage to the computer or an unsuccessful installation, download and install a BIOS update only when the computer is connected to reliable external power using the AC adapter. Follow the on-screen instructions to download your hard drive that are displayed on your selection to a network, consult the network administrator before installing any device, cable, or cord. 1. Using the hard drive path...
User Guide
Page 83
... 1 Function key, identifying 10 H hard drive light 5 HDMI configuring audio 23 HDMI port, connecting 22 HDMI port, identifying 4, 20 Hibernation exiting 31 initiated during critical battery level 34 initiating 31 high-definition devices, connecting 22 HP and third-party software updates, installing 54 HP Recovery Manager 62 hubs 36 I input power 65 installing critical security updates 54 optional security cable lock 55 integrated webcam light, identifying 6, 19 internal microphone, identifying 6, 19 Internet connection setup 16 Internet security software, using 53 J jacks audio-in (microphone...
... 1 Function key, identifying 10 H hard drive light 5 HDMI configuring audio 23 HDMI port, connecting 22 HDMI port, identifying 4, 20 Hibernation exiting 31 initiated during critical battery level 34 initiating 31 high-definition devices, connecting 22 HP and third-party software updates, installing 54 HP Recovery Manager 62 hubs 36 I input power 65 installing critical security updates 54 optional security cable lock 55 integrated webcam light, identifying 6, 19 internal microphone, identifying 6, 19 Internet connection setup 16 Internet security software, using 53 J jacks audio-in (microphone...

User Guide
Page 84
... (network) jack, identifying 4 S scrolling TouchPad gesture 29 security cable lock, installing 55 security cable slot, identifying 4 security, wireless 16 serial number 12 serial number, computer 12 service door 46 service labels locating 12 setting password protection on wakeup 31 setup of WLAN 16 Setup Utility (BIOS) passwords 53 shipping the computer 49 shutdown 35 Sleep exiting 30 initiating 30 slots Digital Media 5 security cable 4 software CyberLink PowerDVD 24 Disk Cleanup 45 Disk Defragmenter 45 software updates, installing 54 speakers, identifying 3, 19 storing a battery 34 supported...
... (network) jack, identifying 4 S scrolling TouchPad gesture 29 security cable lock, installing 55 security cable slot, identifying 4 security, wireless 16 serial number 12 serial number, computer 12 service door 46 service labels locating 12 setting password protection on wakeup 31 setup of WLAN 16 Setup Utility (BIOS) passwords 53 shipping the computer 49 shutdown 35 Sleep exiting 30 initiating 30 slots Digital Media 5 security cable 4 software CyberLink PowerDVD 24 Disk Cleanup 45 Disk Defragmenter 45 software updates, installing 54 speakers, identifying 3, 19 storing a battery 34 supported...
User Guide
Page 85
... connection 66 turning off the computer 35 U unresponsive system 35 USB cable, connecting 37 USB devices connecting 36 description 36 removing 37 USB hubs 36 USB ports, identifying 3, 4, 19 using external AC power 34 using passwords 51 using the power meter 31 Windows logo key, identifying 10 Windows passwords 52 Windows security updates, installing 54 Wireless Assistant software 14 wireless button 14 wireless certification label 13 wireless controls button 14 operating system 14 Wireless Assistant software 14 wireless light 8, 14 wireless module compartment, identifying 12 wireless network...
... connection 66 turning off the computer 35 U unresponsive system 35 USB cable, connecting 37 USB devices connecting 36 description 36 removing 37 USB hubs 36 USB ports, identifying 3, 4, 19 using external AC power 34 using passwords 51 using the power meter 31 Windows logo key, identifying 10 Windows passwords 52 Windows security updates, installing 54 Wireless Assistant software 14 wireless button 14 wireless certification label 13 wireless controls button 14 operating system 14 Wireless Assistant software 14 wireless light 8, 14 wireless module compartment, identifying 12 wireless network...


