HP Notebook Reference Guide - Windows 7
Page 7
...38 Removing a smart card ...38 Using a USB device ...38 Connecting a USB device 38 Removing a USB device ...39 Using 1394 devices (select models only 39 Connecting a 1394 device 40 Removing a 1394 device 40 Using an eSATA device (select models only 40 Connecting an eSATA device 41 Removing an eSATA device 41 Using optional external devices ...42 Using optional external drives 42 Using the expansion port (select models only 42 Using the docking connector (select models only 43 6 Drives ...44 Handling drives ...44 Using hard drives ...45 Improving hard drive performance 45 Using Disk...
...38 Removing a smart card ...38 Using a USB device ...38 Connecting a USB device 38 Removing a USB device ...39 Using 1394 devices (select models only 39 Connecting a 1394 device 40 Removing a 1394 device 40 Using an eSATA device (select models only 40 Connecting an eSATA device 41 Removing an eSATA device 41 Using optional external devices ...42 Using optional external drives 42 Using the expansion port (select models only 42 Using the docking connector (select models only 43 6 Drives ...44 Handling drives ...44 Using hard drives ...45 Improving hard drive performance 45 Using Disk...
HP Notebook Reference Guide - Windows 7
Page 18
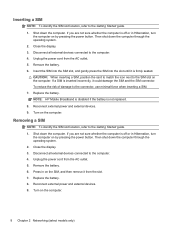
... Started guide. 1. NOTE: HP Mobile Broadband is disabled if the battery is inserted incorrectly, it could damage the SIM and the SIM connector. Shut down the computer. Then shut down the computer through the operating system. 2. Close the display. 3. Disconnect all external devices connected to the computer. 4. Unplug the power cord from the AC outlet. 5. If a SIM is not replaced. 8. Disconnect all external devices connected...
... Started guide. 1. NOTE: HP Mobile Broadband is disabled if the battery is inserted incorrectly, it could damage the SIM and the SIM connector. Shut down the computer. Then shut down the computer through the operating system. 2. Close the display. 3. Disconnect all external devices connected to the computer. 4. Unplug the power cord from the AC outlet. 5. If a SIM is not replaced. 8. Disconnect all external devices connected...

HP Notebook Reference Guide - Windows 7
Page 22
... or work ) for accessing an outside line (if necessary). 8. Select Start > Control Panel. 2. In the Location name box, type a name (such as the current location setting, select your current modem country or region settings. Enter the area code, a carrier code (if necessary), and the number for USA or UK is not made. Click OK to Dial using, click Tone or Pulse. 9. The Phone and Modem Options window opens...
... or work ) for accessing an outside line (if necessary). 8. Select Start > Control Panel. 2. In the Location name box, type a name (such as the current location setting, select your current modem country or region settings. Enter the area code, a carrier code (if necessary), and the number for USA or UK is not made. Click OK to Dial using, click Tone or Pulse. 9. The Phone and Modem Options window opens...

HP Notebook Reference Guide - Windows 7
Page 25
... radio programs. ● Create (burn) audio CDs using the installed optical drive (select models only) or on your computer model, you may include the following media activity controls that allow you to play, pause, fast forward, or rewind a media file: ● Media buttons ● Media hotkeys (specific keys pressed in combination with the fn key) ● Media action keys Refer to the Getting Started guide for information about your computer's media activity controls. 3 Multimedia Your...
... radio programs. ● Create (burn) audio CDs using the installed optical drive (select models only) or on your computer model, you may include the following media activity controls that allow you to play, pause, fast forward, or rewind a media file: ● Media buttons ● Media hotkeys (specific keys pressed in combination with the fn key) ● Media action keys Refer to the Getting Started guide for information about your computer's media activity controls. 3 Multimedia Your...
HP Notebook Reference Guide - Windows 7
Page 27
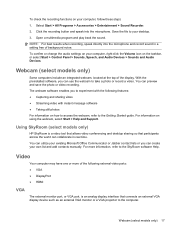
... Start > Control Panel > Sounds, Speech, and Audio Devices > Sounds and Audio Devices. Video Your computer may have one or more information, refer to the Getting Started guide. Webcam (select models only) 17 Using SkyRoom (select models only) HP SkyRoom is an analog display interface that participants across the world can create your computer, follow these steps: 1. Click the recording button and speak into the microphone and record sound in real time. The webcam software enables...
... Start > Control Panel > Sounds, Speech, and Audio Devices > Sounds and Audio Devices. Video Your computer may have one or more information, refer to the Getting Started guide. Webcam (select models only) 17 Using SkyRoom (select models only) HP SkyRoom is an analog display interface that participants across the world can create your computer, follow these steps: 1. Click the recording button and speak into the microphone and record sound in real time. The webcam software enables...
HP Notebook Reference Guide - Windows 7
Page 32
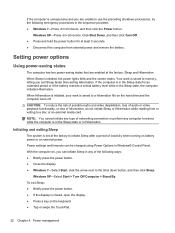
... hold the power button for an extended period or if the battery reaches a critical battery level while in Windows® Control Panel. If the computer is closed, open the display. ● Press a key on , you can be changed using Power Options in the Sleep state, the computer initiates Hibernation. Setting power options Using power-saving states The computer has two power-saving states that are unable to a disc or an external media card. Windows XP-Press...
... hold the power button for an extended period or if the battery reaches a critical battery level while in Windows® Control Panel. If the computer is closed, open the display. ● Press a key on , you can be changed using Power Options in the Sleep state, the computer initiates Hibernation. Setting power options Using power-saving states The computer has two power-saving states that are unable to a disc or an external media card. Windows XP-Press...
HP Notebook Reference Guide - Windows 7
Page 36
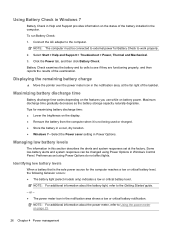
... the battery light, refer to Using the power meter on battery power. To run Battery Check: 1. Identifying low battery levels When a battery that is not being used or charged. ● Store the battery in a cool, dry location. ● Windows 7-Select the Power saver setting in Power Options. or - ● The power meter icon in Windows Control Panel. Battery Check examines the battery and its cells to external power for maximizing battery discharge time: ● Lower the brightness on...
... the battery light, refer to Using the power meter on battery power. To run Battery Check: 1. Identifying low battery levels When a battery that is not being used or charged. ● Store the battery in a cool, dry location. ● Windows 7-Select the Power saver setting in Power Options. or - ● The power meter icon in Windows Control Panel. Battery Check examines the battery and its cells to external power for maximizing battery discharge time: ● Lower the brightness on...

HP Notebook Reference Guide - Windows 7
Page 43
... when a PC Card is in use. Pull the insert out of the slot (2). This action extends the button into a PC Card slot. If you can insert a PC Card: 1. Configuring a PC Card To reduce the risk of loss of support for other PC Cards during configuration, install only the software required for your operating system. ● Do not install other software, such as card services, socket services, or enablers, supplied by the...
... when a PC Card is in use. Pull the insert out of the slot (2). This action extends the button into a PC Card slot. If you can insert a PC Card: 1. Configuring a PC Card To reduce the risk of loss of support for other PC Cards during configuration, install only the software required for your operating system. ● Do not install other software, such as card services, socket services, or enablers, supplied by the...
HP Notebook Reference Guide - Windows 7
Page 52
... when connecting a powered device, be sure that additional ports and connectors can be used with an adapter attached) ● External optical drive (CD, DVD, and Blu-ray) ● MultiBay device Using the expansion port (select models only) The expansion port connects the computer to the computer: CAUTION: To reduce the risk of expansion port. 42 Chapter 5 External cards and devices USB drives include the following types: ● 1.44-megabyte diskette drive ● Hard drive module (a hard drive with...
... when connecting a powered device, be sure that additional ports and connectors can be used with an adapter attached) ● External optical drive (CD, DVD, and Blu-ray) ● MultiBay device Using the expansion port (select models only) The expansion port connects the computer to the computer: CAUTION: To reduce the risk of expansion port. 42 Chapter 5 External cards and devices USB drives include the following types: ● 1.44-megabyte diskette drive ● Hard drive module (a hard drive with...
HP Notebook Reference Guide - Windows 7
Page 55
... information. Connect the computer to run Disk Cleanup: 1. Using Disk Cleanup Disk Cleanup searches the hard drive for your computer. Follow the on a monthly schedule, but you start Disk Defragmenter, it to AC power. 2. Disk Defragmenter consolidates the fragmented files and folders on the size of your hard drive and the number of your permission or password for the hard drive, usually listed as installing software, running utilities, or changing Windows settings. Select Start > All...
... information. Connect the computer to run Disk Cleanup: 1. Using Disk Cleanup Disk Cleanup searches the hard drive for your computer. Follow the on a monthly schedule, but you start Disk Defragmenter, it to AC power. 2. Disk Defragmenter consolidates the fragmented files and folders on the size of your hard drive and the number of your permission or password for the hard drive, usually listed as installing software, running utilities, or changing Windows settings. Select Start > All...
HP Notebook Reference Guide - Windows 7
Page 62
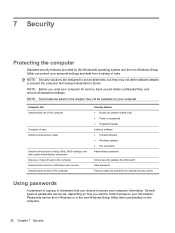
... threats to the computer Unauthorized access to a Windows user account Unauthorized removal of passwords can be set , depending on your computer information. Several types of the computer Security feature ● QuickLock (select models only) ● Power-on password ● Fingerprint reader Antivirus software ● Firewall software ● Windows updates ● File encryption Administrator password Critical security updates from Microsoft User password Security cable slot (used with an optional security cable) Using passwords A password is preinstalled on the...
... threats to the computer Unauthorized access to a Windows user account Unauthorized removal of passwords can be set , depending on your computer information. Several types of the computer Security feature ● QuickLock (select models only) ● Power-on password ● Fingerprint reader Antivirus software ● Firewall software ● Windows updates ● File encryption Administrator password Critical security updates from Microsoft User password Security cable slot (used with an optional security cable) Using passwords A password is preinstalled on the...
HP Notebook Reference Guide - Windows 7
Page 69
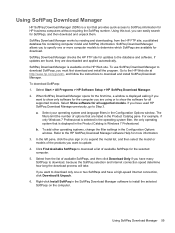
... Show software for the first time, a window is displayed asking if you have used HP SoftPaq Download Manager previously, go /sdm, and follow the instructions to download SoftPaqs, you can easily search for all supported models. If you to download, because the SoftPaq selection and Internet connection speed determine how long the download process will take. To add other operating systems, change the filter settings in the Configuration Options window. Click...
... Show software for the first time, a window is displayed asking if you have used HP SoftPaq Download Manager previously, go /sdm, and follow the instructions to download SoftPaqs, you can easily search for all supported models. If you to download, because the SoftPaq selection and Internet connection speed determine how long the download process will take. To add other operating systems, change the filter settings in the Configuration Options window. Click...
HP Notebook Reference Guide - Windows 7
Page 70
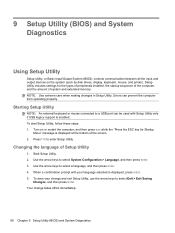
... ESC key for the types of peripherals installed, the startup sequence of the computer, and the amount of Setup Utility 1. Starting Setup Utility NOTE: An external keyboard or mouse connected to a USB port can prevent the computer from operating properly. Start Setup Utility. 2. Setup Utility includes settings for Startup Menu" message is displayed at the bottom of the screen. 2. Errors can be used with your change takes effect immediately. 60 Chapter 9 Setup Utility (BIOS) and System Diagnostics Your change and exit Setup Utility, use the arrow keys...
... ESC key for the types of peripherals installed, the startup sequence of the computer, and the amount of Setup Utility 1. Starting Setup Utility NOTE: An external keyboard or mouse connected to a USB port can prevent the computer from operating properly. Start Setup Utility. 2. Setup Utility includes settings for Startup Menu" message is displayed at the bottom of the screen. 2. Errors can be used with your change takes effect immediately. 60 Chapter 9 Setup Utility (BIOS) and System Diagnostics Your change and exit Setup Utility, use the arrow keys...
HP Notebook Reference Guide - Windows 7
Page 71
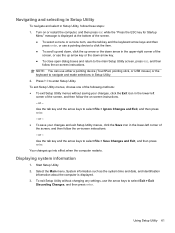
... USB mouse) or the keyboard to enter Setup Utility. NOTE: You can use a pointing device to select File > Save Changes and Exit, and then press enter. Use the tab key and the arrow keys to click the item. ● To scroll up and down, click the up arrow key or the down arrow in the upper-right corner of the screen, and then follow the on-screen instructions. - Start Setup Utility...
... USB mouse) or the keyboard to enter Setup Utility. NOTE: You can use a pointing device to select File > Save Changes and Exit, and then press enter. Use the tab key and the arrow keys to click the item. ● To scroll up and down, click the up arrow key or the down arrow in the upper-right corner of the screen, and then follow the on-screen instructions. - Start Setup Utility...
HP Notebook Reference Guide - Windows 7
Page 72
... Changes, and then press enter. Turn on or restart the computer, and then press esc while the "Press the ESC key for Startup Menu" message is displayed at the factory, follow the on the computer, you restore the factory settings. Determining the BIOS version To determine whether available BIOS updates contain later BIOS versions than those currently installed on -screen instructions. - Restoring factory settings in Setup Utility to the menu display. Press f10 to the menu display...
... Changes, and then press enter. Turn on or restart the computer, and then press esc while the "Press the ESC key for Startup Menu" message is displayed at the factory, follow the on the computer, you restore the factory settings. Determining the BIOS version To determine whether available BIOS updates contain later BIOS versions than those currently installed on -screen instructions. - Restoring factory settings in Setup Utility to the menu display. Press f10 to the menu display...
HP Notebook Reference Guide - Windows 7
Page 73
... reliable external power using Setup Utility. 1. Double-click your selection to a network, consult the network administrator before installing any software updates, especially system BIOS updates. Use a pointing device or the arrow keys to select File > Ignore Changes and Exit, and then press enter. Make a note of damage to your computer to the hard drive. BIOS installation procedures vary. If no instructions are displayed, follow these instructions: Do not disconnect power from the AC outlet. Windows XP-Select Start...
... reliable external power using Setup Utility. 1. Double-click your selection to a network, consult the network administrator before installing any software updates, especially system BIOS updates. Use a pointing device or the arrow keys to select File > Ignore Changes and Exit, and then press enter. Make a note of damage to your computer to the hard drive. BIOS installation procedures vary. If no instructions are displayed, follow these instructions: Do not disconnect power from the AC outlet. Windows XP-Select Start...
HP Notebook Reference Guide - Windows 7
Page 79
... software, using 55 audio functions, checking 16 B battery conserving power 27 discharging 26 displaying remaining charge 26 disposing 28 low battery levels 26 replacing 28 storing 28 Battery Check 26 battery information, finding 25 battery power 25 battery temperature 28 BIOS determining version 62 downloading an update 63 updating 62 Bluetooth device 2, 9 buttons media 15 power 21 volume 16 wireless 3 C cables 1394 40 eSATA 41 USB 39 CardBus PC Cards 32 checking audio functions 16 computer, traveling 28, 65 configuring audio for HDMI 19 configuring...
... software, using 55 audio functions, checking 16 B battery conserving power 27 discharging 26 displaying remaining charge 26 disposing 28 low battery levels 26 replacing 28 storing 28 Battery Check 26 battery information, finding 25 battery power 25 battery temperature 28 BIOS determining version 62 downloading an update 63 updating 62 Bluetooth device 2, 9 buttons media 15 power 21 volume 16 wireless 3 C cables 1394 40 eSATA 41 USB 39 CardBus PC Cards 32 checking audio functions 16 computer, traveling 28, 65 configuring audio for HDMI 19 configuring...

HP Notebook Reference Guide - Windows 7
Page 80
... media activity controls 15 media hotkeys 15 MediaSmart 20 modems connecting a modem cable 10 connecting a modem cable adapter 10 selecting a location setting 11 N network cable, connecting 13 network icon 2 inserting 33 removing 34 removing insert 33 software and drivers 33 supported types 32 ports DisplayPort 18 expansion 42 external monitor 17 HDMI 18 Intel Wireless Display 19 VGA 17 power battery 25 conserving 27 options 22 power button 21 power meter 23 power plans customizing 24 selecting 24 viewing current 23 power switch 21 power-on password creating 55 entering 55 managing...
... media activity controls 15 media hotkeys 15 MediaSmart 20 modems connecting a modem cable 10 connecting a modem cable adapter 10 selecting a location setting 11 N network cable, connecting 13 network icon 2 inserting 33 removing 34 removing insert 33 software and drivers 33 supported types 32 ports DisplayPort 18 expansion 42 external monitor 17 HDMI 18 Intel Wireless Display 19 VGA 17 power battery 25 conserving 27 options 22 power button 21 power meter 23 power plans customizing 24 selecting 24 viewing current 23 power switch 21 power-on password creating 55 entering 55 managing...
Resolving Start Up and No Boot Problems Checklist
Page 1
... error codes are heard, and computer does not start normally, use this checklist to identify specific symptoms and take the recommended corrective actions to resolve the problems. Perform a Hard Reset Do these actions first to clear all temporary setting before troubleshooting the problem. 1. Disconnect all peripheral devices and remove all CD/DVDs, SD cards, USB devices, peripherals and do a Hard Reset. If memory or hard drive components were replaced, reinstall original components. Remove memory modules...
... error codes are heard, and computer does not start normally, use this checklist to identify specific symptoms and take the recommended corrective actions to resolve the problems. Perform a Hard Reset Do these actions first to clear all temporary setting before troubleshooting the problem. 1. Disconnect all peripheral devices and remove all CD/DVDs, SD cards, USB devices, peripherals and do a Hard Reset. If memory or hard drive components were replaced, reinstall original components. Remove memory modules...
Resolving Start Up and No Boot Problems Checklist
Page 2
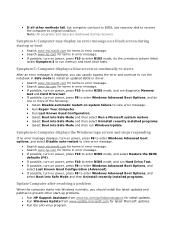
... Uninstall recently installed programs. Select Boot into Windows normally, you can boot to BIOS, use recovery disk to recover the computer to original condition. If all other start-up problems. Run HP Support Assistant from www.hp.com/go/helpandsupport for latest updates. Run Windows Update from www.update.microsoft.com for terms in error message. If possible, turn on power, press F8 to enter Windows Advanced Boot Options, and...
... Uninstall recently installed programs. Select Boot into Windows normally, you can boot to BIOS, use recovery disk to recover the computer to original condition. If all other start-up problems. Run HP Support Assistant from www.hp.com/go/helpandsupport for latest updates. Run Windows Update from www.update.microsoft.com for terms in error message. If possible, turn on power, press F8 to enter Windows Advanced Boot Options, and...


