Quick Start Guide
Page 6
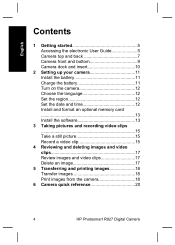
... Setting up your camera 11 Install the battery 11 Charge the battery 11 Turn on the camera 12 Choose the language 12 Set the region 12 Set the date and time 12 Install and format an optional memory card 13 Install the software 13 3 Taking pictures and recording video clips 15 Take a still picture 15 Record a video clip 15 4 Reviewing and deleting images and video clips 17 Review images and video clips 17 Delete an image 17 5 Transferring and printing images 18 Transfer images 18 Print images from the camera 18 6 Camera quick reference 20 4 HP Photosmart R927 Digital Camera
... Setting up your camera 11 Install the battery 11 Charge the battery 11 Turn on the camera 12 Choose the language 12 Set the region 12 Set the date and time 12 Install and format an optional memory card 13 Install the software 13 3 Taking pictures and recording video clips 15 Take a still picture 15 Record a video clip 15 4 Reviewing and deleting images and video clips 17 Review images and video clips 17 Delete an image 17 5 Transferring and printing images 18 Transfer images 18 Print images from the camera 18 6 Camera quick reference 20 4 HP Photosmart R927 Digital Camera

Quick Start Guide
Page 8
... installation screen. Getting assistance ● For tips and tools to your camera more effectively, visit www.hp.com/photosmart (English only) or www.hp.com. ● For product assistance, diagnostics, and driver downloads 24x7, visit www.hp.com/support. ● For help with the HP Photosmart Software, see the onlne help you use your computer when you install the HP Photosmart Software. The electronic User Guide is also copied to help for the HP Photosmart Software. 6 HP Photosmart R927 Digital Camera English To view the User Guide: 1. On Windows: Click View User Guide...
... installation screen. Getting assistance ● For tips and tools to your camera more effectively, visit www.hp.com/photosmart (English only) or www.hp.com. ● For product assistance, diagnostics, and driver downloads 24x7, visit www.hp.com/support. ● For help with the HP Photosmart Software, see the onlne help you use your computer when you install the HP Photosmart Software. The electronic User Guide is also copied to help for the HP Photosmart Software. 6 HP Photosmart R927 Digital Camera English To view the User Guide: 1. On Windows: Click View User Guide...
Quick Start Guide
Page 21
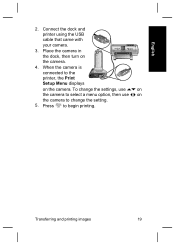
To change the setting. 5. Connect the dock and printer using the USB cable that came with your camera. 3. Transferring and printing images 19 English 2. Place the camera in the dock, then turn on the camera to select a menu option, then use on the camera to change the settings, use on the camera. 4. Press to the printer, the Print Setup Menu displays on the camera. When the camera is connected to begin printing.
To change the setting. 5. Connect the dock and printer using the USB cable that came with your camera. 3. Transferring and printing images 19 English 2. Place the camera in the dock, then turn on the camera to select a menu option, then use on the camera to change the settings, use on the camera. 4. Press to the printer, the Print Setup Menu displays on the camera. When the camera is connected to begin printing.
Quick Start Guide
Page 24
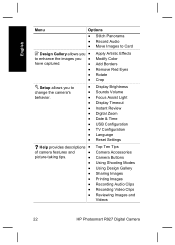
... Sounds Volume ● Focus Assist Light ● Display Timeout ● Instant Review ● Digital Zoom ● Date & Time ● USB Configuration ● TV Configuration ● Language ● Reset Settings Help provides descriptions ● of camera features and ● picture-taking tips. ● ● ● ● ● ● ● ● Top Ten Tips Camera Accessories Camera Buttons Using Shooting Modes Using Design Gallery Sharing Images Printing Images Recording Audio Clips Recording Video Clips Reviewing Images and Videos 22 HP Photosmart R927...
... Sounds Volume ● Focus Assist Light ● Display Timeout ● Instant Review ● Digital Zoom ● Date & Time ● USB Configuration ● TV Configuration ● Language ● Reset Settings Help provides descriptions ● of camera features and ● picture-taking tips. ● ● ● ● ● ● ● ● Top Ten Tips Camera Accessories Camera Buttons Using Shooting Modes Using Design Gallery Sharing Images Printing Images Recording Audio Clips Recording Video Clips Reviewing Images and Videos 22 HP Photosmart R927...
Warranty and Regulatory Information
Page 4
... Warranty Statement (LWS) are Customer's sole and exclusive remedies. 2. Grant Customer additional warranty rights; 2 HP Photosmart R927 warranty Software, media, parts, accessories, supplies, or power adapters or sources not provided or supported by Customer. 2. Operation or other appropriate factors. 6. Limitations of warranty service may contain remanufactured parts, components, or materials equivalent to that is covered by local law, the remedies provided...
... Warranty Statement (LWS) are Customer's sole and exclusive remedies. 2. Grant Customer additional warranty rights; 2 HP Photosmart R927 warranty Software, media, parts, accessories, supplies, or power adapters or sources not provided or supported by Customer. 2. Operation or other appropriate factors. 6. Limitations of warranty service may contain remanufactured parts, components, or materials equivalent to that is covered by local law, the remedies provided...
Warranty and Regulatory Information
Page 6
... period begins on the date of batteries, follow the battery manufacturer's disposal and recycling instructions or the guidelines that are Customer's sole and exclusive remedies. 4 HP Photosmart R927 warranty b. Operation or other appropriate factors. 6. HP's limited warranty is valid in the camera when the camera is covered by HP's limited warranty, HP may, within a reasonable time after being replaced. 8. Contact an authorized HP Service Center for the...
... period begins on the date of batteries, follow the battery manufacturer's disposal and recycling instructions or the guidelines that are Customer's sole and exclusive remedies. 4 HP Photosmart R927 warranty b. Operation or other appropriate factors. 6. HP's limited warranty is valid in the camera when the camera is covered by HP's limited warranty, HP may, within a reasonable time after being replaced. 8. Contact an authorized HP Service Center for the...
Warranty and Regulatory Information
Page 8
...-user customer (Customer) that the operation of purchase by HP; Software, media, parts, accessories, supplies, or power adapters or sources not provided or supported by Customer. 2. or, c. Hewlett-Packard (HP) warrants to execute programming instructions. The warranty period begins on usage and other appropriate factors. 6. Improper use of a Product, and does not cover any Product will also void your camera. Operation or other problems...
...-user customer (Customer) that the operation of purchase by HP; Software, media, parts, accessories, supplies, or power adapters or sources not provided or supported by Customer. 2. or, c. Hewlett-Packard (HP) warrants to execute programming instructions. The warranty period begins on usage and other appropriate factors. 6. Improper use of a Product, and does not cover any Product will also void your camera. Operation or other problems...
Warranty and Regulatory Information
Page 10
... 8 HP Photosmart R927 warranty This regulatory number should not be free from defects in the camera when the camera is covered by HP for 3 years. Contact an authorized HP Service Center for your product is assigned a Regulatory Model Number. HP limited warranty statement- Camera hardware One year. The warranty period begins on the date of limited warranty 1. Use only the AC power adapter or camera docks approved by HP's limited...
... 8 HP Photosmart R927 warranty This regulatory number should not be free from defects in the camera when the camera is covered by HP for 3 years. Contact an authorized HP Service Center for your product is assigned a Regulatory Model Number. HP limited warranty statement- Camera hardware One year. The warranty period begins on the date of limited warranty 1. Use only the AC power adapter or camera docks approved by HP's limited...
User Guide
Page 9
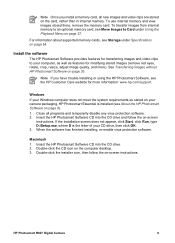
... images (remove red eyes, rotate, crop, resize, adjust image quality, and more information: www.hp.com/support. Insert the HP Photosmart Software CD into the CD drive. 2. Double-click the installer icon, then follow the on page 9). 1. To use internal memory and view images stored there, remove the memory card. Install the software The HP Photosmart Software provides features for transferring images and video clips to Card under Specifications on page 54. If the installation screen does not appear, click Start, click Run, type D:\Setup...
... images (remove red eyes, rotate, crop, resize, adjust image quality, and more information: www.hp.com/support. Insert the HP Photosmart Software CD into the CD drive. 2. Double-click the installer icon, then follow the on page 9). 1. To use internal memory and view images stored there, remove the memory card. Install the software The HP Photosmart Software provides features for transferring images and video clips to Card under Specifications on page 54. If the installation screen does not appear, click Start, click Run, type D:\Setup...
User Guide
Page 17
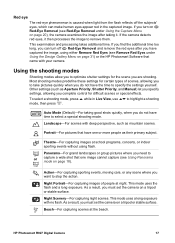
... subjects' eyes, which can turn on Red-Eye Removal (see Red-Eye Removal under Using the Design Gallery Menu on page 31) or the HP Photosmart Software that have one image cannot capture (see Remove Red Eyes under Using the Capture Menu on page 18). to highlight a shooting Auto Mode (Default)-For taking it then processes the image to select a special shooting mode. Red eye The red-eye phenomenon is caused when light from the flash reflects off Red-Eye Removal and remove the red eyes after taking good shots quickly, when...
... subjects' eyes, which can turn on Red-Eye Removal (see Red-Eye Removal under Using the Design Gallery Menu on page 31) or the HP Photosmart Software that have one image cannot capture (see Remove Red Eyes under Using the Capture Menu on page 18). to highlight a shooting Auto Mode (Default)-For taking it then processes the image to select a special shooting mode. Red eye The red-eye phenomenon is caused when light from the flash reflects off Red-Eye Removal and remove the red eyes after taking good shots quickly, when...
User Guide
Page 19
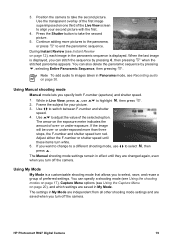
... can also delete the panoramic sequence by pressing , then pressing when the stitched panorama appears. The settings in effect until these items turn red. Use the transparent overlay of the first image superimposed on the exposure meter indicates the amount of the Live View screen to take the second picture. 5. When the last image is displayed. 3. Position the camera to align your picture. 3. Press the Shutter button to adjust the value...
... can also delete the panoramic sequence by pressing , then pressing when the stitched panorama appears. The settings in effect until these items turn red. Use the transparent overlay of the first image superimposed on the exposure meter indicates the amount of the Live View screen to take the second picture. 5. When the last image is displayed. 3. Position the camera to align your picture. 3. Press the Shutter button to adjust the value...
User Guide
Page 21
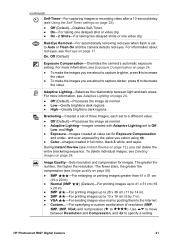
... full color, black & white, and sepia. The fewer stars, the greater the compression (see Deleting images on page 24. ● Off (Default)-Processes the image as normal. ● Adaptive Lighting-Images created with Adaptive Lighting set to Off, Low, and High. ● Exposure-Images created at value set to Auto or Flash On and the camera detects red eyes. During Instant Review (see Using the Self-Timer settings on page 23). ● Off (Default)-Disables Self-Timer. ● On-For taking...
... full color, black & white, and sepia. The fewer stars, the greater the compression (see Deleting images on page 24. ● Off (Default)-Processes the image as normal. ● Adaptive Lighting-Images created with Adaptive Lighting set to Off, Low, and High. ● Exposure-Images created at value set to Auto or Flash On and the camera detects red eyes. During Instant Review (see Using the Self-Timer settings on page 23). ● Off (Default)-Disables Self-Timer. ● On-For taking...
User Guide
Page 24
... it resets to the default Off setting when you turn out gray without the use Exposure Compensation to override the camera's automatic exposure setting. The Image Display remains off the camera. The Burst setting remains in the scene. The Self-Timer setting resets to the default Off setting after the picture or video clip is useful in Instant Review (see Instant Review on page 20). For more pictures as quickly as possible until it . Adaptive Lighting This setting balances the...
... it resets to the default Off setting when you turn out gray without the use Exposure Compensation to override the camera's automatic exposure setting. The Image Display remains off the camera. The Burst setting remains in the scene. The Self-Timer setting resets to the default Off setting after the picture or video clip is useful in Instant Review (see Instant Review on page 20). For more pictures as quickly as possible until it . Adaptive Lighting This setting balances the...

User Guide
Page 25
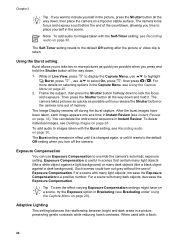
... if taken without a flash at ISO 100, use a tripod. You can also adjust the white balance to the image. HP Photosmart R927 Digital Camera 25 Tip To see Bracketing under Using the Capture Menu on a scene, use the Adaptive Lighting option in low light conditions without a flash or a tripod. Higher ISO speeds produce pictures with more accurately and ensuring that a flash wouldn't reach. If taking pictures in slower shutter speeds. For example, the Sun setting produces a warmer look...
... if taken without a flash at ISO 100, use a tripod. You can also adjust the white balance to the image. HP Photosmart R927 Digital Camera 25 Tip To see Bracketing under Using the Capture Menu on a scene, use the Adaptive Lighting option in low light conditions without a flash or a tripod. Higher ISO speeds produce pictures with more accurately and ensuring that a flash wouldn't reach. If taking pictures in slower shutter speeds. For example, the Sun setting produces a warmer look...
User Guide
Page 28
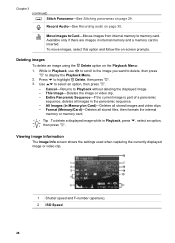
... displayed image or video clip. 1 Shutter speed and F-number (aperture). 2 ISO Speed. 28 Available only if there are images in internal memory and a memory card is part of a panoramic sequence, deletes all images in Playback, use to scroll to the image you want to delete, then press to highlight Delete, then press . 3. While in the panoramic sequence. - All Images (in Playback, press , select an option, then press . Record Audio-See Recording audio on Card)-Deletes all stored files, then formats the internal memory or memory card...
... displayed image or video clip. 1 Shutter speed and F-number (aperture). 2 ISO Speed. 28 Available only if there are images in internal memory and a memory card is part of a panoramic sequence, deletes all images in Playback, use to scroll to the image you want to delete, then press to highlight Delete, then press . 3. While in the panoramic sequence. - All Images (in Playback, press , select an option, then press . Record Audio-See Recording audio on Card)-Deletes all stored files, then formats the internal memory or memory card...
User Guide
Page 36
... set the camera's USB Configuration to Disk Drive (see Printing panoramas from the camera 36 For more information about how to print still images and frames saved from a video clip (see Saving frames from the camera to a printer, see USB Configuration under Using the Setup Menu on your computer. 5. Using a memory card reader You can connect the camera using the dock to any PictBridge-certified printer to copy files, visit Mac help . Either the HP Photosmart Software, Image Capture, or iPhoto starts automatically and guides...
... set the camera's USB Configuration to Disk Drive (see Printing panoramas from the camera 36 For more information about how to print still images and frames saved from a video clip (see Saving frames from the camera to a printer, see USB Configuration under Using the Setup Menu on your computer. 5. Using a memory card reader You can connect the camera using the dock to any PictBridge-certified printer to copy files, visit Mac help . Either the HP Photosmart Software, Image Capture, or iPhoto starts automatically and guides...

User Guide
Page 37
... that the printer is turned on, there is connected to Digital Camera (see Stitching panoramas on the camera. - When you want to a non-HP printer and encounter problems with your printer manufacturer. Follow Steps 1 to the Print Setup Menu. 5. Check that you have panorama paper in the printer. 2. Connect the dock and printer using the USB cable that the camera's USB Configuration is set to the printer, the Print Setup Menu displays on page 29) directly to begin printing. HP Photosmart R927 Digital Camera 37 Verify...
... that the printer is turned on, there is connected to Digital Camera (see Stitching panoramas on the camera. - When you want to a non-HP printer and encounter problems with your printer manufacturer. Follow Steps 1 to the Print Setup Menu. 5. Check that you have panorama paper in the printer. 2. Connect the dock and printer using the USB cable that the camera's USB Configuration is set to the printer, the Print Setup Menu displays on page 29) directly to begin printing. HP Photosmart R927 Digital Camera 37 Verify...

User Guide
Page 41
.... ● High-For very bright lighting conditions. Use to highlight a menu option, then press to the computer on page 8. Display Brightness-Adjusts the brightness of your picture. Sounds Volume-Adjusts the speaker volume for the camera's behavior. 1. Focus Assist Light-Enables the focus assist light used in Instant Review. Never, 15, 30, 45 (Default), 60 seconds. Instant Review-Adjusts the time an image or video clip is displayed in low-light situations. Digital Zoom-Enables or disables digital zoom. Date & Time-Sets the date and time. HP Photosmart R927 Digital Camera 41
.... ● High-For very bright lighting conditions. Use to highlight a menu option, then press to the computer on page 8. Display Brightness-Adjusts the brightness of your picture. Sounds Volume-Adjusts the speaker volume for the camera's behavior. 1. Focus Assist Light-Enables the focus assist light used in Instant Review. Never, 15, 30, 45 (Default), 60 seconds. Instant Review-Adjusts the time an image or video clip is displayed in low-light situations. Digital Zoom-Enables or disables digital zoom. Date & Time-Sets the date and time. HP Photosmart R927 Digital Camera 41
User Guide
Page 57
... D Date & Time 8, 41 Date & Time Imprint 23 deleting images 5, 28 Design Gallery 31 digital zoom 16, 41 dimensions 55 direct print 36 Display Brightness 41 Display Timeout 41 dock 6 Document mode 18 E e-mail images 38 exposure 14, 18, 19 Exposure Compensation 21, 24 F F-number 54 flash red-eye removal 16, 17, 21 working range 55 Flash button 5 focal length 54 focus auto focus 12 Auto Focus Area 22 brackets 12 focus lock 13 Manual Focus 15 optimizing 13 settings 14, 54 Focus Assist light 41 Focus button 5 format memory card 8 G getting assistance 48 H HP Photosmart...
... D Date & Time 8, 41 Date & Time Imprint 23 deleting images 5, 28 Design Gallery 31 digital zoom 16, 41 dimensions 55 direct print 36 Display Brightness 41 Display Timeout 41 dock 6 Document mode 18 E e-mail images 38 exposure 14, 18, 19 Exposure Compensation 21, 24 F F-number 54 flash red-eye removal 16, 17, 21 working range 55 Flash button 5 focal length 54 focus auto focus 12 Auto Focus Area 22 brackets 12 focus lock 13 Manual Focus 15 optimizing 13 settings 14, 54 Focus Assist light 41 Focus button 5 format memory card 8 G getting assistance 48 H HP Photosmart...
User Guide
Page 58
... reset camera 43 Reset Settings 42 resolution 54 reviewing images 26 S safety precautions for batteries 50, 52 Saturation 23 Saved Settings, My Mode 20 selecting images for destinations 39, 40 Self-Timer light 6 setting 21, 23 sending individual images 39 set date and time 8 setting up destinations 38 settings reset 42 Setup Menu 41 Share button 5 share pictures 38 Sharpness 23 shooting mode 17 Shutter button 5, 12 Shutter Priority mode 18 shutter speed 18, 19, 54 slideshow 29 Snow mode 18 software install 9 solving problems 43 sounds of camera 41 Sounds Volume...
... reset camera 43 Reset Settings 42 resolution 54 reviewing images 26 S safety precautions for batteries 50, 52 Saturation 23 Saved Settings, My Mode 20 selecting images for destinations 39, 40 Self-Timer light 6 setting 21, 23 sending individual images 39 set date and time 8 setting up destinations 38 settings reset 42 Setup Menu 41 Share button 5 share pictures 38 Sharpness 23 shooting mode 17 Shutter button 5, 12 Shutter Priority mode 18 shutter speed 18, 19, 54 slideshow 29 Snow mode 18 software install 9 solving problems 43 sounds of camera 41 Sounds Volume...


