HP Pavilion 14 Notebook PC HP Pavilion 14 TouchSmart Notebook PC Maintenance and Service Guide
Page 8
...75 Downloading HP PC Hardware Diagnostics (UEFI) to a USB device 76 8 Ubuntu Linux - Service door ...38 Memory module ...39 Optical drive ...40 6 Removal and replacement procedures for Authorized Service Provider parts 42 Component replacement procedures 42 Display subcomponents (bezel, webcamera, panel 43 Top cover ...47 Hard drive ...51 Power button board ...53 TouchPad button board ...54 WLAN module ...55 System board ...57 RTC battery ...61 Fan ...62 Heat sink assembly ...63 Power connector cable ...67 Speakers ...68 Display assembly ...69 7 Windows - Using Setup Utility (BIOS) and...
...75 Downloading HP PC Hardware Diagnostics (UEFI) to a USB device 76 8 Ubuntu Linux - Service door ...38 Memory module ...39 Optical drive ...40 6 Removal and replacement procedures for Authorized Service Provider parts 42 Component replacement procedures 42 Display subcomponents (bezel, webcamera, panel 43 Top cover ...47 Hard drive ...51 Power button board ...53 TouchPad button board ...54 WLAN module ...55 System board ...57 RTC battery ...61 Fan ...62 Heat sink assembly ...63 Power connector cable ...67 Speakers ...68 Display assembly ...69 7 Windows - Using Setup Utility (BIOS) and...
HP Pavilion 14 Notebook PC HP Pavilion 14 TouchSmart Notebook PC Maintenance and Service Guide
Page 85
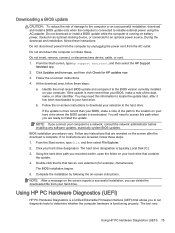
... hard drive where the BIOS update is functioning properly. From the Start screen, type hp support assistant, and then select the HP Support Assistant app. 2. If the update is more recent than your BIOS, make a note of damage to the computer or an unsuccessful installation, download and install a BIOS update only when the computer is more recent than your BIOS, make a note of the path to reliable external power using the AC adapter. You may need to a network...
... hard drive where the BIOS update is functioning properly. From the Start screen, type hp support assistant, and then select the HP Support Assistant app. 2. If the update is more recent than your BIOS, make a note of damage to the computer or an unsuccessful installation, download and install a BIOS update only when the computer is more recent than your BIOS, make a note of the path to reliable external power using the AC adapter. You may need to a network...
HP Pavilion 14 Notebook PC HP Pavilion 14 TouchSmart Notebook PC Maintenance and Service Guide
Page 93
... create DVD recovery media, you can use an external optical drive (purchased separately) to create recovery discs, or you can also find contact information from the HP website. Do not interrupt the creation process. ● If necessary, you can take up to a USB port on page 84. The next time you start HP Recovery Manager, you have finished creating all of expertise: ● Windows offers several options for installation through the Drivers...
... create DVD recovery media, you can use an external optical drive (purchased separately) to create recovery discs, or you can also find contact information from the HP website. Do not interrupt the creation process. ● If necessary, you can take up to a USB port on page 84. The next time you start HP Recovery Manager, you have finished creating all of expertise: ● Windows offers several options for installation through the Drivers...
HP Pavilion 14 Notebook PC HP Pavilion 14 TouchSmart Notebook PC Maintenance and Service Guide
Page 94
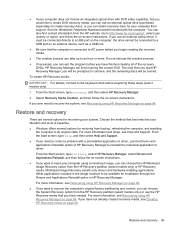
... Windows - Recovering using HP Recovery Manager HP Recovery Manager software allows you to recover the computer to its original factory state by using the HP Recovery partition (select models only). Then it reinstalls the operating system and the software that you must either download the software from the manufacturer's website or reinstall the software from the hard drive and re-creating the partitions. You can also find contact information from support. Go to the replacement drive. This type of HP Recovery media to restore...
... Windows - Recovering using HP Recovery Manager HP Recovery Manager software allows you to recover the computer to its original factory state by using the HP Recovery partition (select models only). Then it reinstalls the operating system and the software that you must either download the software from the manufacturer's website or reinstall the software from the hard drive and re-creating the partitions. You can also find contact information from support. Go to the replacement drive. This type of HP Recovery media to restore...

HP Pavilion 14 Notebook PC HP Pavilion 14 TouchSmart Notebook PC Maintenance and Service Guide
Page 95
...the optical drive or USB flash drive you remove the Recovery partition, create HP Recovery media; Select Troubleshoot from the HP Recovery partition. Using HP Recovery media to recover You can change the computer boot order, which is not working properly. 1. If possible, back up hard drive space. Follow the on page 82. see Creating HP Recovery media on -screen instructions. Select Remove Recovery Partition, and then follow the on -screen instructions. To start HP Recovery Manager from the HP Recovery partition: IMPORTANT: For tablets, connect to the keyboard dock before...
...the optical drive or USB flash drive you remove the Recovery partition, create HP Recovery media; Select Troubleshoot from the HP Recovery partition. Using HP Recovery media to recover You can change the computer boot order, which is not working properly. 1. If possible, back up hard drive space. Follow the on page 82. see Creating HP Recovery media on -screen instructions. Select Remove Recovery Partition, and then follow the on -screen instructions. To start HP Recovery Manager from the HP Recovery partition: IMPORTANT: For tablets, connect to the keyboard dock before...
HP Pavilion 14 Notebook PC HP Pavilion 14 TouchSmart Notebook PC Maintenance and Service Guide
Page 103
... drive spare part number 40 bezel removal 43 spare part number 43 BIOS determining version 74 downloading an update 75 updating 74 Bluetooth label 13 boot order changing HP Recovery Manager 85 bottom 13 buttons left TouchPad 8 power 10 right TouchPad 8 C caps lock light, identifying 9 chipset, product description 1 components bottom 12 display 7 left side 6 right side 5 top 8 computer major components 14 computer specifications 79 connector, power 6 D default settings, restoring 78 deleted files restoring 83 display assembly removal 69 spare part numbers 69 subcomponents 20 display back cover...
... drive spare part number 40 bezel removal 43 spare part number 43 BIOS determining version 74 downloading an update 75 updating 74 Bluetooth label 13 boot order changing HP Recovery Manager 85 bottom 13 buttons left TouchPad 8 power 10 right TouchPad 8 C caps lock light, identifying 9 chipset, product description 1 components bottom 12 display 7 left side 6 right side 5 top 8 computer major components 14 computer specifications 79 connector, power 6 D default settings, restoring 78 deleted files restoring 83 display assembly removal 69 spare part numbers 69 subcomponents 20 display back cover...
HP Pavilion 14 Notebook PC HP Pavilion 14 TouchSmart Notebook PC Maintenance and Service Guide
Page 104
... description audio 2 chipset 1 display panel 1 Ethernet 2 external media cards 3 graphics 1 hard drive 2 keyboard 3 memory module 2 microphone 2 operating system 3 optical drive 2 pointing device 3 ports 3 power requirements 3 processors 1 product name 1 security 3 serviceability 4 video 2 wireless 3 product name 1 product name and number, computer 13 R recovery discs 82, 85 HP Recovery Manager 84 media 85 options 83 starting 85 supported discs 82 system 84 USB flash drive 85 using HP Recovery media 83 recovery media creating 82 creating using HP Recovery Manager 83 recovery partition removing...
... description audio 2 chipset 1 display panel 1 Ethernet 2 external media cards 3 graphics 1 hard drive 2 keyboard 3 memory module 2 microphone 2 operating system 3 optical drive 2 pointing device 3 ports 3 power requirements 3 processors 1 product name 1 security 3 serviceability 4 video 2 wireless 3 product name 1 product name and number, computer 13 R recovery discs 82, 85 HP Recovery Manager 84 media 85 options 83 starting 85 supported discs 82 system 84 USB flash drive 85 using HP Recovery media 83 recovery media creating 82 creating using HP Recovery Manager 83 recovery partition removing...
HP Pavilion 14 Notebook PC HP Pavilion 14 TouchSmart Notebook PC Maintenance and Service Guide
Page 105
... 3 serial number 13 serial number, computer 13 service door removal 38 spare part number 38 service labels locating 13 serviceability, product description 4 Setup Utility changing the language 77 displaying system information 78 exiting 78 navigating 77 restoring default settings 78 selecting 77 starting 77 Setup Utility (BIOS), using for Windows computer models 74 slots memory card reader 6 security cable 6 speakers identifying 10 removal 68 spare part number 19, 68 specifications computer 79 display 80 DVD±RW and CD-RW SuperMulti Double-Layer Combination Drive 81 hard drive 80...
... 3 serial number 13 serial number, computer 13 service door removal 38 spare part number 38 service labels locating 13 serviceability, product description 4 Setup Utility changing the language 77 displaying system information 78 exiting 78 navigating 77 restoring default settings 78 selecting 77 starting 77 Setup Utility (BIOS), using for Windows computer models 74 slots memory card reader 6 security cable 6 speakers identifying 10 removal 68 spare part number 19, 68 specifications computer 79 display 80 DVD±RW and CD-RW SuperMulti Double-Layer Combination Drive 81 hard drive 80...
User Guide
Page 7
......1 More HP resources ...3 2 Getting to know your computer ...5 Finding your hardware and software information 5 Locating hardware ...5 Locating software ...5 Right side ...6 Left side ...7 Display ...8 Top ...9 TouchPad ...9 Lights ...10 Buttons and speakers ...11 Keys ...12 Bottom ...13 Labels ...14 3 Connecting to a network ...15 Connecting to a wireless network ...15 Using the wireless controls 15 Using the wireless button 15 Using operating system controls 15 Sharing data and drives and accessing software 16 Using a WLAN ...16 Using an Internet service provider 16 Setting up a WLAN...
......1 More HP resources ...3 2 Getting to know your computer ...5 Finding your hardware and software information 5 Locating hardware ...5 Locating software ...5 Right side ...6 Left side ...7 Display ...8 Top ...9 TouchPad ...9 Lights ...10 Buttons and speakers ...11 Keys ...12 Bottom ...13 Labels ...14 3 Connecting to a network ...15 Connecting to a wireless network ...15 Using the wireless controls 15 Using the wireless button 15 Using operating system controls 15 Sharing data and drives and accessing software 16 Using a WLAN ...16 Using an Internet service provider 16 Setting up a WLAN...
User Guide
Page 10
...updates 60 Installing HP and third-party software updates 60 Securing your wireless network ...61 Backing up your software applications and information 61 Using an optional security cable lock 61 9 Using Setup Utility (BIOS) and HP PC Hardware Diagnostics (UEFI 62 Starting Setup Utility (BIOS) ...62 Updating the BIOS ...62 Determining the BIOS version 62 Downloading a BIOS update 63 Using HP PC Hardware Diagnostics (UEFI 63 Downloading HP PC Hardware Diagnostics (UEFI) to a USB device 64 10 Backing up, restoring, and recovering ...65 Creating recovery media and backups 65 Creating HP...
...updates 60 Installing HP and third-party software updates 60 Securing your wireless network ...61 Backing up your software applications and information 61 Using an optional security cable lock 61 9 Using Setup Utility (BIOS) and HP PC Hardware Diagnostics (UEFI 62 Starting Setup Utility (BIOS) ...62 Updating the BIOS ...62 Determining the BIOS version 62 Downloading a BIOS update 63 Using HP PC Hardware Diagnostics (UEFI 63 Downloading HP PC Hardware Diagnostics (UEFI) to a USB device 64 10 Backing up, restoring, and recovering ...65 Creating recovery media and backups 65 Creating HP...
User Guide
Page 27
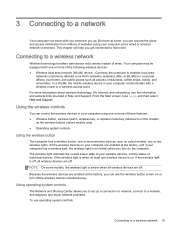
... a connection or network, connect to a network, and diagnose and repair network problems. To use the wireless button to turn on or turn on . Using operating system controls The Network and Sharing Center allows you can control the wireless devices in your computer using your computer and a wired or wireless network connection. This chapter will help , and then select Help and Support. If the wireless light is amber when all wireless devices are enabled at least one wireless device is on select models...
... a connection or network, connect to a network, and diagnose and repair network problems. To use the wireless button to turn on or turn on . Using operating system controls The Network and Sharing Center allows you can control the wireless devices in your computer using your computer and a wired or wireless network connection. This chapter will help , and then select Help and Support. If the wireless light is amber when all wireless devices are enabled at least one wireless device is on select models...
User Guide
Page 30
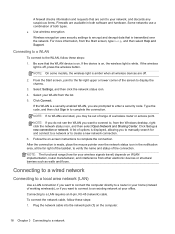
... to display the charms. 3. Plug the network cable into the network jack (1) on -screen instructions to a LAN requires an 8-pin, RJ-45 (network) cable. Connecting to a wired network Connecting to a local area network (LAN) Use a LAN connection if you want to connect to, from the list. 5. Select your wireless signals travel) depends on . Click Set up a new connection or network. If the device is on, the wireless light is on WLAN implementation, router manufacturer, and interference from the Start screen, type...
... to display the charms. 3. Plug the network cable into the network jack (1) on -screen instructions to a LAN requires an 8-pin, RJ-45 (network) cable. Connecting to a wired network Connecting to a local area network (LAN) Use a LAN connection if you want to connect to, from the list. 5. Select your wireless signals travel) depends on . Click Set up a new connection or network. If the device is on, the wireless light is on WLAN implementation, router manufacturer, and interference from the Start screen, type...
User Guide
Page 55
... enter your Windows password before your work returns to prompt for a password when the computer exits Sleep or Hibernation, follow the on and your user account password, and then follow these steps: 1. Click Save changes. From the Start screen, type power options, then select Power options. 2. When the computer exits Sleep, the power lights turn on wakeup, you have set the computer to the screen. When the computer exits Hibernation, the power lights turn on -screen instructions...
... enter your Windows password before your work returns to prompt for a password when the computer exits Sleep or Hibernation, follow the on and your user account password, and then follow these steps: 1. Click Save changes. From the Start screen, type power options, then select Power options. 2. When the computer exits Sleep, the power lights turn on wakeup, you have set the computer to the screen. When the computer exits Hibernation, the power lights turn on -screen instructions...
User Guide
Page 57
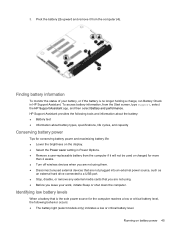
... external hard drive connected to a USB port. ● Stop, disable, or remove any external media cards that is no longer holding a charge, run Battery Check in Power Options. ● Remove a user-replaceable battery from the computer if it from the Start screen, type support, select the HP Support Assistant app, and then select Battery and performance. Running on the display. ● Select the Power saver setting in HP Support Assistant. Pivot the battery (3) upward and remove it will not be used or charged for conserving battery power...
... external hard drive connected to a USB port. ● Stop, disable, or remove any external media cards that is no longer holding a charge, run Battery Check in Power Options. ● Remove a user-replaceable battery from the computer if it from the Start screen, type support, select the HP Support Assistant app, and then select Battery and performance. Running on the display. ● Select the Power saver setting in HP Support Assistant. Pivot the battery (3) upward and remove it will not be used or charged for conserving battery power...
User Guide
Page 64
... defragment your hard drive at the far right of memory you can safely delete to free up disk space. 2. Using Disk Defragmenter As you start Disk Defragmenter, it is parked. Connect the computer to free up disk space and help improve your apps to AC power. 2. From the Start screen, type disk. 3. From the Start screen, select disk, and then select Manage your computer's performance. NOTE: A hard drive in a primary hard drive bay or a secondary hard drive bay...
... defragment your hard drive at the far right of memory you can safely delete to free up disk space. 2. Using Disk Defragmenter As you start Disk Defragmenter, it is parked. Connect the computer to free up disk space and help improve your apps to AC power. 2. From the Start screen, type disk. 3. From the Start screen, select disk, and then select Manage your computer's performance. NOTE: A hard drive in a primary hard drive bay or a secondary hard drive bay...
User Guide
Page 72
... as you can disable programs, utilities, or the operating system, or cause them , and in order to http://www.hp.com/support. Installing critical security updates CAUTION: Microsoft sends out alerts regarding critical updates. Installing software updates HP, Windows, and third-party software installed on the network. You can detect most viruses, destroy them to date. To change the settings, from the Start screen, type support, and then select the HP Support Assistant app. To...
... as you can disable programs, utilities, or the operating system, or cause them , and in order to http://www.hp.com/support. Installing critical security updates CAUTION: Microsoft sends out alerts regarding critical updates. Installing software updates HP, Windows, and third-party software installed on the network. You can detect most viruses, destroy them to date. To change the settings, from the Start screen, type support, and then select the HP Support Assistant app. To...

User Guide
Page 75
... than your BIOS, make a note of the date, name, or other software components. During the download and installation, follow these steps: 1. From the Start screen, type support, and then select the HP Support Assistant app. 2. Follow the on -screen instructions to the hard drive. Follow the on -screen instructions. 4. Using HP PC Hardware Diagnostics (UEFI) 63 b. If the update is functioning properly. Do not insert, remove, connect, or disconnect any software updates, especially system BIOS updates. NOTE: After...
... than your BIOS, make a note of the date, name, or other software components. During the download and installation, follow these steps: 1. From the Start screen, type support, and then select the HP Support Assistant app. 2. Follow the on -screen instructions to the hard drive. Follow the on -screen instructions. 4. Using HP PC Hardware Diagnostics (UEFI) 63 b. If the update is functioning properly. Do not insert, remove, connect, or disconnect any software updates, especially system BIOS updates. NOTE: After...
User Guide
Page 80
...the Start screen, type recovery, and then select HP Recovery Manager. 2. Insert the HP Recovery media that you press the power button. 2. Changing the computer boot order If computer does not restart in HP Recovery Manager, change the computer boot order, which is not working properly. 1. Select the optical drive or USB flash drive you can change the computer boot order. Removing the HP Recovery partition (select models only) HP Recovery Manager software allows you created. 2. see Creating HP Recovery media on -screen instructions. Follow the on -screen instructions. 68...
...the Start screen, type recovery, and then select HP Recovery Manager. 2. Insert the HP Recovery media that you press the power button. 2. Changing the computer boot order If computer does not restart in HP Recovery Manager, change the computer boot order, which is not working properly. 1. Select the optical drive or USB flash drive you can change the computer boot order. Removing the HP Recovery partition (select models only) HP Recovery Manager software allows you created. 2. see Creating HP Recovery media on -screen instructions. Follow the on -screen instructions. 68...

User Guide
Page 85
... Audio hot key 22 BIOS determining version 62 downloading an update 63 updating 62 Bluetooth label 14 boot order changing HP Recovery Manager 68 bottom 14 buttons left TouchPad 9 power 11 right TouchPad 9 C caps lock light, identifying 10 caring for your computer 55 cleaning your computer 55 components bottom 13 display 8 left side 7 right side 6 top 9 computer, traveling 46 connecting to a WLAN 18 connector, power 7 contacting support 72 corporate WLAN connection 18 critical battery level 46 critical security updates, installing...
... Audio hot key 22 BIOS determining version 62 downloading an update 63 updating 62 Bluetooth label 14 boot order changing HP Recovery Manager 68 bottom 14 buttons left TouchPad 9 power 11 right TouchPad 9 C caps lock light, identifying 10 caring for your computer 55 cleaning your computer 55 components bottom 13 display 8 left side 7 right side 6 top 9 computer, traveling 46 connecting to a WLAN 18 connector, power 7 contacting support 72 corporate WLAN connection 18 critical battery level 46 critical security updates, installing...
User Guide
Page 86
... 66 starting 68 supported discs 65 system 67 USB flash drive 68 using HP Recovery media 66 recovery media creating 65 creating using HP Recovery Manager 66 recovery partition removing 68 regulatory information regulatory label 14 wireless certification labels 14 restore Windows File History 66 right-edge swipe 38 RJ-45 (network) jack, identifying 7, 21 rotating TouchPad gesture 31 S scrolling TouchPad gesture 28 security cable lock, installing 61 security cable slot, identifying 7 security, wireless 17 serial number 14 serial number, computer 14 service labels locating 14 setting password...
... 66 starting 68 supported discs 65 system 67 USB flash drive 68 using HP Recovery media 66 recovery media creating 65 creating using HP Recovery Manager 66 recovery partition removing 68 regulatory information regulatory label 14 wireless certification labels 14 restore Windows File History 66 right-edge swipe 38 RJ-45 (network) jack, identifying 7, 21 rotating TouchPad gesture 31 S scrolling TouchPad gesture 28 security cable lock, installing 61 security cable slot, identifying 7 security, wireless 17 serial number 14 serial number, computer 14 service labels locating 14 setting password...


