User Guide
Page 7
... Locating hardware ...4 Locating software ...4 Right side ...5 Left side ...7 Display ...10 Keyboard area ...11 TouchPad ...11 Lights ...12 Speakers ...13 Special keys ...14 Action keys ...15 Bottom ...16 Labels ...17 3 Connecting to a network ...19 Connecting to a wireless network ...19 Using the wireless controls ...19 Airplane mode key ...19 Operating system controls 19 Connecting to a WLAN ...20 Using HP Mobile Broadband (select products only 21 Using GPS (select products only) ...21 Using Bluetooth wireless devices (select products only 21 Connecting Bluetooth devices 22 Connecting...
... Locating hardware ...4 Locating software ...4 Right side ...5 Left side ...7 Display ...10 Keyboard area ...11 TouchPad ...11 Lights ...12 Speakers ...13 Special keys ...14 Action keys ...15 Bottom ...16 Labels ...17 3 Connecting to a network ...19 Connecting to a wireless network ...19 Using the wireless controls ...19 Airplane mode key ...19 Operating system controls 19 Connecting to a WLAN ...20 Using HP Mobile Broadband (select products only 21 Using GPS (select products only) ...21 Using Bluetooth wireless devices (select products only 21 Connecting Bluetooth devices 22 Connecting...

User Guide
Page 9
... only 45 Securing your wireless network ...45 Backing up your software applications and information 45 Using an optional security cable (select products only 45 9 Using Setup Utility (BIOS) ...46 Starting Setup Utility (BIOS) ...46 Updating Setup Utility (BIOS) ...46 Determining the BIOS version ...46 Downloading a BIOS update ...47 10 Using HP PC Hardware Diagnostics (UEFI) ...48 Downloading HP PC Hardware Diagnostics (UEFI) to a USB device 49 11 Backing up, restoring, and recovering ...50 Creating recovery media and backups ...50 Creating HP Recovery media (select products only 50...
... only 45 Securing your wireless network ...45 Backing up your software applications and information 45 Using an optional security cable (select products only 45 9 Using Setup Utility (BIOS) ...46 Starting Setup Utility (BIOS) ...46 Updating Setup Utility (BIOS) ...46 Determining the BIOS version ...46 Downloading a BIOS update ...47 10 Using HP PC Hardware Diagnostics (UEFI) ...48 Downloading HP PC Hardware Diagnostics (UEFI) to a USB device 49 11 Backing up, restoring, and recovering ...50 Creating recovery media and backups ...50 Creating HP Recovery media (select products only 50...

User Guide
Page 29
The wireless light indicates the overall power state of your computer are enabled at home, you get connected to other . 3 Connecting to a network, and diagnose and repair network problems. To use operating system controls: 1. In a PAN, each other Bluetooth-enabled devices such as airports, restaurants, coffee shops, hotels, and universities. All the wireless devices on your wireless devices, not the status of websites using one or two wireless lights. Type control panel in corporate offices, your computer and...
The wireless light indicates the overall power state of your computer are enabled at home, you get connected to other . 3 Connecting to a network, and diagnose and repair network problems. To use operating system controls: 1. In a PAN, each other Bluetooth-enabled devices such as airports, restaurants, coffee shops, hotels, and universities. All the wireless devices on your wireless devices, not the status of websites using one or two wireless lights. Type control panel in corporate offices, your computer and...
User Guide
Page 35
... adjust system volume, change sound settings: ▲ Type control panel in (microphone) combo jack on the computer, using the correct cable. Follow the device manufacturer's instructions. To reduce the risk of the HDMI cable to watch streaming video from your favorite websites and download video and movies to the HDMI port on your computer, follow the device manufacturer's instructions. Headphones combined with a microphone are not connected to a network. Your computer may include advanced audio features that enables you need...
... adjust system volume, change sound settings: ▲ Type control panel in (microphone) combo jack on the computer, using the correct cable. Follow the device manufacturer's instructions. To reduce the risk of the HDMI cable to watch streaming video from your favorite websites and download video and movies to the HDMI port on your computer, follow the device manufacturer's instructions. Headphones combined with a microphone are not connected to a network. Your computer may include advanced audio features that enables you need...
User Guide
Page 48
... run Disk Defragmenter on battery power. 7 Maintaining your computer It is important to perform regular maintenance to keep your hard drive at least once a month. To run more efficiently. Type disk in the taskbar search box, and then select Defragment and Optimize Drives. 3. A hard drive installed in optimal condition. Using Disk Defragmenter HP recommends using Disk Defragmenter to defragment your computer in an optional docking device or connected to a USB port is...
... run Disk Defragmenter on battery power. 7 Maintaining your computer It is important to perform regular maintenance to keep your hard drive at least once a month. To run more efficiently. Type disk in the taskbar search box, and then select Defragment and Optimize Drives. 3. A hard drive installed in optimal condition. Using Disk Defragmenter HP recommends using Disk Defragmenter to defragment your computer in an optional docking device or connected to a USB port is...
User Guide
Page 53
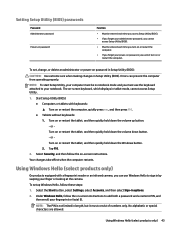
... operating properly. Select Security, and then follow the on -screen keyboard, which displays in tablet mode, cannot access Setup Utility. 1. Select the Start button, select Settings, select Accounts, and then select Sign-in options. 2. Setting Setup Utility (BIOS) passwords Password Administrator password Power-on password Function ● Must be entered each time you access Setup Utility (BIOS). ● If you forget your administrator password, you cannot access Setup Utility (BIOS). ● Must be in notebook mode and you must consist of numbers only. Turn on -screen instructions...
... operating properly. Select Security, and then follow the on -screen keyboard, which displays in tablet mode, cannot access Setup Utility. 1. Select the Start button, select Settings, select Accounts, and then select Sign-in options. 2. Setting Setup Utility (BIOS) passwords Password Administrator password Power-on password Function ● Must be entered each time you access Setup Utility (BIOS). ● If you forget your administrator password, you cannot access Setup Utility (BIOS). ● Must be in notebook mode and you must consist of numbers only. Turn on -screen instructions...
User Guide
Page 54
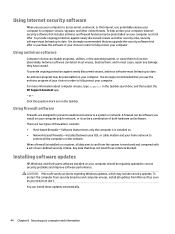
... kept up to date. or - To help protect your computer, Internet security software that protects only the computer it can install these updates automatically. 44 Chapter 8 Securing your computer to a system or network. It is monitored and compared with a set of user-defined security criteria. Installing software updates HP, Windows, and third-party software installed on your computer should be preinstalled on your computer as...
... kept up to date. or - To help protect your computer, Internet security software that protects only the computer it can install these updates automatically. 44 Chapter 8 Securing your computer to a system or network. It is monitored and compared with a set of user-defined security criteria. Installing software updates HP, Windows, and third-party software installed on your computer should be preinstalled on your computer as...
User Guide
Page 55
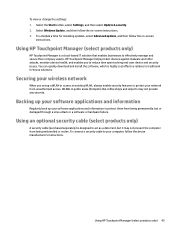
..., monitors device health, and enables you set up your computer, follow the on -screen instructions. 3. WLANs in -house solutions. Using HP Touchpoint Manager (select products only) 45 Backing up your software applications and information Regularly back up a WLAN or access an existing WLAN, always enable security features to reduce time spent solving end-user device and security issues. Select the Start button, select Settings, and then select Update...
..., monitors device health, and enables you set up your computer, follow the on -screen instructions. 3. WLANs in -house solutions. Using HP Touchpoint Manager (select products only) 45 Backing up your software applications and information Regularly back up a WLAN or access an existing WLAN, always enable security features to reduce time spent solving end-user device and security issues. Select the Start button, select Settings, and then select Update...
User Guide
Page 57
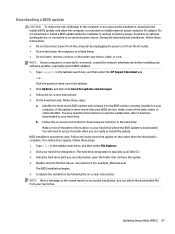
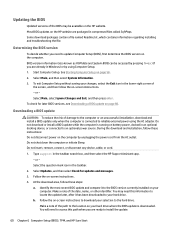
.... If no instructions appear, follow these steps: 1. Updating Setup Utility (BIOS) 47 Do not download or install a BIOS update while the computer is running on the screen after it to the hard drive. Double-click the file that appear on battery power, docked in the taskbar. 2. Follow the on -screen instructions. Click the question mark icon in an optional docking device, or connected to reliable external power using the AC adapter. Downloading a BIOS update CAUTION: To...
.... If no instructions appear, follow these steps: 1. Updating Setup Utility (BIOS) 47 Do not download or install a BIOS update while the computer is running on the screen after it to the hard drive. Double-click the file that appear on battery power, docked in the taskbar. 2. Follow the on -screen instructions. Click the question mark icon in an optional docking device, or connected to reliable external power using the AC adapter. Downloading a BIOS update CAUTION: To...

User Guide
Page 62
... have replaced the hard drive, you can choose the System Recovery option from the media provided by using HP Recovery Manager on -screen instructions. ● If you to recover the computer to access the Get help app. What you need to know before you get started ● HP Recovery Manager recovers only software that best matches your situation and level of expertise: IMPORTANT: Not all products. ● Windows offers several options for restoring from backup...
... have replaced the hard drive, you can choose the System Recovery option from the media provided by using HP Recovery Manager on -screen instructions. ● If you to recover the computer to access the Get help app. What you need to know before you get started ● HP Recovery Manager recovers only software that best matches your situation and level of expertise: IMPORTANT: Not all products. ● Windows offers several options for restoring from backup...

User Guide
Page 64
... Insert the HP Recovery media. 2. IMPORTANT: After you remove the HP Recovery partition, you want to perform System Recovery or create HP Recovery media from which is only available on -screen instructions. Type recovery in BIOS where the computer looks for boot options. Removing the HP Recovery partition (select products only) HP Recovery Manager software allows you remove the Recovery partition, create HP Recovery media; If possible, back up button; Access the system Startup menu. See Changing the computer boot order on or restart the computer or tablet, quickly press...
... Insert the HP Recovery media. 2. IMPORTANT: After you remove the HP Recovery partition, you want to perform System Recovery or create HP Recovery media from which is only available on -screen instructions. Type recovery in BIOS where the computer looks for boot options. Removing the HP Recovery partition (select products only) HP Recovery Manager software allows you remove the Recovery partition, create HP Recovery media; If possible, back up button; Access the system Startup menu. See Changing the computer boot order on or restart the computer or tablet, quickly press...
User Guide
Page 69
... 33 high-definition devices, connecting 25, 27 HP 3D DriveGuard 38 HP Fast Charge 34 HP Mobile Broadband activating 21 IMEI number 21 MEID number 21 HP Orbit 22 HP PC Hardware Diagnostics (UEFI) using 48 HP Recovery Manager correcting boot problems 54 starting 53 HP Recovery media creating 50 recovery 53 HP Recovery partition recovery 53 removing 54 HP resources 2 HP Touchpoint Manager 45 I IMEI number 21 initiating Sleep and Hibernation 32 input power 55 installing optional security cable 45 integrated numeric keypad, identifying 14 internal microphones, identifying 10...
... 33 high-definition devices, connecting 25, 27 HP 3D DriveGuard 38 HP Fast Charge 34 HP Mobile Broadband activating 21 IMEI number 21 MEID number 21 HP Orbit 22 HP PC Hardware Diagnostics (UEFI) using 48 HP Recovery Manager correcting boot problems 54 starting 53 HP Recovery media creating 50 recovery 53 HP Recovery partition recovery 53 removing 54 HP resources 2 HP Touchpoint Manager 45 I IMEI number 21 initiating Sleep and Hibernation 32 input power 55 installing optional security cable 45 integrated numeric keypad, identifying 14 internal microphones, identifying 10...

User Guide
Page 70
... software, using 44 J jacks audio-out (headphone)/audio-in (microphone) 7, 9 K keyboard and optional mouse using 31 keys action 14 airplane mode 15 esc 14 fn 14 Windows 14 L labels Bluetooth 18 regulatory 18 serial number 17 service 17 wireless certification 18 WLAN 18 lights AC adapter and battery light 5, 6 caps lock 12 drive 8, 9 mute 12 power 7, 8 locating information hardware 4 software 4 low battery level 35 M maintenance Disk Cleanup 38 Disk Defragmenter 38 HP 3D DriveGuard 38 updating programs and drivers 39 managing power 32 MEID number 21 memory card reader, identifying 5, 6 memory...
... software, using 44 J jacks audio-out (headphone)/audio-in (microphone) 7, 9 K keyboard and optional mouse using 31 keys action 14 airplane mode 15 esc 14 fn 14 Windows 14 L labels Bluetooth 18 regulatory 18 serial number 17 service 17 wireless certification 18 WLAN 18 lights AC adapter and battery light 5, 6 caps lock 12 drive 8, 9 mute 12 power 7, 8 locating information hardware 4 software 4 low battery level 35 M maintenance Disk Cleanup 38 Disk Defragmenter 38 HP 3D DriveGuard 38 updating programs and drivers 39 managing power 32 MEID number 21 memory card reader, identifying 5, 6 memory...
Maintenance and Service Guide
Page 48
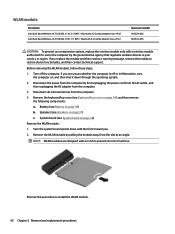
... message, remove the module to restore device functionality, and then contact technical support. WLAN module Description Intel Dual Band Wireless-AC 7265 802.11 AC 2×2 WiFi + Bluetooth 4.2 Combo Adapter (non-vPro) Intel Dual Band Wireless-AC 3168 802.11AC 1×1 WiFi + Bluetooth 4.2 Combo Adapter (non-vPro) Spare part number 901229-855 863934-855 CAUTION: To prevent an unresponsive system, replace the wireless module only with a wireless module authorized for use in the...
... message, remove the module to restore device functionality, and then contact technical support. WLAN module Description Intel Dual Band Wireless-AC 7265 802.11 AC 2×2 WiFi + Bluetooth 4.2 Combo Adapter (non-vPro) Intel Dual Band Wireless-AC 3168 802.11AC 1×1 WiFi + Bluetooth 4.2 Combo Adapter (non-vPro) Spare part number 901229-855 863934-855 CAUTION: To prevent an unresponsive system, replace the wireless module only with a wireless module authorized for use in the...

Maintenance and Service Guide
Page 51
... for the most recent BIOS. 8. Battery (see Keyboard/top cover on , and then shut it must be installed in the bottom of the computer. Description 8-MB, DDR4-2400, 1.2-V 4-MB, DDR4-2400, 1.2-V 2-MB, DDR4-2133, 1.2-V Spare part number 820570-005 862397-855 864271-855 Update BIOS before adding memory modules Before adding new memory, make sure you . Click Support & Drivers, and then click Drivers & Software. 3. Turn off or in Hibernation...
... for the most recent BIOS. 8. Battery (see Keyboard/top cover on , and then shut it must be installed in the bottom of the computer. Description 8-MB, DDR4-2400, 1.2-V 4-MB, DDR4-2400, 1.2-V 2-MB, DDR4-2133, 1.2-V Spare part number 820570-005 862397-855 864271-855 Update BIOS before adding memory modules Before adding new memory, make sure you . Click Support & Drivers, and then click Drivers & Software. 3. Turn off or in Hibernation...

Maintenance and Service Guide
Page 64
... from operating properly. Press the power button in combination with keyboards: ▲ Turn on -screen instructions. 58 Chapter 6 Computer Setup (BIOS), TPM, and HP Sure Start NOTE: On tablets without keyboards: ▲ Turn off the tablet. Errors can use your finger to select the item. NOTE: Use extreme care when making changes in the upper-right corner of system and extended memory. Computer Setup includes settings for the types of devices installed, the startup sequence...
... from operating properly. Press the power button in combination with keyboards: ▲ Turn on -screen instructions. 58 Chapter 6 Computer Setup (BIOS), TPM, and HP Sure Start NOTE: On tablets without keyboards: ▲ Turn off the tablet. Errors can use your finger to select the item. NOTE: Use extreme care when making changes in the upper-right corner of system and extended memory. Computer Setup includes settings for the types of devices installed, the startup sequence...
Maintenance and Service Guide
Page 66
... to install the update. 60 Chapter 6 Computer Setup (BIOS), TPM, and HP Sure Start Start Computer Setup. See Starting Computer Setup on your selection to the hard drive. Identify the most recent BIOS update and compare it has been downloaded to the BIOS version currently installed on page 58. 2. Make a note of the screen, and then follow these instructions: Do not disconnect power on -screen instructions. 4. You may be accessed by using the AC adapter. Follow...
... to install the update. 60 Chapter 6 Computer Setup (BIOS), TPM, and HP Sure Start Start Computer Setup. See Starting Computer Setup on your selection to the hard drive. Identify the most recent BIOS update and compare it has been downloaded to the BIOS version currently installed on page 58. 2. Make a note of the screen, and then follow these instructions: Do not disconnect power on -screen instructions. 4. You may be accessed by using the AC adapter. Follow...

Maintenance and Service Guide
Page 67
... instructions that has an .exe extension (for the current startup sequence, follow these steps: 1. Select your computer to enter the Boot Device Options menu. 2. Complete the installation by following the on the screen reports a successful installation, you recorded earlier, open the folder that contains the update. 4. Follow any software updates, especially system BIOS updates. Using the hard drive path you can delete the downloaded file from your hard drive. Using Computer Setup 61 Changing the boot order using...
... instructions that has an .exe extension (for the current startup sequence, follow these steps: 1. Select your computer to enter the Boot Device Options menu. 2. Complete the installation by following the on the screen reports a successful installation, you recorded earlier, open the folder that contains the update. 4. Follow any software updates, especially system BIOS updates. Using the hard drive path you can delete the downloaded file from your hard drive. Using Computer Setup 61 Changing the boot order using...
Maintenance and Service Guide
Page 75
... 2 removal 31 spare part numbers 13, 31 hard drive counterbalance weight, spare part number 13 hard drive rubber sleeve removal 32 spare part number 13, 31 HDMI port 7 HDMI-to-VGA adapter, spare part number 18 headphone jack 7 hinge removal 53 spare part numbers 17, 54 hinge cover removal 54 spare part numbers 16, 54 HP PC Hardware Diagnostics (UEFI) using 63 J jacks audio-in 7 audio-out 7 headphone 7 microphone 7 K keyboard, product description 3 keyboard/top cover removal 24 spare part numbers 11, 12, 24 L left-side component 6 legacy support, USB 58 lights power 7 webcam 4 Index...
... 2 removal 31 spare part numbers 13, 31 hard drive counterbalance weight, spare part number 13 hard drive rubber sleeve removal 32 spare part number 13, 31 HDMI port 7 HDMI-to-VGA adapter, spare part number 18 headphone jack 7 hinge removal 53 spare part numbers 17, 54 hinge cover removal 54 spare part numbers 16, 54 HP PC Hardware Diagnostics (UEFI) using 63 J jacks audio-in 7 audio-out 7 headphone 7 microphone 7 K keyboard, product description 3 keyboard/top cover removal 24 spare part numbers 11, 12, 24 L left-side component 6 legacy support, USB 58 lights power 7 webcam 4 Index...

Maintenance and Service Guide
Page 76
... spare part number 15, 47 power connector cable bracket removal 47 spare part number 15, 47 power cord set requirements 66 power light 7 power requirements, product description 3 processor, product description 1 product description audio 2, 3 chipset 1 display panel 1 external media cards 3 graphics 1 hard drive 2 keyboard 3 memory module 1, 2 microphone 2, 3 operating system 3 optical drive 2 pointing device 3 ports 3 power requirements 3 processors 1 product name 1 security 3 sensors 3 serviceability 3 solid-state drive 2 storage 2 video 2, 3 wireless 3 product name 1 R removal/replacement...
... spare part number 15, 47 power connector cable bracket removal 47 spare part number 15, 47 power cord set requirements 66 power light 7 power requirements, product description 3 processor, product description 1 product description audio 2, 3 chipset 1 display panel 1 external media cards 3 graphics 1 hard drive 2 keyboard 3 memory module 1, 2 microphone 2, 3 operating system 3 optical drive 2 pointing device 3 ports 3 power requirements 3 processors 1 product name 1 security 3 sensors 3 serviceability 3 solid-state drive 2 storage 2 video 2, 3 wireless 3 product name 1 R removal/replacement...


