
HP Mini 1101 Notebook PC, HP Mini 110, and Compaq Mini 110 - Maintenance and Service Guide
Page 11
... power √ √ 92% keyboard √ √ TouchPad, with 2 TouchPad buttons √ √ and 2-way scrolling (taps enabled as default) 30-W UMA AC adapter (non-Smart) with Mobile Mi installed. Digital Media Slot (consumer models) or √ √ Media Card Reader (commercial models) with push-push technology supporting: ● Memory Stick (MS) ● Memory Stick Pro (MSP) ● MultiMediaCard (MMC) ● Secure Digital (SD) Memory Card ● xD-Picture Card (XD) HP Mini Mobile Drive Bay (on models...
... power √ √ 92% keyboard √ √ TouchPad, with 2 TouchPad buttons √ √ and 2-way scrolling (taps enabled as default) 30-W UMA AC adapter (non-Smart) with Mobile Mi installed. Digital Media Slot (consumer models) or √ √ Media Card Reader (commercial models) with push-push technology supporting: ● Memory Stick (MS) ● Memory Stick Pro (MSP) ● MultiMediaCard (MMC) ● Secure Digital (SD) Memory Card ● xD-Picture Card (XD) HP Mini Mobile Drive Bay (on models...

HP Mini 1101 Notebook PC, HP Mini 110, and Compaq Mini 110 - Maintenance and Service Guide
Page 111
... drivers, software, and utilities from the backup used for your information using Startup Repair, follow these topics in this guide. 3. If possible, back up , follow these steps: CAUTION: Using Startup Repair completely erases hard drive contents and reformats the hard drive. Refer to the "Using a Windows Vista operating system DVD (purchased separately)" section in Help and Support. NOTE: For additional information on -screen instructions. Click Start > All Programs > Maintenance > Backup and Restore Center. 2. To find the partitions, select Start > Computer. Windows...
... drivers, software, and utilities from the backup used for your information using Startup Repair, follow these topics in this guide. 3. If possible, back up , follow these steps: CAUTION: Using Startup Repair completely erases hard drive contents and reformats the hard drive. Refer to the "Using a Windows Vista operating system DVD (purchased separately)" section in Help and Support. NOTE: For additional information on -screen instructions. Click Start > All Programs > Maintenance > Backup and Restore Center. 2. To find the partitions, select Start > Computer. Windows...
HP Mini 1101 Notebook PC, HP Mini 110, and Compaq Mini 110 - Maintenance and Service Guide
Page 128
... part number 22, 64 display specifications 76 display switch, identifying 13 displaying system information 72 drive light, identifying 9 Driver Recovery disc 106 drives preventing damage 30 drives, boot order 73 E earbuds 12 electrostatic discharge 31 Ethernet, product description 2 exiting the Setup Utility 72 external media cards, product description 3 external monitor port pin assignments 109 external monitor port, identifying 11 F f11 recovery 104 fan removal 57 spare part number 19, 57 feet locations 35 spare part number 35 flash storage drive, product description 2 fn key 7, 8 function...
... part number 22, 64 display specifications 76 display switch, identifying 13 displaying system information 72 drive light, identifying 9 Driver Recovery disc 106 drives preventing damage 30 drives, boot order 73 E earbuds 12 electrostatic discharge 31 Ethernet, product description 2 exiting the Setup Utility 72 external media cards, product description 3 external monitor port pin assignments 109 external monitor port, identifying 11 F f11 recovery 104 fan removal 57 spare part number 19, 57 feet locations 35 spare part number 35 flash storage drive, product description 2 fn key 7, 8 function...
HP Mini 1101 Notebook PC, HP Mini 110, and Compaq Mini 110 - Maintenance and Service Guide
Page 129
... 97 using 98 I I/O address specifications 81 internal display switch, identifying 13 internal media cards, product description 3 internal microphone, identifying 13 interrupt specifications 80 J jacks audio-in (microphone) 12 audio-out (headphone) 12 RJ-45 (network) 11 K keyboard product description 3 removal 40 spare part number 18, 40 keys fn 7, 8 function 7, 8 Home 8 Program Switcher 8 Windows applications 7 Windows logo 7 L language support 73 latches, battery release 14 left TouchPad button, identifying 5 lights battery 9 caps lock 6 drive 9 power 9 webcam 13 wireless 10 M Main menu 73...
... 97 using 98 I I/O address specifications 81 internal display switch, identifying 13 internal media cards, product description 3 internal microphone, identifying 13 interrupt specifications 80 J jacks audio-in (microphone) 12 audio-out (headphone) 12 RJ-45 (network) 11 K keyboard product description 3 removal 40 spare part number 18, 40 keys fn 7, 8 function 7, 8 Home 8 Program Switcher 8 Windows applications 7 Windows logo 7 L language support 73 latches, battery release 14 left TouchPad button, identifying 5 lights battery 9 caps lock 6 drive 9 power 9 webcam 13 wireless 10 M Main menu 73...
HP Mini User Guide - Windows XP
Page 7
Adjusting the volume ...39 Multimedia software ...40 Using other preinstalled multimedia software 40 Installing multimedia software from the Internet 40 Audio ...41 Connecting external audio devices 41 Checking your audio functions 41 Video ...43 Connecting an external monitor or projector 43 Webcam ...44 6 Security Protecting the computer ...45 Using passwords ...45 Passwords set in Windows 46 Passwords set in Setup Utility 46 Administrator password 47 Managing an administrator password 47 Entering an administrator password 47 Power-on password 47 Managing a power-on password 48 ...
Adjusting the volume ...39 Multimedia software ...40 Using other preinstalled multimedia software 40 Installing multimedia software from the Internet 40 Audio ...41 Connecting external audio devices 41 Checking your audio functions 41 Video ...43 Connecting an external monitor or projector 43 Webcam ...44 6 Security Protecting the computer ...45 Using passwords ...45 Passwords set in Windows 46 Passwords set in Setup Utility 46 Administrator password 47 Managing an administrator password 47 Entering an administrator password 47 Power-on password 47 Managing a power-on password 48 ...
HP Mini User Guide - Windows XP
Page 31
Select Start > Control Panel > Performance and Maintenance > Power Options. 2. Click OK. If the computer is off . NOTE: A stored battery should be unused and unplugged from external power for one month or more than 50 percent, recharge the battery before using it if it in Windows Control Panel. ● Turn off wireless and local area network (LAN) connections and exit modem applications when you leave your work, initiate Standby or Hibernation, or...
Select Start > Control Panel > Performance and Maintenance > Power Options. 2. Click OK. If the computer is off . NOTE: A stored battery should be unused and unplugged from external power for one month or more than 50 percent, recharge the battery before using it if it in Windows Control Panel. ● Turn off wireless and local area network (LAN) connections and exit modem applications when you leave your work, initiate Standby or Hibernation, or...

HP Mini User Guide - Windows XP
Page 32
do not disassemble, crush, or puncture; Select Start > Turn Off Computer > Turn Off. To reduce the risk of the following conditions: ● When you need to replace the battery or access components inside the computer ● When you are connecting an external hardware device that does not connect to a USB port ● When the computer will be unused and disconnected from external power for an extended period To...
do not disassemble, crush, or puncture; Select Start > Turn Off Computer > Turn Off. To reduce the risk of the following conditions: ● When you need to replace the battery or access components inside the computer ● When you are connecting an external hardware device that does not connect to a USB port ● When the computer will be unused and disconnected from external power for an extended period To...

HP Mini User Guide - Windows XP
Page 53
... passwords can be set , changed, or deleted, it in this chapter to use of risks. Device risk Security feature Unauthorized use the following features: ● Passwords ● Firewall software ● Antivirus support (Norton Internet Security) ● Critical security updates NOTE: Security solutions are not displayed as deterrents, but they are set in Windows or in the non-Windows Setup Utility preinstalled on password ● Firewall software ● Windows updates Unauthorized access to Setup Utility, BIOS settings...
... passwords can be set , changed, or deleted, it in this chapter to use of risks. Device risk Security feature Unauthorized use the following features: ● Passwords ● Firewall software ● Antivirus support (Norton Internet Security) ● Critical security updates NOTE: Security solutions are not displayed as deterrents, but they are set in Windows or in the non-Windows Setup Utility preinstalled on password ● Firewall software ● Windows updates Unauthorized access to Setup Utility, BIOS settings...

HP Mini User Guide - Windows XP
Page 84
... lock light, identifying 4 CD drive 61 changing Setup Utility language 72 charging batteries 18, 21 checking audio functions 41 compartments, memory module 10 components additional hardware 11 bottom 9 display 8 front 5 left-side 7 right-side 7 TouchPad 3 connecting to a WLAN 31 connection, external power 16 conservation, power 23 cord, power 11 corporate WLAN connection 31 critical battery level 20 D Diagnostics menu 75 digital card inserting 52 removing 53 stopping 53 Digital Media Slot, identifying 7 diskette drive 61 display image, switching 58 screen brightness hotkeys 58 display switch...
... lock light, identifying 4 CD drive 61 changing Setup Utility language 72 charging batteries 18, 21 checking audio functions 41 compartments, memory module 10 components additional hardware 11 bottom 9 display 8 front 5 left-side 7 right-side 7 TouchPad 3 connecting to a WLAN 31 connection, external power 16 conservation, power 23 cord, power 11 corporate WLAN connection 31 critical battery level 20 D Diagnostics menu 75 digital card inserting 52 removing 53 stopping 53 Digital Media Slot, identifying 7 diskette drive 61 display image, switching 58 screen brightness hotkeys 58 display switch...
HP Mini User Guide - Windows XP
Page 85
... battery 6 caps lock 4 drive 6 power 6 webcam 9 wireless 6 local area network (LAN) cable required 26 connecting cable 26 low battery level 19 M Main menu 74 managing a power-on password 48 managing an administrator password 47 memory module inserting 64 removing 64 memory module compartment cover removing 64 replacing 65 memory module compartment, identifying 10 memory test 75 microphone (audio-in) jack 8, 38 monitor, connecting 43 mouse, external connecting 56 setting preferences 56 multimedia components, identifying 37 multimedia software installing 40 using 40 mute button 39 mute hotkey...
... battery 6 caps lock 4 drive 6 power 6 webcam 9 wireless 6 local area network (LAN) cable required 26 connecting cable 26 low battery level 19 M Main menu 74 managing a power-on password 48 managing an administrator password 47 memory module inserting 64 removing 64 memory module compartment cover removing 64 replacing 65 memory module compartment, identifying 10 memory test 75 microphone (audio-in) jack 8, 38 monitor, connecting 43 mouse, external connecting 56 setting preferences 56 multimedia components, identifying 37 multimedia software installing 40 using 40 mute button 39 mute hotkey...
HP Mini User Guide - Windows XP
Page 86
... HP Mobile Broadband Module serial number 12 regulatory label 12 wireless 12 release latches battery 9, 18 restoring default settings 73 right TouchPad button, identifying 4 RJ-45 (network) jack, identifying 7 S screen brightness hotkeys 58 screen image, switching 58 security cable slot, identifying 7 Security menu 74 security, cable slot 7 security, wireless 30 selecting in Setup Utility 72 serial number, computer 11 service tag 11 setup of WLAN 30 Setup Utility, passwords set in 46 setup, computer 3 shut down 24 SIM inserting 33 removing 34 software installing 40 multimedia 40 Windows Media...
... HP Mobile Broadband Module serial number 12 regulatory label 12 wireless 12 release latches battery 9, 18 restoring default settings 73 right TouchPad button, identifying 4 RJ-45 (network) jack, identifying 7 S screen brightness hotkeys 58 screen image, switching 58 security cable slot, identifying 7 Security menu 74 security, cable slot 7 security, wireless 30 selecting in Setup Utility 72 serial number, computer 11 service tag 11 setup of WLAN 30 Setup Utility, passwords set in 46 setup, computer 3 shut down 24 SIM inserting 33 removing 34 software installing 40 multimedia 40 Windows Media...
Mini User Guide - Windows 7
Page 7
... 38 Adjusting the volume ...40 Multimedia software ...41 Using other preinstalled multimedia software 41 Installing multimedia software from the Internet 41 Audio ...42 Connecting external audio devices 42 Checking your audio functions 42 Video ...43 Connecting an external monitor or projector 43 Webcam ...44 6 Security Protecting the computer ...45 Using passwords ...45 Setting passwords in Windows 46 Setting passwords in Setup Utility 46 Administrator password 47 Managing an administrator password 47 Entering an administrator password 47 Power-on password 47 Managing a power-on...
... 38 Adjusting the volume ...40 Multimedia software ...41 Using other preinstalled multimedia software 41 Installing multimedia software from the Internet 41 Audio ...42 Connecting external audio devices 42 Checking your audio functions 42 Video ...43 Connecting an external monitor or projector 43 Webcam ...44 6 Security Protecting the computer ...45 Using passwords ...45 Setting passwords in Windows 46 Setting passwords in Setup Utility 46 Administrator password 47 Managing an administrator password 47 Entering an administrator password 47 Power-on password 47 Managing a power-on...
Mini User Guide - Windows 7
Page 33
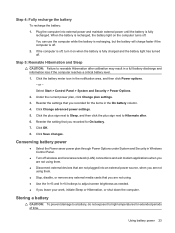
... hotkeys to reenable Hibernation after . 6. Step 5: Reenable Hibernation and Sleep CAUTION: Failure to adjust screen brightness as needed. ● If you recorded for extended periods of time. When the battery is fully recharged. Click the plus sign next to Sleep, and then click the plus sign next to high temperatures for On battery. 7. Click Save changes. Select Start > Control Panel > System and Security > Power Options. 2. Using battery power...
... hotkeys to reenable Hibernation after . 6. Step 5: Reenable Hibernation and Sleep CAUTION: Failure to adjust screen brightness as needed. ● If you recorded for extended periods of time. When the battery is fully recharged. Click the plus sign next to Sleep, and then click the plus sign next to high temperatures for On battery. 7. Click Save changes. Select Start > Control Panel > System and Security > Power Options. 2. Using battery power...

Mini User Guide - Windows 7
Page 55
...; Antivirus support (Norton Internet Security) ● Critical security updates NOTE: Security solutions are set, changed, or deleted, it in the non-Windows Setup Utility preinstalled on the computer. Passwords can be set, depending on password ● Firewall software ● Windows updates Unauthorized access to Setup Utility, BIOS settings, and other Administrator password system identification information Ongoing or future threats to the computer Critical security updates from Microsoft Unauthorized access to a Windows user account User password Using passwords A password is...
...; Antivirus support (Norton Internet Security) ● Critical security updates NOTE: Security solutions are set, changed, or deleted, it in the non-Windows Setup Utility preinstalled on the computer. Passwords can be set, depending on password ● Firewall software ● Windows updates Unauthorized access to Setup Utility, BIOS settings, and other Administrator password system identification information Ongoing or future threats to the computer Critical security updates from Microsoft Unauthorized access to a Windows user account User password Using passwords A password is...

Mini User Guide - Windows 7
Page 66
... Use Mouse Properties in Windows® to the scroll zone will not activate the scrolling function. Connecting an external mouse You can connect an external USB mouse to the computer using one of the USB ports on the computer. To scroll up and down over the lines. Hotkey functions and procedures are using the TouchPad vertical scroll zone, slide your device, and select Mouse settings. Using the keyboard Using hotkeys Hotkeys are combinations of the fn key (1) and one of the function keys (2). Use the TouchPad buttons...
... Use Mouse Properties in Windows® to the scroll zone will not activate the scrolling function. Connecting an external mouse You can connect an external USB mouse to the computer using one of the USB ports on the computer. To scroll up and down over the lines. Hotkey functions and procedures are using the TouchPad vertical scroll zone, slide your device, and select Mouse settings. Using the keyboard Using hotkeys Hotkeys are combinations of the fn key (1) and one of the function keys (2). Use the TouchPad buttons...
Mini User Guide - Windows 7
Page 78
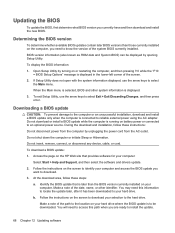
... displayed, use the arrow keys to select Exit > Exit Discarding Changes, and then press enter. During the download and installation, follow these instructions: Do not disconnect power from the computer by opening Setup Utility. Follow the instructions on the HP Web site that is to the hard drive. Do not insert, remove, connect, or disconnect any device, cable, or cord. b. Follow the instructions on battery power or connected to an optional power source. Updating the BIOS To update the BIOS...
... displayed, use the arrow keys to select Exit > Exit Discarding Changes, and then press enter. During the download and installation, follow these instructions: Do not disconnect power from the computer by opening Setup Utility. Follow the instructions on the HP Web site that is to the hard drive. Do not insert, remove, connect, or disconnect any device, cable, or cord. b. Follow the instructions on battery power or connected to an optional power source. Updating the BIOS To update the BIOS...
Mini User Guide - Windows 7
Page 86
... caps lock light, identifying 4 CD drive 61 changing Setup Utility language 72 charging batteries 17, 20 checking audio functions 42 compartments, memory module 9 components additional hardware 10 bottom 9 display 8 front 5 left-side 7 right-side 7 TouchPad 3 connecting to a WLAN 31 Connection Manager icon 27 connection, external power 15 conservation, power 23 cord, power 11 corporate WLAN connection 31 critical battery level 19 D Diagnostics menu 75 digital card inserting 52 removing 53 Digital Media Slot, identifying 7 diskette drive 61 display image, switching 58 screen brightness hotkeys...
... caps lock light, identifying 4 CD drive 61 changing Setup Utility language 72 charging batteries 17, 20 checking audio functions 42 compartments, memory module 9 components additional hardware 10 bottom 9 display 8 front 5 left-side 7 right-side 7 TouchPad 3 connecting to a WLAN 31 Connection Manager icon 27 connection, external power 15 conservation, power 23 cord, power 11 corporate WLAN connection 31 critical battery level 19 D Diagnostics menu 75 digital card inserting 52 removing 53 Digital Media Slot, identifying 7 diskette drive 61 display image, switching 58 screen brightness hotkeys...
Mini User Guide - Windows 7
Page 87
... enabling 71 Setup Utility 74 internal display switch, identifying 8 internal microphone, identifying 9, 39 Internet connection setup 30 J jacks audio-in (microphone) 8, 39 audio-out (headphone) 8, 39 RJ-45 (network) 7 K keyboard hotkeys, identifying 56 keys fn 5 function 5 Windows applications 5 Windows logo 5 L labels Microsoft Certificate of Authenticity 11 regulatory 11 service tag 11 language support 74 latches, battery release 9 left TouchPad button, identifying 3 lights battery 6 caps lock 4 drive 6 power 6 webcam 9 wireless 6 local area network (LAN) cable required 26 connecting cable...
... enabling 71 Setup Utility 74 internal display switch, identifying 8 internal microphone, identifying 9, 39 Internet connection setup 30 J jacks audio-in (microphone) 8, 39 audio-out (headphone) 8, 39 RJ-45 (network) 7 K keyboard hotkeys, identifying 56 keys fn 5 function 5 Windows applications 5 Windows logo 5 L labels Microsoft Certificate of Authenticity 11 regulatory 11 service tag 11 language support 74 latches, battery release 9 left TouchPad button, identifying 3 lights battery 6 caps lock 4 drive 6 power 6 webcam 9 wireless 6 local area network (LAN) cable required 26 connecting cable...

Mini User Guide - Windows XP
Page 51
...; Windows updates Unauthorized access to Setup Utility, BIOS settings, and other Administrator password system identification information Ongoing or future threats to the device Critical security updates from Microsoft Unauthorized access to a Windows user account User password Using passwords A password is essential to secure your device information. Follow the procedures in the non-Windows Setup Utility preinstalled on how you want to control access to your information. Several types of passwords can be set . Because most passwords are not displayed...
...; Windows updates Unauthorized access to Setup Utility, BIOS settings, and other Administrator password system identification information Ongoing or future threats to the device Critical security updates from Microsoft Unauthorized access to a Windows user account User password Using passwords A password is essential to secure your device information. Follow the procedures in the non-Windows Setup Utility preinstalled on how you want to control access to your information. Several types of passwords can be set . Because most passwords are not displayed...

Mini User Guide - Windows XP
Page 80
... lock light, identifying 2 CD drive 59 changing the Setup Utility language 68 charging batteries 16, 19 checking audio functions 39 compartments, memory module 8 components additional hardware 9 bottom 7 display 6 front 3 left-side 5 right-side 5 TouchPad 1 connecting to a WLAN 29 connection, external power 14 conservation, power 21 cord, power 9 corporate WLAN connection 29 critical battery level 18 D Diagnostics menu 71 digital card inserting 50 removing 51 stopping 51 Digital Media Slot, identifying 5 diskette drive 59 display image, switching 56 screen brightness hotkeys 56 display switch...
... lock light, identifying 2 CD drive 59 changing the Setup Utility language 68 charging batteries 16, 19 checking audio functions 39 compartments, memory module 8 components additional hardware 9 bottom 7 display 6 front 3 left-side 5 right-side 5 TouchPad 1 connecting to a WLAN 29 connection, external power 14 conservation, power 21 cord, power 9 corporate WLAN connection 29 critical battery level 18 D Diagnostics menu 71 digital card inserting 50 removing 51 stopping 51 Digital Media Slot, identifying 5 diskette drive 59 display image, switching 56 screen brightness hotkeys 56 display switch...


