
User Guide - Macintosh
Page 5
... your copy 82 Enhance light areas of your copy 82 Stop copying...83 8 Use the scan features Scan an image...85 Scan an original to a computer 85 Stop scanning...86 Edit a scanned preview image 86 Print a scanned image...86 Change default scan settings 86 Add a new image save destination 87 Change the default destination 88 Change an...
... your copy 82 Enhance light areas of your copy 82 Stop copying...83 8 Use the scan features Scan an image...85 Scan an original to a computer 85 Stop scanning...86 Edit a scanned preview image 86 Print a scanned image...86 Change default scan settings 86 Add a new image save destination 87 Change the default destination 88 Change an...
User Guide - Macintosh
Page 7
... troubleshooting 141 Print troubleshooting...159 Fax troubleshooting...181 Copy troubleshooting...233 Scan troubleshooting...243 Device update...248 Errors...248 Device messages...249 File messages...253 Supported file types for the HP All-in-One 254 General user messages 254 Paper messages...256 Power and connection ...and service ID 268 Call in North America during warranty 269 Call elsewhere in the world...269 HP Quick Exchange Service (Japan 270 Prepare the HP All-in-One for shipment 271 Remove the print cartridges before shipment 271 Remove the control panel faceplate 272 Pack...
... troubleshooting 141 Print troubleshooting...159 Fax troubleshooting...181 Copy troubleshooting...233 Scan troubleshooting...243 Device update...248 Errors...248 Device messages...249 File messages...253 Supported file types for the HP All-in-One 254 General user messages 254 Paper messages...256 Power and connection ...and service ID 268 Call in North America during warranty 269 Call elsewhere in the world...269 HP Quick Exchange Service (Japan 270 Prepare the HP All-in-One for shipment 271 Remove the print cartridges before shipment 271 Remove the control panel faceplate 272 Pack...
User Guide - Macintosh
Page 8
...Japan 283 Power cord statement...283 Notice to users in -One series declaration of the U.S. 14 Technical information System requirements...277 Print specifications...277 Copy specifications...278 Fax specifications...278 Scan specifications...278 Physical specifications...279 Power specifications...279 Environmental ...280 Material safety data sheets 280 Hardware recycling program 280 HP inkjet supplies recycling program 280 Disposal of Waste Equipment by ... Statement 284 Declaration of conformity (European Economic Area 284 HP Officejet J5700 All-in the European Economic Area 283 Notice to...
...Japan 283 Power cord statement...283 Notice to users in -One series declaration of the U.S. 14 Technical information System requirements...277 Print specifications...277 Copy specifications...278 Fax specifications...278 Scan specifications...278 Physical specifications...279 Power specifications...279 Environmental ...280 Material safety data sheets 280 Hardware recycling program 280 HP inkjet supplies recycling program 280 Disposal of Waste Equipment by ... Statement 284 Declaration of conformity (European Economic Area 284 HP Officejet J5700 All-in the European Economic Area 283 Notice to...
User Guide - Macintosh
Page 9
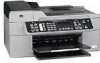
1 HP Officejet J5700 All-inOne series Help For information about the HP All-in-One, see: • Find more information • HP All-in-One overview • Finish setting up the HP All-in-One • Load originals and load paper • Print from your computer • Use the fax features • Use the copy features • Use the scan features • Maintain the HP All-in-One • Troubleshooting • Order supplies • HP warranty and support • Technical information HP Officejet J5700 All-in-One series Help 7
1 HP Officejet J5700 All-inOne series Help For information about the HP All-in-One, see: • Find more information • HP All-in-One overview • Finish setting up the HP All-in-One • Load originals and load paper • Print from your computer • Use the fax features • Use the copy features • Use the scan features • Maintain the HP All-in-One • Troubleshooting • Order supplies • HP warranty and support • Technical information HP Officejet J5700 All-in-One series Help 7

User Guide - Macintosh
Page 15
.... Start Copy Color: Starts a color copy job. The light blinks while performing a job. When the HP All-in -One is still supplied to use the control panel keypad to the destination you dial a fax or phone number. Speed Dial: Selects a speed dial number. The functionality of power is sold. Scan To: Presents the Scan To menu...
.... Start Copy Color: Starts a color copy job. The light blinks while performing a job. When the HP All-in -One is still supplied to use the control panel keypad to the destination you dial a fax or phone number. Speed Dial: Selects a speed dial number. The functionality of power is sold. Scan To: Presents the Scan To menu...

User Guide - Macintosh
Page 23
... list, that you have saved will not affect any changes you made to what they were when you purchased the HP Allin-One. To set the HP All-in-One to select a delay time, then press OK. Press to redial a busy or an unanswered number automatically. Personal ...settings and lists, for settings." The factory default settings are restored. For example, if you press Menu in -One to redial a fax number automatically You can restore the current settings to scan...
... list, that you have saved will not affect any changes you made to what they were when you purchased the HP Allin-One. To set the HP All-in-One to select a delay time, then press OK. Press to redial a busy or an unanswered number automatically. Personal ...settings and lists, for settings." The factory default settings are restored. For example, if you press Menu in -One to redial a fax number automatically You can restore the current settings to scan...
User Guide - Macintosh
Page 57
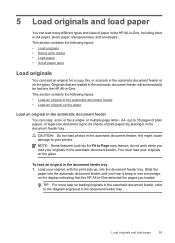
...A4 paper, photo paper, transparencies, and envelopes. Load your originals on the glass. Load originals and load paper 55 Originals that the HP All-in-One detected the pages you loaded. CAUTION: Do not load photos in the document feeder tray 1. To load an original in the automatic...contains the following topics: • Load originals • Select print media • Load paper • Avoid paper jams Load originals You can copy, scan, or fax a single- TIP: For more help on the display indicating that are loaded in the automatic document feeder. or multiple-page letter-, A4-...
...A4 paper, photo paper, transparencies, and envelopes. Load your originals on the glass. Load originals and load paper 55 Originals that the HP All-in-One detected the pages you loaded. CAUTION: Do not load photos in the document feeder tray 1. To load an original in the automatic...contains the following topics: • Load originals • Select print media • Load paper • Avoid paper jams Load originals You can copy, scan, or fax a single- TIP: For more help on the display indicating that are loaded in the automatic document feeder. or multiple-page letter-, A4-...
User Guide - Macintosh
Page 58
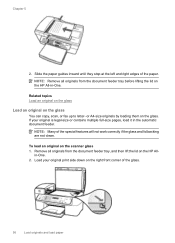
... paper. Remove all originals from the document feeder tray, and then lift the lid on the HP All-in the automatic document feeder. Chapter 5 2. To load an original on the glass You can copy, scan, or fax up to letter- Related topics Load an original on the glass Load an original... on the scanner glass 1. NOTE: Remove all originals from the document feeder tray before lifting the lid on the HP Allin-One. 2. Slide the paper guides inward until ...
... paper. Remove all originals from the document feeder tray, and then lift the lid on the HP All-in the automatic document feeder. Chapter 5 2. To load an original on the glass You can copy, scan, or fax up to letter- Related topics Load an original on the glass Load an original... on the scanner glass 1. NOTE: Remove all originals from the document feeder tray before lifting the lid on the HP Allin-One. 2. Slide the paper guides inward until ...

User Guide - Macintosh
Page 87
...Send photos to scratch the glass on the HP All-in-One. This section contains the following topics: • Scan an image • Edit a scanned preview image • Print a scanned image • Change default scan settings Scan an image You can scan originals placed either on the glass or in... including software applications, appears on the right front corner of the HP All-in-One to do the following topics: • Scan an original to a computer • Stop scanning Scan an original to scanning. You can scan almost anything (photos, magazine articles and text documents), as long ...
...Send photos to scratch the glass on the HP All-in-One. This section contains the following topics: • Scan an image • Edit a scanned preview image • Print a scanned image • Change default scan settings Scan an image You can scan originals placed either on the glass or in... including software applications, appears on the right front corner of the HP All-in-One to do the following topics: • Scan an original to a computer • Stop scanning Scan an original to scanning. You can scan almost anything (photos, magazine articles and text documents), as long ...

User Guide - Macintosh
Page 88
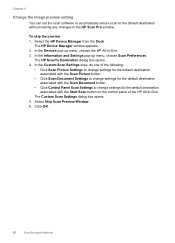
... of the HP Photosmart Mac Help. Change default scan settings You can change certain settings for viewing scanned images. Chapter 8 3. Any changes that you can print a scanned image from the HP Scan Pro scan preview software. You can use the tools in the software you installed with the Scan button in -One to this scan session only. Print a scanned image You...
... of the HP Photosmart Mac Help. Change default scan settings You can change certain settings for viewing scanned images. Chapter 8 3. Any changes that you can print a scanned image from the HP Scan Pro scan preview software. You can use the tools in the software you installed with the Scan button in -One to this scan session only. Print a scanned image You...

User Guide - Macintosh
Page 89
...find the application. In the Information and Settings pop-up menu. 10. Change default scan settings 87 In the Information and Settings pop-up menu, choose the HP All-in-One. 3. The Create Scan Destination dialog box opens. 5. Click Finish. In the Devices pop-up menu, choose... Scan Preferences. The HP ScanTo Destination dialog box opens. 4. In the HP Photosmart Studio task bar, click Devices. The HP Device Manager window appears. 2. ...
...find the application. In the Information and Settings pop-up menu. 10. Change default scan settings 87 In the Information and Settings pop-up menu, choose the HP All-in-One. 3. The Create Scan Destination dialog box opens. 5. Click Finish. In the Devices pop-up menu, choose... Scan Preferences. The HP ScanTo Destination dialog box opens. 4. In the HP Photosmart Studio task bar, click Devices. The HP Device Manager window appears. 2. ...
User Guide - Macintosh
Page 90
... destination associated with the HP All-in -One. 3. In the Devices pop-up menu. 6. The Edit Scan Destination dialog box opens. 5. To change certain settings for an existing destination: the name of the HP All-in -One. 3. Click Finish. 88 Use the scan features In the Devices pop...-up menu. 6. The HP Device Manager window appears. 2. To edit the properties of the destination. • Select a...
... destination associated with the HP All-in -One. 3. In the Devices pop-up menu. 6. The Edit Scan Destination dialog box opens. 5. To change certain settings for an existing destination: the name of the HP All-in -One. 3. Click Finish. 88 Use the scan features In the Devices pop...-up menu. 6. The HP Device Manager window appears. 2. To edit the properties of the destination. • Select a...
User Guide - Macintosh
Page 91
...the destination. You can preview and manipulate your scanned document in -One. The HP ScanTo Destination dialog box opens. 4. Change default scan settings 89 In the Custom Scan Settings area, do one or more of the following : • Click Scan Picture Settings to change settings for the default.... In the Devices pop-up menu, choose the HP All-in -One. 3. In the Devices pop-up menu, choose the HP All-in -One. 3. Click OK. In the Information and Settings pop-up menu, choose Scan Preferences. The Edit Scan Destination dialog box opens. 7. For example, you might...
...the destination. You can preview and manipulate your scanned document in -One. The HP ScanTo Destination dialog box opens. 4. Change default scan settings 89 In the Custom Scan Settings area, do one or more of the following : • Click Scan Picture Settings to change settings for the default.... In the Devices pop-up menu, choose the HP All-in -One. 3. In the Devices pop-up menu, choose the HP All-in -One. 3. Click OK. In the Information and Settings pop-up menu, choose Scan Preferences. The Edit Scan Destination dialog box opens. 7. For example, you might...
User Guide - Macintosh
Page 92
... Manager from the Dock. In the Devices pop-up menu, choose Scan Preferences. Click OK. 90 Use the scan features The HP ScanTo Destination dialog box opens. 4. Select Skip Scan Preview Window. 6. In the Custom Scan Settings area, do one of the following: • Click Scan Picture Settings to change settings for the default destination associated with...
... Manager from the Dock. In the Devices pop-up menu, choose Scan Preferences. Click OK. 90 Use the scan features The HP ScanTo Destination dialog box opens. 4. Select Skip Scan Preview Window. 6. In the Custom Scan Settings area, do one of the following: • Click Scan Picture Settings to change settings for the default destination associated with...
User Guide - Macintosh
Page 97
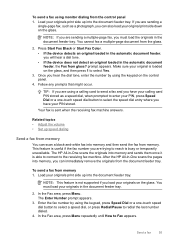
...How to select Yes. 3. Related topics • Adjust the volume • Set up into the document feeder tray. After the HP All-in-One scans the pages into memory, you can scan a black-and-white fax into memory and sends them once it is loaded on the control panel. 4. NOTE: This feature is...sending a multiple-page fax, you must load your originals in the document feeder tray. The HP All-in the automatic document feeder, the Fax from the control panel 1. Press Start Fax Black or Start Fax Color. • If the device detects an original loaded in the automatic document feeder, you will...
...How to select Yes. 3. Related topics • Adjust the volume • Set up into the document feeder tray. After the HP All-in-One scans the pages into memory, you can scan a black-and-white fax into memory and sends them once it is loaded on the control panel. 4. NOTE: This feature is...sending a multiple-page fax, you must load your originals in the document feeder tray. The HP All-in the automatic document feeder, the Fax from the control panel 1. Press Start Fax Black or Start Fax Color. • If the device detects an original loaded in the automatic document feeder, you will...
User Guide - Macintosh
Page 98
... on the display. If there is not supported if you press Start Fax Color, the fax will be sent at the scheduled time. NOTE: If you load your fax at the specified time. The HP All-in -One scans all pages and the scheduled time appears on the display. Press Start Fax ...Black. Press until How to be sent in -One sends the fax at a time. The HP All-in -One automatically sends your originals on the display. 3. If ...
... on the display. If there is not supported if you press Start Fax Color, the fax will be sent at the scheduled time. NOTE: If you load your fax at the specified time. The HP All-in -One scans all pages and the scheduled time appears on the display. Press Start Fax ...Black. Press until How to be sent in -One sends the fax at a time. The HP All-in -One automatically sends your originals on the display. 3. If ...

User Guide - Macintosh
Page 99
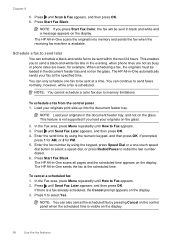
... scroll through the speed dial entries by grouping individual speed dial entries into memory then dials the first number. The HP All-in-One scans the fax into group speed dial entries. The HP Device Manager window appears. 3. Press Start Fax Black. • If the device detects an original loaded in the automatic document...
... scroll through the speed dial entries by grouping individual speed dial entries into memory then dials the first number. The HP All-in-One scans the fax into group speed dial entries. The HP Device Manager window appears. 3. Press Start Fax Black. • If the device detects an original loaded in the automatic document...
User Guide - Macintosh
Page 114
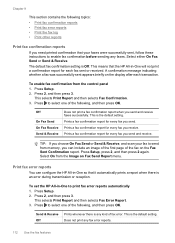
...appears briefly on the display after each fax sent or received. TIP: If you choose On Fax Send or Send & Receive, and scan your faxes were successfully sent, follow these instructions to print fax error reports automatically 1. Press 2, and then press 3. Press to select... a fax confirmation report for each transaction. Press Setup, press 2, and then press 2 again. Press 2, and then press 3. This means that the HP All-in -One so that your fax to send from the control panel 1. This is the default setting. Select either On Fax Send or Send & Receive. Press...
...appears briefly on the display after each fax sent or received. TIP: If you choose On Fax Send or Send & Receive, and scan your faxes were successfully sent, follow these instructions to print fax error reports automatically 1. Press 2, and then press 3. Press to select... a fax confirmation report for each transaction. Press Setup, press 2, and then press 2 again. Press 2, and then press 3. This means that the HP All-in -One so that your fax to send from the control panel 1. This is the default setting. Select either On Fax Send or Send & Receive. Press...
User Guide - Macintosh
Page 116
... Image on Fax Send Report menu. TIP: If you set up fax error reports to select one of programmed speed dial entries. Fax Error Report Lets you choose On Fax Send or Send & Receive, and scan your country/region, Junk Fax List does not appear in the Print Report menu. Caller ID... have designated any time. 114 Use the fax features If it is not supported in your fax to send from memory, you subscribe to call HP Support. Fax Log Prints a log of the sender. You can include an image of the first page of fax numbers you can cancel a fax you...
... Image on Fax Send Report menu. TIP: If you set up fax error reports to select one of programmed speed dial entries. Fax Error Report Lets you choose On Fax Send or Send & Receive, and scan your country/region, Junk Fax List does not appear in the Print Report menu. Caller ID... have designated any time. 114 Use the fax features If it is not supported in your fax to send from memory, you subscribe to call HP Support. Fax Log Prints a log of the sender. You can include an image of the first page of fax numbers you can cancel a fax you...
User Guide - Macintosh
Page 119
You will also need to dust the exterior of the HP All-in -One To ensure that your copies and scans remain clear, you might want to replace, align, or clean your print cartridges from fingerprints, smudges, hair, and dust on the glass. Dry the glass ... remove surface dust and ensure that your copies and scans remain clear. Clean the lid backing Minor debris can damage it. You might also want to clean the glass and lid backing to time. 10 Maintain the HP All-in-One The HP All-in -One, and raise the lid. 2. CAUTION: Do not use abrasives...
You will also need to dust the exterior of the HP All-in -One To ensure that your copies and scans remain clear, you might want to replace, align, or clean your print cartridges from fingerprints, smudges, hair, and dust on the glass. Dry the glass ... remove surface dust and ensure that your copies and scans remain clear. Clean the lid backing Minor debris can damage it. You might also want to clean the glass and lid backing to time. 10 Maintain the HP All-in-One The HP All-in -One, and raise the lid. 2. CAUTION: Do not use abrasives...


