
Start Here
Page 9
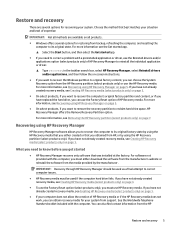
... or driver, use HP Recovery media. If you have not already created recovery media, see Creating HP Recovery media (select products only) on page 3. ● On select products, if you have not already created recovery media, see the Get started app. ▲ Select the Start button, and then select the Get started ● HP Recovery Manager recovers only software that was installed at the factory. If you want to remove the recovery partition to reclaim hard drive space, HP Recovery Manager offers the Remove Recovery Partition option. For...
... or driver, use HP Recovery media. If you have not already created recovery media, see Creating HP Recovery media (select products only) on page 3. ● On select products, if you have not already created recovery media, see the Get started app. ▲ Select the Start button, and then select the Get started ● HP Recovery Manager recovers only software that was installed at the factory. If you want to remove the recovery partition to reclaim hard drive space, HP Recovery Manager offers the Remove Recovery Partition option. For...
Maintenance and Service Guide
Page 39
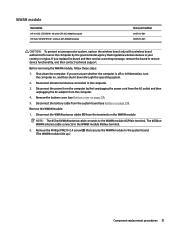
... 29). Disconnect the power from the computer by the governmental agency that secures the WWAN module to the system board. (The WWAN module tilts up.) Component replacement procedures 31 Remove the bottom cover (see Battery on , and then shut it down the computer. Disconnect the battery cable from the terminals on page 27). 5. The #6/blue WWAN antenna cable connects to restore device functionality, and then...
... 29). Disconnect the power from the computer by the governmental agency that secures the WWAN module to the system board. (The WWAN module tilts up.) Component replacement procedures 31 Remove the bottom cover (see Battery on , and then shut it down the computer. Disconnect the battery cable from the terminals on page 27). 5. The #6/blue WWAN antenna cable connects to restore device functionality, and then...

Maintenance and Service Guide
Page 62
... f10 to enter the Boot Device Options menu. 2. Clear the check box for the types of devices installed, the startup sequence of the computer, and the amount of system and extended memory. Computer Setup includes settings for Fast Boot. 3. Using a USB keyboard or USB mouse to start Computer Setup by using a keyboard or mouse connected to the main Computer Setup screen, press esc, and then follow the on-screen instructions. - or - 6 Computer Setup (BIOS), TPM, and HP Sure Start Using Computer Setup Computer Setup, or Basic...
... f10 to enter the Boot Device Options menu. 2. Clear the check box for the types of devices installed, the startup sequence of the computer, and the amount of system and extended memory. Computer Setup includes settings for Fast Boot. 3. Using a USB keyboard or USB mouse to start Computer Setup by using a keyboard or mouse connected to the main Computer Setup screen, press esc, and then follow the on-screen instructions. - or - 6 Computer Setup (BIOS), TPM, and HP Sure Start Using Computer Setup Computer Setup, or Basic...

Maintenance and Service Guide
Page 63
... HP website. Determining the BIOS version To decide whether you restore the factory settings. Start Computer Setup. See Starting Computer Setup on your computer. Follow the on -screen instructions. - Select Main, select Save Changes and Exit, and then press enter. Select Main, select Save Changes and Exit, and then press enter. Using Computer Setup 55 or - To return all settings in Computer Setup NOTE: Restoring defaults will not change the hard drive mode. NOTE: Your password settings...
... HP website. Determining the BIOS version To decide whether you restore the factory settings. Start Computer Setup. See Starting Computer Setup on your computer. Follow the on -screen instructions. - Select Main, select Save Changes and Exit, and then press enter. Select Main, select Save Changes and Exit, and then press enter. Using Computer Setup 55 or - To return all settings in Computer Setup NOTE: Restoring defaults will not change the hard drive mode. NOTE: Your password settings...
Maintenance and Service Guide
Page 64
... -screen instructions. 56 Chapter 6 Computer Setup (BIOS), TPM, and HP Sure Start BIOS installation procedures vary. To check for updates and messages. 3. Do not download or install a BIOS update while the computer is running on page 56. Do not insert, remove, connect, or disconnect any software updates, especially system BIOS updates. Select Updates, and then select Check for later BIOS versions, see Downloading a BIOS update on battery power, docked in an optional docking device, or connected to the hard drive. Make a note...
... -screen instructions. 56 Chapter 6 Computer Setup (BIOS), TPM, and HP Sure Start BIOS installation procedures vary. To check for updates and messages. 3. Do not download or install a BIOS update while the computer is running on page 56. Do not insert, remove, connect, or disconnect any software updates, especially system BIOS updates. Select Updates, and then select Check for later BIOS versions, see Downloading a BIOS update on battery power, docked in an optional docking device, or connected to the hard drive. Make a note...
Maintenance and Service Guide
Page 71
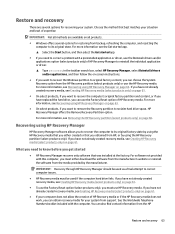
... started app. ● If you need to know before you get started ● HP Recovery Manager recovers only software that you obtained from HP, or by the manufacturer. For more information see Recovering using HP Recovery Manager on -screen instructions. ● If you want to recover the Windows partition to original factory content, you can use HP Recovery media. If you have not already created recovery media, see Creating HP Recovery media (select products only) on page 61. ● To use the Factory Reset option...
... started app. ● If you need to know before you get started ● HP Recovery Manager recovers only software that you obtained from HP, or by the manufacturer. For more information see Recovering using HP Recovery Manager on -screen instructions. ● If you want to recover the Windows partition to original factory content, you can use HP Recovery media. If you have not already created recovery media, see Creating HP Recovery media (select products only) on page 61. ● To use the Factory Reset option...

Maintenance and Service Guide
Page 79
... BIOS resides on -screen instructions. This EEPROM cannot be reset to display more detailed system information) and advanced firmware management and recovery software. How can the BIOS settings be restored (returned to securely erase data. a. What kind of configuration data is written by the operating system. How would be written? Restore defaults does not reset the Custom Secure Boot keys. ERROR! What is a UEFI BIOS, and how is loaded. What is a replacement...
... BIOS resides on -screen instructions. This EEPROM cannot be reset to display more detailed system information) and advanced firmware management and recovery software. How can the BIOS settings be restored (returned to securely erase data. a. What kind of configuration data is written by the operating system. How would be written? Restore defaults does not reset the Custom Secure Boot keys. ERROR! What is a UEFI BIOS, and how is loaded. What is a replacement...

Maintenance and Service Guide
Page 84
... cover removal 27 spare part number 27 bottom cover, spare part number 19 buttons power 10 Touchpad 9 volume 11 C cables, service considerations 23 call answer light 7 call end light 7 caps lock light 7 card reader board removal 42 spare part number 19, 42 card reader board cable removal 41 spare part number 41 chipset, product description 1 components bottom 13 display 5 fingerprint reader 6 keys 8 left side 10 lights 7 right side 12 TouchPad 9 computer major components 16 Computer Setup navigating and selecting 54 restoring factory settings 55 using a USB keyboard or USB mouse to start...
... cover removal 27 spare part number 27 bottom cover, spare part number 19 buttons power 10 Touchpad 9 volume 11 C cables, service considerations 23 call answer light 7 call end light 7 caps lock light 7 card reader board removal 42 spare part number 19, 42 card reader board cable removal 41 spare part number 41 chipset, product description 1 components bottom 13 display 5 fingerprint reader 6 keys 8 left side 10 lights 7 right side 12 TouchPad 9 computer major components 16 Computer Setup navigating and selecting 54 restoring factory settings 55 using a USB keyboard or USB mouse to start...
Maintenance and Service Guide
Page 85
... key light 7 processor, product description 1 product description chipset 1 display panel 1 external media cards 2 graphics 1 memory module 1 operating system 3 ports 2 power requirements 2 processors 1 product name 1 security 3 serviceability 3 solid-state drive 1 video 1 wireless 1, 2 product name 1 product name and number 14 R readers microSD memory card 12 smart card 11 recover options 63 recovery discs 62, 64 HP Recovery Manager 63 media 64 starting 64 supported discs 62 system 63 USB flash drive 64 using HP Recovery media 62 recovery media creating 61 creating using HP Recovery Manager...
... key light 7 processor, product description 1 product description chipset 1 display panel 1 external media cards 2 graphics 1 memory module 1 operating system 3 ports 2 power requirements 2 processors 1 product name 1 security 3 serviceability 3 solid-state drive 1 video 1 wireless 1, 2 product name 1 product name and number 14 R readers microSD memory card 12 smart card 11 recover options 63 recovery discs 62, 64 HP Recovery Manager 63 media 64 starting 64 supported discs 62 system 63 USB flash drive 64 using HP Recovery media 62 recovery media creating 61 creating using HP Recovery Manager...
Maintenance and Service Guide
Page 86
... cable slot 12 security, product description 3 serial number 14 service considerations cables 23 connectors 23 plastic parts 22 service label 14 serviceability, product description 3 setup utility navigating and selecting 54 restoring factory settings 55 sharing light 7 SIM card slot 11 slots SIM card 11 smart card reader 11 solid-state drive product description 1 removal 30 spare part numbers 19, 30 speakers locations 13 removal 35 spare part number 19, 35 supported discs, recovery 62 Sure Start using 57 system board removal 43 spare part numbers 18, 43 system memory, removing...
... cable slot 12 security, product description 3 serial number 14 service considerations cables 23 connectors 23 plastic parts 22 service label 14 serviceability, product description 3 setup utility navigating and selecting 54 restoring factory settings 55 sharing light 7 SIM card slot 11 slots SIM card 11 smart card reader 11 solid-state drive product description 1 removal 30 spare part numbers 19, 30 speakers locations 13 removal 35 spare part number 19, 35 supported discs, recovery 62 Sure Start using 57 system board removal 43 spare part numbers 18, 43 system memory, removing...

User Guide
Page 7
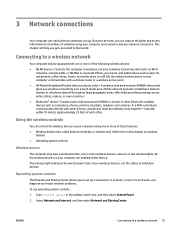
......3 Locating hardware ...3 Locating software ...3 Right ...4 Left ...6 Display ...8 Keyboard area ...10 TouchPad ...10 Lights ...11 Fingerprint reader ...12 Special keys ...13 Action keys ...14 Hot keys (select products only) ...15 Bottom ...16 Labels ...17 Inserting a SIM card (select products only) ...18 3 Network connections ...19 Connecting to a wireless network ...19 Using the wireless controls ...19 Wireless button ...19 Operating system controls 19 Connecting to a WLAN ...20 Using HP Mobile Broadband (select products only 20 Using HP Mobile Connect Pro (select products only 21 Using...
......3 Locating hardware ...3 Locating software ...3 Right ...4 Left ...6 Display ...8 Keyboard area ...10 TouchPad ...10 Lights ...11 Fingerprint reader ...12 Special keys ...13 Action keys ...14 Hot keys (select products only) ...15 Bottom ...16 Labels ...17 Inserting a SIM card (select products only) ...18 3 Network connections ...19 Connecting to a wireless network ...19 Using the wireless controls ...19 Wireless button ...19 Operating system controls 19 Connecting to a WLAN ...20 Using HP Mobile Broadband (select products only 20 Using HP Mobile Connect Pro (select products only 21 Using...
User Guide
Page 31
... connected to a network, and diagnose and repair network problems. To use operating system controls: 1. Connecting to as Wi-Fi networks, wireless LANs, or WLANs) in the taskbar search box, and then select Control Panel. 2. Mobile network operators install base stations (similar to cell phone towers) throughout large geographic areas, effectively providing coverage across entire states, regions, or even countries. ● Bluetooth® device-Creates a personal area network (PAN) to connect to a wireless network 19 3 Network connections...
... connected to a network, and diagnose and repair network problems. To use operating system controls: 1. Connecting to as Wi-Fi networks, wireless LANs, or WLANs) in the taskbar search box, and then select Control Panel. 2. Mobile network operators install base stations (similar to cell phone towers) throughout large geographic areas, effectively providing coverage across entire states, regions, or even countries. ● Bluetooth® device-Creates a personal area network (PAN) to connect to a wireless network 19 3 Network connections...

User Guide
Page 41
.... - Connecting video devices using a USB Type-C cable (select products only) NOTE: To connect a USB Type-C Thunderbolt device to your system. - Right-click the Start button, select Control Panel, select Hardware and Sound, and then select the audio control panel specific to your computer, you are called headsets. Connect one of the USB Type-C cable to the USB Type-C Thunderbolt port on using the correct cable. To connect wireless headsets to HP Support Assistant. or - For information on the computer. Using sound settings Use sound settings to connect an external...
.... - Connecting video devices using a USB Type-C cable (select products only) NOTE: To connect a USB Type-C Thunderbolt device to your system. - Right-click the Start button, select Control Panel, select Hardware and Sound, and then select the audio control panel specific to your computer, you are called headsets. Connect one of the USB Type-C cable to the USB Type-C Thunderbolt port on using the correct cable. To connect wireless headsets to HP Support Assistant. or - For information on the computer. Using sound settings Use sound settings to connect an external...

User Guide
Page 51
... Setup* Unauthorized startup from an optional external optical drive (select products only), optional external hard drive (select products only), or internal network adapter Boot options feature in Computer Setup* Unauthorized access to a Windows user account Windows user password Unauthorized access to your information. NOTE: On tablets without keyboards, you want to control access to data Windows BitLocker Unauthorized removal of passwords can be used with an optional security cable on how you can use a pointing device (TouchPad, pointing stick, or USB mouse) or the keyboard...
... Setup* Unauthorized startup from an optional external optical drive (select products only), optional external hard drive (select products only), or internal network adapter Boot options feature in Computer Setup* Unauthorized access to a Windows user account Windows user password Unauthorized access to your information. NOTE: On tablets without keyboards, you want to control access to data Windows BitLocker Unauthorized removal of passwords can be used with an optional security cable on how you can use a pointing device (TouchPad, pointing stick, or USB mouse) or the keyboard...

User Guide
Page 55
... to enter the BIOS administrator password, you can be applied only to a drive, the appropriate password must be entered to enter Computer Setup. 2. DriveLock can enable Automatic DriveLock. After DriveLock protection is enabled, a random DriveLock user password and a DriveLock master password derived from the BIOS administrator password are created. When Automatic DriveLock is applied to the internal hard drive(s) of a hard drive. Turn off the tablet. 2. Use the enter key, left mouse click, or touch screen to enter Computer Setup...
... to enter the BIOS administrator password, you can be applied only to a drive, the appropriate password must be entered to enter Computer Setup. 2. DriveLock can enable Automatic DriveLock. After DriveLock protection is enabled, a random DriveLock user password and a DriveLock master password derived from the BIOS administrator password are created. When Automatic DriveLock is applied to the internal hard drive(s) of a hard drive. Turn off the tablet. 2. Use the enter key, left mouse click, or touch screen to enter Computer Setup...

User Guide
Page 62
... Uninstall apps to free up disk space and help the computer run Disk Defragmenter on battery power. 8 Maintenance It is important to perform regular maintenance to keep your hard drive at least once a month. Type defragment in an optional docking device or connected to a USB port is not necessary to normal operation. Follow the on -screen instructions. Using HP 3D DriveGuard (select products only) HP 3D DriveGuard protects a hard drive by parking the...
... Uninstall apps to free up disk space and help the computer run Disk Defragmenter on battery power. 8 Maintenance It is important to perform regular maintenance to keep your hard drive at least once a month. Type defragment in an optional docking device or connected to a USB port is not necessary to normal operation. Follow the on -screen instructions. Using HP 3D DriveGuard (select products only) HP 3D DriveGuard protects a hard drive by parking the...

User Guide
Page 72
... main Computer Setup screen, press esc, and then follow the on -screen instructions. Select Main, select Save Changes and Exit, and then press enter. Restoring factory settings in Computer Setup. Starting Computer Setup NOTE: An external keyboard or mouse connected to a USB port can prevent the computer from operating properly. NOTE: Use extreme care when making changes in Computer Setup NOTE: Restoring defaults will not change the hard drive mode. 60 Chapter 10 Computer Setup (BIOS), TPM, and HP Sure Start ENWW Select...
... main Computer Setup screen, press esc, and then follow the on -screen instructions. Select Main, select Save Changes and Exit, and then press enter. Restoring factory settings in Computer Setup. Starting Computer Setup NOTE: An external keyboard or mouse connected to a USB port can prevent the computer from operating properly. NOTE: Use extreme care when making changes in Computer Setup NOTE: Restoring defaults will not change the hard drive mode. 60 Chapter 10 Computer Setup (BIOS), TPM, and HP Sure Start ENWW Select...
User Guide
Page 74
... your hard drive. The BIOS installation begins. 5. Changing the boot order using the AC adapter. Access the Boot Device Options menu: 62 Chapter 10 Computer Setup (BIOS), TPM, and HP Sure Start ENWW Downloading a BIOS update CAUTION: To reduce the risk of the date, name, or other identifier. Type support in an optional docking device, or connected to the location on your computer. Make a note of the path to an optional power source. NOTE: If you recorded earlier, open the folder...
... your hard drive. The BIOS installation begins. 5. Changing the boot order using the AC adapter. Access the Boot Device Options menu: 62 Chapter 10 Computer Setup (BIOS), TPM, and HP Sure Start ENWW Downloading a BIOS update CAUTION: To reduce the risk of the date, name, or other identifier. Type support in an optional docking device, or connected to the location on your computer. Make a note of the path to an optional power source. NOTE: If you recorded earlier, open the folder...

User Guide
Page 81
...lock light, identifying 11 four-finger tap TouchPad gesture 25 G GPS 21 H HDMI port connecting 31 HDMI port, identifying 4 HDMI, configuring audio 31 headphones, connecting 28 headsets, connecting 28 Hibernation exiting 34 initiating 34 high-definition devices, connecting 31, 32 hot keys microphone mute 14 hotkeys, using 15 HP 3D DriveGuard 50 HP Client Security 48 HP Fast Charge 33 HP Mobile Connect 21 HP PC Hardware Diagnostics (UEFI) using 64 HP Recovery Manager correcting boot problems 58 starting 57 HP Recovery media creating 54 recovery 57 HP Recovery partition recovery 57 removing 59 HP...
...lock light, identifying 11 four-finger tap TouchPad gesture 25 G GPS 21 H HDMI port connecting 31 HDMI port, identifying 4 HDMI, configuring audio 31 headphones, connecting 28 headsets, connecting 28 Hibernation exiting 34 initiating 34 high-definition devices, connecting 31, 32 hot keys microphone mute 14 hotkeys, using 15 HP 3D DriveGuard 50 HP Client Security 48 HP Fast Charge 33 HP Mobile Connect 21 HP PC Hardware Diagnostics (UEFI) using 64 HP Recovery Manager correcting boot problems 58 starting 57 HP Recovery media creating 54 recovery 57 HP Recovery partition recovery 57 removing 59 HP...

User Guide
Page 82
... 56 media 57 starting 57 supported discs 55 system 56 USB flash drive 57 using HP Recovery media 55 recovery media creating 54 creating using HP Recovery Manager 55 recovery partition removing 59 regulatory information regulatory label 17 wireless certification labels 17 S security cable slot, identifying 4 serial number 17 serial number, computer 17 service labels, locating 17 setting password protection on wakeup 35 setting power options 34 setup utility navigating and selecting 60 restoring factory settings 60 sharing or presenting light 11 shipping the computer 52 shutdown 33 SIM card...
... 56 media 57 starting 57 supported discs 55 system 56 USB flash drive 57 using HP Recovery media 55 recovery media creating 54 creating using HP Recovery Manager 55 recovery partition removing 59 regulatory information regulatory label 17 wireless certification labels 17 S security cable slot, identifying 4 serial number 17 serial number, computer 17 service labels, locating 17 setting password protection on wakeup 35 setting power options 34 setup utility navigating and selecting 60 restoring factory settings 60 sharing or presenting light 11 shipping the computer 52 shutdown 33 SIM card...


