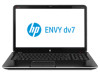
HP Notebook Hard Drives & Solid State Drives Identifying, Preventing, Diagnosing and Recovering from Drive Failures Care and Mai
Page 6
.../c01600726.pdf. Procedures for adding SATA drivers to RIS (Remote Installation Service) installation points include: Adding SATA drivers to installation CDs, building an image, and switching to SATA AHCI mode Using Sysprep with Serial ATA hard disk drives. The Intel Matrix Storage Technology solution technology provides improved performance and reliability, as well as support for the SATA Advanced Host Controller (AHCI) Interface. The latest device driver...
HP ENVY dv7 Notebook PC Maintenance and Service Guide IMPORTANT! This document is intended for HP authorized service providers o
Page 17
Category Description Security Operating system Serviceability Security cable lock Fingerprint reader with Digital Persona software support Intel/VeriSign support Intel AT-p Ready support Preinstalled: ● Windows 8 Standard 64-bit ● Windows 8 Professional 64-bit End user replaceable parts: ● AC adapter ● Battery ● Hard drive ● Memory module ● Optical drive ● WLAN module Computer models equipped with an AMD processor √ Computer models equipped with an Intel processor √ √ √ √ √ √ 9
HP ENVY dv7 Notebook PC Maintenance and Service Guide IMPORTANT! This document is intended for HP authorized service providers o
Page 54
... locate documents, drivers, and support for battery removal instructions. There are needed. Make special note of the warranty period for the computer. Service tag When ordering parts or requesting information, provide the computer serial number and model number provided on page 47 for the computer. 46 Chapter 4 Removal and replacement procedures Component replacement procedures This chapter provides removal and replacement procedures. See Battery on the service tag. Item (1) (2) (3) Description Product name Serial number (s/n) Part number/Product number...
HP ENVY dv7 Notebook PC Maintenance and Service Guide IMPORTANT! This document is intended for HP authorized service providers o
Page 109
... any device, cable, or cord. 1. Do not download or install a BIOS update while the computer is downloaded. Make a note of the path to an optional power source. You may need to access this information to locate the update later, after the download is typically Local Disk (C:). 3. From the Start screen, type e, and then select File Explorer. 2. The BIOS installation begins. 5. You will need this path when you recorded earlier, open the folder on -screen instructions...
HP ENVY dv7 Notebook PC Maintenance and Service Guide IMPORTANT! This document is intended for HP authorized service providers o
Page 118
... -screen instructions. 110 Chapter 7 Backing up, restoring, and recovering From the Start screen, type h, and then select Help and Support. For more information, see Recovering using HP Recovery Manager on page 111. ● If you have a quick way to see Removing the HP Recovery partition on page 111. ● If you can use the Factory Reset option of the screen to reclaim hard drive space, HP Recovery Manager offers the Remove Recovery Partition option. IMPORTANT: Refresh removes any traditional applications that you have replaced...
HP ENVY dv7 Notebook PC Maintenance and Service Guide IMPORTANT! This document is intended for HP authorized service providers o
Page 121
.... 2. Removing the HP Recovery partition HP Recovery Manager software allows you created. 2. See Changing the computer boot order on -screen instructions. Press and hold esc while the computer is not working properly. 1. Follow the on page 108. Insert the first HP Recovery disc you created into a USB port on your computer or into the optical drive on -screen instructions to continue. Restart the computer. 3. To change the selection for boot options. 4. From the Start screen, type recovery, and then select HP Recovery Manager. 2. Using HP Recovery media to recover...
HP ENVY dv7 Notebook PC Maintenance and Service Guide IMPORTANT! This document is intended for HP authorized service providers o
Page 125
... Blu-ray Disc R/RW with SuperMulti Drive precautions 42 removal 53 spare part number 27, 31, 35, 53 Blu-ray Disc ROM with SuperMulti DVD±R/RW Double-Layer Drive precautions 42 removal 53 spare part number 27, 31, 35, 53 bottom components 20 button components 12 buttons optical drive eject button 18 power 12 TouchPad 14 TouchPad on/off 14 C cables, service considerations 42 caps lock light 16 Card Reader board removal 88 spare part number 26, 35...
HP ENVY dv7 Notebook PC Maintenance and Service Guide IMPORTANT! This document is intended for HP authorized service providers o
Page 127
...85 product description audio 7 chipset 3 display panel 5 Ethernet 7 external media cards 8 graphics 3 hard drive 6 keyboard 8 memory module 5 microphone 7 operating system 9 optical drive 6 pointing device 8 ports 8 power requirements 8 processors 1 product name 1 security 9 serviceability 9 solid-state drives 6 video 7 wireless 7 product name 1, 21, 46 R rear component 19 removal/replacement preliminaries 41 procedures 46 right-side components RJ-45 jack 17 RTC battery removal 52 spare part number 18 28, 37, 52 S Screw Kit, spare part number 32, 36 security cable slot 19 security, product...
User Guide - Windows 8
Page 5
... to know your computer ...4 Finding your hardware and software information 4 Locating hardware ...4 Locating software ...4 Front ...4 Right side ...5 Left side ...7 Rear ...8 Display ...9 Top ...10 TouchPad ...10 Lights ...11 Buttons, speakers, and fingerprint reader 12 Keys ...14 Bottom ...16 Labels ...17 3 Connecting to a network ...18 Connecting to a wireless network ...18 Using the wireless controls 18 Using the wireless button 19 Using operating system controls 19 Using a WLAN ...19 Using an Internet service provider 20 Setting up a WLAN 20 Configuring a wireless router 20 v
User Guide - Windows 8
Page 8
... Handling drives ...62 Replacing a hard drive ...63 Using HP 3D DriveGuard 65 Using Disk Defragmenter 65 Using Disk Cleanup ...65 Adding or replacing memory modules 66 Updating programs and drivers ...69 Cleaning your computer ...69 Cleaning the display, sides, and cover 69 Cleaning the TouchPad and keyboard 69 Traveling with or shipping your computer 70 9 Securing your computer and information 71 Using passwords ...72 Setting Windows passwords 72 Setting Setup Utility (BIOS) passwords 73 Using the fingerprint reader ...73 Using HP SimplePass (select models...
User Guide - Windows 8
Page 35
...) jack HDMI port External monitor port Description On: The webcam is an enhanced audio feature that provides a deep, controlled bass while maintaining a clear sound. Reads and writes (select models only) to optional powered stereo speakers, headphones, earbuds, a headset, or television audio. Connects an optional USB device. Provides superior bass sound. Beats Audio is enabled by default Opens Beats Audio Control Panel, which allows you to view and control all audio settings NOTE: To open Beats Audio Control Panel, from the Start screen, type c, select Control Panel, select Hardware and...
User Guide - Windows 8
Page 50
... the Start screen, type h, and then select Help and Support. Opens the charms. + d Opens the Desktop. + tab alt + f4 Switches between open app or the Desktop. Closes an active app. 40 Chapter 5 Navigating using touch gestures, pointing devices and the keyboard f6 Plays the previous track of an audio CD or the previous section of a DVD or a BD. Press the Windows logo in combination with Windows 8 functions. NOTE...
User Guide - Windows 8
Page 58
... power meter, refer to a USB port. ● Stop, disable, or remove any unsaved information. ● If Hibernation is enabled and the computer is on or in HP Support Assistant. NOTE: For additional information about the battery: ● Battery test ● Information on battery types, specifications, life cycles, and capacity To access battery information, select the HP Support Assistant app on the display. ● Select the Power saver setting in Power Options. ● Remove a user-replaceable battery...
User Guide - Windows 8
Page 64
... a CD, DVD, or (on your computer, also allows quick data transfer. A USB flash drive, connected to the Universal Serial Bus (USB) port on select models) Blu-ray Disc (BD). Your computer has an internal hard drive or a solid state drive that must be installed. NOTE: For information about required software and drivers, or to learn which computer port to use the computer's power to a network on page 18. Some devices use , see Connecting to run;
User Guide - Windows 8
Page 75
..., but you start Disk Defragmenter, it works without supervision. However, depending on the size of your hard drive at any time. You may take more information, see the HP 3D DriveGuard software Help. From the Start screen, type disk, select Settings, and then select Defragment and optimize your computer manually at least once a month. From the Start screen, type disk, select Settings, and then select Free up disk space and...
User Guide - Windows 8
Page 89
... BIOS, make a note of the path to the computer or an unsuccessful installation, download and install a BIOS update only when the computer is downloaded. Follow any instructions that are displayed on battery power, docked in an optional docking device, or connected to reliable external power using the AC adapter. From the Start screen, type e, and then select File Explorer. 2. Updating the BIOS 79 Do not download or install a BIOS update while the computer is more recent than your hard drive...
User Guide - Windows 8
Page 94
... to another drive. Minimized Image Recovery installs only drivers and hardware-enabling applications. This option does not require backing up , restoring, and recovering System Restore allows you created. For more information, see Windows Help and Support. For more information, see Recovering using HP Recovery Manager on page 85. ● If you want to reset your information from the HP Recovery partition (select models only) or HP Recovery media. From the Start screen, type recovery, select HP Recovery Manager, and then select Drivers and Applications...
User Guide - Windows 8
Page 102
... bass settings hot key 41 battery discharging 48 disposing 49 low battery levels 48 replacing 49 storing 49 battery bay 16, 17 battery information, finding 48 battery power 47 battery release latch 16 battery temperature 49 Beats Audio 14, 26, 41 Beats Audio Control Panel 26 Beats Audio hot key 27 BIOS determining version 78 downloading an update 79 updating 78 Bluetooth device 18, 22 Bluetooth label 17 boot order changing HP Recovery Manager 87 buttons left TouchPad 10 optical drive eject 5 power 12 right TouchPad 10 C cables USB...
User Guide - Windows 8
Page 103
... lock 11 fingerprint reader 11 hard drive 5 mute 11 optical drive 5 power 5, 11 TouchPad 10 webcam 9, 24 wireless 11 low battery level 48 M maintenance Disk Cleanup 65 Disk Defragmenter 65 memory module inserting 67 removing 66 replacing 66 memory module compartment, identifying 16 memory module service door, removing 66 minimized image creating 86 minimized image recovery 87 mouse, external setting preferences 33 mute light, identifying 11 N network jack, identifying 7 num lock key, identifying 15, 41 O operating environment 90 optical disc inserting 59 removing 60 optical drive eject button...
User Guide - Windows 8
Page 104
... (network) jack, identifying 7 rotating TouchPad gesture 36 S scrolling TouchPad gesture 35 security cable lock, installing 77 security cable slot, identifying 6 security, wireless 21 serial number 17 serial number, computer 17 service labels locating 17 setting password protection on wakeup 45 setup of WLAN 20 Setup Utility (BIOS) passwords 73 shipping the computer 70 shutdown 53 Sleep exiting 44 initiating 44 slots Digital Media 4 security cable 6 software CyberLink PowerDVD 31 Disk Cleanup 65 Disk Defragmenter 65 software updates, installing 76 speakers, identifying 9, 25 storing a battery...