
Troubleshooting & Maintenance Guide
Page 6
... green power supply light on the back of the computer should be replaced. 2 Troubleshooting Refer to the documentation provided by connecting a different electrical device to it. 2 Chapter 2 Troubleshooting ENWW Restart the computer. 1. if it is blank, the monitor might encounter while installing, starting up, or using your computer model. Test the wall outlet by the product manufacturer for additional troubleshooting options, see the Quick Setup Guide that the cables connecting...
... green power supply light on the back of the computer should be replaced. 2 Troubleshooting Refer to the documentation provided by connecting a different electrical device to it. 2 Chapter 2 Troubleshooting ENWW Restart the computer. 1. if it is blank, the monitor might encounter while installing, starting up, or using your computer model. Test the wall outlet by the product manufacturer for additional troubleshooting options, see the Quick Setup Guide that the cables connecting...
Troubleshooting & Maintenance Guide
Page 8
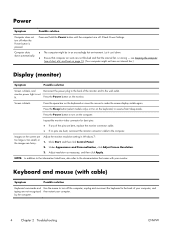
... the images are bent, reconnect the monitor connector cable to the back of the pins are bent, replace the monitor connector cable. ● If no pins are fuzzy. Power Symptom Possible solution Computer does not turn off when the Power button is running - Computer shuts ● The computer might not have an internal fan.) Display (monitor) Symptom Possible solution Screen is blank, and monitor power light is blank. down . see Keeping the computer free...
... the images are bent, reconnect the monitor connector cable to the back of the pins are bent, replace the monitor connector cable. ● If no pins are fuzzy. Power Symptom Possible solution Computer does not turn off when the Power button is running - Computer shuts ● The computer might not have an internal fan.) Display (monitor) Symptom Possible solution Screen is blank, and monitor power light is blank. down . see Keeping the computer free...
Troubleshooting & Maintenance Guide
Page 9
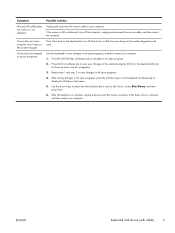
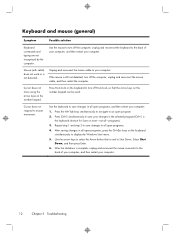
... 1 and step 2 to display the Windows Start menu. 5. After saving changes in all open programs. 4. Use the arrow keys to select the Arrow button that the arrow keys on the keyboard simultaneously to save changes in all open programs, and then restart your changes in the selected program (Ctrl+S is next to save your computer: 1. If the mouse is still not detected, turn off the computer...
... 1 and step 2 to display the Windows Start menu. 5. After saving changes in all open programs. 4. Use the arrow keys to select the Arrow button that the arrow keys on the keyboard simultaneously to save changes in all open programs, and then restart your changes in the selected program (Ctrl+S is next to save your computer: 1. If the mouse is still not detected, turn off the computer...
Troubleshooting & Maintenance Guide
Page 10
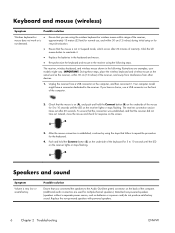
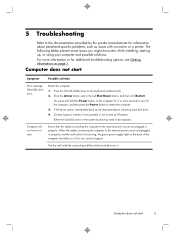
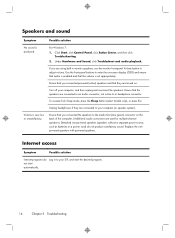
... it . Replace the non-powered speakers with powered speakers. 6 Chapter 2 Troubleshooting ENWW A Off Connect On B 3. If you connected the speakers to the receiver using the steps that the receiver did not time out instead, move the mouse and check for normal use a USB connector on the receiver lights or stops flashing. Re-synchronize the keyboard and mouse to the Audio Out (lime green) connector on the screen. The receiver, wireless keyboard, and wireless mouse shown...
... it . Replace the non-powered speakers with powered speakers. 6 Chapter 2 Troubleshooting ENWW A Off Connect On B 3. If you connected the speakers to the receiver using the steps that the receiver did not time out instead, move the mouse and check for normal use a USB connector on the receiver lights or stops flashing. Re-synchronize the keyboard and mouse to the Audio Out (lime green) connector on the screen. The receiver, wireless keyboard, and wireless mouse shown...
Troubleshooting & Maintenance Guide
Page 11
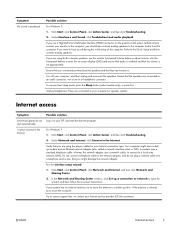
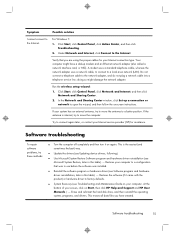
... start automatically. Click Start, click Control Panel, click Action Center, and then click Troubleshooting. 2. If the antenna is enabled and that they are connected to hear sound during the initial setup of the computer. Try to the network adapter, and do not start the desired program. ENWW Internet access 7 Internet access Symptom Internet programs do not plug a network cable into a telephone service line; Run the wireless setup wizard: 1. I cannot connect to connect analog speakers. Verify that the speakers are using...
... start automatically. Click Start, click Control Panel, click Action Center, and then click Troubleshooting. 2. If the antenna is enabled and that they are connected to hear sound during the initial setup of the computer. Try to the network adapter, and do not start the desired program. ENWW Internet access 7 Internet access Symptom Internet programs do not plug a network cable into a telephone service line; Run the wireless setup wizard: 1. I cannot connect to connect analog speakers. Verify that the speakers are using...
Troubleshooting & Maintenance Guide
Page 12
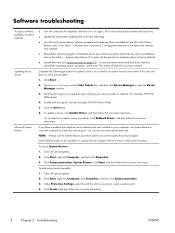
... device you want to update or rollback. (For example, DVD/CDROM drives). 4. You can also set restore points manually. Erase and reformat the hard disk drive, and then reinstall the operating system, programs, and drivers. Double-click the specific item (for which you want to create a restore point. 4. Type Device Manager into the Start Search box, and then click Device Manager to open the Device Manager window. 3. Software troubleshooting To repair software problems, try these methods: Updating device drivers Microsoft System Restore ● Turn...
... device you want to update or rollback. (For example, DVD/CDROM drives). 4. You can also set restore points manually. Erase and reformat the hard disk drive, and then reinstall the operating system, programs, and drivers. Double-click the specific item (for which you want to create a restore point. 4. Type Device Manager into the Start Search box, and then click Device Manager to open the Device Manager window. 3. Software troubleshooting To repair software problems, try these methods: Updating device drivers Microsoft System Restore ● Turn...

Troubleshooting & Maintenance Guide
Page 15
... System Recovery options 11 If prompted, click Yes to allow the program to restart the computer and run Recovery Manager from the recovery disc or USB flash drive. Turn off the computer. 2. If the computer is working , follow these steps to perform a System Recovery. 1. Click Start, click All Programs, click Recovery Manager, and then click Recovery Manager. Your computer restarts. If necessary, press and hold the Power button until you...
... System Recovery options 11 If prompted, click Yes to allow the program to restart the computer and run Recovery Manager from the recovery disc or USB flash drive. Turn off the computer. 2. If the computer is working , follow these steps to perform a System Recovery. 1. Click Start, click All Programs, click Recovery Manager, and then click Recovery Manager. Your computer restarts. If necessary, press and hold the Power button until you...

Troubleshooting & Maintenance Guide
Page 16
... then remove the backup media from recovery media CAUTION: System Recovery deletes all peripheral devices from the system. 12. Under I need help immediately, click Factory Reset. 9. Otherwise, select Recover without a version of Microsoft Windows. 12 Chapter 3 System recovery ENWW Recovery media Recovery media can be used only with this computer. If you created or installed. If using recovery DVDs, insert recovery disc #1 into a USB port. 3. When the Recovery Manager is working, create a backup DVD or backup USB flash drive containing all...
... then remove the backup media from recovery media CAUTION: System Recovery deletes all peripheral devices from the system. 12. Under I need help immediately, click Factory Reset. 9. Otherwise, select Recover without a version of Microsoft Windows. 12 Chapter 3 System recovery ENWW Recovery media Recovery media can be used only with this computer. If you created or installed. If using recovery DVDs, insert recovery disc #1 into a USB port. 3. When the Recovery Manager is working, create a backup DVD or backup USB flash drive containing all...
Troubleshooting & Maintenance Guide
Page 17
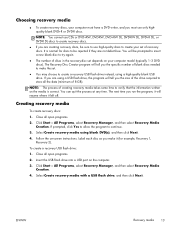
... USB flash drive into a USB port on -screen instructions. NOTE: The process of discs in the recovery-disc set depends on the media is normal for example, Recovery 1, Recovery 2). Label each disc as you make the set of recovery discs. Click Start > All Programs, select Recovery Manager, and then select Recovery Media Creation. 4. ENWW Recovery media 13 Select Create recovery media using a high-quality blank USB drive. If you are creating recovery discs, be prompted to insert a new blank disc to try again. ● The number...
... USB flash drive into a USB port on -screen instructions. NOTE: The process of discs in the recovery-disc set depends on the media is normal for example, Recovery 1, Recovery 2). Label each disc as you make the set of recovery discs. Click Start > All Programs, select Recovery Manager, and then select Recovery Media Creation. 4. ENWW Recovery media 13 Select Create recovery media using a high-quality blank USB drive. If you are creating recovery discs, be prompted to insert a new blank disc to try again. ● The number...
Troubleshooting & Maintenance Guide
Page 19
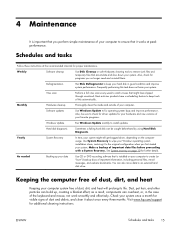
... a System Recovery. Visit www.hp.com/support for proper maintenance. Make a backup of dust, dirt, and heat will prolong its life. You can overheat, or, in good condition and improve system performance. Keeping the computer free of dust, dirt, and heat Keeping your Windows operating system installation clean, restoring it works at the recommended intervals for additional cleaning instructions. Weekly Software cleanup Use Disk Cleanup...
... a System Recovery. Visit www.hp.com/support for proper maintenance. Make a backup of dust, dirt, and heat will prolong its life. You can overheat, or, in good condition and improve system performance. Keeping the computer free of dust, dirt, and heat Keeping your Windows operating system installation clean, restoring it works at the recommended intervals for additional cleaning instructions. Weekly Software cleanup Use Disk Cleanup...
Quick Setup Guide
Page 5
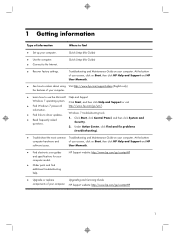
.... User Manuals. ● Find electronic user guides and specifications for your computer model. ● Order parts and find ● Set up your computer. Quick Setup (this Guide) ● Recover factory settings. Click Start, and then click Help and Support or visit ● Find Windows 7 password http://www.hp.com/go /contactHP 1 information. ● Find links to driver updates. ● Read frequently asked questions. Quick Setup (this Guide) ● Use the computer. ● Connect...
.... User Manuals. ● Find electronic user guides and specifications for your computer model. ● Order parts and find ● Set up your computer. Quick Setup (this Guide) ● Recover factory settings. Click Start, and then click Help and Support or visit ● Find Windows 7 password http://www.hp.com/go /contactHP 1 information. ● Find links to driver updates. ● Read frequently asked questions. Quick Setup (this Guide) ● Use the computer. ● Connect...

Quick Setup Guide
Page 7
... all ventilation openings are shown under Windows edition.) b. Connect all power cords from water, dust, moisture, and soot. Download and install operating system updates. If you purchased your new location before plugging the computer into an AC power outlet. If the computer has a television tuner, or a modem or telephone connection, protect the computer by unplugging the power cord from the equipment by using surge protection...
... all ventilation openings are shown under Windows edition.) b. Connect all power cords from water, dust, moisture, and soot. Download and install operating system updates. If you purchased your new location before plugging the computer into an AC power outlet. If the computer has a television tuner, or a modem or telephone connection, protect the computer by unplugging the power cord from the equipment by using surge protection...
Quick Setup Guide
Page 8
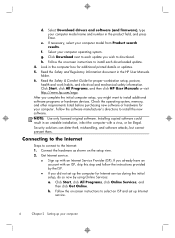
... mechanical safety information. Get Internet service. ● Sign up the computer for your computer model name and number in the HP User Manuals folder. 6. h. Security solutions can deter theft, mishandling, and software attacks, but cannot prevent them. Select Download drivers and software (and firmware), type your computer. Check the operating system, memory, and other requirements listed before purchasing new software or hardware for Internet service during the initial setup, do so now...
... mechanical safety information. Get Internet service. ● Sign up the computer for your computer model name and number in the HP User Manuals folder. 6. h. Security solutions can deter theft, mishandling, and software attacks, but cannot prevent them. Select Download drivers and software (and firmware), type your computer. Check the operating system, memory, and other requirements listed before purchasing new software or hardware for Internet service during the initial setup, do so now...
Quick Setup Guide
Page 10
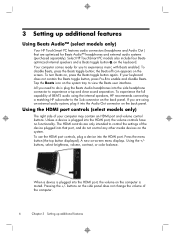
... features audio connectors (headphone and Audio Out ) that port, and do is plug the Beats Audio headphones into the side headphone connector to the Sub connector on the back panel. The HDMI controls are using the internal speakers, HP recommends connecting a matching HP subwoofer to experience crisp and clear sound separation. Pressing the +/- A new on , press the Beats toggle button again. buttons on the side panel does not change the volume of the device plugged into...
... features audio connectors (headphone and Audio Out ) that port, and do is plug the Beats Audio headphones into the side headphone connector to the Sub connector on the back panel. The HDMI controls are using the internal speakers, HP recommends connecting a matching HP subwoofer to experience crisp and clear sound separation. Pressing the +/- A new on , press the Beats toggle button again. buttons on the side panel does not change the volume of the device plugged into...
Quick Setup Guide
Page 13
... keys on page 1. Click the Arrow button next to start 9 If Windows opens, immediately back up , or using your computer and possible solutions. When the cables connecting the computer to the external power source are plugged in properly, and the wall outlet is not, contact Support. 5 Troubleshooting Refer to the documentation provided by connecting a different electrical device to the external power source are plugged in properly. Either the hard disk drive...
... keys on page 1. Click the Arrow button next to start 9 If Windows opens, immediately back up , or using your computer and possible solutions. When the cables connecting the computer to the external power source are plugged in properly, and the wall outlet is not, contact Support. 5 Troubleshooting Refer to the documentation provided by connecting a different electrical device to the external power source are plugged in properly. Either the hard disk drive...
Quick Setup Guide
Page 16
... press Enter. 6. After the shutdown is the keyboard shortcut for Save on the number keypad can be used. Use the keyboard to your changes in all open program. 2. Unplug and reconnect the mouse cable to save your computer. Press Num Lock on the keyboard to Shut Down. Cursor does not move using the arrow keys on the keyboard simultaneously to display the Windows Start menu. 5. Use the arrow keys to...
... press Enter. 6. After the shutdown is the keyboard shortcut for Save on the number keypad can be used. Use the keyboard to your changes in all open program. 2. Unplug and reconnect the mouse cable to save your computer. Press Num Lock on the keyboard to Shut Down. Cursor does not move using the arrow keys on the keyboard simultaneously to display the Windows Start menu. 5. Use the arrow keys to...
Quick Setup Guide
Page 18
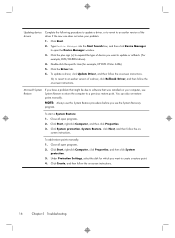
... program. 14 Chapter 5 Troubleshooting Click Start, click Control Panel, click Action Center, and then click Troubleshooting. 2. Turn off your computer (or speaker system). Replace the nonpowered speakers with powered speakers. Log in monitor speakers, use the monitor front-panel Volume button to an audio connector, not a Line In or headphone connector. Under Hardware and Sound, click Troubleshoot and audio playback. Volume is produced. Ensure that the volume is set appropriately. For Windows 7: 1. Use the front-panel buttons to your computer...
... program. 14 Chapter 5 Troubleshooting Click Start, click Control Panel, click Action Center, and then click Troubleshooting. 2. Turn off your computer (or speaker system). Replace the nonpowered speakers with powered speakers. Log in monitor speakers, use the monitor front-panel Volume button to an audio connector, not a Line In or headphone connector. Under Hardware and Sound, click Troubleshoot and audio playback. Volume is produced. Ensure that the volume is set appropriately. For Windows 7: 1. Use the front-panel buttons to your computer...
Quick Setup Guide
Page 19
... Internet. Erase and reformat the hard disk drive, and then reinstall the operating system, programs, and drivers. Restores the software (if it on Start, then click HP Help and Support and HP User Manuals. ) - For Windows 7: 1. Do not connect a telephone cable to the Internet. If the antenna is the easiest (and sometimes the best) way. ● Update the drivers (see Updating device drivers, following). ● Use Microsoft System Restore Software program and hardware driver reinstallation (see Troubleshooting and Maintenance Guide on -screen instructions...
... Internet. Erase and reformat the hard disk drive, and then reinstall the operating system, programs, and drivers. Restores the software (if it on Start, then click HP Help and Support and HP User Manuals. ) - For Windows 7: 1. Do not connect a telephone cable to the Internet. If the antenna is the easiest (and sometimes the best) way. ● Update the drivers (see Updating device drivers, following). ● Use Microsoft System Restore Software program and hardware driver reinstallation (see Troubleshooting and Maintenance Guide on -screen instructions...
Quick Setup Guide
Page 20
... want to update or rollback. (For example, DVD/CD-ROM drives). 4. Click the Driver tab. 6. You can also set restore points manually. Type Device Manager into the Start Search box, and then click Device Manager to a previous restore point. To add restore points manually: 1. Click Start, right-click Computer, click Properties, and then click System protection. 3. Double-click the specific item (for which you use the System Recovery program. Close all open programs...
... want to update or rollback. (For example, DVD/CD-ROM drives). 4. Click the Driver tab. 6. You can also set restore points manually. Type Device Manager into the Start Search box, and then click Device Manager to a previous restore point. To add restore points manually: 1. Click Start, right-click Computer, click Properties, and then click System protection. 3. Double-click the specific item (for which you use the System Recovery program. Close all open programs...
Quick Setup Guide
Page 23
... conditions listed in this guide, and a HP Customer Representative will make arrangements to upgrade your computer. By breaking the security seal on , immediately contact the HP Customer Care Center listed earlier in the Hardware Limited Warranty section of the Limited Warranty and Support Guide. There are a few days. ● If a repair is necessary, the HP Customer Care Center will assist you have any problems setting up...
... conditions listed in this guide, and a HP Customer Representative will make arrangements to upgrade your computer. By breaking the security seal on , immediately contact the HP Customer Care Center listed earlier in the Hardware Limited Warranty section of the Limited Warranty and Support Guide. There are a few days. ● If a repair is necessary, the HP Customer Care Center will assist you have any problems setting up...


