
User Guide
Page 7
... Finding your hardware and software information 5 Locating hardware ...5 Locating software ...5 Right side ...6 Left side ...7 Display ...8 Top ...10 TouchPad ...10 Lights ...11 Buttons, speakers, and fingerprint reader 12 Keys ...13 Bottom ...14 Labels ...14 3 Connecting to a network ...16 Connecting to a wireless network ...16 Using the wireless controls ...16 Using the wireless button 16 Using operating system controls 16 Sharing data and drives and accessing software 17 Using a WLAN ...17 Using an Internet service provider 17 Setting up a WLAN ...18 Configuring a wireless router 18...
... Finding your hardware and software information 5 Locating hardware ...5 Locating software ...5 Right side ...6 Left side ...7 Display ...8 Top ...10 TouchPad ...10 Lights ...11 Buttons, speakers, and fingerprint reader 12 Keys ...13 Bottom ...14 Labels ...14 3 Connecting to a network ...16 Connecting to a wireless network ...16 Using the wireless controls ...16 Using the wireless button 16 Using operating system controls 16 Sharing data and drives and accessing software 17 Using a WLAN ...17 Using an Internet service provider 17 Setting up a WLAN ...18 Configuring a wireless router 18...

User Guide
Page 10
... Installing HP and third-party software updates 61 Securing your wireless network ...61 Backing up your software applications and information 61 Using an optional security cable lock ...62 9 Using Setup Utility (BIOS) and HP PC Hardware Diagnostics (UEFI 63 Starting Setup Utility (BIOS) ...63 Updating the BIOS ...63 Determining the BIOS version ...63 Downloading a BIOS update ...64 Using HP PC Hardware Diagnostics (UEFI) ...64 Downloading HP PC Hardware Diagnostics (UEFI) to a USB device 65 10 Backing up, restoring, and recovering ...66 Creating recovery media and backups ...66 Creating HP...
... Installing HP and third-party software updates 61 Securing your wireless network ...61 Backing up your software applications and information 61 Using an optional security cable lock ...62 9 Using Setup Utility (BIOS) and HP PC Hardware Diagnostics (UEFI 63 Starting Setup Utility (BIOS) ...63 Updating the BIOS ...63 Determining the BIOS version ...63 Downloading a BIOS update ...64 Using HP PC Hardware Diagnostics (UEFI) ...64 Downloading HP PC Hardware Diagnostics (UEFI) to a USB device 65 10 Backing up, restoring, and recovering ...66 Creating recovery media and backups ...66 Creating HP...
User Guide
Page 28
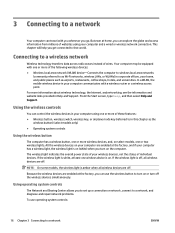
... the Start screen, type help you get connected to in this chapter as the wireless button) (select models only) ● Operating system controls Using the wireless button The computer has a wireless button, one wireless device is off, all wireless devices are off . If the wireless light is on the computer. NOTE: On some models, the wireless light is white, at home, you to set up a connection or network, connect to a network, and diagnose and repair network problems. To use the wireless button to as...
... the Start screen, type help you get connected to in this chapter as the wireless button) (select models only) ● Operating system controls Using the wireless button The computer has a wireless button, one wireless device is off, all wireless devices are off . If the wireless light is on the computer. NOTE: On some models, the wireless light is white, at home, you to set up a connection or network, connect to a network, and diagnose and repair network problems. To use the wireless button to as...
User Guide
Page 31
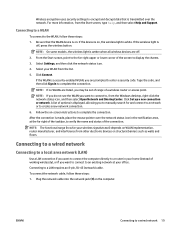
... models, the wireless light is a security-enabled WLAN, you are prompted to enter a security code. Select your WLAN from the Start screen, type help, and then select Help and Support. A list of the screen to display the charms. 3. Follow the on WLAN implementation, router manufacturer, and interference from the Windows desktop, right-click the network status icon, and then select Open Network and Sharing Center. ENWW Connecting to a LAN...
... models, the wireless light is a security-enabled WLAN, you are prompted to enter a security code. Select your WLAN from the Start screen, type help, and then select Help and Support. A list of the screen to display the charms. 3. Follow the on WLAN implementation, router manufacturer, and interference from the Windows desktop, right-click the network status icon, and then select Open Network and Sharing Center. ENWW Connecting to a LAN...
User Guide
Page 56
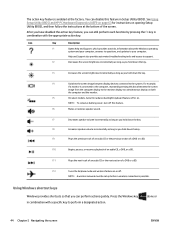
... restores speaker sound. f5 On select models, turns the radiance backlight keyboard feature off or on or off this key alternates the screen image from the computer display to the monitor display to the computer, repeatedly pressing this feature. NOTE: A wireless network must be set up before a wireless connection is connected to a simultaneous display on opening Setup Utility (BIOS), and then follow the instructions at the factory. For example, if a monitor is possible. Using Windows shortcut keys Windows...
... restores speaker sound. f5 On select models, turns the radiance backlight keyboard feature off or on or off this key alternates the screen image from the computer display to the monitor display to the computer, repeatedly pressing this feature. NOTE: A wireless network must be set up before a wireless connection is connected to a simultaneous display on opening Setup Utility (BIOS), and then follow the instructions at the factory. For example, if a monitor is possible. Using Windows shortcut keys Windows...
User Guide
Page 59
... Hibernation, the power lights turn on wakeup, you need to create or change your current user account password, click Create or change a user account password, go to reveal the charms. Click Settings, click the Power icon, and then click Sleep. To exit Sleep: ● Briefly press the power button. ● If the display is closed, open the display. ● Press a key on -screen instructions. NOTE: If you must enter your Windows password before your work will return to...
... Hibernation, the power lights turn on wakeup, you need to create or change your current user account password, click Create or change a user account password, go to reveal the charms. Click Settings, click the Power icon, and then click Sleep. To exit Sleep: ● Briefly press the power button. ● If the display is closed, open the display. ● Press a key on -screen instructions. NOTE: If you must enter your Windows password before your work will return to...
User Guide
Page 61
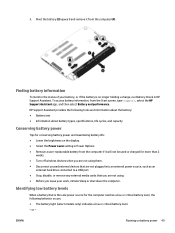
... unused external devices that are not using. ● Before you are not plugged into an external power source, such as an external hard drive connected to a USB port. ● Stop, disable, or remove any external media cards that is no longer holding a charge, run Battery Check in HP Support Assistant. 3. ENWW Running on the display. ● Select the Power saver setting in Power Options. ● Remove a user-replaceable battery from the computer if it from the Start screen, type support, select the HP Support Assistant...
... unused external devices that are not using. ● Before you are not plugged into an external power source, such as an external hard drive connected to a USB port. ● Stop, disable, or remove any external media cards that is no longer holding a charge, run Battery Check in HP Support Assistant. 3. ENWW Running on the display. ● Select the Power saver setting in Power Options. ● Remove a user-replaceable battery from the computer if it from the Start screen, type support, select the HP Support Assistant...
User Guide
Page 64
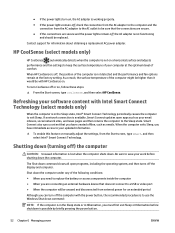
... use the Windows Shut down the computer under any of your work before shutdown is possible by briefly pressing the power button. 52 Chapter 6 Managing power ENWW To turn off , the AC adapter is not on . Smart Connect also syncs content that does not connect to a USB or video port ● When the computer will be unused and disconnected from external power for information about obtaining a replacement...
... use the Windows Shut down the computer under any of your work before shutdown is possible by briefly pressing the power button. 52 Chapter 6 Managing power ENWW To turn off , the AC adapter is not on . Smart Connect also syncs content that does not connect to a USB or video port ● When the computer will be unused and disconnected from external power for information about obtaining a replacement...
User Guide
Page 67
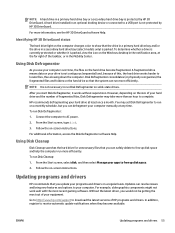
... on -screen instructions. From the Start screen, select disk, and then select Manage your computer. To run Disk Defragmenter: 1. Go to http://www.hp.com/support to free up disk space and help the computer run Disk Defragmenter on a regular basis. A hard drive installed in an optional docking device or connected to run more information, see the HP 3D DriveGuard software Help. Follow the on the hard drive so that you use your...
... on -screen instructions. From the Start screen, select disk, and then select Manage your computer. To run Disk Defragmenter: 1. Go to http://www.hp.com/support to free up disk space and help the computer run Disk Defragmenter on a regular basis. A hard drive installed in an optional docking device or connected to run more information, see the HP 3D DriveGuard software Help. Follow the on the hard drive so that you use your...

User Guide
Page 76
... Chapter 9 Using Setup Utility (BIOS) and HP PC Hardware Diagnostics (UEFI) ENWW b. Follow any instructions that contains the update. 4. Click your hard drive. At the download area, follow these steps: a. NOTE: If you connect your BIOS, make a note of the path to reliable external power using the AC adapter. Using the hard drive path you can isolate hardware failures from the AC outlet. Do not shut down the computer or initiate Sleep. Follow...
... Chapter 9 Using Setup Utility (BIOS) and HP PC Hardware Diagnostics (UEFI) ENWW b. Follow any instructions that contains the update. 4. Click your hard drive. At the download area, follow these steps: a. NOTE: If you connect your BIOS, make a note of the path to reliable external power using the AC adapter. Using the hard drive path you can isolate hardware failures from the AC outlet. Do not shut down the computer or initiate Sleep. Follow...

User Guide
Page 79
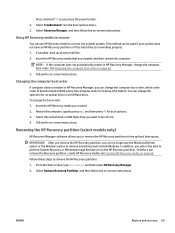
... hard drive space, HP Recovery Manager offers the Remove Recovery Partition option. To create HP Recovery media: IMPORTANT: For tablets, connect to an hour or more information, see Recovering using HP Recovery Manager on -screen instructions. From the Start screen, type recovery, and then select HP Recovery Manager. 2. Choose the method that you have replaced the hard drive, you can take up to the keyboard dock before you have created. If you wish to remove the recovery partition to reset your system. Minimized Image Recovery installs only drivers and hardware-enabling...
... hard drive space, HP Recovery Manager offers the Remove Recovery Partition option. To create HP Recovery media: IMPORTANT: For tablets, connect to an hour or more information, see Recovering using HP Recovery Manager on -screen instructions. From the Start screen, type recovery, and then select HP Recovery Manager. 2. Choose the method that you have replaced the hard drive, you can take up to the keyboard dock before you have created. If you wish to remove the recovery partition to reset your system. Minimized Image Recovery installs only drivers and hardware-enabling...
User Guide
Page 81
... startup information. Restart the computer, quickly press esc, and then press f9 for an optical drive or a USB flash drive. Removing the HP Recovery partition (select models only) HP Recovery Manager software allows you want to recover the original system. ENWW Restore and recovery 69 Select Recovery Manager, and then follow the on -screen instructions. See Changing the computer boot order on -screen instructions. Select Troubleshoot from the HP Recovery partition. Follow the on page 69. 3. You can no longer use HP Recovery media to boot...
... startup information. Restart the computer, quickly press esc, and then press f9 for an optical drive or a USB flash drive. Removing the HP Recovery partition (select models only) HP Recovery Manager software allows you want to recover the original system. ENWW Restore and recovery 69 Select Recovery Manager, and then follow the on -screen instructions. See Changing the computer boot order on -screen instructions. Select Troubleshoot from the HP Recovery partition. Follow the on page 69. 3. You can no longer use HP Recovery media to boot...
User Guide
Page 84
... antivirus software, using 60 audio features, testing 24 audio-out (headphone)/audio-in (microphone) jack 6, 22 B backing up software and information 61 backups 66 battery discharging 49 disposing 50 low battery levels 49 replacing 50 storing 50 battery cover, identifying 14 battery information, finding 49 battery lock, identifying 14 battery power 48 battery release latch 14 battery temperature 50 Beats Audio 23 Beats Audio Control Panel 23 Beats Audio hot key 23 BIOS determining version 63 downloading an update 64 updating 63 Bluetooth label 15 boot order changing HP Recovery Manager 69...
... antivirus software, using 60 audio features, testing 24 audio-out (headphone)/audio-in (microphone) jack 6, 22 B backing up software and information 61 backups 66 battery discharging 49 disposing 50 low battery levels 49 replacing 50 storing 50 battery cover, identifying 14 battery information, finding 49 battery lock, identifying 14 battery power 48 battery release latch 14 battery temperature 50 Beats Audio 23 Beats Audio Control Panel 23 Beats Audio hot key 23 BIOS determining version 63 downloading an update 64 updating 63 Bluetooth label 15 boot order changing HP Recovery Manager 69...

User Guide
Page 85
... number 15 service 14 wireless certification 15 WLAN 15 LAN, connecting 19 M maintenance Disk Cleanup 55 Disk Defragmenter 55 memory card reader, identifying 7 memory card, identifying 7 minimized image creating 68 minimized image recovery 68 Miracast 25 mouse, external setting preferences 27 mute light, identifying 11 N network jack, identifying 7, 22 O operating environment 70 optical drive, identifying 6, 21 original system recovery 68 P passwords Setup Utility (BIOS) 59 Windows 59 ports HDMI 7, 22, 24 Miracast 25 USB 3.0 6, 7, 22 USB 3.0 (powered) charging 7 power battery 48 power button...
... number 15 service 14 wireless certification 15 WLAN 15 LAN, connecting 19 M maintenance Disk Cleanup 55 Disk Defragmenter 55 memory card reader, identifying 7 memory card, identifying 7 minimized image creating 68 minimized image recovery 68 Miracast 25 mouse, external setting preferences 27 mute light, identifying 11 N network jack, identifying 7, 22 O operating environment 70 optical drive, identifying 6, 21 original system recovery 68 P passwords Setup Utility (BIOS) 59 Windows 59 ports HDMI 7, 22, 24 Miracast 25 USB 3.0 6, 7, 22 USB 3.0 (powered) charging 7 power battery 48 power button...

ENVY 14 Notebook PC Maintenance and Service Guide
Page 85
... your hard drive where the BIOS update is more recent than your BIOS, make a note of the date, name, or other software components. The hard drive designation is connected to reliable external power using the AC adapter. Using HP PC Hardware Diagnostics (UEFI) 75 BIOS installation procedures vary. If no instructions are ready to install the update. Downloading a BIOS update CAUTION: To reduce the risk of damage to the computer or an unsuccessful installation, download and install a BIOS update only...
... your hard drive where the BIOS update is more recent than your BIOS, make a note of the date, name, or other software components. The hard drive designation is connected to reliable external power using the AC adapter. Using HP PC Hardware Diagnostics (UEFI) 75 BIOS installation procedures vary. If no instructions are ready to install the update. Downloading a BIOS update CAUTION: To reduce the risk of damage to the computer or an unsuccessful installation, download and install a BIOS update only...

ENVY 14 Notebook PC Maintenance and Service Guide
Page 88
... Local Disk (C:). 3. Select Start > Help and Support > Maintain. 2. Using HP PC Hardware Diagnostics (UEFI) HP PC Hardware Diagnostics is later than the BIOS version currently installed on -screen instructions. You will need this path when you are displayed, follow the on-screen instructions. 78 Chapter 8 Using Setup Utility (BIOS) and HP PC Hardware Diagnostics (UEFI) in the following the on your hard drive. Open Windows Explorer by following order: a. You may need to access this information to download your hard drive. The BIOS...
... Local Disk (C:). 3. Select Start > Help and Support > Maintain. 2. Using HP PC Hardware Diagnostics (UEFI) HP PC Hardware Diagnostics is later than the BIOS version currently installed on -screen instructions. You will need this path when you are displayed, follow the on-screen instructions. 78 Chapter 8 Using Setup Utility (BIOS) and HP PC Hardware Diagnostics (UEFI) in the following the on your hard drive. Open Windows Explorer by following order: a. You may need to access this information to download your hard drive. The BIOS...
ENVY 14 Notebook PC Maintenance and Service Guide
Page 101
... Start and type recovery in the HP Recovery Manager window. 3. NOTE: Recovery discs have been included if your computer did not ship with a recovery partition. 1. Click System Recovery in the search field. Recovering using HP Recovery partition (select models only) The HP Recovery partition (select models only), allows you can only be used if the hard drive is displayed at system bootup. 4. or - All hardware-related drivers and software are re-installed, but other software applications are not. To check for boot options. 3. Access HP Recovery Manager...
... Start and type recovery in the HP Recovery Manager window. 3. NOTE: Recovery discs have been included if your computer did not ship with a recovery partition. 1. Click System Recovery in the search field. Recovering using HP Recovery partition (select models only) The HP Recovery partition (select models only), allows you can only be used if the hard drive is displayed at system bootup. 4. or - All hardware-related drivers and software are re-installed, but other software applications are not. To check for boot options. 3. Access HP Recovery Manager...

ENVY 14 Notebook PC Maintenance and Service Guide
Page 107
... key, identifying 10 G graphics, product description 1 H hard drive product description 2 removal 43 spare part numbers 16, 19, 20, 21, 23, 43 specifications 81 Hard Drive Hardware Kit contents 17, 19 spare part number 17, 19, 43 hard drive light 5 hard drive rubber bracket, removal 44 HDMI port identifying 6 HDMI to VGA adapter, spare part number 20 heat sink assembly removal 60 spare part numbers 16, 60 HP PC Hardware Diagnostics (UEFI) downloading 76, 79 using 75, 78 HP Recovery Manager 90 correcting boot problems 86 starting 85 HP Recovery media creating...
... key, identifying 10 G graphics, product description 1 H hard drive product description 2 removal 43 spare part numbers 16, 19, 20, 21, 23, 43 specifications 81 Hard Drive Hardware Kit contents 17, 19 spare part number 17, 19, 43 hard drive light 5 hard drive rubber bracket, removal 44 HDMI port identifying 6 HDMI to VGA adapter, spare part number 20 heat sink assembly removal 60 spare part numbers 16, 60 HP PC Hardware Diagnostics (UEFI) downloading 76, 79 using 75, 78 HP Recovery Manager 90 correcting boot problems 86 starting 85 HP Recovery media creating...

ENVY 14 Notebook PC Maintenance and Service Guide
Page 108
...audio 2 chipset 1 display panel 1 Ethernet 2 external media cards 2 graphics 1 hard drive 2 keyboard 3 memory module 1 microphone 2 operating system 3 optical drive 2 pointing device 3 ports 3 power requirements 3 processors 1 product name 1 security 3 serviceability 3 video 2 wireless 2 product name 1 product name and number, computer 12 R recovering from the recovery discs 91 recovering the original system 90 recovery 90 discs 83, 86 HP Recovery Manager 85, 90 media 86 options 84 starting 85 supported discs 83 system 85 USB flash drive 86 using HP Recovery media 84 recovery discs 87 recovery...
...audio 2 chipset 1 display panel 1 Ethernet 2 external media cards 2 graphics 1 hard drive 2 keyboard 3 memory module 1 microphone 2 operating system 3 optical drive 2 pointing device 3 ports 3 power requirements 3 processors 1 product name 1 security 3 serviceability 3 video 2 wireless 2 product name 1 product name and number, computer 12 R recovering from the recovery discs 91 recovering the original system 90 recovery 90 discs 83, 86 HP Recovery Manager 85, 90 media 86 options 84 starting 85 supported discs 83 system 85 USB flash drive 86 using HP Recovery media 84 recovery discs 87 recovery...

ENVY 14 Notebook PC Maintenance and Service Guide
Page 109
... button board removal 47 spare part number 14, 47 TouchPad zone, identifying 7 traveling with the computer 12 U USB 3.0 charging (powered) port, identifying 6 USB 3.0 port, identifying 5, 6 USB/audio board removing 43 spare part number 17, 43 V vents, identifying 6, 11 video, product description 2 W webcam identifying 4 removal 35 spare part number 35 webcam light, identifying 4 webcamera/microphone module removal 70 spare part number 18, 70 Windows File History 84 restoring files 84 system restore point 83 Windows Backup and Restore restoring files 90 Windows key, identifying 10 wireless...
... button board removal 47 spare part number 14, 47 TouchPad zone, identifying 7 traveling with the computer 12 U USB 3.0 charging (powered) port, identifying 6 USB 3.0 port, identifying 5, 6 USB/audio board removing 43 spare part number 17, 43 V vents, identifying 6, 11 video, product description 2 W webcam identifying 4 removal 35 spare part number 35 webcam light, identifying 4 webcamera/microphone module removal 70 spare part number 18, 70 Windows File History 84 restoring files 84 system restore point 83 Windows Backup and Restore restoring files 90 Windows key, identifying 10 wireless...


