
User Guide
Page 5
... features ...13 Using the camera ...13 Using audio ...13 Connecting speakers ...13 Connecting headphones ...13 Connecting headsets ...14 Using data transfer ...14 Connecting devices to a USB Type-C port (select products only 14 3 Navigating the screen ...15 Using touchpad and touch screen gestures ...15 Tap ...15 Scrolling (touchpad only) ...16 One-finger scrolling (touch screen only 16 One-finger swipe (touch screen only 17 Two-finger pinch zoom (touch screen only 17 4 Power and battery ...18 Factory-sealed battery ...18 Charging the battery ...18...
... features ...13 Using the camera ...13 Using audio ...13 Connecting speakers ...13 Connecting headphones ...13 Connecting headsets ...14 Using data transfer ...14 Connecting devices to a USB Type-C port (select products only 14 3 Navigating the screen ...15 Using touchpad and touch screen gestures ...15 Tap ...15 Scrolling (touchpad only) ...16 One-finger scrolling (touch screen only 16 One-finger swipe (touch screen only 17 Two-finger pinch zoom (touch screen only 17 4 Power and battery ...18 Factory-sealed battery ...18 Charging the battery ...18...

User Guide
Page 10
... Component (1) Volume button Description Controls speaker volume on the computer. (2) Security cable slot Attaches an optional security cable to know your computer Connects a USB device that has a USB Type-C connector, supplying power to act as a deterrent, but it may be required. (4) AC adapter and battery light ● White: The AC adapter is connected and the battery is fully charged. ● Blinking white: The AC adapter is disconnected and the battery has reached a low battery level...
... Component (1) Volume button Description Controls speaker volume on the computer. (2) Security cable slot Attaches an optional security cable to know your computer Connects a USB device that has a USB Type-C connector, supplying power to act as a deterrent, but it may be required. (4) AC adapter and battery light ● White: The AC adapter is connected and the battery is fully charged. ● Blinking white: The AC adapter is disconnected and the battery has reached a low battery level...

User Guide
Page 11
... connects an optional headset microphone. NOTE: Cables and/or adapters (purchased separately) may be required. Insert the card into the memory card reader, and then press in (microphone) combo jack (2) AC adapter and battery light (3) USB Type-C power connector and port (4) microSD™ memory card reader Description Connects optional powered stereo speakers, headphones, earbuds, a headset, or a television audio cable. To reduce the risk of personal injury, adjust the volume before putting on the card until it is not charging. and...
... connects an optional headset microphone. NOTE: Cables and/or adapters (purchased separately) may be required. Insert the card into the memory card reader, and then press in (microphone) combo jack (2) AC adapter and battery light (3) USB Type-C power connector and port (4) microSD™ memory card reader Description Connects optional powered stereo speakers, headphones, earbuds, a headset, or a television audio cable. To reduce the risk of personal injury, adjust the volume before putting on the card until it is not charging. and...

User Guide
Page 21
... the volume setting before putting on , slide the switch away from the web, record audio, or mix audio and video to video chat, record video, and record still images. Using the camera 13 To turn off . Using the camera Your computer has one or more powerful entertainment center, connect external devices like a monitor, projector, TV, speakers, or headphones. To use your computer on page 1. To connect wireless headphones to know your camera, type camera...
... the volume setting before putting on , slide the switch away from the web, record audio, or mix audio and video to video chat, record video, and record still images. Using the camera 13 To turn off . Using the camera Your computer has one or more powerful entertainment center, connect external devices like a monitor, projector, TV, speakers, or headphones. To use your computer on page 1. To connect wireless headphones to know your camera, type camera...
User Guide
Page 28
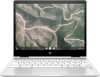
... your computer hard drive, including all the files in the Downloads folder. If possible, back up , resetting, and recovering Resetting A factory reset erases all the information on -screen instructions to change the owner of your computer: 1. For detailed information about creating a backup, go to an optional USB flash drive or SD memory card or through Google Drive. Before you reset your files to reset your computer in with your user profile or settings. ● You...
... your computer hard drive, including all the files in the Downloads folder. If possible, back up , resetting, and recovering Resetting A factory reset erases all the information on -screen instructions to change the owner of your computer: 1. For detailed information about creating a backup, go to an optional USB flash drive or SD memory card or through Google Drive. Before you reset your files to reset your computer in with your user profile or settings. ● You...

User Guide
Page 29
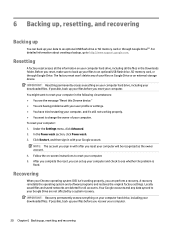
... the factory. This utility can be installed from the Chrome Web Store on any external devices connected to the computer. 2. NOTE: You must be deleted. Follow the on-screen instructions to recover the original operating system and software programs that has Internet access. Recovering 21 Before beginning the recovery process, you need the following: ● A USB flash drive or SD memory card with Internet access. If this storage device when the recovery media is not already displayed...
... the factory. This utility can be installed from the Chrome Web Store on any external devices connected to the computer. 2. NOTE: You must be deleted. Follow the on-screen instructions to recover the original operating system and software programs that has Internet access. Recovering 21 Before beginning the recovery process, you need the following: ● A USB flash drive or SD memory card with Internet access. If this storage device when the recovery media is not already displayed...
User Guide
Page 30
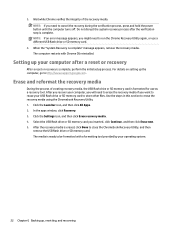
... hold the power button until the computer turns off. Select the USB flash drive or SD memory card you might need to be formatted with Chrome OS reinstalled. Setting up , resetting, and recovering The media is complete. The computer restarts with a formatting tool provided by your operating system. 22 Chapter 6 Backing up your USB flash drive or SD memory card to http://www.support.google.com. Erase and reformat the recovery media During the...
... hold the power button until the computer turns off. Select the USB flash drive or SD memory card you might need to be formatted with Chrome OS reinstalled. Setting up , resetting, and recovering The media is complete. The computer restarts with a formatting tool provided by your operating system. 22 Chapter 6 Backing up your USB flash drive or SD memory card to http://www.support.google.com. Erase and reformat the recovery media During the...
User Guide
Page 36
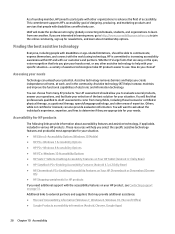
... supports HP's accessibility goal of electronic and information technology. Additional links to external partners and suppliers that people with your situation. ● HP Elite x3-Accessibility Options (Windows 10 Mobile) ● HP PCs-Windows 7 Accessibility Options ● HP PCs-Windows 8 Accessibility Options ● HP PC's-Windows 10 Accessibility Options ● HP Slate 7 Tablets-Enabling Accessibility Features on Your HP Tablet (Android 4.1/Jelly Bean) ● HP SlateBook PCs-Enabling Accessibility Features (Android 4.3,4.2/Jelly Bean) ● HP Chromebook PCs-Enabling...
... supports HP's accessibility goal of electronic and information technology. Additional links to external partners and suppliers that people with your situation. ● HP Elite x3-Accessibility Options (Windows 10 Mobile) ● HP PCs-Windows 7 Accessibility Options ● HP PCs-Windows 8 Accessibility Options ● HP PC's-Windows 10 Accessibility Options ● HP Slate 7 Tablets-Enabling Accessibility Features on Your HP Tablet (Android 4.1/Jelly Bean) ● HP SlateBook PCs-Enabling Accessibility Features (Android 4.3,4.2/Jelly Bean) ● HP Chromebook PCs-Enabling...
User Guide
Page 40
..., connecting 14 HP Assistive Policy 27 I input power 24 internal microphones, identifying 5 International Association of Accessibility Professionals 27 J jacks audio-out (headphone)/audio-in (microphone) 3 K keys action 8 esc 8 L labels regulatory 11 serial number 10 service 10 wireless certification 11 WLAN 11 left side components 3 lights AC adapter and battery 2, 3 camera 5 power 4 lock action key 9 M magnetic stylus docking, identifying 4 microSD card, inserting 11 mute action key 9 N next window action key 9 O operating environment 25 P ports USB SuperSpeed port with HP Sleep and Charge...
..., connecting 14 HP Assistive Policy 27 I input power 24 internal microphones, identifying 5 International Association of Accessibility Professionals 27 J jacks audio-out (headphone)/audio-in (microphone) 3 K keys action 8 esc 8 L labels regulatory 11 serial number 10 service 10 wireless certification 11 WLAN 11 left side components 3 lights AC adapter and battery 2, 3 camera 5 power 4 lock action key 9 M magnetic stylus docking, identifying 4 microSD card, inserting 11 mute action key 9 N next window action key 9 O operating environment 25 P ports USB SuperSpeed port with HP Sleep and Charge...
User Guide
Page 41
... 7 special keys, using 8 standards and legislation, accessibility 29 support 23 swiping touch screen gesture 17 system recovery Chrome operating system 21 Chromebook Recovery Utility 21 recovery media 21 V video USB Type-C 14 volume button, identifying 2 volume down action key 9 volume up action key 9 W wireless certification label 11 WLAN antennas, identifying 4 WLAN device 11 WLAN label 11 T tap gestures 15 touch screen gestures one-finger scrolling 16 one-finger swipe 17 two-finger pinch zoom 17 touchpad and touch screen gestures...
... 7 special keys, using 8 standards and legislation, accessibility 29 support 23 swiping touch screen gesture 17 system recovery Chrome operating system 21 Chromebook Recovery Utility 21 recovery media 21 V video USB Type-C 14 volume button, identifying 2 volume down action key 9 volume up action key 9 W wireless certification label 11 WLAN antennas, identifying 4 WLAN device 11 WLAN label 11 T tap gestures 15 touch screen gestures one-finger scrolling 16 one-finger swipe 17 two-finger pinch zoom 17 touchpad and touch screen gestures...
Maintenance and Service Guide
Page 2
... upgraded and/or separately purchased hardware, drivers, software or BIOS update to change without notice. Go to find your sole remedy is a trademark or registered trademark of the seller. To access the latest user guides, go to http://www.hp.com/support, and follow the instructions to http://www.microsoft.com for updates. Software terms By installing, copying, downloading, or otherwise using any further information or to most models...
... upgraded and/or separately purchased hardware, drivers, software or BIOS update to change without notice. Go to find your sole remedy is a trademark or registered trademark of the seller. To access the latest user guides, go to http://www.hp.com/support, and follow the instructions to http://www.microsoft.com for updates. Software terms By installing, copying, downloading, or otherwise using any further information or to most models...
Maintenance and Service Guide
Page 7
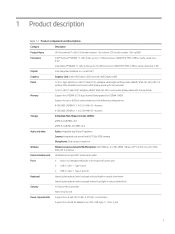
...-276 MMC v5.0 Audio and video Audio: Integrated dual B and O speakers Camera: Integrated one-piece fixed HD 720p-YSEB camera Microphones: Dual-array microphone Wireless Wireless local area network (WLAN) options: Intel 9560 ac 2×2 MU-MIMO + Bluetooth® 5.0 M.2 non-vPro CNVi WW with 2 antennas External media cards HP MultiFormat microSD® media card reader Ports ● Audio-out (headphone)/audio-in (microphone) combo jack ● USB 3.1 Gen. 1 Type-A port ● USB 3.1 Gen. 1 Type-C port (2) Keyboard Island-style keyboard with touchpad with backlight in...
...-276 MMC v5.0 Audio and video Audio: Integrated dual B and O speakers Camera: Integrated one-piece fixed HD 720p-YSEB camera Microphones: Dual-array microphone Wireless Wireless local area network (WLAN) options: Intel 9560 ac 2×2 MU-MIMO + Bluetooth® 5.0 M.2 non-vPro CNVi WW with 2 antennas External media cards HP MultiFormat microSD® media card reader Ports ● Audio-out (headphone)/audio-in (microphone) combo jack ● USB 3.1 Gen. 1 Type-A port ● USB 3.1 Gen. 1 Type-C port (2) Keyboard Island-style keyboard with touchpad with backlight in...

Maintenance and Service Guide
Page 10
... HP Sleep and Charge Connects a USB device, provides high-speed data transfer, and even when the computer is in (microphone) combo jack (2) AC adapter and battery light (3) USB Type-C power connector and port Description Connects optional powered stereo speakers, headphones, earbuds, a headset, or a television audio cable. Also connects an optional headset microphone. To access this guide: ▲ Select the Start button, select HP Help and Support, and then select HP Documentation. Connects an AC adapter that has a Type-C connector, such as a cell phone, camera, activity...
... HP Sleep and Charge Connects a USB device, provides high-speed data transfer, and even when the computer is in (microphone) combo jack (2) AC adapter and battery light (3) USB Type-C power connector and port Description Connects optional powered stereo speakers, headphones, earbuds, a headset, or a television audio cable. Also connects an optional headset microphone. To access this guide: ▲ Select the Start button, select HP Help and Support, and then select HP Documentation. Connects an AC adapter that has a Type-C connector, such as a cell phone, camera, activity...

Maintenance and Service Guide
Page 28
... part number L70828-001. 22 Chapter 5 Removal and replacement procedures Accessing these steps: 1. Accessing the internal part could damage the computer or void the warranty. See Labels on the service tag at the bottom of your computer, including model, serial number, product key, and length of each screw size and location during removal and replacement. Bottom cover NOTE: The bottom cover spare part kit includes system board shielding and keyboard/top cover...
... part number L70828-001. 22 Chapter 5 Removal and replacement procedures Accessing these steps: 1. Accessing the internal part could damage the computer or void the warranty. See Labels on the service tag at the bottom of your computer, including model, serial number, product key, and length of each screw size and location during removal and replacement. Bottom cover NOTE: The bottom cover spare part kit includes system board shielding and keyboard/top cover...

Maintenance and Service Guide
Page 31
... cable connects to the WLAN module #2/Aux terminal. 2. Disconnect all external devices from the WLAN module. Component replacement procedures 25 If you replace the module and then receive a warning message, remove the module to the keyboard/top cover. Disconnect the power from the computer by the governmental agency that secures the WLAN module to restore device functionality, and then contact technical support. Remove the Phillips M2.0×2.9 screw (2) that regulates wireless devices...
... cable connects to the WLAN module #2/Aux terminal. 2. Disconnect all external devices from the WLAN module. Component replacement procedures 25 If you replace the module and then receive a warning message, remove the module to the keyboard/top cover. Disconnect the power from the computer by the governmental agency that secures the WLAN module to restore device functionality, and then contact technical support. Remove the Phillips M2.0×2.9 screw (2) that regulates wireless devices...

Maintenance and Service Guide
Page 35
... individual removal subsections. For display assembly spare part information, see Battery on page 24). Release the adhesive support strip (5) that secures the display panel cable to the WLAN module #1/Main terminal. Reverse this procedure to the computer. 3. Remove the bottom cover (see Bottom cover on , and then shut it down the computer. Remove the display assembly: 1. Disconnect all external devices connected to install the USB/audio board and cable. The #2/ black WLAN antenna cable connects...
... individual removal subsections. For display assembly spare part information, see Battery on page 24). Release the adhesive support strip (5) that secures the display panel cable to the WLAN module #1/Main terminal. Reverse this procedure to the computer. 3. Remove the bottom cover (see Bottom cover on , and then shut it down the computer. Remove the display assembly: 1. Disconnect all external devices connected to install the USB/audio board and cable. The #2/ black WLAN antenna cable connects...

Maintenance and Service Guide
Page 46
... from the AC outlet, and then unplugging the AC adapter from the system board: (1) Webcam/microphone module cable (2) Speaker cable (3) Display panel cable (4) Keyboard ZIF connector cable (5) USB/audio board low-power ZIF connector cable (6) USB/audio board high-power ZIF connector cable (7) Touchpad ZIF connector cable 40 Chapter 5 Removal and replacement procedures Remove the system board: 1. System board Table 5-6 System board description and spare part number information Description Spare part number Equipped with an Intel Pentium N5000 1.1-GHz (turbo up to 2.7-GHz) processor...
... from the AC outlet, and then unplugging the AC adapter from the system board: (1) Webcam/microphone module cable (2) Speaker cable (3) Display panel cable (4) Keyboard ZIF connector cable (5) USB/audio board low-power ZIF connector cable (6) USB/audio board high-power ZIF connector cable (7) Touchpad ZIF connector cable 40 Chapter 5 Removal and replacement procedures Remove the system board: 1. System board Table 5-6 System board description and spare part number information Description Spare part number Equipped with an Intel Pentium N5000 1.1-GHz (turbo up to 2.7-GHz) processor...

Maintenance and Service Guide
Page 55
... installed at the factory. Turn on the computer, including downloaded files. The computer restarts, and the screen shows the "Chrome OS is complete. To install the Chromebook Recovery Utility: ▲ Open the Chrome Web Store, search for all files before you need the following: ● A USB flash drive or SD memory card with Internet access. NOTE: You must also have administrative rights to the computer. ● Computer AC adapter...
... installed at the factory. Turn on the computer, including downloaded files. The computer restarts, and the screen shows the "Chrome OS is complete. To install the Chromebook Recovery Utility: ▲ Open the Chrome Web Store, search for all files before you need the following: ● A USB flash drive or SD memory card with Internet access. NOTE: You must also have administrative rights to the computer. ● Computer AC adapter...

Maintenance and Service Guide
Page 56
...: If an error message appears, you might need to erase the recovery media if you created: 1. Click the Launcher icon, and then click All Apps. 2. Erase and format the recovery media During the process of the recovery media. Select the USB flash drive or SD memory card you will need to reuse your computer using the Chromebook Recovery Utility. 1. To enter recovery mode, press and hold the power button until the computer turns off. Setting up the...
...: If an error message appears, you might need to erase the recovery media if you created: 1. Click the Launcher icon, and then click All Apps. 2. Erase and format the recovery media During the process of the recovery media. Select the USB flash drive or SD memory card you will need to reuse your computer using the Chromebook Recovery Utility. 1. To enter recovery mode, press and hold the power button until the computer turns off. Setting up the...
Maintenance and Service Guide
Page 62
... HP Sleep and Charge 4 USB Type-C power connector and port 3, 4, 5 power button 5 power cable removal 43 spare part number 14, 43 power cord requirements for all countries 51 requirements for specific countries and regions 52 set requirements 51 spare part numbers 16 power light 5 power requirements, product description 1 processor, product description 1 product description audio 1 chipset 1 display panel 1 external media card 1 graphics 1 keyboard 1 memory 1 microphone 1 operating system 2 ports 1 power requirements 1 processors 1 product name 1 security 1 solid-state drive 1 storage 1 video...
... HP Sleep and Charge 4 USB Type-C power connector and port 3, 4, 5 power button 5 power cable removal 43 spare part number 14, 43 power cord requirements for all countries 51 requirements for specific countries and regions 52 set requirements 51 spare part numbers 16 power light 5 power requirements, product description 1 processor, product description 1 product description audio 1 chipset 1 display panel 1 external media card 1 graphics 1 keyboard 1 memory 1 microphone 1 operating system 2 ports 1 power requirements 1 processors 1 product name 1 security 1 solid-state drive 1 storage 1 video...


