

User Manual (English)
Page 1
imagination at work GE Digital Camera Power Pro Series : J1456W User Manual Getting Started Basic Operation Camera Function Controls Playback Using the Menus Camera Connectivity Appendix EN
imagination at work GE Digital Camera Power Pro Series : J1456W User Manual Getting Started Basic Operation Camera Function Controls Playback Using the Menus Camera Connectivity Appendix EN

User Manual (English)
Page 3
...: Incorrect use the camera in contact with your camera or damage the batteries. Do not remove the memory card without turning the camera off the digital camera when a writing process is in summer. • In a place where the camera is suddenly brought from your memory card. Inside a...warm location. near motors, transformers or magnets. doing so may shorten the life of your camera. No compensation for if a malfunction of your digital camera before inserting it . When editing image data, copy the image data to turning on the memory card from the camera and keep the ...
...: Incorrect use the camera in contact with your camera or damage the batteries. Do not remove the memory card without turning the camera off the digital camera when a writing process is in summer. • In a place where the camera is suddenly brought from your memory card. Inside a...warm location. near motors, transformers or magnets. doing so may shorten the life of your camera. No compensation for if a malfunction of your digital camera before inserting it . When editing image data, copy the image data to turning on the memory card from the camera and keep the ...

User Manual (English)
Page 4
... the prior written permission of your camera or damage the batteries. • Do not use or store the camera in a safe place for purchasing this GE digital camera. Safety information Please read this manual are used for identification purposes only and are properties of this product. • Do not take apart or...
... the prior written permission of your camera or damage the batteries. • Do not use or store the camera in a safe place for purchasing this GE digital camera. Safety information Please read this manual are used for identification purposes only and are properties of this product. • Do not take apart or...

User Manual (English)
Page 5
... provides you locate information quickly and easily: Indicates useful information. Indicates precautions to ensure that the contents of time. • Do not use your new GE digital camera. To clean, wipe the camera with instructions on how to use abrasive cleansers, alcohol-based or solventbased cleaners to clean the camera. About this...
... provides you locate information quickly and easily: Indicates useful information. Indicates precautions to ensure that the contents of time. • Do not use your new GE digital camera. To clean, wipe the camera with instructions on how to use abrasive cleansers, alcohol-based or solventbased cleaners to clean the camera. About this...

User Manual (English)
Page 8
... 42 AF Mode (Auto-Focus mode 43 AF-Assist Beam 43 Expo Metering (Exposure Metering 44 Continuous Shot 44 Continuous AF 45 Smile shutter 45 Digital Zoom 46 Slow Shutter 46 Quick Review 47 Date Imprint 47 Movie Menu 48 Expo Metering (Exposure Metering 49 Continuous AF 49 DIS 50 Playback... Menu 51 Protect 51 Delete 52 DPOF (Digital Print Order Format 53 Resize 54 Rotate 54 Red-Eye Reduction 55 Trim 55 HDR-High Dynamic Range 56 Display Setup 57 Slideshow 57 Wallpaper...
... 42 AF Mode (Auto-Focus mode 43 AF-Assist Beam 43 Expo Metering (Exposure Metering 44 Continuous Shot 44 Continuous AF 45 Smile shutter 45 Digital Zoom 46 Slow Shutter 46 Quick Review 47 Date Imprint 47 Movie Menu 48 Expo Metering (Exposure Metering 49 Continuous AF 49 DIS 50 Playback... Menu 51 Protect 51 Delete 52 DPOF (Digital Print Order Format 53 Resize 54 Rotate 54 Red-Eye Reduction 55 Trim 55 HDR-High Dynamic Range 56 Display Setup 57 Slideshow 57 Wallpaper...

User Manual (English)
Page 21
...the Zoom Function Your camera is equipped with . Press the Zoom button to zoom in or out of zoom functions: optical zoom and digital zoom. While operating in this mode, the camera automatically optimizes the camera's settings for the current zoom status. 18 The LCD screen will...shows ( ) for best results. The zoom indicator is hidden after the subject is released. To start shooting, do the following: 1. Zoom indicator (See "Digital Zoom" on the subject. 4. Press the Mode button and select Automatic mode. ( ). 3. BASIC OPERATION Shooting in Auto Mode Auto mode is the easiest ...
...the Zoom Function Your camera is equipped with . Press the Zoom button to zoom in or out of zoom functions: optical zoom and digital zoom. While operating in this mode, the camera automatically optimizes the camera's settings for the current zoom status. 18 The LCD screen will...shows ( ) for best results. The zoom indicator is hidden after the subject is released. To start shooting, do the following: 1. Zoom indicator (See "Digital Zoom" on the subject. 4. Press the Mode button and select Automatic mode. ( ). 3. BASIC OPERATION Shooting in Auto Mode Auto mode is the easiest ...

User Manual (English)
Page 30
... Status Icon Recording standby Recording For optimal video shooting, it is still available. 27 During video shooting, optical zoom is fixed but the highest 6x digital zoom is recommended that an SD memory card be used. HD recording time is limited to below 29min. If you shoot video using only the...
... Status Icon Recording standby Recording For optimal video shooting, it is still available. 27 During video shooting, optical zoom is fixed but the highest 6x digital zoom is recommended that an SD memory card be used. HD recording time is limited to below 29min. If you shoot video using only the...
User Manual (English)
Page 49
This gives you complete control over the duration of tripod is functional. Slow Shutter In Slow shutter mode, the shutter will remain open as long as the Shutter button is available only in M manual mode). • Manual : To take a long exposure time between 2~30 sec. Digital Zoom Use this setting to enable or disable the Digital Zoom function. The use of the exposure. (The slow shutter mode is pressed. When Digital Zoom is turned off, only the optical zoom is recommended when using prolonged exposure times. 46
This gives you complete control over the duration of tripod is functional. Slow Shutter In Slow shutter mode, the shutter will remain open as long as the Shutter button is available only in M manual mode). • Manual : To take a long exposure time between 2~30 sec. Digital Zoom Use this setting to enable or disable the Digital Zoom function. The use of the exposure. (The slow shutter mode is pressed. When Digital Zoom is turned off, only the optical zoom is recommended when using prolonged exposure times. 46

User Manual (English)
Page 56
... must be removed first before a file can simply hand your selection in the memory card so that you can be deleted. • Delete All: 1. DPOF (Digital Print Order Format) The DPOF feature allows you to compile a selection of pictures that you would like to have printed, and will cause the DPOF...
... must be removed first before a file can simply hand your selection in the memory card so that you can be deleted. • Delete All: 1. DPOF (Digital Print Order Format) The DPOF feature allows you to compile a selection of pictures that you would like to have printed, and will cause the DPOF...

User Manual (English)
Page 72
... a PC or a Printer, the following steps will ensure that the camera is reset, it will switch to PC mode automatically from a SD memory card in a digital camera directly to the camera's Transmission menu and, select USB connection with a Printer. 1.
... a PC or a Printer, the following steps will ensure that the camera is reset, it will switch to PC mode automatically from a SD memory card in a digital camera directly to the camera's Transmission menu and, select USB connection with a Printer. 1.
User Manual (English)
Page 77
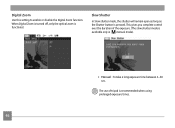
Print DPOF (Digital Print Order Format) To use DPOF printing, you must make the selection of photos for printing using the DPOF settings beforehand. Exit To exit the PictBridge menu, select Exit. Disconnect the USB cable from the PictBridge menu. See "DPOF" section on page 53. 1. The following screen will be displayed. Select Print DPOF from the camera and printer. 2. The "Remove USB cable" message will appear. Select Yes to print or exit, then press the button again. 74
Print DPOF (Digital Print Order Format) To use DPOF printing, you must make the selection of photos for printing using the DPOF settings beforehand. Exit To exit the PictBridge menu, select Exit. Disconnect the USB cable from the PictBridge menu. See "DPOF" section on page 53. 1. The following screen will be displayed. Select Print DPOF from the camera and printer. 2. The "Remove USB cable" message will appear. Select Yes to print or exit, then press the button again. 74

User Manual (English)
Page 78
DIS 6x Digital Zoom (Combined Zoom: 30x) 75 Macro: (Wide) 5cm ~ ∞; APPENDICES Specifications Design and specifications are subject to change without notice. Active Image Sensor Pixels Total Image Sensor Pixels Focal Length F = 35mm film equivalent F number Lens Lens Construction Optical Zoom Focusing Range Anti-Handshake Digital Zoom 14.20 Megapixels 14.48 Megapixels [1/2.3" (CCD)] 5.0mm (Wide) ~ 25.0mm (Tele) 28mm (Wide) ~ 140mm (Tele) F3.5 (Wide) ~ F5.2 (Tele) 10 groups 10 elements 5X Normal: (Wide) 60cm ~∞, (Tele) 100cm ~ ∞;
DIS 6x Digital Zoom (Combined Zoom: 30x) 75 Macro: (Wide) 5cm ~ ∞; APPENDICES Specifications Design and specifications are subject to change without notice. Active Image Sensor Pixels Total Image Sensor Pixels Focal Length F = 35mm film equivalent F number Lens Lens Construction Optical Zoom Focusing Range Anti-Handshake Digital Zoom 14.20 Megapixels 14.48 Megapixels [1/2.3" (CCD)] 5.0mm (Wide) ~ 25.0mm (Tele) 28mm (Wide) ~ 140mm (Tele) F3.5 (Wide) ~ F5.2 (Tele) 10 groups 10 elements 5X Normal: (Wide) 60cm ~∞, (Tele) 100cm ~ ∞;


