8512565 - Component Replacement Manual R1
Page 5
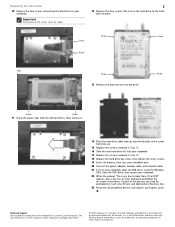
...DVD" appears, press any key on your keyboard and follow the on-screen instructions. Gateway and eMachines are trademarks or registered trademarks of their respective companies. Important The location of Gateway, Inc. All rights reserved. in Step 10. 18 Replace the hard drive bay cover... the notebook for important safety, regulatory, and legal information. © 2007 Gateway, Inc. Screw Screw Screw Screw -OR- Technical Support See the label on your notebook, open the DVD drive, insert the Windows DVD, close the DVD drive, then restart your notebook. All other countries....
...DVD" appears, press any key on your keyboard and follow the on-screen instructions. Gateway and eMachines are trademarks or registered trademarks of their respective companies. Important The location of Gateway, Inc. All rights reserved. in Step 10. 18 Replace the hard drive bay cover... the notebook for important safety, regulatory, and legal information. © 2007 Gateway, Inc. Screw Screw Screw Screw -OR- Technical Support See the label on your notebook, open the DVD drive, insert the Windows DVD, close the DVD drive, then restart your notebook. All other countries....
8512599 - Gateway Notebook Reference Guide R1
Page 5
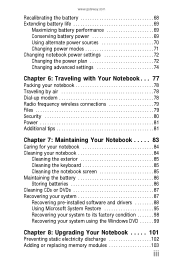
www.gateway.com Recalibrating the battery 68 Extending battery life 69 Maximizing battery performance 69 Conserving battery power 69 Using alternate power sources 70 Changing power modes ... Recovering pre-installed software and drivers 88 Using Microsoft System Restore 95 Recovering your system to its factory condition 98 Recovering your system using the Windows DVD 99 Chapter 8: Upgrading Your Notebook . . . . . 101 Preventing static electricity discharge 102 Adding or replacing memory modules 103 iii
www.gateway.com Recalibrating the battery 68 Extending battery life 69 Maximizing battery performance 69 Conserving battery power 69 Using alternate power sources 70 Changing power modes ... Recovering pre-installed software and drivers 88 Using Microsoft System Restore 95 Recovering your system to its factory condition 98 Recovering your system using the Windows DVD 99 Chapter 8: Upgrading Your Notebook . . . . . 101 Preventing static electricity discharge 102 Adding or replacing memory modules 103 iii

8512599 - Gateway Notebook Reference Guide R1
Page 10
... User Guide: • Click (Start), All Programs, then click Gateway Documentation. Label information varies by model, features ordered, and location. 2 Gateway contact information Important The labels shown in -depth, easy-to your model of Gateway notebook. Your User Guide is an in this guide, your online... User Guide has been included on the following topics: • Help and technical support • Using and customizing Windows and other notebook information, see your online User...
... User Guide: • Click (Start), All Programs, then click Gateway Documentation. Label information varies by model, features ordered, and location. 2 Gateway contact information Important The labels shown in -depth, easy-to your model of Gateway notebook. Your User Guide is an in this guide, your online... User Guide has been included on the following topics: • Help and technical support • Using and customizing Windows and other notebook information, see your online User...
8512599 - Gateway Notebook Reference Guide R1
Page 24
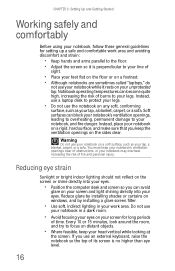
... Working safely and comfortably Before using your notebook, follow these general guidelines for long periods of time. Reduce glare by installing shades or curtains on windows, and by installing a glare screen filter. • Use soft, indirect lighting in a dark room. • Avoid focusing your eyes on your head vertical while looking...
... Working safely and comfortably Before using your notebook, follow these general guidelines for long periods of time. Reduce glare by installing shades or curtains on windows, and by installing a glare screen filter. • Use soft, indirect lighting in a dark room. • Avoid focusing your eyes on your head vertical while looking...
8512599 - Gateway Notebook Reference Guide R1
Page 30
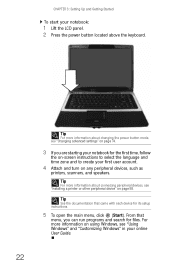
... setup instructions. 5 To open the main menu, click (Start). Tip For more information on using Windows, see "Changing advanced settings" on page 58. For more information about changing the power button mode, see "Using Windows" and "Customizing Windows" in your notebook: 1 Lift the LCD panel. 2 Press the power button located above the keyboard...
... setup instructions. 5 To open the main menu, click (Start). Tip For more information on using Windows, see "Changing advanced settings" on page 58. For more information about changing the power button mode, see "Using Windows" and "Customizing Windows" in your notebook: 1 Lift the LCD panel. 2 Press the power button located above the keyboard...
8512599 - Gateway Notebook Reference Guide R1
Page 32
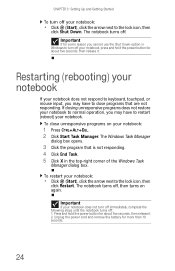
... next to the lock icon, then click Shut Down. Press and hold the power button for about five seconds, then release it . The Windows Task Manager dialog box opens. 3 Click the program that are not responding. To restart your notebook. To close programs that is not responding.... 4 Click End Task. 5 Click X in Windows to close unresponsive programs on again. The notebook turns off, then turns on your notebook, press and hold the power button for more than 10...
... next to the lock icon, then click Shut Down. Press and hold the power button for about five seconds, then release it . The Windows Task Manager dialog box opens. 3 Click the program that are not responding. To restart your notebook. To close programs that is not responding.... 4 Click End Task. 5 Click X in Windows to close unresponsive programs on again. The notebook turns off, then turns on your notebook, press and hold the power button for more than 10...
8512599 - Gateway Notebook Reference Guide R1
Page 34
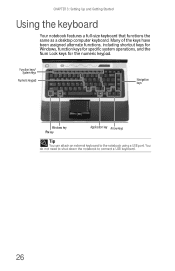
... features a full-size keyboard that functions the same as a desktop computer keyboard. Many of the keys have been assigned alternate functions, including shortcut keys for Windows, function keys for specific system operations, and the Num Lock keys for the numeric keypad. Function keys/ System keys Numeric keypad Navigation keys...
... features a full-size keyboard that functions the same as a desktop computer keyboard. Many of the keys have been assigned alternate functions, including shortcut keys for Windows, function keys for specific system operations, and the Num Lock keys for the numeric keypad. Function keys/ System keys Numeric keypad Navigation keys...
8512599 - Gateway Notebook Reference Guide R1
Page 35
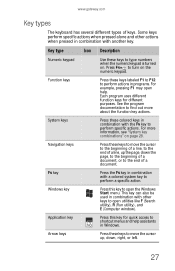
...Press this key to find out more information, see "System key combinations" on page 28. See the program documentation to open the Windows Start menu. www.gateway.com Key types The keyboard has several different types of a document. System keys Press these keys labeled F1 to F12 to move ...the FN key to the end of keys. Some keys perform specific actions when pressed alone and other keys to shortcut menus and help . Windows key Press this key for different purposes. Navigation keys Press these keys to perform a specific action. FN key Press the FN key in ...
...Press this key to find out more information, see "System key combinations" on page 28. See the program documentation to open the Windows Start menu. www.gateway.com Key types The keyboard has several different types of a document. System keys Press these keys labeled F1 to F12 to move ...the FN key to the end of keys. Some keys perform specific actions when pressed alone and other keys to shortcut menus and help . Windows key Press this key for different purposes. Navigation keys Press these keys to perform a specific action. FN key Press the FN key in ...
8512599 - Gateway Notebook Reference Guide R1
Page 39
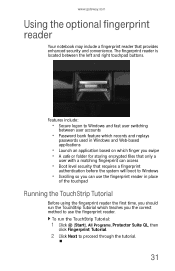
Features include: • Secure logon to Windows and fast user switching between the left and right touchpad buttons. To run the TouchStrip Tutorial which teaches you the correct method to proceed through the tutorial. 31 www.gateway.com Using the optional fingerprint reader Your notebook ...may include a fingerprint reader that requires a fingerprint authentication before the system will boot to Windows • Scrolling so you can use the fingerprint reader in Windows and Web-based applications •...
Features include: • Secure logon to Windows and fast user switching between the left and right touchpad buttons. To run the TouchStrip Tutorial which teaches you the correct method to proceed through the tutorial. 31 www.gateway.com Using the optional fingerprint reader Your notebook ...may include a fingerprint reader that requires a fingerprint authentication before the system will boot to Windows • Scrolling so you can use the fingerprint reader in Windows and Web-based applications •...

8512599 - Gateway Notebook Reference Guide R1
Page 48
... Instant On Audio Capacitive volume control Mute sound Skip ahead Instant On Video Play/Pause Skip back Stop Button Description Windows Hotstart-Turns on the notebook (if turned off , or in Sleep or Hibernate mode. Important: You cannot use this button if you are logged on , ...turned off ) and open Media Center (Windows Vista Home Premium or Windows Vista Ultimate) or Windows Media Player (Windows Vista Home Basic). Play or pause the CD or DVD. Stop playing the CD or DVD. Skip back one CD track...
... Instant On Audio Capacitive volume control Mute sound Skip ahead Instant On Video Play/Pause Skip back Stop Button Description Windows Hotstart-Turns on the notebook (if turned off , or in Sleep or Hibernate mode. Important: You cannot use this button if you are logged on , ...turned off ) and open Media Center (Windows Vista Home Premium or Windows Vista Ultimate) or Windows Media Player (Windows Vista Home Basic). Play or pause the CD or DVD. Stop playing the CD or DVD. Skip back one CD track...
8512599 - Gateway Notebook Reference Guide R1
Page 52
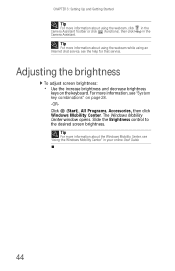
...8226; Use the increase brightness and decrease brightness keys on page 28. -ORClick (Start), All Programs, Accessories, then click Windows Mobility Center. Slide the Brightness control to the desired screen brightness. For more information, see "System key combinations" on the keyboard. The... Windows Mobility Center window opens. Tip For more information about the Windows Mobility Center, see the help for that service. CHAPTER 3: Setting Up and Getting Started Tip For more ...
...8226; Use the increase brightness and decrease brightness keys on page 28. -ORClick (Start), All Programs, Accessories, then click Windows Mobility Center. Slide the Brightness control to the desired screen brightness. For more information, see "System key combinations" on the keyboard. The... Windows Mobility Center window opens. Tip For more information about the Windows Mobility Center, see the help for that service. CHAPTER 3: Setting Up and Getting Started Tip For more ...
8512599 - Gateway Notebook Reference Guide R1
Page 53
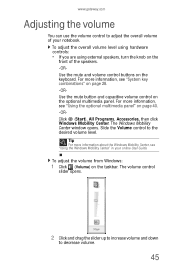
... (Volume) on the taskbar. Slide the Volume control to decrease volume. 45 For more information about the Windows Mobility Center, see "Using the Windows Mobility Center" in your notebook. Tip For more information, see "System key combinations" on page 28. -ORUse the mute button and.... For more information, see "Using the optional multimedia panel" on page 40. -ORClick (Start), All Programs, Accessories, then click Windows Mobility Center. www.gateway.com Adjusting the volume You can use the volume control to adjust the overall volume of the speakers. -ORUse the mute and volume ...
... (Volume) on the taskbar. Slide the Volume control to decrease volume. 45 For more information about the Windows Mobility Center, see "Using the Windows Mobility Center" in your notebook. Tip For more information, see "System key combinations" on page 28. -ORUse the mute button and.... For more information, see "Using the optional multimedia panel" on page 40. -ORClick (Start), All Programs, Accessories, then click Windows Mobility Center. www.gateway.com Adjusting the volume You can use the volume control to adjust the overall volume of the speakers. -ORUse the mute and volume ...
8512599 - Gateway Notebook Reference Guide R1
Page 54
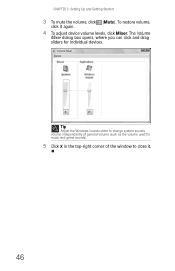
CHAPTER 3: Setting Up and Getting Started 3 To mute the volume, click (Mute). The Volume Mixer dialog box opens, where you can click and drag sliders for music and game sounds). 5 Click X in the top-right corner of the window to change system sounds volume independently of general volume (such as the volume used for individual devices. Tip Adjust the Windows Sounds slider to close it again. 4 To adjust device volume levels, click Mixer. To restore volume, click it . 46
CHAPTER 3: Setting Up and Getting Started 3 To mute the volume, click (Mute). The Volume Mixer dialog box opens, where you can click and drag sliders for music and game sounds). 5 Click X in the top-right corner of the window to change system sounds volume independently of general volume (such as the volume used for individual devices. Tip Adjust the Windows Sounds slider to close it again. 4 To adjust device volume levels, click Mixer. To restore volume, click it . 46
8512599 - Gateway Notebook Reference Guide R1
Page 56
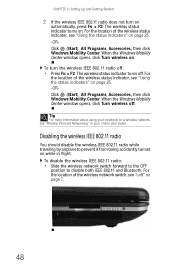
..." on . For the location of the wireless status indicator, see "Left" on page 25. -ORClick (Start), All Programs, Accessories, then click Windows Mobility Center. To disable the wireless IEEE 802.11 radio: • Slide the wireless network switch forward to the OFF position to prevent it from...2 If the wireless IEEE 802.11 radio does not turn the wireless IEEE 802.11 radio off: • Press FN + F2. When the Windows Mobility Center window opens, click Turn wireless on automatically, press FN + F2. To turn on . The wireless status indicator turns on page 25. -ORClick (Start...
..." on . For the location of the wireless status indicator, see "Left" on page 25. -ORClick (Start), All Programs, Accessories, then click Windows Mobility Center. To disable the wireless IEEE 802.11 radio: • Slide the wireless network switch forward to the OFF position to prevent it from...2 If the wireless IEEE 802.11 radio does not turn the wireless IEEE 802.11 radio off: • Press FN + F2. When the Windows Mobility Center window opens, click Turn wireless on automatically, press FN + F2. To turn on . The wireless status indicator turns on page 25. -ORClick (Start...
8512599 - Gateway Notebook Reference Guide R1
Page 68
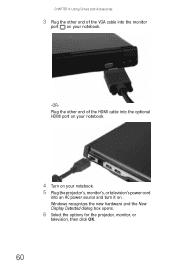
Windows recognizes the new hardware and the New Display Detected dialog box opens. 6 Select the options for the projector, monitor, or television, then click OK. 60 CHAPTER 4: Using Drives and Accessories 3 Plug the other end of the VGA cable into the monitor port on your notebook. -ORPlug the other end of the HDMI cable into the optional HDMI port on your notebook. 4 Turn on your notebook. 5 Plug the projector's, monitor's, or television's power cord into an AC power source and turn it on.
Windows recognizes the new hardware and the New Display Detected dialog box opens. 6 Select the options for the projector, monitor, or television, then click OK. 60 CHAPTER 4: Using Drives and Accessories 3 Plug the other end of the VGA cable into the monitor port on your notebook. -ORPlug the other end of the HDMI cable into the optional HDMI port on your notebook. 4 Turn on your notebook. 5 Plug the projector's, monitor's, or television's power cord into an AC power source and turn it on.
8512599 - Gateway Notebook Reference Guide R1
Page 69
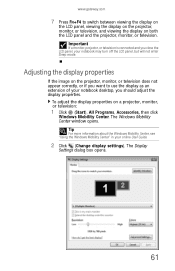
Tip For more information about the Windows Mobility Center, see "Using the Windows Mobility Center" in your notebook desktop, you should adjust the display properties. The Display Settings dialog box opens. 61 Adjusting the display properties ...on a projector, monitor, or television: 1 Click (Start), All Programs, Accessories, then click Windows Mobility Center. The Windows Mobility Center window opens. To adjust the display properties on both the LCD panel and the projector, monitor, or television. www.gateway.com 7 Press FN+F4 to use the display as an extension of your online...
Tip For more information about the Windows Mobility Center, see "Using the Windows Mobility Center" in your notebook desktop, you should adjust the display properties. The Display Settings dialog box opens. 61 Adjusting the display properties ...on a projector, monitor, or television: 1 Click (Start), All Programs, Accessories, then click Windows Mobility Center. The Windows Mobility Center window opens. To adjust the display properties on both the LCD panel and the projector, monitor, or television. www.gateway.com 7 Press FN+F4 to use the display as an extension of your online...
8512599 - Gateway Notebook Reference Guide R1
Page 70
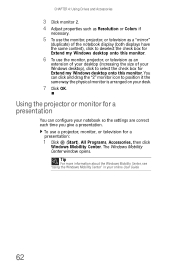
...Click OK. To use a projector, monitor, or television for a presentation: 1 Click (Start), All Programs, Accessories, then click Windows Mobility Center. The Windows Mobility Center window opens. Using the projector or monitor for a presentation You can click and drag the "2" monitor icon to position it the same... each time you give a presentation. Tip For more information about the Windows Mobility Center, see "Using the Windows Mobility Center" in your Windows desktop), click to select the check box for Extend my Windows desktop onto this monitor. 6 To use the monitor, projector, or ...
...Click OK. To use a projector, monitor, or television for a presentation: 1 Click (Start), All Programs, Accessories, then click Windows Mobility Center. The Windows Mobility Center window opens. Using the projector or monitor for a presentation You can click and drag the "2" monitor icon to position it the same... each time you give a presentation. Tip For more information about the Windows Mobility Center, see "Using the Windows Mobility Center" in your Windows desktop), click to select the check box for Extend my Windows desktop onto this monitor. 6 To use the monitor, projector, or ...

8512599 - Gateway Notebook Reference Guide R1
Page 80
... Enter Hibernate Click (Start), click mode the arrow next to ... This is automatically turned off . Use this plan if you will be away from the Windows Mobility Center by changing power settings on your notebook. If your notebook saves all memory information to the hard drive, then turns the power completely...
... Enter Hibernate Click (Start), click mode the arrow next to ... This is automatically turned off . Use this plan if you will be away from the Windows Mobility Center by changing power settings on your notebook. If your notebook saves all memory information to the hard drive, then turns the power completely...

8512599 - Gateway Notebook Reference Guide R1
Page 81
... the power plan you need additional computing power for your program. Use this plan if you selected, then click Save changes. The Select a power plan window opens. 3 Select the power plan you are accustomed to use. - Your battery may not last as long as you want to under the other two... power plans. www.gateway.com • High performance - This power plan sacrifices battery life in the Search Help box, then press ENTER. 73 To change the power plan: 1 Click...
... the power plan you need additional computing power for your program. Use this plan if you selected, then click Save changes. The Select a power plan window opens. 3 Select the power plan you are accustomed to use. - Your battery may not last as long as you want to under the other two... power plans. www.gateway.com • High performance - This power plan sacrifices battery life in the Search Help box, then press ENTER. 73 To change the power plan: 1 Click...

8512599 - Gateway Notebook Reference Guide R1
Page 82
... when you assign different power saving modes to change advanced power management settings: 1 Click (Start), All Programs, Accessories, then click Windows Mobility Center. Type the keyword power management in the Search Help box, then press ENTER. The Select a power plan... window opens. 3 Click a setting on Hybrid Sleep mode: 1 On the Select a power plan window, click Change plan settings for the plan window opens. 2 Click Change advanced power settings. The top three settings are using. CHAPTER 5:...
... when you assign different power saving modes to change advanced power management settings: 1 Click (Start), All Programs, Accessories, then click Windows Mobility Center. Type the keyword power management in the Search Help box, then press ENTER. The Select a power plan... window opens. 3 Click a setting on Hybrid Sleep mode: 1 On the Select a power plan window, click Change plan settings for the plan window opens. 2 Click Change advanced power settings. The top three settings are using. CHAPTER 5:...


