
8511418 - Component Replacement Manual
Page 6
... drive to you see the Windows startup screen. -ORIf you from the old drive. All rights reserved. Gateway and eMachines are trademarks or registered trademarks of their respective companies. Screws Screws 9 Remove the cover from Gateway with the operating system, applications, and drivers installed, you will see a...notebook. 17 If the hard drive was sent to the hard drive cover. Technical Support See the label on the bottom of Gateway, Inc. in the United States and other brands and product names are trademarks or registered trademarks of the notebook for important safety...
... drive to you see the Windows startup screen. -ORIf you from the old drive. All rights reserved. Gateway and eMachines are trademarks or registered trademarks of their respective companies. Screws Screws 9 Remove the cover from Gateway with the operating system, applications, and drivers installed, you will see a...notebook. 17 If the hard drive was sent to the hard drive cover. Technical Support See the label on the bottom of Gateway, Inc. in the United States and other brands and product names are trademarks or registered trademarks of the notebook for important safety...
8511369 - Gateway Notebook Hardware Reference
Page 44
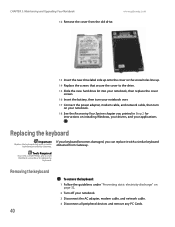
... then turn on your notebook. 18 See the Recovering Your System chapter you can replace it with a similar keyboard provided by Gateway. www.gateway.com 13 Insert the new drive label side up onto the cover so the screw holes line up. 14 Replace the screws ... 2 Turn off your applications. Removing the keyboard 40 To remove the keyboard: 1 Follow the guidelines under "Preventing static electricity discharge" on installing Windows, your drivers, and your notebook. 3 Disconnect the AC adapter, modem cable, and network cable. 4 Disconnect all peripheral devices and remove any PC Cards. ...
... then turn on your notebook. 18 See the Recovering Your System chapter you can replace it with a similar keyboard provided by Gateway. www.gateway.com 13 Insert the new drive label side up onto the cover so the screw holes line up. 14 Replace the screws ... 2 Turn off your applications. Removing the keyboard 40 To remove the keyboard: 1 Follow the guidelines under "Preventing static electricity discharge" on installing Windows, your drivers, and your notebook. 3 Disconnect the AC adapter, modem cable, and network cable. 4 Disconnect all peripheral devices and remove any PC Cards. ...


