
User Guide
Page 5
... Cleaning the exterior 95 Cleaning the keyboard 96 Cleaning the notebook screen 96 Cleaning CDs or DVDs 96 Protecting your notebook from viruses 97 Updating Windows 100 Restoring your system 101 Microsoft System Restore 101 Reinstalling programs and drivers 101 Restoring your notebook to the original configuration 102 9 Troubleshooting 103 Safety... management 112 Hard drive 112 Internet 114 Keyboard 115 Memory 116 Memory card reader 116 Modem (cable or DSL 116 Modem (dial-up 117 www.gateway.com iii
... Cleaning the exterior 95 Cleaning the keyboard 96 Cleaning the notebook screen 96 Cleaning CDs or DVDs 96 Protecting your notebook from viruses 97 Updating Windows 100 Restoring your system 101 Microsoft System Restore 101 Reinstalling programs and drivers 101 Restoring your notebook to the original configuration 102 9 Troubleshooting 103 Safety... management 112 Hard drive 112 Internet 114 Keyboard 115 Memory 116 Memory card reader 116 Modem (cable or DSL 116 Modem (dial-up 117 www.gateway.com iii

User Guide
Page 11
To start Help and Support: ■ Click Start, then click Help and Support. www.gateway.com 5 Help and Support opens. You can find help information, troubleshooters, and automated support. Help and Support Help and Support Your notebook includes Help and Support, an easily accessible collection of your Gateway notebook. Use Help and Support to answer questions about Windows and to help you quickly discover and use the many features of help information by clicking a link, performing a search, or browsing the index.
To start Help and Support: ■ Click Start, then click Help and Support. www.gateway.com 5 Help and Support opens. You can find help information, troubleshooters, and automated support. Help and Support Help and Support Your notebook includes Help and Support, an easily accessible collection of your Gateway notebook. Use Help and Support to answer questions about Windows and to help you quickly discover and use the many features of help information by clicking a link, performing a search, or browsing the index.

User Guide
Page 13
... or learn how to this guide, the Using Your Computer guide has been included on using Windows, using the program. To access the Using Your Computer guide: ■ Click Start, All Programs, then click Gateway Documentation. www.gateway.com 7 Using Your Computer guide Using Your Computer guide In addition to perform a task while...
... or learn how to this guide, the Using Your Computer guide has been included on using Windows, using the program. To access the Using Your Computer guide: ■ Click Start, All Programs, then click Gateway Documentation. www.gateway.com 7 Using Your Computer guide Using Your Computer guide In addition to perform a task while...

User Guide
Page 34
...cannot use the notebook on your hard drive. Do not use the Turn Off Computer option in Windows to turn off your notebook, it may become hot enough to "wake" it . 28 www.gateway.com Important If for about changing the power button mode, see "Changing Power-Saving Settings" ...a power-saving mode called Standby. Windows shuts down and turns off your notebook, press and hold the power button for some reason you close the LCD panel without turning off your skin. To access this guide, click Start, All Programs, then click Gateway Documentation. The Turn Off Computer dialog...
...cannot use the notebook on your hard drive. Do not use the Turn Off Computer option in Windows to turn off your notebook, it may become hot enough to "wake" it . 28 www.gateway.com Important If for about changing the power button mode, see "Changing Power-Saving Settings" ...a power-saving mode called Standby. Windows shuts down and turns off your notebook, press and hold the power button for some reason you close the LCD panel without turning off your skin. To access this guide, click Start, All Programs, then click Gateway Documentation. The Turn Off Computer dialog...

User Guide
Page 35
... responding. 4 Click End Task. 5 Click X in the top-right corner of the regular startup process, a program to check the disk status runs automatically. The Windows Security dialog box opens. 2 Click Task Manager. When the checks are not responding. Restarting (rebooting) your notebook Restarting (rebooting) your notebook If your notebook does... until the notebook turns off , wait ten seconds, then turn it off : 1 Press and hold the power button for more than 10 seconds. www.gateway.com 29 As a part of the Windows Task Manager dialog box. 6 If your notebook: 1 Press CTRL+ALT+DEL.
... responding. 4 Click End Task. 5 Click X in the top-right corner of the regular startup process, a program to check the disk status runs automatically. The Windows Security dialog box opens. 2 Click Task Manager. When the checks are not responding. Restarting (rebooting) your notebook Restarting (rebooting) your notebook If your notebook does... until the notebook turns off , wait ten seconds, then turn it off : 1 Press and hold the power button for more than 10 seconds. www.gateway.com 29 As a part of the Windows Task Manager dialog box. 6 If your notebook: 1 Press CTRL+ALT+DEL.

User Guide
Page 37
...of the keys have been assigned alternate functions, including shortcut keys for Windows, function keys for specific system operations, and the Num Lock keys for the numeric keypad. Function keys/System keys Numeric keypad FN key Windows key Application key Navigation keys Arrow keys Tips & Tricks You can ...attach an external keyboard to connect a USB keyboard. www.gateway.com 31 You do not need to shut down the notebook to the...
...of the keys have been assigned alternate functions, including shortcut keys for Windows, function keys for specific system operations, and the Num Lock keys for the numeric keypad. Function keys/System keys Numeric keypad FN key Windows key Application key Navigation keys Arrow keys Tips & Tricks You can ...attach an external keyboard to connect a USB keyboard. www.gateway.com 31 You do not need to shut down the notebook to the...

User Guide
Page 38
... help . Press these keys labeled F1 to F12 to turn on . Press the FN key in programs. For example, pressing F1 may open the Windows Start menu. Each program uses different function keys for quick access to open utilities like F (Search utility), R (Run utility), and E (Explorer ...to perform a specific action. Press these keys to type numbers when the numeric keypad is turned on the numeric keypad. 1 32 www.gateway.com Windows key FN key Numeric keypad Press this key for different purposes. Chapter 3: Getting Started Key types The keyboard has several different types of ...
... help . Press these keys labeled F1 to F12 to turn on . Press the FN key in programs. For example, pressing F1 may open the Windows Start menu. Each program uses different function keys for quick access to open utilities like F (Search utility), R (Run utility), and E (Explorer ...to perform a specific action. Press these keys to type numbers when the numeric keypad is turned on the numeric keypad. 1 32 www.gateway.com Windows key FN key Numeric keypad Press this key for different purposes. Chapter 3: Getting Started Key types The keyboard has several different types of ...

User Guide
Page 46
The Control Panel window opens. The Mouse Properties dialog box opens. 40 www.gateway.com Chapter 3: Getting Started Turning the touchpad or pointing device on or off You can turn the touchpad or optional pointing device on or off , depending on or off : 1 Click Start, then click Control Panel. To turn the touchpad and optional pointing device on which device you prefer to use. If your Control Panel is in Category View, click Printers and Other Hardware. 2 Click/Double-click the Mouse icon.
The Control Panel window opens. The Mouse Properties dialog box opens. 40 www.gateway.com Chapter 3: Getting Started Turning the touchpad or pointing device on or off You can turn the touchpad or optional pointing device on or off , depending on or off : 1 Click Start, then click Control Panel. To turn the touchpad and optional pointing device on which device you prefer to use. If your Control Panel is in Category View, click Printers and Other Hardware. 2 Click/Double-click the Mouse icon.

User Guide
Page 48
... the mute and volume control buttons on the keyboard. To access this guide, click Start, All Programs, then click Gateway Documentation. 42 www.gateway.com For more information, see "Adjusting the Volume" in Windows, see "System key combinations" on page 33. Chapter 3: Getting Started Adjusting the volume You can use the volume control...
... the mute and volume control buttons on the keyboard. To access this guide, click Start, All Programs, then click Gateway Documentation. 42 www.gateway.com For more information, see "Adjusting the Volume" in Windows, see "System key combinations" on page 33. Chapter 3: Getting Started Adjusting the volume You can use the volume control...
User Guide
Page 57
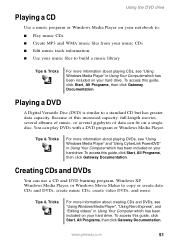
..., click Start, All Programs, then click Gateway Documentation. You can fit on a single disc. Because of data can play DVDs with a DVD program or Windows Media Player. Tips & Tricks For more information about playing CDs, see "Using Windows Media Player" in Using Your Computer which .... To access this guide, click Start, All Programs, then click Gateway Documentation. To access this guide, click Start, All Programs, then click Gateway Documentation. Using the DVD drive Playing a CD Use a music program or Windows Media Player on your notebook to: ■ Play music CDs ■...
..., click Start, All Programs, then click Gateway Documentation. You can fit on a single disc. Because of data can play DVDs with a DVD program or Windows Media Player. Tips & Tricks For more information about playing CDs, see "Using Windows Media Player" in Using Your Computer which .... To access this guide, click Start, All Programs, then click Gateway Documentation. To access this guide, click Start, All Programs, then click Gateway Documentation. Using the DVD drive Playing a CD Use a music program or Windows Media Player on your notebook to: ■ Play music CDs ■...

User Guide
Page 62
... second monitor icon (labeled 2), then click Attached. 8 Click Apply. 9 Adjust properties such as Screen Resolution or Color Quality if necessary. 10 Click OK. 56 www.gateway.com Windows recognizes the new hardware and searches for its driver.
... second monitor icon (labeled 2), then click Attached. 8 Click Apply. 9 Adjust properties such as Screen Resolution or Color Quality if necessary. 10 Click OK. 56 www.gateway.com Windows recognizes the new hardware and searches for its driver.

User Guide
Page 64
If your notebook. 5 Click Start, then click Control Panel. The Display Properties dialog box opens. 7 Click the Settings tab. 8 Click Advanced. The Control Panel window opens. The Multiple Monitors and ATI Mobility Radeon X700 Properties dialog box opens. 58 www.gateway.com Chapter 4: Using Drives and Ports 4 Start your Control Panel is in Category View, click Appearance and Themes. 6 Click/Double-click the Display icon.
If your notebook. 5 Click Start, then click Control Panel. The Display Properties dialog box opens. 7 Click the Settings tab. 8 Click Advanced. The Control Panel window opens. The Multiple Monitors and ATI Mobility Radeon X700 Properties dialog box opens. 58 www.gateway.com Chapter 4: Using Drives and Ports 4 Start your Control Panel is in Category View, click Appearance and Themes. 6 Click/Double-click the Display icon.
User Guide
Page 89
Replacing the hard drive kit 18 Connect the power adapter, modem cable, and network cable, then turn on your notebook. 19 For instructions on installing Windows, your drivers, and your applications, see the instructions in the restore booklet that came with your notebook. www.gateway.com 83
Replacing the hard drive kit 18 Connect the power adapter, modem cable, and network cable, then turn on your notebook. 19 For instructions on installing Windows, your drivers, and your applications, see the instructions in the restore booklet that came with your notebook. www.gateway.com 83

User Guide
Page 99
Chapter 8 Maintaining Your Notebook • Caring for your notebook • Cleaning your notebook • Protecting your notebook from viruses • Updating Windows • Restoring your system 93
Chapter 8 Maintaining Your Notebook • Caring for your notebook • Cleaning your notebook • Protecting your notebook from viruses • Updating Windows • Restoring your system 93
User Guide
Page 103
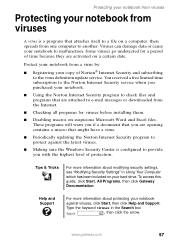
...level of protection. To access this guide, click Start, All Programs, then click Gateway Documentation. Help and Support For more information about protecting your notebook against the latest viruses. ■ Making sure the Windows Security Center is a program that attaches itself to a file on a computer, ...in Using Your Computer which has been included on your hard drive. Protect your notebook from one computer to another. www.gateway.com 97 Viruses can damage data or cause your notebook to the virus definition update service. Protecting your notebook from viruses ...
...level of protection. To access this guide, click Start, All Programs, then click Gateway Documentation. Help and Support For more information about protecting your notebook against the latest viruses. ■ Making sure the Windows Security Center is a program that attaches itself to a file on a computer, ...in Using Your Computer which has been included on your hard drive. Protect your notebook from one computer to another. www.gateway.com 97 Viruses can damage data or cause your notebook to the virus definition update service. Protecting your notebook from viruses ...

User Guide
Page 106
...tailored selection of Windows that apply only to the software and hardware on -screen instructions. Type the keyword Windows Update in Windows XP, click ...Start, then click Help and Support. Chapter 8: Maintaining Your Notebook 3 Click LiveUpdate. Use Windows ...Windows Update scans your notebook up-to the Internet. 2 Click Start, All Programs, then click Windows Update. 3 Follow the on your notebook. To run Windows Update: 1 Connect to -date. Updating Windows Windows...Windows Update in the HelpSpot Search box , then click the arrow. 100 www...
...tailored selection of Windows that apply only to the software and hardware on -screen instructions. Type the keyword Windows Update in Windows XP, click ...Start, then click Help and Support. Chapter 8: Maintaining Your Notebook 3 Click LiveUpdate. Use Windows ...Windows Update scans your notebook up-to the Internet. 2 Click Start, All Programs, then click Windows Update. 3 Follow the on your notebook. To run Windows Update: 1 Connect to -date. Updating Windows Windows...Windows Update in the HelpSpot Search box , then click the arrow. 100 www...

User Guide
Page 108
To restore your notebook, then press F11. 2 Follow the on your notebook to the original configuration. Chapter 8: Maintaining Your Notebook Restoring your notebook to the original configuration If Windows does not start or if the two previous procedures do not correct the problem, you may need to restore your notebook to the original configuration: 1 Turn on -screen instructions. 102 www.gateway.com
To restore your notebook, then press F11. 2 Follow the on your notebook to the original configuration. Chapter 8: Maintaining Your Notebook Restoring your notebook to the original configuration If Windows does not start or if the two previous procedures do not correct the problem, you may need to restore your notebook to the original configuration: 1 Turn on -screen instructions. 102 www.gateway.com

User Guide
Page 112
... device Sometimes a new device, such as a PC Card, can cause a system resource (IRQ) conflict. The Control Panel window opens. All IRQs and their hardware assignments are displayed. 106 www.gateway.com The Device Manager window opens. 3 Click View, then click Resources by type. CD drives CD drive troubleshooting is covered under "Sound" on...
... device Sometimes a new device, such as a PC Card, can cause a system resource (IRQ) conflict. The Control Panel window opens. All IRQs and their hardware assignments are displayed. 106 www.gateway.com The Device Manager window opens. 3 Click View, then click Resources by type. CD drives CD drive troubleshooting is covered under "Sound" on...

User Guide
Page 113
...The diskette drive is disabled. Delete unnecessary files on the diskette and try to access the diskette again. Occasionally diskettes are IBM-compatible. www.gateway.com 107 Type the keyword IRQs in the upper-right corner of the existing devices or ports you can disable. 3 Right-click the ...that the diskette you are trying to disable, then click Disable. To free IRQ resources for the new device: 1 In the Device Manager window, check the device list for a resource conflict. Help and Support Troubleshooting For more information about IRQs, click Start, then click Help and Support.
...The diskette drive is disabled. Delete unnecessary files on the diskette and try to access the diskette again. Occasionally diskettes are IBM-compatible. www.gateway.com 107 Type the keyword IRQs in the upper-right corner of the existing devices or ports you can disable. 3 Right-click the ...that the diskette you are trying to disable, then click Disable. To free IRQ resources for the new device: 1 In the Device Manager window, check the device list for a resource conflict. Help and Support Troubleshooting For more information about IRQs, click Start, then click Help and Support.

User Guide
Page 116
... turned on page 33. ■ Make sure that you have a DVD drive. To access this guide, click Start, All Programs, then click Gateway Documentation. ■ Make sure that the volume control on page 96. Occasionally discs are flawed and cannot be experiencing some temporary memory problems. Shut...9632; Try a different disc. An audio CD does not produce sound ■ Make sure that they are plugged in Windows, see "Cleaning CDs or DVDs" on your notebook. 110 www.gateway.com For more information, see "System key combinations" on page 33. ■ Make sure that headphones are not ...
... turned on page 33. ■ Make sure that you have a DVD drive. To access this guide, click Start, All Programs, then click Gateway Documentation. ■ Make sure that the volume control on page 96. Occasionally discs are flawed and cannot be experiencing some temporary memory problems. Shut...9632; Try a different disc. An audio CD does not produce sound ■ Make sure that they are plugged in Windows, see "Cleaning CDs or DVDs" on your notebook. 110 www.gateway.com For more information, see "System key combinations" on page 33. ■ Make sure that headphones are not ...


