8512949 - Component Replacement Manual R0
Page 6
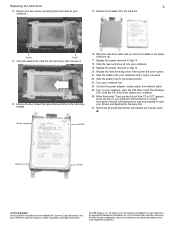
..." appears, press any key on your keyboard and follow the on the bottom of the notebook for important safety, regulatory, and legal information. © 2008 Gateway, Inc. Replacing the hard drive 2 12 Remove the two screws connecting the hard drive to insert your Drivers and Applications Recovery disc. 27 Reconnect all... cover screws. 21 Slide the battery into your Reference Guide for Customer Care Information. Screw Screw Screw Screw Technical Support See the label on -screen instructions. All other countries. All rights reserved.
..." appears, press any key on your keyboard and follow the on the bottom of the notebook for important safety, regulatory, and legal information. © 2008 Gateway, Inc. Replacing the hard drive 2 12 Remove the two screws connecting the hard drive to insert your Drivers and Applications Recovery disc. 27 Reconnect all... cover screws. 21 Slide the battery into your Reference Guide for Customer Care Information. Screw Screw Screw Screw Technical Support See the label on -screen instructions. All other countries. All rights reserved.
8513065 - Gateway Notebook Hardware Reference R1
Page 10
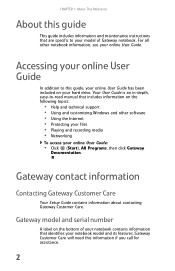
... and customizing Windows and other notebook information, see your notebook model and its features. Gateway Customer Care will need this guide This guide includes information and maintenance instructions that identifies your online User Guide. Accessing your online User Guide In addition to -...read manual that includes information on the bottom of Gateway notebook. For all other software • Using the Internet...
... and customizing Windows and other notebook information, see your notebook model and its features. Gateway Customer Care will need this guide This guide includes information and maintenance instructions that identifies your online User Guide. Accessing your online User Guide In addition to -...read manual that includes information on the bottom of Gateway notebook. For all other software • Using the Internet...
8513065 - Gateway Notebook Hardware Reference R1
Page 32
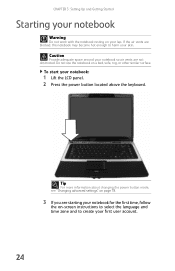
..., the notebook may become hot enough to harm your notebook so air vents are starting your notebook for the first time, follow the on-screen instructions to select the language and time zone and to create your lap. Caution Provide adequate space around your skin. Do not use the notebook on...
..., the notebook may become hot enough to harm your notebook so air vents are starting your notebook for the first time, follow the on-screen instructions to select the language and time zone and to create your lap. Caution Provide adequate space around your skin. Do not use the notebook on...
8513065 - Gateway Notebook Hardware Reference R1
Page 33
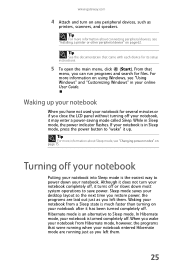
...press the power button to save power. If your notebook entered Hibernate mode are laid out just as printers, scanners, and speakers. www.gateway.com 4 Attach and turn your notebook completely off, it turns off your notebook. Waking your online User Guide. Tip For more information ...about connecting peripheral devices, see "Changing power modes" on any peripheral devices, such as you can run programs and search for its setup instructions. 5 To open the main menu, click (Start). While in your notebook from Hibernate mode, however, the programs that came with each ...
...press the power button to save power. If your notebook entered Hibernate mode are laid out just as printers, scanners, and speakers. www.gateway.com 4 Attach and turn your notebook completely off, it turns off your notebook. Waking your online User Guide. Tip For more information ...about connecting peripheral devices, see "Changing power modes" on any peripheral devices, such as you can run programs and search for its setup instructions. 5 To open the main menu, click (Start). While in your notebook from Hibernate mode, however, the programs that came with each ...

8513065 - Gateway Notebook Hardware Reference R1
Page 49
Tip For instructions on how to connect a USB mouse. For more information, see "Changing the mouse, touchpad, or pointing device settings" in your online User Guide. Move your ... pointer farther, lift your finger, move it to select objects. Position the pointer over the object. This action is called double-clicking. 41 To... www.gateway.com You can use the EZ-Pad left and right buttons below the touchpad to the middle of space and need to shut down the...
Tip For instructions on how to connect a USB mouse. For more information, see "Changing the mouse, touchpad, or pointing device settings" in your online User Guide. Move your ... pointer farther, lift your finger, move it to select objects. Position the pointer over the object. This action is called double-clicking. 41 To... www.gateway.com You can use the EZ-Pad left and right buttons below the touchpad to the middle of space and need to shut down the...
8513065 - Gateway Notebook Hardware Reference R1
Page 70
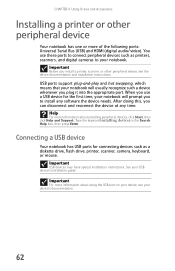
...devices such as a diskette drive, flash drive, printer, scanner, camera, keyboard, or mouse. Important USB devices may have special installation instructions. USB ports support plug-and-play and hot swapping, which means that your notebook will prompt you plug it into the appropriate port... USB device's installation guide. Help For more information about using the USB port on your device, see the device documentation and installation instructions. You use a USB device for connecting devices such as printers, scanners, and digital cameras to install any time. After doing this...
...devices such as a diskette drive, flash drive, printer, scanner, camera, keyboard, or mouse. Important USB devices may have special installation instructions. USB ports support plug-and-play and hot swapping, which means that your notebook will prompt you plug it into the appropriate port... USB device's installation guide. Help For more information about using the USB port on your device, see the device documentation and installation instructions. You use a USB device for connecting devices such as printers, scanners, and digital cameras to install any time. After doing this...

8513065 - Gateway Notebook Hardware Reference R1
Page 92
... soon as it was put in hibernate mode. This is difficult for someone else to enter at startup. You do not need to Gateway for your notebook so you need to guess. The startup password is very secure, with confidential files until you can attach a cable lock... stations, or bus terminals. The BIOS Setup utility opens. 2 Open the Security menu, highlight Set Supervisor Password, then press ENTER and follow the instructions. Important You must enter the Supervisor Password each time you see your notebook if it passes through the X-ray machine in Sleep mode. 4 Highlight ...
... soon as it was put in hibernate mode. This is difficult for someone else to enter at startup. You do not need to Gateway for your notebook so you need to guess. The startup password is very secure, with confidential files until you can attach a cable lock... stations, or bus terminals. The BIOS Setup utility opens. 2 Open the Security menu, highlight Set Supervisor Password, then press ENTER and follow the instructions. Important You must enter the Supervisor Password each time you see your notebook if it passes through the X-ray machine in Sleep mode. 4 Highlight ...
8513065 - Gateway Notebook Hardware Reference R1
Page 99
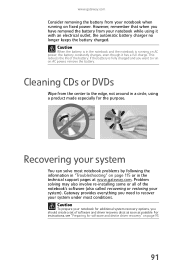
... AC power, the battery constantly charges, even though it with an electrical outlet, the automatic battery charger no longer keeps the battery charged. Gateway provides everything you need to recover your system You can solve most conditions. Caution When the battery is in a circle, using it has...the purpose. Cleaning CDs or DVDs Wipe from your notebook for software and device driver recovery" on AC power, remove the battery. For instructions, see "Preparing for additional system recovery options, you want to the edge, not around in the notebook and the notebook is fully ...
... AC power, the battery constantly charges, even though it with an electrical outlet, the automatic battery charger no longer keeps the battery charged. Gateway provides everything you need to recover your system You can solve most conditions. Caution When the battery is in a circle, using it has...the purpose. Cleaning CDs or DVDs Wipe from your notebook for software and device driver recovery" on AC power, remove the battery. For instructions, see "Preparing for additional system recovery options, you want to the edge, not around in the notebook and the notebook is fully ...
8513065 - Gateway Notebook Hardware Reference R1
Page 100
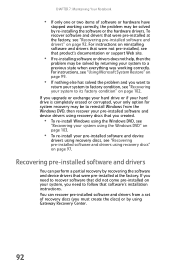
... partial recovery by returning your system, you must create the discs) or by re-installing the software or the hardware drivers. For instructions on page 97. Recovering pre-installed software and drivers You can recover pre-installed software and drivers from the Windows DVD, then recover...not come pre-installed on your system to a previous state when everything was working correctly, the problem may be solved by using Gateway Recovery Center. 92 For instructions, see "Using Microsoft System Restore" on page 99. • If nothing else has solved the problem and you created. &#...
... partial recovery by returning your system, you must create the discs) or by re-installing the software or the hardware drivers. For instructions on page 97. Recovering pre-installed software and drivers You can recover pre-installed software and drivers from the Windows DVD, then recover...not come pre-installed on your system to a previous state when everything was working correctly, the problem may be solved by using Gateway Recovery Center. 92 For instructions, see "Using Microsoft System Restore" on page 99. • If nothing else has solved the problem and you created. &#...

8513065 - Gateway Notebook Hardware Reference R1
Page 103
...hard drive, and your Start menu does not contain Gateway Recovery Center as an option, you must recover your software and drivers using recovery discs" on page 97. 95 The Gateway Recovery Center opens. For instructions, see "Recovering pre-installed software and drivers using ...software and driver recovery discs you have created. www.gateway.com Recovering pre-installed software and drivers using Gateway Recovery Center To recover specific drivers and...
...hard drive, and your Start menu does not contain Gateway Recovery Center as an option, you must recover your software and drivers using recovery discs" on page 97. 95 The Gateway Recovery Center opens. For instructions, see "Recovering pre-installed software and drivers using ...software and driver recovery discs you have created. www.gateway.com Recovering pre-installed software and drivers using Gateway Recovery Center To recover specific drivers and...
8513065 - Gateway Notebook Hardware Reference R1
Page 107
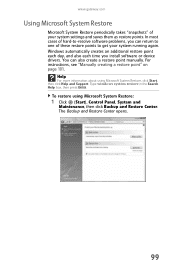
... information about using Microsoft System Restore: 1 Click (Start), Control Panel, System and Maintenance, then click Backup and Restore Center. www.gateway.com Using Microsoft System Restore Microsoft System Restore periodically takes "snapshots" of hard-to get your system settings and saves them as restore .... In most cases of your system running again. To restore using Microsoft System Restore, click Start, then click Help and Support. For instructions, see "Manually creating a restore point" on page 101. The Backup and Restore Center opens. 99 Type windows system restore in the ...
... information about using Microsoft System Restore: 1 Click (Start), Control Panel, System and Maintenance, then click Backup and Restore Center. www.gateway.com Using Microsoft System Restore Microsoft System Restore periodically takes "snapshots" of hard-to get your system settings and saves them as restore .... In most cases of your system running again. To restore using Microsoft System Restore, click Start, then click Help and Support. For instructions, see "Manually creating a restore point" on page 101. The Backup and Restore Center opens. 99 Type windows system restore in the ...
8513065 - Gateway Notebook Hardware Reference R1
Page 111
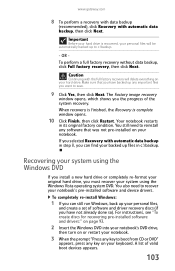
... backed up any key to c:\backup. - To completely re-install Windows: 1 If you can find your backed up your notebook. For instructions, see "To create discs for recovering pre-installed software and drivers:" on page 93. 2 Insert the Windows DVD into your notebook's DVD...software that you selected Recovery with automatic data backup, then click Next. Recovering your system using the Windows Vista operating system DVD. www.gateway.com 8 To perform a recovery with data backup (recommended), click Recovery with automatic data backup in step 8, you can still run Windows...
... backed up any key to c:\backup. - To completely re-install Windows: 1 If you can find your backed up your notebook. For instructions, see "To create discs for recovering pre-installed software and drivers:" on page 93. 2 Insert the Windows DVD into your notebook's DVD...software that you selected Recovery with automatic data backup, then click Next. Recovering your system using the Windows Vista operating system DVD. www.gateway.com 8 To perform a recovery with data backup (recommended), click Recovery with automatic data backup in step 8, you can still run Windows...
8513065 - Gateway Notebook Hardware Reference R1
Page 112
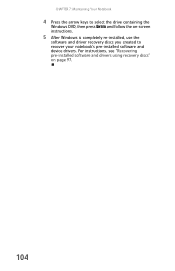
For instructions, see "Recovering pre-installed software and drivers using recovery discs" on -screen instructions. 5 After Windows is completely re-installed, use the software and driver recovery discs you created to recover your notebook's pre-installed software and device drivers. CHAPTER 7: Maintaining Your Notebook 4 Press the arrow keys to select the drive containing the Windows DVD, then press ENTER and follow the on page 97. 104
For instructions, see "Recovering pre-installed software and drivers using recovery discs" on -screen instructions. 5 After Windows is completely re-installed, use the software and driver recovery discs you created to recover your notebook's pre-installed software and device drivers. CHAPTER 7: Maintaining Your Notebook 4 Press the arrow keys to select the drive containing the Windows DVD, then press ENTER and follow the on page 97. 104
8513065 - Gateway Notebook Hardware Reference R1
Page 122
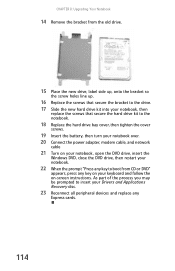
... on your Drivers and Applications Recovery disc. 23 Reconnect all peripheral devices and replace any key to insert your keyboard and follow the on-screen instructions. CHAPTER 8: Upgrading Your Notebook 14 Remove the bracket from the old drive. 15 Place the new drive, label side up, onto the bracket so the...
... on your Drivers and Applications Recovery disc. 23 Reconnect all peripheral devices and replace any key to insert your keyboard and follow the on-screen instructions. CHAPTER 8: Upgrading Your Notebook 14 Remove the bracket from the old drive. 15 Place the new drive, label side up, onto the bracket so the...
8513065 - Gateway Notebook Hardware Reference R1
Page 125
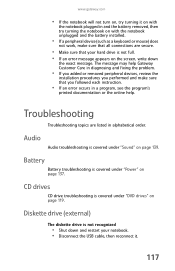
...program, see the program's printed documentation or the online help Gateway Customer Care in diagnosing and fixing the problem. • If you added or removed peripheral devices, review the installation procedures you followed each instruction. • If an error occurs in alphabetical order. ...The message may help . Diskette drive (external) The diskette drive is not recognized • Shut down the exact message. www.gateway.com • If the notebook ...
...program, see the program's printed documentation or the online help Gateway Customer Care in diagnosing and fixing the problem. • If you added or removed peripheral devices, review the installation procedures you followed each instruction. • If an error occurs in alphabetical order. ...The message may help . Diskette drive (external) The diskette drive is not recognized • Shut down the exact message. www.gateway.com • If the notebook ...
8513065 - Gateway Notebook Hardware Reference R1
Page 126
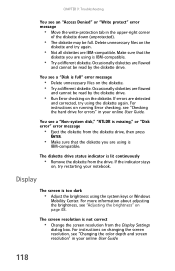
.... If errors are using is too dark • Adjust the brightness using the diskette again. Display The screen is IBM-compatible. For instructions on changing the screen resolution, see "Adjusting the brightness" on running Error checking, see an "Access Denied" or "Write protect" error...more information about adjusting the brightness, see "Changing the color depth and screen resolution" in your online User Guide. 118 For instructions on page 48. The diskette drive status indicator is not correct • Change the screen resolution from the drive. The screen ...
.... If errors are using is too dark • Adjust the brightness using the diskette again. Display The screen is IBM-compatible. For instructions on changing the screen resolution, see "Adjusting the brightness" on running Error checking, see an "Access Denied" or "Write protect" error...more information about adjusting the brightness, see "Changing the color depth and screen resolution" in your online User Guide. 118 For instructions on page 48. The diskette drive status indicator is not correct • Change the screen resolution from the drive. The screen ...
8513065 - Gateway Notebook Hardware Reference R1
Page 127
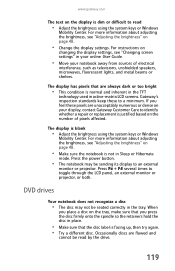
... in active-matrix LCD screens. If you press the disc firmly onto the spindle so the retainers hold the disc in the tray. For instructions on changing the display settings, see "Adjusting the brightness" on page 48. • Make sure the notebook is blank • Adjust ... • This condition is normal and inherent in the TFT technology used in your online User Guide. • Move your display, contact Gateway Customer Care to identify whether a repair or replacement is justified based on the number of electrical interference, such as televisions, unshielded speakers, microwaves...
... in active-matrix LCD screens. If you press the disc firmly onto the spindle so the retainers hold the disc in the tray. For instructions on changing the display settings, see "Adjusting the brightness" on page 48. • Make sure the notebook is blank • Adjust ... • This condition is normal and inherent in the TFT technology used in your online User Guide. • Move your display, contact Gateway Customer Care to identify whether a repair or replacement is justified based on the number of electrical interference, such as televisions, unshielded speakers, microwaves...

8513065 - Gateway Notebook Hardware Reference R1
Page 128
... movies" in Windows, see "Cleaning CDs or DVDs" on page 91. • Your notebook may be able to play these CDs on page 92. For instructions on how to adjust the volume control in your notebook. • Reinstall the audio device drivers. For more information, see "Adjusting the volume" on page... 91. You may not be able to play these CDs on your notebook. • Make sure that the CD label is turned up . For instructions on playing a DVD, see "Cleaning CDs or DVDs" on page 49. • Make sure that Mute controls are turned off. • If you are plugged...
... movies" in Windows, see "Cleaning CDs or DVDs" on page 91. • Your notebook may be able to play these CDs on page 92. For instructions on how to adjust the volume control in your notebook. • Reinstall the audio device drivers. For more information, see "Adjusting the volume" on page... 91. You may not be able to play these CDs on your notebook. • Make sure that the CD label is turned up . For instructions on playing a DVD, see "Cleaning CDs or DVDs" on page 49. • Make sure that Mute controls are turned off. • If you are plugged...
8513065 - Gateway Notebook Hardware Reference R1
Page 129
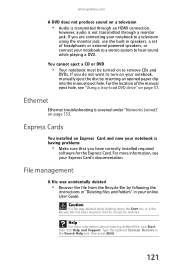
... or external powered speakers, or connect your notebook to a stereo system to turn on your notebook, manually eject the disc by following the instructions in "Deleting files and folders" in your notebook to remove CDs and DVDs. Caution If a file was accidentally deleted • Recover the... Audio is transmitted through an HDMI connection, however, audio is having problems • Make sure that you are connecting your online User Guide. www.gateway.com A DVD does not produce sound on page 133. Help For more information, see "Using a tray-load DVD drive" on to a television...
... or external powered speakers, or connect your notebook to a stereo system to turn on your notebook, manually eject the disc by following the instructions in "Deleting files and folders" in your notebook to remove CDs and DVDs. Caution If a file was accidentally deleted • Recover the... Audio is transmitted through an HDMI connection, however, audio is having problems • Make sure that you are connecting your online User Guide. www.gateway.com A DVD does not produce sound on page 133. Help For more information, see "Using a tray-load DVD drive" on to a television...
8513065 - Gateway Notebook Hardware Reference R1
Page 130
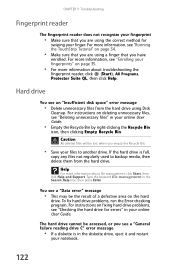
... the hard drive for swiping your finger. The hard drive cannot be accessed, or you see "Deleting unnecessary files" in your online User Guide. For instructions on page 34. • Make sure that you are using a finger that you are using Disk Cleanup. If the hard drive is in the Search... for errors" in your online User Guide. • Empty the Recycle Bin by right-clicking the Recycle Bin icon, then clicking Empty Recycle Bin. For instructions on the hard drive.
... the hard drive for swiping your finger. The hard drive cannot be accessed, or you see "Deleting unnecessary files" in your online User Guide. For instructions on page 34. • Make sure that you are using a finger that you are using Disk Cleanup. If the hard drive is in the Search... for errors" in your online User Guide. • Empty the Recycle Bin by right-clicking the Recycle Bin icon, then clicking Empty Recycle Bin. For instructions on the hard drive.


