Owner's Manual
Page 3
.............16 Map 16 Compass 17 Elevation Plot 19 Trip Computer 20 eTrex Owner's Manual Table of Contents Geocaches 21 Downloading Geocaches 21 Filtering the Geocache List..........21 Navigating to a Geocache............22 Logging the Attempt 22 chirp 23 Applications 24 Sharing Data 24 Setting a Proximity Alarm 24 Calculating the Size of Contents Getting Started 5 Device Overview 5 Using the eTrex Keys 6 Battery Information 7 Turning the Device On or Off.........8 Satellite Signals 8 Registering Your Device 8 Waypoints, Routes, and Tracks 9 Waypoints 9 Using Sight...
.............16 Map 16 Compass 17 Elevation Plot 19 Trip Computer 20 eTrex Owner's Manual Table of Contents Geocaches 21 Downloading Geocaches 21 Filtering the Geocache List..........21 Navigating to a Geocache............22 Logging the Attempt 22 chirp 23 Applications 24 Sharing Data 24 Setting a Proximity Alarm 24 Calculating the Size of Contents Getting Started 5 Device Overview 5 Using the eTrex Keys 6 Battery Information 7 Turning the Device On or Off.........8 Satellite Signals 8 Registering Your Device 8 Waypoints, Routes, and Tracks 9 Waypoints 9 Using Sight...
Owner's Manual
Page 4
... Tracks Settings 32 Changing the Units of Measure...33 Time Settings 33 Position Format Settings 33 Heading Settings 34 Altimeter Settings 34 Geocaching Settings 35 Routing Settings 36 Marine Map Settings 37 Fitness 38 Resetting Data 38 Changing the Page Sequence.....39 Device Information 40 Adjusting the Screen 40 Updating the Software 40 Viewing Device Information..........40 Specifications 41 About the Batteries 41 Caring for the Device 42 Data Management 43 Appendix 46 Optional Accessories 46 Data Field Options 47 Troubleshooting 52 Index 54 4 eTrex Owner's Manual
... Tracks Settings 32 Changing the Units of Measure...33 Time Settings 33 Position Format Settings 33 Heading Settings 34 Altimeter Settings 34 Geocaching Settings 35 Routing Settings 36 Marine Map Settings 37 Fitness 38 Resetting Data 38 Changing the Page Sequence.....39 Device Information 40 Adjusting the Screen 40 Updating the Software 40 Viewing Device Information..........40 Specifications 41 About the Batteries 41 Caring for the Device 42 Data Management 43 Appendix 46 Optional Accessories 46 Data Field Options 47 Troubleshooting 52 Index 54 4 eTrex Owner's Manual
Owner's Manual
Page 5
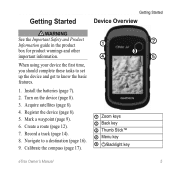
...; When using your device the first time, you should complete these tasks to set up the device and get to a destination (page 16). 9. Create a route (page 12). 7. Navigate to know the basic features. 1. Acquire satellites (page 8). 4. Mark a waypoint (page 9). 6. Record a track (page 14). 8. Register the device (page 8). 5. Calibrate the compass (page 17). ➊ Zoom keys ➋ Back key ➌ Thumb Stick™ ➍ Menu key ➎ /Backlight key eTrex Owner's Manual 5 Turn on the device (page 8). 3. Install the batteries (page...
...; When using your device the first time, you should complete these tasks to set up the device and get to a destination (page 16). 9. Create a route (page 12). 7. Navigate to know the basic features. 1. Acquire satellites (page 8). 4. Mark a waypoint (page 9). 6. Record a track (page 14). 8. Register the device (page 8). 5. Calibrate the compass (page 17). ➊ Zoom keys ➋ Back key ➌ Thumb Stick™ ➍ Menu key ➎ /Backlight key eTrex Owner's Manual 5 Turn on the device (page 8). 3. Install the batteries (page...
Owner's Manual
Page 13
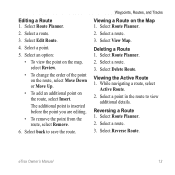
...2. Select a point in the route to save the route. Select a route. 3. Select a point. 5. Waypoints, Routes, and Tracks Viewing a Route on the route, select Insert. Select Route Planner. 2. Deleting a Route 1. Select Route Planner. 2. Select Route Planner. 2. Viewing the Active Route 1. Select Delete Route. Select Reverse Route. Select an option: • To view the point on the map, select Review. • To change the order of the point on the route, select Move Down or Move Up. • To add an additional point on the Map 1. Select a route. 3. eTrex Owner...
...2. Select a point in the route to save the route. Select a route. 3. Select a point. 5. Waypoints, Routes, and Tracks Viewing a Route on the route, select Insert. Select Route Planner. 2. Deleting a Route 1. Select Route Planner. 2. Select Route Planner. 2. Viewing the Active Route 1. Select Delete Route. Select Reverse Route. Select an option: • To view the point on the map, select Review. • To change the order of the point on the route, select Move Down or Move Up. • To add an additional point on the Map 1. Select a route. 3. eTrex Owner...

Owner's Manual
Page 14
... device turned on the map indicates your track. 3. Select Record Method. 4. Select Record Interval. 6. eTrex Owner's Manual Recording Track Logs 1. Select Setup > Tracks > Track Log. 2. NOTE: Using the Most Often interval provides the most track detail, but fills up the device memory quicker. • Enter a time or distance, and select Done. Complete an action: • Select an option to record tracks more or less often. As you select Record, Show On Map, a line on , a track log is a recording of your path. Waypoints, Routes, and Tracks Tracks A track is created. Select...
... device turned on the map indicates your track. 3. Select Record Method. 4. Select Record Interval. 6. eTrex Owner's Manual Recording Track Logs 1. Select Setup > Tracks > Track Log. 2. NOTE: Using the Most Often interval provides the most track detail, but fills up the device memory quicker. • Enter a time or distance, and select Done. Complete an action: • Select an option to record tracks more or less often. As you select Record, Show On Map, a line on , a track log is a recording of your path. Waypoints, Routes, and Tracks Tracks A track is created. Select...
Owner's Manual
Page 15
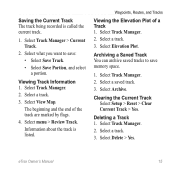
...the current track. 1. Select Track Manager. 2. Select a saved track. 3. Clearing the Current Track Select Setup > Reset > Clear Current Track > Yes. Select View Map. Select Elevation Plot. Select a track. 3. eTrex Owner's Manual 15 Archiving a Saved Track You can archive saved tracks to save memory space. 1. Select Track Manager. 2. Deleting a Track 1. Select Delete > Yes. Waypoints, Routes, and Tracks Viewing the Elevation Plot of the track are marked by flags. 4. Select Track Manager. 2. The beginning and the end of a Track 1. Select menu > Review Track. Select...
...the current track. 1. Select Track Manager. 2. Select a saved track. 3. Clearing the Current Track Select Setup > Reset > Clear Current Track > Yes. Select View Map. Select Elevation Plot. Select a track. 3. eTrex Owner's Manual 15 Archiving a Saved Track You can archive saved tracks to save memory space. 1. Select Track Manager. 2. Deleting a Track 1. Select Delete > Yes. Waypoints, Routes, and Tracks Viewing the Elevation Plot of the track are marked by flags. 4. Select Track Manager. 2. The beginning and the end of a Track 1. Select menu > Review Track. Select...
Owner's Manual
Page 17
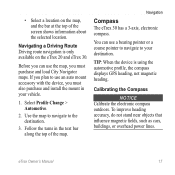
... the screen shows information about the selected location. Calibrating the Compass Notice Calibrate the electronic compass outdoors. Follow the turns in your destination. Navigation Compass The eTrex 30 has a 3-axis, electronic compass. Before you can use an auto mount accessory with the device, you plan to the destination. 3. Use the map to navigate to use a bearing pointer or a course pointer to navigate to your vehicle. 1. eTrex Owner's Manual 17 To improve heading accuracy, do not stand near objects that influence magnetic fields, such...
... the screen shows information about the selected location. Calibrating the Compass Notice Calibrate the electronic compass outdoors. Follow the turns in your destination. Navigation Compass The eTrex 30 has a 3-axis, electronic compass. Before you can use an auto mount accessory with the device, you plan to the destination. 3. Use the map to navigate to use a bearing pointer or a course pointer to navigate to your vehicle. 1. eTrex Owner's Manual 17 To improve heading accuracy, do not stand near objects that influence magnetic fields, such...
Owner's Manual
Page 19
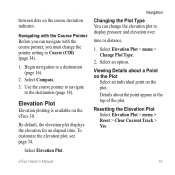
... with the course pointer, you must change the elevation plot to Course (CDI) (page 34). 1. Resetting the Elevation Plot Select Elevation Plot > menu > Reset > Clear Current Track > Yes. eTrex Owner's Manual 19 Elevation Plot Elevation plotting is available on the course deviation indicator. Select Compass. 3. Select Elevation Plot > menu > Change Plot Type. 2. Navigating with the Course Pointer Before you can change the pointer setting to display pressure and elevation over time or distance. 1. between dots on the eTrex 30. Select Elevation Plot. Viewing Details about...
... with the course pointer, you must change the elevation plot to Course (CDI) (page 34). 1. Resetting the Elevation Plot Select Elevation Plot > menu > Reset > Clear Current Track > Yes. eTrex Owner's Manual 19 Elevation Plot Elevation plotting is available on the course deviation indicator. Select Compass. 3. Select Elevation Plot > menu > Change Plot Type. 2. Navigating with the Course Pointer Before you can change the pointer setting to display pressure and elevation over time or distance. 1. between dots on the eTrex 30. Select Elevation Plot. Viewing Details about...
Owner's Manual
Page 26
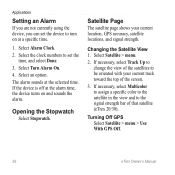
... with your current location, GPS accuracy, satellite locations, and signal strength. Satellite Page The satellite page shows your current track toward the top of that satellite (eTrex 20/30). Select Satellite > menu. 2. Turning Off GPS Select Satellite > menu > Use With GPS Off. 26 eTrex Owner's Manual Applications Setting an Alarm If you are not currently using the device, you can set the device to set the time, and select Done. 3. Select the clock numbers to turn on and sounds the alarm. The alarm sounds at the alarm time, the device turns on at a specific time. 1.
... with your current location, GPS accuracy, satellite locations, and signal strength. Satellite Page The satellite page shows your current track toward the top of that satellite (eTrex 20/30). Select Satellite > menu. 2. Turning Off GPS Select Satellite > menu > Use With GPS Off. 26 eTrex Owner's Manual Applications Setting an Alarm If you are not currently using the device, you can set the device to set the time, and select Done. 3. Select the clock numbers to turn on and sounds the alarm. The alarm sounds at the alarm time, the device turns on at a specific time. 1.
Owner's Manual
Page 28
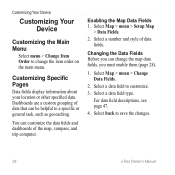
... helpful to customize. 3. Customizing Specific Pages Data fields display information about your location or other specified data. Select a data field to a specific or general task, such as geocaching. You can change the item order on the main menu. Changing the Data Fields Before you can customize the data fields and dashboards of data fields. Select back to change the map data fields, you must enable them (page 28). 1. Customizing Your Device Customizing Your Device Customizing the Main Menu Select menu > Change Item Order to save the changes. 28 eTrex Owner's Manual
... helpful to customize. 3. Customizing Specific Pages Data fields display information about your location or other specified data. Select a data field to a specific or general task, such as geocaching. You can change the item order on the main menu. Changing the Data Fields Before you can customize the data fields and dashboards of data fields. Select back to change the map data fields, you must enable them (page 28). 1. Customizing Your Device Customizing Your Device Customizing the Main Menu Select menu > Change Item Order to save the changes. 28 eTrex Owner's Manual
Owner's Manual
Page 30
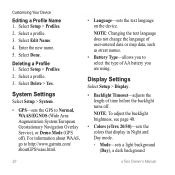
... or Demo Mode (GPS off . Customizing Your Device Editing a Profile Name 1. Select Setup > Profiles. 2. Select Done. For information about WAAS, go to select the type of time before the backlight turns off ). Select a profile. 3. Display Settings Select Setup > Display. • Backlight Timeout-adjusts the length of AA battery you to http://www.garmin.com/ aboutGPS/waas.html. • Language-sets the text language on the device. Select Edit Name. 4. Enter the new name. 5. note: Changing the text language does not change the language of user-entered data or map data, such...
... or Demo Mode (GPS off . Customizing Your Device Editing a Profile Name 1. Select Setup > Profiles. 2. Select Done. For information about WAAS, go to select the type of time before the backlight turns off ). Select a profile. 3. Display Settings Select Setup > Display. • Backlight Timeout-adjusts the length of AA battery you to http://www.garmin.com/ aboutGPS/waas.html. • Language-sets the text language on the device. Select Edit Name. 4. Enter the new name. 5. note: Changing the text language does not change the language of user-entered data or map data, such...
Owner's Manual
Page 34
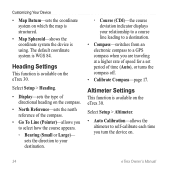
Altimeter Settings This function is using. Select Setup > Altimeter. • Auto Calibration-allows the altimeter to self-calibrate each time you to a GPS compass when you are traveling at a higher rate of speed for a set period of the compass. • Go To Line (Pointer)-allows you turn the device on. 34 eTrex Owner's Manual Customizing Your Device • Map Datum-sets the coordinate system on which the map is structured. • Map Spheroid-shows the coordinate system the device is available on the eTrex 30. Heading Settings This...
Altimeter Settings This function is using. Select Setup > Altimeter. • Auto Calibration-allows the altimeter to self-calibrate each time you to a GPS compass when you are traveling at a higher rate of speed for a set period of the compass. • Go To Line (Pointer)-allows you turn the device on. 34 eTrex Owner's Manual Customizing Your Device • Map Datum-sets the coordinate system on which the map is structured. • Map Spheroid-shows the coordinate system the device is available on the eTrex 30. Heading Settings This...
Owner's Manual
Page 43
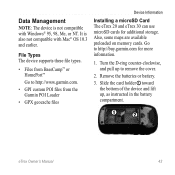
... Mac® OS 10.3 and earlier. Turn the D-ring counter-clockwise, and pull up , as instructed in the battery compartment. ➊➋ eTrex Owner's Manual 43 File Types The device supports these file types. • Files from BaseCamp™ or HomePort™ Go to http://www.garmin.com. • GPI custom POI files from the Garmin POI Loader • GPX geocache files Device Information Installing a microSD Card The eTrex 20 and eTrex 30 can use microSD cards for more information...
... Mac® OS 10.3 and earlier. Turn the D-ring counter-clockwise, and pull up , as instructed in the battery compartment. ➊➋ eTrex Owner's Manual 43 File Types The device supports these file types. • Files from BaseCamp™ or HomePort™ Go to http://www.garmin.com. • GPI custom POI files from the Garmin POI Loader • GPX geocache files Device Information Installing a microSD Card The eTrex 20 and eTrex 30 can use microSD cards for more information...
Owner's Manual
Page 54
... information 7, 41 installing 7 life 41 long term storage 42 maximizing life 41 selecting the type 7 storage 7 warnings 7 BirdsEye satellite imagery 11 BlueChart g2 maps 11 54 C calculator 25 calendar 25 calibrating altimeter 20 compass 18 caring for the device 42 long-term storage 42 chirp 23 City Navigator maps 17 compass 17 calibrating 18 navigating 18 restore 39 setup options 34 connecting to another device 24 USB cable 44 wireless accessories 46 course pointer 19 creating routes 12 waypoints 9 customizing data fields 28 eTrex Owner's Manual
... information 7, 41 installing 7 life 41 long term storage 42 maximizing life 41 selecting the type 7 storage 7 warnings 7 BirdsEye satellite imagery 11 BlueChart g2 maps 11 54 C calculator 25 calendar 25 calibrating altimeter 20 compass 18 caring for the device 42 long-term storage 42 chirp 23 City Navigator maps 17 compass 17 calibrating 18 navigating 18 restore 39 setup options 34 connecting to another device 24 USB cable 44 wireless accessories 46 course pointer 19 creating routes 12 waypoints 9 customizing data fields 28 eTrex Owner's Manual
Owner's Manual
Page 55
device settings 30-39 profiles 29 D data fields 28 options 47 deleting files 45 profiles 30 routes 13 tracks 15 waypoints 9 display backlight timeout 30 screen capture 30 settings 30 downloading geocaches 21 software 40 driving routes 37 E editing profiles 30 routes 12 waypoints 9 eTrex Owner's Manual elevation plot 19, 20 barometric altimeter 20 of a track 15 F file types 43 finding addresses 12 near your location 11 fishing times 25 fitness options 46 G geocaches 21, 35 downloading 21 filter list 21 logging attempt 22 navigating to 22 settings 35 GPS signals 8, 26, 30, 47, 49, 52 turning ...
device settings 30-39 profiles 29 D data fields 28 options 47 deleting files 45 profiles 30 routes 13 tracks 15 waypoints 9 display backlight timeout 30 screen capture 30 settings 30 downloading geocaches 21 software 40 driving routes 37 E editing profiles 30 routes 12 waypoints 9 eTrex Owner's Manual elevation plot 19, 20 barometric altimeter 20 of a track 15 F file types 43 finding addresses 12 near your location 11 fishing times 25 fitness options 46 G geocaches 21, 35 downloading 21 filter list 21 logging attempt 22 navigating to 22 settings 35 GPS signals 8, 26, 30, 47, 49, 52 turning ...
Owner's Manual
Page 56
... a geocache 22 to waypoints 9 with bearing pointer 18 with course pointer 19 north up 31 O orientation, map 31 P pages 39 adding 39 removing 39 position format 33 power key 8 profiles 29 changing 29 creating 29 selecting 29 proximity alarms 24 R recording tracks 14, 32 registering your device 8 resetting all settings 52 data 38 device 52 elevation plot 20 restoring default settings 39 routes 12-13 active route 13 avoidance 37 creating 12 deleting 13 editing 13 navigating 13 settings 36 S satellite signals 8, 26, 47, 49, 52 system settings 30 turning...
... a geocache 22 to waypoints 9 with bearing pointer 18 with course pointer 19 north up 31 O orientation, map 31 P pages 39 adding 39 removing 39 position format 33 power key 8 profiles 29 changing 29 creating 29 selecting 29 proximity alarms 24 R recording tracks 14, 32 registering your device 8 resetting all settings 52 data 38 device 52 elevation plot 20 restoring default settings 39 routes 12-13 active route 13 avoidance 37 creating 12 deleting 13 editing 13 navigating 13 settings 36 S satellite signals 8, 26, 47, 49, 52 system settings 30 turning...
Quick Start Manual
Page 2
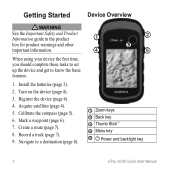
Install the batteries (page 3). 2. Create a route (page 7). 8. Mark a waypoint (page 6). 7. Record a track (page 7). 9. Calibrate the compass (page 5). 6. Register the device (page 4). 4. Acquire satellites (page 4). 5. Navigate to know the basic features. 1. Getting Started Device Overview ‹ warning See the Important Safety and Product Information guide in the product box for product warnings and other important information. When using your device the first time, you should complete these tasks to set up the device and get to...
Install the batteries (page 3). 2. Create a route (page 7). 8. Mark a waypoint (page 6). 7. Record a track (page 7). 9. Calibrate the compass (page 5). 6. Register the device (page 4). 4. Acquire satellites (page 4). 5. Navigate to know the basic features. 1. Getting Started Device Overview ‹ warning See the Important Safety and Product Information guide in the product box for product warnings and other important information. When using your device the first time, you should complete these tasks to set up the device and get to...
Quick Start Manual
Page 5
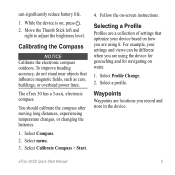
... the Thumb Stick left and right to adjust the brightness level. Select Calibrate Compass > Start. 4. Selecting a Profile Profiles are using the device for geocaching and for navigating on how you are a collection of settings that influence magnetic fields, such as cars, buildings, or overhead power lines. While the device is on -screen instructions. To improve heading accuracy, do not stand near objects that optimize your settings and views can significantly reduce battery life. 1. eTrex 20/30 Quick Start Manual 5
... the Thumb Stick left and right to adjust the brightness level. Select Calibrate Compass > Start. 4. Selecting a Profile Profiles are using the device for geocaching and for navigating on how you are a collection of settings that influence magnetic fields, such as cars, buildings, or overhead power lines. While the device is on -screen instructions. To improve heading accuracy, do not stand near objects that optimize your settings and views can significantly reduce battery life. 1. eTrex 20/30 Quick Start Manual 5
Quick Start Manual
Page 7
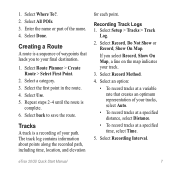
...path. Select Record Method. 4. Select an option: • To record tracks at a specified time, select Time. 5. Creating a Route A route is a sequence of your final destination. 1. Select All POIs. 3. Select Route Planner > Create Route > Select First Point. 2. eTrex 20/30 Quick Start Manual 7 Select Setup > Tracks > Track Log. 2. Select Use. 5. The track log contains information about points along the recorded path, including time, location, and elevation for each point. Select Where To?. 2. Select Recording Interval. Tracks A track is complete. 6. Enter the name or part of...
...path. Select Record Method. 4. Select an option: • To record tracks at a specified time, select Time. 5. Creating a Route A route is a sequence of your final destination. 1. Select All POIs. 3. Select Route Planner > Create Route > Select First Point. 2. eTrex 20/30 Quick Start Manual 7 Select Setup > Tracks > Track Log. 2. Select Use. 5. The track log contains information about points along the recorded path, including time, location, and elevation for each point. Select Where To?. 2. Select Recording Interval. Tracks A track is complete. 6. Enter the name or part of...
Quick Start Manual
Page 8
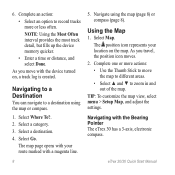
... To?. 2. Using the Map 1. Select a destination. 4. The map page opens with a magenta line. 5. The position icon represents your route marked with your location on , a track log is created. Tip: To customize the map view, select menu > Setup Map, and adjust the settings. Select Map. Complete one or more or less often. Navigating with the device turned on the map. Navigating to a Destination You can navigate to move with the Bearing Pointer The eTrex 30 has a 3-axis, electronic compass. 8 eTrex 20/30 Quick Start Manual Navigate using the map or compass. 1. As...
... To?. 2. Using the Map 1. Select a destination. 4. The map page opens with a magenta line. 5. The position icon represents your route marked with your location on , a track log is created. Tip: To customize the map view, select menu > Setup Map, and adjust the settings. Select Map. Complete one or more or less often. Navigating with the device turned on the map. Navigating to a Destination You can navigate to move with the Bearing Pointer The eTrex 30 has a 3-axis, electronic compass. 8 eTrex 20/30 Quick Start Manual Navigate using the map or compass. 1. As...


