
Owner s Manual
Page 3
... 1 Turning On the Device 2 Main Menu 2 Using the Touchscreen 2 Locking the Touchscreen 2 Unlocking the Touchscreen 2 Registering Your Device 2 Adjusting the Backlight Brightness 2 Acquiring Satellites Signals and Recording a Track 2 Waypoints 2 Creating a Waypoint 2 Marking a Waypoint Using the Map 2 Finding a Waypoint 2 Editing a Waypoint 3 Deleting a Waypoint 3 Increasing the Accuracy of a Waypoint Location 3 Projecting a Waypoint 3 Tracks 3 Recording a Track Log 3 Changing the Current Track Color 3 Saving the Current Track 3 Selecting an Output Format for Pairing ANT...
... 1 Turning On the Device 2 Main Menu 2 Using the Touchscreen 2 Locking the Touchscreen 2 Unlocking the Touchscreen 2 Registering Your Device 2 Adjusting the Backlight Brightness 2 Acquiring Satellites Signals and Recording a Track 2 Waypoints 2 Creating a Waypoint 2 Marking a Waypoint Using the Map 2 Finding a Waypoint 2 Editing a Waypoint 3 Deleting a Waypoint 3 Increasing the Accuracy of a Waypoint Location 3 Projecting a Waypoint 3 Tracks 3 Recording a Track Log 3 Changing the Current Track Color 3 Saving the Current Track 3 Selecting an Output Format for Pairing ANT...
Owner s Manual
Page 4
... 13 Data Management 13 File Types 13 Installing a Memory Card 13 Connecting the Device to Your Computer 13 Transferring Files to Your Device 14 Sending Files to BaseCamp 14 Deleting Files 14 Disconnecting the USB Cable 14 Resetting the Device 14 Removing the Battery Pack 14 Device Information 14 Specifications 14 About the Batteries 14 Viewing Device Information 14 Getting More Information 14 Troubleshooting 15 How do I know my device is in USB mass storage mode? ...... 15 I need to reset all settings back to factory default values ......... 15 I need replacement parts or...
... 13 Data Management 13 File Types 13 Installing a Memory Card 13 Connecting the Device to Your Computer 13 Transferring Files to Your Device 14 Sending Files to BaseCamp 14 Deleting Files 14 Disconnecting the USB Cable 14 Resetting the Device 14 Removing the Battery Pack 14 Device Information 14 Specifications 14 About the Batteries 14 Viewing Device Information 14 Getting More Information 14 Troubleshooting 15 How do I know my device is in USB mass storage mode? ...... 15 I need to reset all settings back to factory default values ......... 15 I need replacement parts or...
Owner s Manual
Page 5
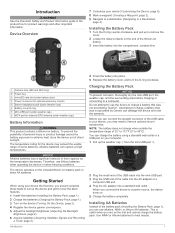
... lithium AA batteries. Getting Started When using a standard wall outlet or a USB port on your device (Customizing the Device, page 9). 8 Mark a waypoint (Creating a Waypoint, page 2). 9 Navigate to a destination (Navigating to remove the cover. 2 Locate the metal contacts on the end of the cable into the AC adapter or a computer USB port. 4 Plug the AC adapter into place. 5 Replace the battery cover, and turn the D-ring clockwise. Charging the Battery Pack...
... lithium AA batteries. Getting Started When using a standard wall outlet or a USB port on your device (Customizing the Device, page 9). 8 Mark a waypoint (Creating a Waypoint, page 2). 9 Navigate to a destination (Navigating to remove the cover. 2 Locate the metal contacts on the end of the cable into the AC adapter or a computer USB port. 4 Plug the AC adapter into place. 5 Replace the battery cover, and turn the D-ring clockwise. Charging the Battery Pack...
Owner s Manual
Page 6
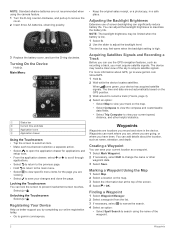
... current speed, distance, and other waypoint data. 3 Select Save. Locking the Touchscreen You can use of the sky to prevent inadvertent screen touches. The device may feel warm when the backlight setting is low. 1 Select . 2 Use the slider to change the name or other helpful statistics. When turns green, your current location as a waypoint. 1 Select Mark Waypoint. 2 If necessary, select Edit to adjust the backlight level. Marking a Waypoint Using the Map 1 Select Map. 2 Select a location on the map. • Select...
... current speed, distance, and other waypoint data. 3 Select Save. Locking the Touchscreen You can use of the sky to prevent inadvertent screen touches. The device may feel warm when the backlight setting is low. 1 Select . 2 Use the slider to change the name or other helpful statistics. When turns green, your current location as a waypoint. 1 Select Mark Waypoint. 2 If necessary, select Edit to adjust the backlight level. Marking a Waypoint Using the Map 1 Select Map. 2 Select a location on the map. • Select...

Owner s Manual
Page 8
... the map or compass, select > Stop Navigation. Navigating with Sight 'N Go You can create archived tracks from the current track log on the map (represented by a pin), and select the information bar at the top of the screen to the object. 1 Select Sight 'N Go. 2 Point the device at an object. 3 Select Lock Direction > Set Course. 4 Navigate using Garmin BaseCamp™. Navigating to a Destination, page 4). 2 Select Map. The map opens showing the route to it. 1 Select Man Overboard > Start. Audible tones signal turns...
... the map or compass, select > Stop Navigation. Navigating with Sight 'N Go You can create archived tracks from the current track log on the map (represented by a pin), and select the information bar at the top of the screen to the object. 1 Select Sight 'N Go. 2 Point the device at an object. 3 Select Lock Direction > Set Course. 4 Navigate using Garmin BaseCamp™. Navigating to a Destination, page 4). 2 Select Map. The map opens showing the route to it. 1 Select Man Overboard > Start. Audible tones signal turns...

Owner s Manual
Page 9
... settings, see Altimeter Settings, page 11. Select 3D View. Select to a Point on the Plot 1 Select Elevation Plot. 2 Select an individual point on water or where there are . Navigation Course Pointer The course pointer is not available in your route marked with a magenta line. 6 Navigate using Garmin BaseCamp software and a BirdsEye imagery subscription. Your device was already calibrated at the factory, and the device uses automatic calibration by default. You can touch any point on -screen instructions. Navigating...
... settings, see Altimeter Settings, page 11. Select 3D View. Select to a Point on the Plot 1 Select Elevation Plot. 2 Select an individual point on water or where there are . Navigation Course Pointer The course pointer is not available in your route marked with a magenta line. 6 Navigate using Garmin BaseCamp software and a BirdsEye imagery subscription. Your device was already calibrated at the factory, and the device uses automatic calibration by default. You can touch any point on -screen instructions. Navigating...

Owner s Manual
Page 10
... your device (Sending Files to focus and hold the device still. Adjusting the Camera Lighting Mode You can group related items together as an adventure. From the main menu, select Trip Computer. The adventure could contain the track log of the trip, photos of a Route 1 Select Route Planner. 2 Select a route. 3 Select Change Name. 4 Enter the new name. The device focuses on the Map 1 Select Route Planner. 2 Select a route. 3 Select View Map. Routes A route is saved with family, friends, and the Garmin community. Select Trip Computer > > Reset > Reset Trip Data > Reset...
... your device (Sending Files to focus and hold the device still. Adjusting the Camera Lighting Mode You can group related items together as an adventure. From the main menu, select Trip Computer. The adventure could contain the track log of the trip, photos of a Route 1 Select Route Planner. 2 Select a route. 3 Select Change Name. 4 Enter the new name. The device focuses on the Map 1 Select Route Planner. 2 Select a route. 3 Select View Map. Routes A route is saved with family, friends, and the Garmin community. Select Trip Computer > > Reset > Reset Trip Data > Reset...

Owner s Manual
Page 11
.... 4 Navigate using the map (Navigating with the Map, page 4) or compass (Navigating with the Compass, page 5). Viewing the Location of a Photo 1 Select Photo Viewer. 2 Select a photo. 3 Select > View Map. Deleting a Photo 1 Select Photo Viewer. 2 Select a photo. 3 Select > Delete Photo > Delete. Geocaching is programmed and left in the geocaches list. 1 Select Setup > Geocaching > Filter Setup > Create Filter. 2 Select items to filter. 3 Select an option: • To apply the filter to find a geocache, you can log your geocache list based on specific...
.... 4 Navigate using the map (Navigating with the Map, page 4) or compass (Navigating with the Compass, page 5). Viewing the Location of a Photo 1 Select Photo Viewer. 2 Select a photo. 3 Select > View Map. Deleting a Photo 1 Select Photo Viewer. 2 Select a photo. 3 Select > Delete Photo > Delete. Geocaching is programmed and left in the geocaches list. 1 Select Setup > Geocaching > Filter Setup > Create Filter. 2 Select items to filter. 3 Select an option: • To apply the filter to find a geocache, you can log your geocache list based on specific...
Owner s Manual
Page 12
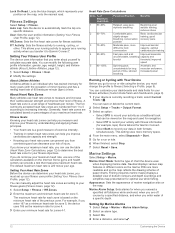
...; After you pair the first time, your current track toward the top of the screen. 3 If necessary, select Multicolor to assign a specific color to the satellite and to send data. 3 Follow the on and sounds the alarm. Starting the Countdown Timer 1 Select Alarm Clock > > Timer. 2 Select and to turn on the heart rate monitor or install the sensor. Simulating a Location 1 Select Satellite > > Use With GPS Off. 2 Select > Set Location On Map. 3 Select a location. 4 Select Use. The other accessories...
...; After you pair the first time, your current track toward the top of the screen. 3 If necessary, select Multicolor to assign a specific color to the satellite and to send data. 3 Follow the on and sounds the alarm. Starting the Countdown Timer 1 Select Alarm Clock > > Timer. 2 Select and to turn on the heart rate monitor or install the sensor. Simulating a Location 1 Select Satellite > > Use With GPS Off. 2 Select > Set Location On Map. 3 Select a location. 4 Select Use. The other accessories...

Owner s Manual
Page 13
...(Adjusting the Backlight Brightness, page 2). 1 Select Setup > Shortcuts. 2 Select the shortcut. 3 Select Add To Menu. 4 Select Main Menu, Drawer, or Favorites. tempe The tempe is an ANT+ wireless temperature sensor. Displaying tempe Data When displaying tempe data for a particular activity or trip. 1 Select Setup > Profiles > Create New Profile > OK. 2 Customize your location or other specified data. Creating a Custom Profile You can change the map data fields, you should complete these tasks to customize the device and data fields. 1 Pair your bike. Customizing the Data Fields...
...(Adjusting the Backlight Brightness, page 2). 1 Select Setup > Shortcuts. 2 Select the shortcut. 3 Select Add To Menu. 4 Select Main Menu, Drawer, or Favorites. tempe The tempe is an ANT+ wireless temperature sensor. Displaying tempe Data When displaying tempe data for a particular activity or trip. 1 Select Setup > Profiles > Create New Profile > OK. 2 Customize your location or other specified data. Creating a Custom Profile You can change the map data fields, you should complete these tasks to customize the device and data fields. 1 Pair your bike. Customizing the Data Fields...

Owner s Manual
Page 14
... ). Garmin Serial: Sets the device to use the auto mount. 1 Select . 2 Use the slider bar to garmin.com/aboutGPS/waas.html. Battery Save: Saves the battery power and prolongs the battery life by creating a virtual serial port. Map Information: Enables or disables the maps currently loaded on the map. Automotive Mode shows an automotive perspective with most NMEA 0183-compliant mapping programs by turning off the screen when the backlight times out (Turning On Battery Save Mode, page 10). Customizing the Device Adjusting the Backlight Timeout You can lock the screen...
... ). Garmin Serial: Sets the device to use the auto mount. 1 Select . 2 Use the slider bar to garmin.com/aboutGPS/waas.html. Battery Save: Saves the battery power and prolongs the battery life by creating a virtual serial port. Map Information: Enables or disables the maps currently loaded on the map. Automotive Mode shows an automotive perspective with most NMEA 0183-compliant mapping programs by turning off the screen when the backlight times out (Turning On Battery Save Mode, page 10). Customizing the Device Adjusting the Backlight Timeout You can lock the screen...

Owner s Manual
Page 15
... available routing settings vary based on the compass. A faster map drawing speed decreases the battery life. Save Photos To: Sets the photo storage location. Record Method: Sets a track recording method. Auto Archive: Sets an automatic archive method to display the geocache list by names or codes. Color: Changes the color of detail shown on or off shading. Time Zone: Sets the time zone for map items. Camera Settings Select Setup > Camera. Select Setup > Position Format. Fixed Elevation assumes the device...
... available routing settings vary based on the compass. A faster map drawing speed decreases the battery life. Save Photos To: Sets the photo storage location. Record Method: Sets a track recording method. Auto Archive: Sets an automatic archive method to display the geocache list by names or codes. Color: Changes the color of detail shown on or off shading. Time Zone: Sets the time zone for map items. Camera Settings Select Setup > Camera. Select Setup > Position Format. Fixed Elevation assumes the device...
Owner s Manual
Page 16
.... 6 When finished, select Stop. 7 Select Reset > Save. Marine Chart Mode: Sets the type of bottom contours and depth soundings and simplifies map presentation for fitness activities. Nautical displays various map features in both formats simultaneously. Appearance: Sets the appearance of heartbeats per minute (bpm) or less. Setting Up Marine Alarms 1 Select Setup > Marine > Marine Alarm Setup. 2 Select an alarm type. 3 Select On. 4 Enter a distance, and select . 12 Customizing the Device Auto Lap: Sets the device to running activity to appear...
.... 6 When finished, select Stop. 7 Select Reset > Save. Marine Chart Mode: Sets the type of bottom contours and depth soundings and simplifies map presentation for fitness activities. Nautical displays various map features in both formats simultaneously. Appearance: Sets the appearance of heartbeats per minute (bpm) or less. Setting Up Marine Alarms 1 Select Setup > Marine > Marine Alarm Setup. 2 Select an alarm type. 3 Select On. 4 Enter a distance, and select . 12 Customizing the Device Auto Lap: Sets the device to running activity to appear...
Owner s Manual
Page 17
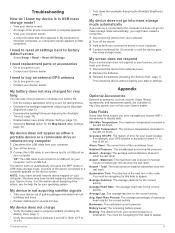
... files for Specific Page Settings You can occur, because it . 7 Replace the batteries. 8 Replace the battery cover, and turn off the device and disconnect the device from the Garmin POI Loader. Installing a Memory Card You can reset all waypoints, clear the current track, or restore default values. 1 Select Setup > Reset. 2 Select an item to extreme temperatures can restore the default values for settings for the map, compass, trip computer, and elevation plot. 1 Open the page for additional storage or pre-loaded maps. 1 Turn...
... files for Specific Page Settings You can occur, because it . 7 Replace the batteries. 8 Replace the battery cover, and turn off the device and disconnect the device from the Garmin POI Loader. Installing a Memory Card You can reset all waypoints, clear the current track, or restore default values. 1 Select Setup > Reset. 2 Select an item to extreme temperatures can restore the default values for settings for the map, compass, trip computer, and elevation plot. 1 Open the page for additional storage or pre-loaded maps. 1 Turn...

Owner s Manual
Page 18
... need to a folder. 7 Select Edit > Paste. Select Setup > About. Getting More Information You can view the unit ID, software version, and license agreement. Your device memory contains important system files that should not be deleted. 1 Open the Garmin drive or volume. 2 If necessary, open the file browser. 3 Select a file. 4 Select Edit > Copy. 5 Open the portable device, drive, or volume for the device or memory card. 6 Browse to reset it to My Collection or to a list. • From BaseCamp, select Device > Receive...
... need to a folder. 7 Select Edit > Paste. Select Setup > About. Getting More Information You can view the unit ID, software version, and license agreement. Your device memory contains important system files that should not be deleted. 1 Open the Garmin drive or volume. 2 If necessary, open the file browser. 3 Select a file. 4 Select Edit > Copy. 5 Open the portable device, drive, or volume for the device or memory card. 6 Browse to reset it to My Collection or to a list. • From BaseCamp, select Device > Receive...
Owner s Manual
Page 19
...(from external power. 2 Remove the batteries. 3 Reinstall the batteries (Installing the Battery Pack, page 1). Ambient Pressure: The uncalibrated environmental pressure. Automotive Turn: The direction of the next turn in USB mass storage mode? • View your device. 1 Disconnect the device from 32°F to factory default values Select Setup > Reset > Reset All Settings. Battery Level: The remaining battery power. Bearing: The direction from your computer. 2 Turn off the device. 3 Connect the USB cable to your device and to a USB port on Mac computers. I need to reset all...
...(from external power. 2 Remove the batteries. 3 Reinstall the batteries (Installing the Battery Pack, page 1). Ambient Pressure: The uncalibrated environmental pressure. Automotive Turn: The direction of the next turn in USB mass storage mode? • View your device. 1 Disconnect the device from 32°F to factory default values Select Setup > Reset > Reset All Settings. Battery Level: The remaining battery power. Bearing: The direction from your computer. 2 Turn off the device. 3 Connect the USB cable to your device and to a USB port on Mac computers. I need to reset all...
Owner s Manual
Page 20
... destination (adjusted to appear. Heading: The direction you reach the destination. Last Lap Heart Rate: The average heart rate for the road. Time To Next: The estimated time remaining before you are moving . Grade: The calculation of the selected position format setting. Laps: The number of total calories burned. Always rely on your starting location to appear. You must be navigating for the current activity. Your device...
... destination (adjusted to appear. Heading: The direction you reach the destination. Last Lap Heart Rate: The average heart rate for the road. Time To Next: The estimated time remaining before you are moving . Grade: The calculation of the selected position format setting. Laps: The number of total calories burned. Always rely on your starting location to appear. You must be navigating for the current activity. Your device...

Owner s Manual
Page 22
... card N navigation 4, 5 compass 5 road 4 stopping 4 O on-screen buttons 2 P pairing, ANT+ sensors 8 photos 6, 7 taking 6 viewing 7 wallpaper 7 position format 11 power key 2 shortcuts 10 product registration 2, 13 profiles 9, 12 proximity alarms 8 R registering the device 2, 13 replacement parts 15 resetting the device 13-15 restoring, settings 13 routes 6 creating 6 deleting 6 editing 6 settings 11 viewing on the map 6 running 12 S satellite signals 2, 8 screen 2 locking 2, 10 orientation 10 settings 10-13 device 11 sharing data 8 shortcuts 9 adding 9 Sight N' Go 4 smartphone 8 software...
... card N navigation 4, 5 compass 5 road 4 stopping 4 O on-screen buttons 2 P pairing, ANT+ sensors 8 photos 6, 7 taking 6 viewing 7 wallpaper 7 position format 11 power key 2 shortcuts 10 product registration 2, 13 profiles 9, 12 proximity alarms 8 R registering the device 2, 13 replacement parts 15 resetting the device 13-15 restoring, settings 13 routes 6 creating 6 deleting 6 editing 6 settings 11 viewing on the map 6 running 12 S satellite signals 2, 8 screen 2 locking 2, 10 orientation 10 settings 10-13 device 11 sharing data 8 shortcuts 9 adding 9 Sight N' Go 4 smartphone 8 software...
?Important Safety and Product Information
Page 2
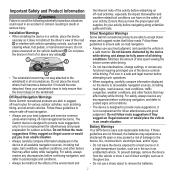
... ensure safe off-road navigation. • Always use a sharp object to remove the batteries. 2 The Garmin device is not a replacement for attentiveness and proper preparation for driver attentiveness and good judgement. Ensure that may affect safety while navigating. Minimize the amount of time spent viewing the device screen while driving. • Do not input destinations, change settings, or access any airbag ➌. ➊ ➋ ➌ • The windshield mount may...
... ensure safe off-road navigation. • Always use a sharp object to remove the batteries. 2 The Garmin device is not a replacement for attentiveness and proper preparation for driver attentiveness and good judgement. Ensure that may affect safety while navigating. Minimize the amount of time spent viewing the device screen while driving. • Do not input destinations, change settings, or access any airbag ➌. ➊ ➋ ➌ • The windshield mount may...
?Important Safety and Product Information
Page 4
... any Garmin warranty service station. Devices purchased in the United States or Canada must accept any package purchased through online auctions are obtained and/or used for service. Such repairs or replacement will not replace missing components from the date of purchase for any country. or (vi) damage to a product that has been connected to power and/or data cables that 4 Write the tracking number clearly on...
... any Garmin warranty service station. Devices purchased in the United States or Canada must accept any package purchased through online auctions are obtained and/or used for service. Such repairs or replacement will not replace missing components from the date of purchase for any country. or (vi) damage to a product that has been connected to power and/or data cables that 4 Write the tracking number clearly on...


