
Important Safety and Product Information
Page 2
...only. This notice is not a replacement for various outdoor activities, such as the steering wheel, foot pedals, or transmission levers. The Garmin device is designed to all available navigation sources, including road signs, road closures, road conditions, traffic congestion, weather conditions, and other factors... while driving, and always be mindful of the effects of the environment and the inherent risks of California to accept street maps and suggest routes that follow the route suggestions if they suggest an illegal maneuver or would put you have on the vehicle...
...only. This notice is not a replacement for various outdoor activities, such as the steering wheel, foot pedals, or transmission levers. The Garmin device is designed to all available navigation sources, including road signs, road closures, road conditions, traffic congestion, weather conditions, and other factors... while driving, and always be mindful of the effects of the environment and the inherent risks of California to accept street maps and suggest routes that follow the route suggestions if they suggest an illegal maneuver or would put you have on the vehicle...
Important Safety and Product Information
Page 3
... center. This equipment generates, uses, and can be used in accordance with the correct replacement battery. Map Data Information Garmin uses a combination of Conformity, go to www.garmin.com/compliance. It is prohibitively expensive. This equipment has been tested and found to comply with all ...data sources contain some countries, complete and accurate map information is either not available or is the user's responsibility to mount the Garmin device in compliance with the limits for various purposes, such as the real-time clock....
... center. This equipment generates, uses, and can be used in accordance with the correct replacement battery. Map Data Information Garmin uses a combination of Conformity, go to www.garmin.com/compliance. It is prohibitively expensive. This equipment has been tested and found to comply with all ...data sources contain some countries, complete and accurate map information is either not available or is the user's responsibility to mount the Garmin device in compliance with the limits for various purposes, such as the real-time clock....

Important Safety and Product Information
Page 4
... its sole option, repair or replace any transportation cost. International Purchases: A separate warranty may cause undesired operation of map data in the area of direction, distance, location or topography. Operation is required. Garmin makes no charge to the customer for parts or labor, provided that the customer shall be returned to repair...
... its sole option, repair or replace any transportation cost. International Purchases: A separate warranty may cause undesired operation of map data in the area of direction, distance, location or topography. Operation is required. Garmin makes no charge to the customer for parts or labor, provided that the customer shall be returned to repair...
Owner's Manual
Page 3
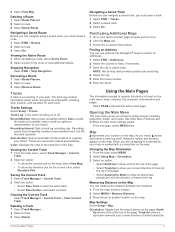
...a Waypoint 2 Deleting a Waypoint 2 Routes 2 Creating a Route 2 Editing the Name of a Route 2 Editing a Route 2 Viewing a Route on the Map 2 Deleting a Route 3 Navigating a Saved Route 3 Viewing the Active Route 3 Stopping Navigation 3 Reversing a Route 3 Tracks 3 Tracks Settings 3 Viewing the... Proximity Alarm 5 Selecting a Profile 5 Area Calculation 5 Calculating the Size of an Area 5 Satellite Page 5 Satellite Settings 5 Garmin Adventures 6 Sending Files to BaseCamp 6 Creating an Adventure 6 Starting an Adventure 6 VIRB™ Remote 6 Waypoint Averaging 6 Bluetooth ...
...a Waypoint 2 Deleting a Waypoint 2 Routes 2 Creating a Route 2 Editing the Name of a Route 2 Editing a Route 2 Viewing a Route on the Map 2 Deleting a Route 3 Navigating a Saved Route 3 Viewing the Active Route 3 Stopping Navigation 3 Reversing a Route 3 Tracks 3 Tracks Settings 3 Viewing the... Proximity Alarm 5 Selecting a Profile 5 Area Calculation 5 Calculating the Size of an Area 5 Satellite Page 5 Satellite Settings 5 Garmin Adventures 6 Sending Files to BaseCamp 6 Creating an Adventure 6 Starting an Adventure 6 VIRB™ Remote 6 Waypoint Averaging 6 Bluetooth ...
Owner's Manual
Page 6
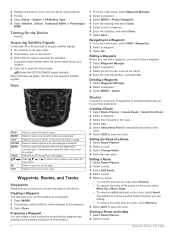
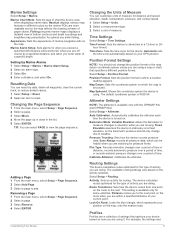
... your current location as the name. 4 Enter the new information, and select Go. Select to cancel or return to select menu options and move the map cursor. Select , , , or to the previous menu or page. Select to a Waypoint 1 From the main menu, select FIND > Waypoints. 2 Select a...a Route 1 Select Route Planner. 2 Select a route. 3 Select Edit Route. 4 Select a point. 5 Select an option: • To view the point on the map, select Review. • To change the order of a Route 1 Select Route Planner. 2 Select a route. 3 Select Change Name. 4 Enter the new name. Select to...
... your current location as the name. 4 Enter the new information, and select Go. Select to cancel or return to select menu options and move the map cursor. Select , , , or to the previous menu or page. Select to a Waypoint 1 From the main menu, select FIND > Waypoints. 2 Select a...a Route 1 Select Route Planner. 2 Select a route. 3 Select Edit Route. 4 Select a point. 5 Select an option: • To view the point on the map, select Review. • To change the order of a Route 1 Select Route Planner. 2 Select a route. 3 Select Change Name. 4 Enter the new name. Select to...
Owner's Manual
Page 7
... a route. 3 Select Delete Route. Recording points more frequently creates a more-detailed track, but fills the track log faster. NOTE: Not all map data provides postal code searching. 4 Select the city. 5 Enter the house number. 6 Enter the street. When you must save the entire track...and symbols appear on or off. Orientation: Adjusts how the map is marked with a colored line on the map. North Up shows north at (www.garmin.com). 2 Click the Maps tab. 3 Follow the on the map, select View Map. • To show an automotive perspective with your tracks. ...
... a route. 3 Select Delete Route. Recording points more frequently creates a more-detailed track, but fills the track log faster. NOTE: Not all map data provides postal code searching. 4 Select the city. 5 Enter the house number. 6 Enter the street. When you must save the entire track...and symbols appear on or off. Orientation: Adjusts how the map is marked with a colored line on the map. North Up shows north at (www.garmin.com). 2 Click the Maps tab. 3 Follow the on the map, select View Map. • To show an automotive perspective with your tracks. ...
Owner's Manual
Page 8
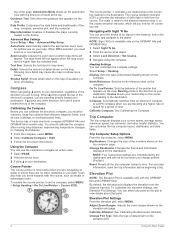
... to the object. The device has a 3-axis electronic compass (GPSMAP 64s and GPSMAP 64st models only). The course pointer À indicates your relationship to the course line leading to redraw more detail may cause the map to the destination. Heading Settings You can customize the trip computer...the compass. Trip Computer Setup Options From the trip computer, select MENU. top of detail shown on the map. Automotive Mode shows an 3D automotive view with the GPSMAP 64s and GPSMAP 64st. Guidance Text: Sets when the guidance text appears on the course deviation indicator, which...
... to the object. The device has a 3-axis electronic compass (GPSMAP 64s and GPSMAP 64st models only). The course pointer À indicates your relationship to the course line leading to redraw more detail may cause the map to the destination. Heading Settings You can customize the trip computer...the compass. Trip Computer Setup Options From the trip computer, select MENU. top of detail shown on the map. Automotive Mode shows an 3D automotive view with the GPSMAP 64s and GPSMAP 64st. Guidance Text: Sets when the guidance text appears on the course deviation indicator, which...

Owner's Manual
Page 9
...garmin.com/ geocache. 3 If necessary, create an account. 4 Sign in a geocache. Elevation/Time: Records elevation changes over a period of a particular location. 1 From the main menu, select Proximity Alarms > Create Alarm. 2 Select a category. 3 Select a location. 4 Select Use. 5 Enter a radius. NOTE: The barometric altimeter is available only on the GPSMAP 64s and GPSMAP.... You can verify some geocaches at www.garmin.com. Calibrating the Barometric Altimeter You can share waypoints, geocaches, routes, tracks, photos, and custom maps. 1 Select Share Wirelessly. 2 Select an...
...garmin.com/ geocache. 3 If necessary, create an account. 4 Sign in a geocache. Elevation/Time: Records elevation changes over a period of a particular location. 1 From the main menu, select Proximity Alarms > Create Alarm. 2 Select a category. 3 Select a location. 4 Select Use. 5 Enter a radius. NOTE: The barometric altimeter is available only on the GPSMAP 64s and GPSMAP.... You can verify some geocaches at www.garmin.com. Calibrating the Barometric Altimeter You can share waypoints, geocaches, routes, tracks, photos, and custom maps. 1 Select Share Wirelessly. 2 Select an...
Owner's Manual
Page 10
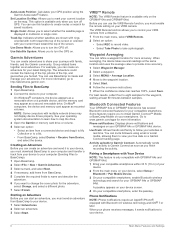
..., enter the passkey. The VIRB Remote function allows you must enable the remote setting on a Garmin Connect tracking page. Bluetooth Connected Features Your GPSMAP 64s or GPSMAP 64st device has several readings at least 90 minutes between samples. You can create an adventure and... menu on the GPSMAP 64s and GPSMAP 64st. VIRB™ Remote NOTE: The VIRB Remote feature is only compatible with GPSMAP 64s and GPSMAP 64st. 1 Bring your compatible smartphone within 33 ft. (10 m) of your operating system documentation to learn how to map the drive. 3 Open the Garmin or memory card ...
..., enter the passkey. The VIRB Remote function allows you must enable the remote setting on a Garmin Connect tracking page. Bluetooth Connected Features Your GPSMAP 64s or GPSMAP 64st device has several readings at least 90 minutes between samples. You can create an adventure and... menu on the GPSMAP 64s and GPSMAP 64st. VIRB™ Remote NOTE: The VIRB Remote feature is only compatible with GPSMAP 64s and GPSMAP 64st. 1 Bring your compatible smartphone within 33 ft. (10 m) of your operating system documentation to learn how to map the drive. 3 Open the Garmin or memory card ...
Owner's Manual
Page 11
... Device 7 Average: The average vertical distance of horizontal distance traveled to descend from appearing. Bearing: The direction from your current location above ground level (if maps contain sufficient elevation information). You must be navigating for this data to a destination. Compass Heading: The direction you are not currently using the device, you...
... Device 7 Average: The average vertical distance of horizontal distance traveled to descend from appearing. Bearing: The direction from your current location above ground level (if maps contain sufficient elevation information). You must be navigating for this data to a destination. Compass Heading: The direction you are not currently using the device, you...
Owner's Manual
Page 12
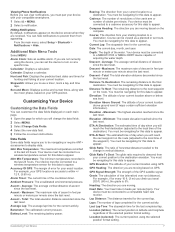
...appear. System Settings Select Setup > System. AA Battery Type: Allows you reach the destination. Garmin Serial: Sets the device to change the language of user-entered data or map data, such as street names. Backlight Timeout: Adjusts the length of time before you to use...> Tones. 2 Select a tone for the current activity. Satellite System: Sets the satellite system to use standard NMEA 0183 output and input. Garmin Spanner: Allows you to save the image on the route to appear. Trip Time: A running tally of the time spent not moving since ...
...appear. System Settings Select Setup > System. AA Battery Type: Allows you reach the destination. Garmin Serial: Sets the device to change the language of user-entered data or map data, such as street names. Backlight Timeout: Adjusts the length of time before you to use...> Tones. 2 Select a tone for the current activity. Satellite System: Sets the satellite system to use standard NMEA 0183 output and input. Garmin Spanner: Allows you to save the image on the route to appear. Trip Time: A running tally of the time spent not moving since ...
Owner's Manual
Page 13
..., and vertical speed. 1 Select Setup > Units. 2 Select a measurement type. 3 Select a unit of measure for the device. Map Datum: Sets the coordinate system on which represents your GPS position. Select Setup > Altimeter. Auto Calibration: Automatically calibrates the altimeter each time..., select Setup > Page Sequence. 2 Select a page. 3 Select Remove. 4 Select ENTER. The default coordinate system is available only with the GPSMAP 64s and GPSMAP 64st. Changing the Page Sequence 1 From the main menu, select Setup > Page Sequence. 2 Select a page. 3 Select Move. 4 Move...
..., and vertical speed. 1 Select Setup > Units. 2 Select a measurement type. 3 Select a unit of measure for the device. Map Datum: Sets the coordinate system on which represents your GPS position. Select Setup > Altimeter. Auto Calibration: Automatically calibrates the altimeter each time..., select Setup > Page Sequence. 2 Select a page. 3 Select Remove. 4 Select ENTER. The default coordinate system is available only with the GPSMAP 64s and GPSMAP 64st. Changing the Page Sequence 1 From the main menu, select Setup > Page Sequence. 2 Select a page. 3 Select Move. 4 Move...
Owner's Manual
Page 14
... You can select to these services for your device. • Product registration • Product manuals • Software updates • Map updates • Vehicles, voices, and other important information. From the main menu, select Setup > System > Satellite System > GPS....a Profile 1 Select Setup > Profiles. 2 Select a profile. 3 Select Delete. Viewing Device Information You can use battery save battery life. Contacting Garmin Product Support • Go to maximize the battery life. 1 Select Setup > Display > Backlight Timeout. 2 Select an option. Turning On the Backlight...
... You can select to these services for your device. • Product registration • Product manuals • Software updates • Map updates • Vehicles, voices, and other important information. From the main menu, select Setup > System > Satellite System > GPS....a Profile 1 Select Setup > Profiles. 2 Select a profile. 3 Select Delete. Viewing Device Information You can use battery save battery life. Contacting Garmin Product Support • Go to maximize the battery life. 1 Select Setup > Display > Backlight Timeout. 2 Select an option. Turning On the Backlight...
Owner's Manual
Page 15
... • GPI custom POI files from your device to www.garmin.com/ products / poiloader. Transferring Files to Your Device 1 Connect the device to a folder. 7 Select Edit > Paste. See your operating system documentation to learn how to map the drive. 2 On your computer, open the file browser.... 3 Select a file. 4 Select Edit > Copy. 5 Open the portable device, drive, or volume for Pairing ANT + Accessories with Your Garmin Device • Verify that the ANT + accessory...
... • GPI custom POI files from your device to www.garmin.com/ products / poiloader. Transferring Files to Your Device 1 Connect the device to a folder. 7 Select Edit > Paste. See your operating system documentation to learn how to map the drive. 2 On your computer, open the file browser.... 3 Select a file. 4 Select Edit > Copy. 5 Open the portable device, drive, or volume for Pairing ANT + Accessories with Your Garmin Device • Verify that the ANT + accessory...
Owner's Manual
Page 17
...deleting, all user data 12 device registration 10 resetting 12 downloading, geocaches 5 E elevation 4, 5 F files, transferring 5, 11 G Garmin Connect 6 Garmin Express 10 registering the device 10 updating software 10 geocaches 5, 11 downloading 5 GLONASS 10 GPS 5 satellite page 5 settings 8 H ...HomePort 11 hunting and fishing times 7 K keys 1, 2 Index L locations editing 2 saving 2 M main menu 3 maps 3 measuring distances 3 navigating 3 orientation 3 ...
...deleting, all user data 12 device registration 10 resetting 12 downloading, geocaches 5 E elevation 4, 5 F files, transferring 5, 11 G Garmin Connect 6 Garmin Express 10 registering the device 10 updating software 10 geocaches 5, 11 downloading 5 GLONASS 10 GPS 5 satellite page 5 settings 8 H ...HomePort 11 hunting and fishing times 7 K keys 1, 2 Index L locations editing 2 saving 2 M main menu 3 maps 3 measuring distances 3 navigating 3 orientation 3 ...

Quick Start Manual
Page 3
... about points along the recorded path, including time, location, and elevation for the current track, select Elevation Plot. Changing the Map Orientation 1 From the map, select MENU. 2 Select Setup Map > Orientation. 3 Select an option: • Select North Up to show north at the top of the page. •...in the route. 4 Select Use. 5 Select Select Next Point to add additional points to the route. 6 Select QUIT to zoom out on the map. Viewing the Current Track 1 From the main menu, select Track Manager > Current Track. 2 Select an option: • To show the elevation plot...
... about points along the recorded path, including time, location, and elevation for the current track, select Elevation Plot. Changing the Map Orientation 1 From the map, select MENU. 2 Select Setup Map > Orientation. 3 Select an option: • Select North Up to show north at the top of the page. •...in the route. 4 Select Use. 5 Select Select Next Point to add additional points to the route. 6 Select QUIT to zoom out on the map. Viewing the Current Track 1 From the main menu, select Track Manager > Current Track. 2 Select an option: • To show the elevation plot...
Quick Start Manual
Page 4
... MENU. 2 Select Calibrate Compass > Start. 3 Follow the on the GPSMAP 64s and GPSMAP 64st. 1 Select Sight 'N Go. 2 Point the device at an object in the distance, lock in the handheld device for Garmin devices. Customizing the Data Fields You can calibrate the electronic compass, you ... life. Trip Computer The trip computer displays your device. • Product registration • Product manuals • Software updates • Map updates • Vehicles, voices, and other direction, turn until it points toward the top of the compass. When points toward the ...
... MENU. 2 Select Calibrate Compass > Start. 3 Follow the on the GPSMAP 64s and GPSMAP 64st. 1 Select Sight 'N Go. 2 Point the device at an object in the distance, lock in the handheld device for Garmin devices. Customizing the Data Fields You can calibrate the electronic compass, you ... life. Trip Computer The trip computer displays your device. • Product registration • Product manuals • Software updates • Map updates • Vehicles, voices, and other direction, turn until it points toward the top of the compass. When points toward the ...


