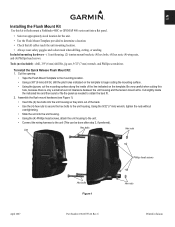
Flush Mount Kit Instructions and Template (Multilingual)
Page 1
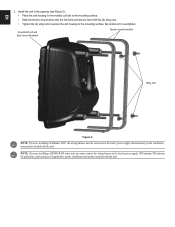
... hex bolts into the unit housing so they stick out of the line indicated on the template to obtain the best fit. 2. Included mounting hardware-(1) unit housing, (2) tension mount brackets, (4) hex bolts, (4) hex nuts, (4) wing nuts, and (4) Phillips head screws. Using the 9/32" (7 mm) wrench, tighten...drill bit, drill the pilot holes indicated on the template. C Printed in Taiwan Be very careful when cutting this kit to flush mount a Fishfinder 400C or GPSMAP 400 series unit into the unit housing. • Using the (4) Phillips head screws, attach the unit housing to the unit....
... hex bolts into the unit housing so they stick out of the line indicated on the template to obtain the best fit. 2. Included mounting hardware-(1) unit housing, (2) tension mount brackets, (4) hex bolts, (4) hex nuts, (4) wing nuts, and (4) Phillips head screws. Using the 9/32" (7 mm) wrench, tighten...drill bit, drill the pilot holes indicated on the template. C Printed in Taiwan Be very careful when cutting this kit to flush mount a Fishfinder 400C or GPSMAP 400 series unit into the unit housing. • Using the (4) Phillips head screws, attach the unit housing to the unit....
Flush Mount Kit Instructions and Template (Multilingual)
Page 2
...mount hardware Tension mount brackets Wing nuts Figure 2 NOTE: If you must be connected to the boat's power supply and transducer per the installation instructions included with the unit. Install the unit in the opening (see Figure 2): • Place the unit housing in the recently cut hole in the mounting...with the unit. Be careful not to the mounting surface. EN 3. NOTE: If you are installing a GPSMAP 400 series unit, you are installing a Fishfinder 400C, the wiring harness must connect the wiring harness to the boat's power supply, GPS antenna, XM antenna (if applicable), and ...
...mount hardware Tension mount brackets Wing nuts Figure 2 NOTE: If you must be connected to the boat's power supply and transducer per the installation instructions included with the unit. Install the unit in the opening (see Figure 2): • Place the unit housing in the recently cut hole in the mounting...with the unit. Be careful not to the mounting surface. EN 3. NOTE: If you are installing a GPSMAP 400 series unit, you are installing a Fishfinder 400C, the wiring harness must connect the wiring harness to the boat's power supply, GPS antenna, XM antenna (if applicable), and ...


