Operation Manual
Page 6
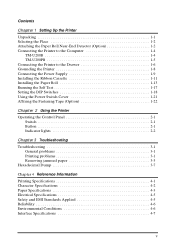
... 1-1 Selecting the Place 1-2 Attaching the Paper Roll Near-End Detector (Option 1-2 Connecting the Printer to the Computer 1-4 TM-U200B 1-4 TM-U200PB 1-5 Connecting the Printer to the Drawer 1-6 Grounding the Printer 1-8 Connecting the Power Supply 1-9 Installing the Ribbon Cassette 1-11 Installing the Paper Roll 1-13 Running the Self Test 1-17 Setting the DIP Switches 1-18 Using the Power...
... 1-1 Selecting the Place 1-2 Attaching the Paper Roll Near-End Detector (Option 1-2 Connecting the Printer to the Computer 1-4 TM-U200B 1-4 TM-U200PB 1-5 Connecting the Printer to the Drawer 1-6 Grounding the Printer 1-8 Connecting the Power Supply 1-9 Installing the Ribbon Cassette 1-11 Installing the Paper Roll 1-13 Running the Self Test 1-17 Setting the DIP Switches 1-18 Using the Power...
Operation Manual
Page 9
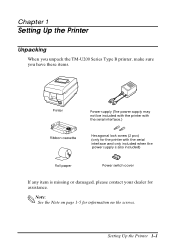
Setting Up the Printer 1-1 Note: See the Note on the screws. Chapter 1 Setting Up the Printer Unpacking When you unpack the TM-U200 Series Type B printer, make sure you have these items. Printer Ribbon cassette Power supply (The power supply may not be included with the printer with the serial interface.) Hexagonal lock screw (2 pcs) (only for the printer with the serial interface and only included when the power supply is also included) Roll paper Power switch cover If any item is missing or damaged, please contact your dealer for information on page 1-5 for assistance.
Setting Up the Printer 1-1 Note: See the Note on the screws. Chapter 1 Setting Up the Printer Unpacking When you unpack the TM-U200 Series Type B printer, make sure you have these items. Printer Ribbon cassette Power supply (The power supply may not be included with the printer with the serial interface.) Hexagonal lock screw (2 pcs) (only for the printer with the serial interface and only included when the power supply is also included) Roll paper Power switch cover If any item is missing or damaged, please contact your dealer for information on page 1-5 for assistance.


