
Network Guide
Page 4
Contents Chapter 1 Introduction About Your Printer 7 About This Guide 7 Warnings, Cautions, and Notes 8 Operating Environment 8 Features of the Network Interface 9 Network Interface Operation 10 Status lights 10 Network connector 10 About ... Windows 7 and Windows Vista 13 Windows XP 14 Mac OS X 16 Setting Up the Network Interface 17 Connecting the Network Printer to the Network 17 Configuring the Network Interface 18 Printing a Network Status Sheet 20 Installing the Printer Software 21 Windows 21 Mac OS X 23 Adding the Network Port 24 Windows 24 Mac OS...
Contents Chapter 1 Introduction About Your Printer 7 About This Guide 7 Warnings, Cautions, and Notes 8 Operating Environment 8 Features of the Network Interface 9 Network Interface Operation 10 Status lights 10 Network connector 10 About ... Windows 7 and Windows Vista 13 Windows XP 14 Mac OS X 16 Setting Up the Network Interface 17 Connecting the Network Printer to the Network 17 Configuring the Network Interface 18 Printing a Network Status Sheet 20 Installing the Printer Software 21 Windows 21 Mac OS X 23 Adding the Network Port 24 Windows 24 Mac OS...

Network Guide
Page 12
...Connection (Windows 7) or View Status (Windows Vista), and then click the Properties button. Note: If you need to the Network" on page 17. Windows 7 and Windows Vista For Windows 7 and Windows Vista, use the following table lists the network components required for configuring the network interface...and tasks or double-click Network and Sharing Center. 2. Check if the following network components are already installed, go to "Connecting the Network Printer to set the IP address, the subnet mask, and the default gateway of the computer. 1. Note: ❏ The Windows operating system ...
...Connection (Windows 7) or View Status (Windows Vista), and then click the Properties button. Note: If you need to the Network" on page 17. Windows 7 and Windows Vista For Windows 7 and Windows Vista, use the following table lists the network components required for configuring the network interface...and tasks or double-click Network and Sharing Center. 2. Check if the following network components are already installed, go to "Connecting the Network Printer to set the IP address, the subnet mask, and the default gateway of the computer. 1. Note: ❏ The Windows operating system ...

Network Guide
Page 13
... select Control Panel, and then select Network Connections. 2. If the necessary components are now installed. Go to the section "Connecting the Network Printer to the Network" on the Local Area Connection Properties dialog box to open the Internet Protocols Version 4 (TCP/IPv4) Properties dialog box. ...Double-click Internet Protocol Version 4 (TCP/IPv4) on page 17. Restart the computer. The necessary components are not in the list, click Install to install the necessary components. Under LAN or High-Speed...
... select Control Panel, and then select Network Connections. 2. If the necessary components are now installed. Go to the section "Connecting the Network Printer to the Network" on the Local Area Connection Properties dialog box to open the Internet Protocols Version 4 (TCP/IPv4) Properties dialog box. ...Double-click Internet Protocol Version 4 (TCP/IPv4) on page 17. Restart the computer. The necessary components are not in the list, click Install to install the necessary components. Under LAN or High-Speed...

Network Guide
Page 14
EpsonNet Config's setting screens TCP/IP, SNMP (IP trap) Necessary components Internet Protocol (TCP/IP) Setting Up Your System for configuring the network interface with EpsonNet Config. 3. Check if the following table lists the network components required for Network Printing 15 The following network components are already installed, go to "Connecting the Network Printer to the Network" on page 17. If they are in the list.
EpsonNet Config's setting screens TCP/IP, SNMP (IP trap) Necessary components Internet Protocol (TCP/IP) Setting Up Your System for configuring the network interface with EpsonNet Config. 3. Check if the following table lists the network components required for Network Printing 15 The following network components are already installed, go to "Connecting the Network Printer to the Network" on page 17. If they are in the list.

Network Guide
Page 15
...menu, and then assign the IP address. 4. For LPR printing: Double-click Internet Protocol (TCP/IP) on page 17. Go to the section "Connecting the Network Printer to the Network" on the Local Area Connection Properties dialog box to open the Internet Protocols (TCP/IP) Properties dialog ... the Network control panel. 3. Restart the computer. Select Ethernet as the connecting method on page 17. 16 Setting Up Your System for network printing. Go to the section "Connecting the Network Printer to the Network" on the Network control panel, select the method to save any changes. Printing...
...menu, and then assign the IP address. 4. For LPR printing: Double-click Internet Protocol (TCP/IP) on page 17. Go to the section "Connecting the Network Printer to the Network" on the Local Area Connection Properties dialog box to open the Internet Protocols (TCP/IP) Properties dialog ... the Network control panel. 3. Restart the computer. Select Ethernet as the connecting method on page 17. 16 Setting Up Your System for network printing. Go to the section "Connecting the Network Printer to the Network" on the Network control panel, select the method to save any changes. Printing...
Network Guide
Page 16
... twisted-pair cable to connect the printer to prevent malfunction. ❏ Do not connect or disconnect the network cable when the printer is on by default, you print...the network. Turn on page 18 for Mac OS X: Since the printer supports Bonjour and is on the network and print a network status...the Network Printer to the Network Follow the instructions below to connect the network interface to disable the Bonjour setting, use the printer's control ... Network Interface" on your printer. Now you want to the network. 1. When you can use the printer on the printer, and the other end to...
... twisted-pair cable to connect the printer to prevent malfunction. ❏ Do not connect or disconnect the network cable when the printer is on by default, you print...the network. Turn on page 18 for Mac OS X: Since the printer supports Bonjour and is on the network and print a network status...the Network Printer to the Network Follow the instructions below to connect the network interface to disable the Bonjour setting, use the printer's control ... Network Interface" on your printer. Now you want to the network. 1. When you can use the printer on the printer, and the other end to...

Network Guide
Page 38
... Bonjour printing, 26 installing printer driver, 23 network settings, 16 TCP/IP printing, 26 N Network cable, 10 connector, 10 printing status sheet, 20 protocols, 7 Network interface configuring, 18 to 20 connecting to network, 17 Network port Windows, 24 to 25 Network software, uninstalling, 37 to 38... O Operating environment, 8 P Password, EpsonNet Config with Web Browser, 34 Printer driver installing in Macintosh, 23 installing in Windows, 21 to 22...
... Bonjour printing, 26 installing printer driver, 23 network settings, 16 TCP/IP printing, 26 N Network cable, 10 connector, 10 printing status sheet, 20 protocols, 7 Network interface configuring, 18 to 20 connecting to network, 17 Network port Windows, 24 to 25 Network software, uninstalling, 37 to 38... O Operating environment, 8 P Password, EpsonNet Config with Web Browser, 34 Printer driver installing in Macintosh, 23 installing in Windows, 21 to 22...
User's Guide
Page 5
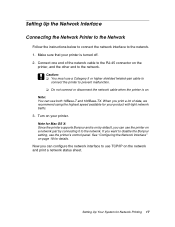
... 17 Printer Parts 18 Front 18 Back 18 Control Panel 19 LCD Screen 19 1 Setting Up the Printer Unpacking and Connecting the Printer ...21 Installing Ink 23 Connecting to Your System 25 Connecting Directly to the Computer 25 Windows 25 Macintosh 27 Connecting to a Network 28 Configuring the Network Interface 28 Printing a Network Status Sheet 30 Installing the Printer... Software 30 Adding the Network Port 33 Updating Your Printer Firmware 35 Checking the Current Firmware Version...
... 17 Printer Parts 18 Front 18 Back 18 Control Panel 19 LCD Screen 19 1 Setting Up the Printer Unpacking and Connecting the Printer ...21 Installing Ink 23 Connecting to Your System 25 Connecting Directly to the Computer 25 Windows 25 Macintosh 27 Connecting to a Network 28 Configuring the Network Interface 28 Printing a Network Status Sheet 30 Installing the Printer... Software 30 Adding the Network Port 33 Updating Your Printer Firmware 35 Checking the Current Firmware Version...
User's Guide
Page 10
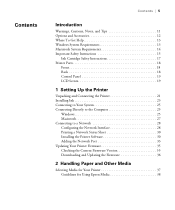
... purchase optional equipment and genuine Epson ink and paper from an Epson Professional Imaging Authorized Reseller. Options and Accessories Your Epson Stylus Pro 4900® offers these user-replaceable items: Consumables and user-replaceable parts Part Replacement ink maintenance tank (see page 137) Replacement borderfree maintenance tank (see page 137) Replacement printer cutter blade (see page 133...
... purchase optional equipment and genuine Epson ink and paper from an Epson Professional Imaging Authorized Reseller. Options and Accessories Your Epson Stylus Pro 4900® offers these user-replaceable items: Consumables and user-replaceable parts Part Replacement ink maintenance tank (see page 137) Replacement borderfree maintenance tank (see page 137) Replacement printer cutter blade (see page 133...

User's Guide
Page 35
... for your printer • Using cut sheets up to 17 inches wide. See page 58 for available media. core: 6 in the printer before purchasing large quantities or printing large jobs. Check the Epson Pro Imaging website (www.proimaging.epson.com) or your Epson Professional Imaging ...17 × 24 in. (203 x 254 up to 432 x 610 mm) Maximum 2 in . wide (203 to 432 mm) 8 × 10 in . 37 Chapter 2: Handling Paper and Other Media Note: You can also use heavy stock, such as posterboard up to 59 mil (1.5 mm) thick, via the front manual feeder. The Epson Stylus Pro 4900...
... for your printer • Using cut sheets up to 17 inches wide. See page 58 for available media. core: 6 in the printer before purchasing large quantities or printing large jobs. Check the Epson Pro Imaging website (www.proimaging.epson.com) or your Epson Professional Imaging ...17 × 24 in. (203 x 254 up to 432 x 610 mm) Maximum 2 in . wide (203 to 432 mm) 8 × 10 in . 37 Chapter 2: Handling Paper and Other Media Note: You can also use heavy stock, such as posterboard up to 59 mil (1.5 mm) thick, via the front manual feeder. The Epson Stylus Pro 4900...

User's Guide
Page 36
...paper: • You can print on the spindle when you send your bare hands. The Epson Stylus Pro 4900 accepts sheets ranging from 8 × 10 inches to maintain quality. See page 91 (...Always select the correct paper source (roll, tray or manual feed) in a cool, dry place to 17× 24 inches. Fingerprints may affect print quality. Handle media by the edges or use cotton gloves...page 64 (Windows) for instructions on selecting the paper source in your printer software. • Keep unused media in your printer driver software before you print on cut sheet paper and other media:...
...paper: • You can print on the spindle when you send your bare hands. The Epson Stylus Pro 4900 accepts sheets ranging from 8 × 10 inches to maintain quality. See page 91 (...Always select the correct paper source (roll, tray or manual feed) in a cool, dry place to 17× 24 inches. Fingerprints may affect print quality. Handle media by the edges or use cotton gloves...page 64 (Windows) for instructions on selecting the paper source in your printer software. • Keep unused media in your printer driver software before you print on cut sheet paper and other media:...

User's Guide
Page 39
... Lift the edge of the output tray to load cut sheets in the paper cassette: 1. Press OK. 3. Handling Paper and Other Media | 41 Epson cut sheet paper capacity Paper type Presentation Paper Matte Photo Quality Ink Jet Paper Proofing Paper White Semimatte Proofing Paper Commercial Standard Proofing Paper 240... Standard Proofing Paper SWOP 3 Ultra Premium Presentation Paper Matte Enhanced Matte Paper Size (inches) 8.5 × 11 11 × 17 13 × 19 17 × 22 13 × 19 Loading capacity 200 100 50 100 8.5 × 11 100 11.7 × 16.5 50 13 × ...
... Lift the edge of the output tray to load cut sheets in the paper cassette: 1. Press OK. 3. Handling Paper and Other Media | 41 Epson cut sheet paper capacity Paper type Presentation Paper Matte Photo Quality Ink Jet Paper Proofing Paper White Semimatte Proofing Paper Commercial Standard Proofing Paper 240... Standard Proofing Paper SWOP 3 Ultra Premium Presentation Paper Matte Enhanced Matte Paper Size (inches) 8.5 × 11 11 × 17 13 × 19 17 × 22 13 × 19 Loading capacity 200 100 50 100 8.5 × 11 100 11.7 × 16.5 50 13 × ...

User's Guide
Page 48
... also cause paper jams if the paper is a simple process. Check the Epson Pro Imaging website (www.proimaging.epson.com) or your Epson Professional Imaging authorized reseller for roll paper: • When storing roll paper...appear on the surface of the paper and it comes out of the printer. Caution: Some 2-inch core roll paper at widths smaller than 10" may cause the print ...inch core, up to another is torn during the printing process. Manually switching from one paper roll to 17 inches wide. Roll Paper Guidelines When printing on roll paper, be cut . 50 Make sure the ...
... also cause paper jams if the paper is a simple process. Check the Epson Pro Imaging website (www.proimaging.epson.com) or your Epson Professional Imaging authorized reseller for roll paper: • When storing roll paper...appear on the surface of the paper and it comes out of the printer. Caution: Some 2-inch core roll paper at widths smaller than 10" may cause the print ...inch core, up to another is torn during the printing process. Manually switching from one paper roll to 17 inches wide. Roll Paper Guidelines When printing on roll paper, be cut . 50 Make sure the ...

User's Guide
Page 164
... 26 inches (405 mm) Width 40 inches (863 mm) Depth 36 inches (766 mm) Weight 115 lb (52 kg) printer, (without consumables) stand, and paper basket Printer Interfaces • USB (1.1 and 2.0 compatible) • Ethernet 10/100 BaseT Safety Approvals Safety standards EMC UL 60950-1 CSA 22....2 No. 60950-1 FCC part 15 subpart B, class B CAN/CSA-CEI/IEC CISPR 22 Class B Media Roll Paper Maximum roll width 17 inches (432 mm...
... 26 inches (405 mm) Width 40 inches (863 mm) Depth 36 inches (766 mm) Weight 115 lb (52 kg) printer, (without consumables) stand, and paper basket Printer Interfaces • USB (1.1 and 2.0 compatible) • Ethernet 10/100 BaseT Safety Approvals Safety standards EMC UL 60950-1 CSA 22....2 No. 60950-1 FCC part 15 subpart B, class B CAN/CSA-CEI/IEC CISPR 22 Class B Media Roll Paper Maximum roll width 17 inches (432 mm...
User's Guide
Page 167
..., 155 Bonjour printing, 32 Borderless printing Mac OS X 10.6 & 10.5, 91 to 94 Windows, 62, 69 to 74 Buttons, control panel, 17, 144 C Cable printer, 11, 12 problems, 157 requirements, 11, 12 Canceling print jobs Mac OS X 10.6 & 10.5, 105 Windows, 85 Cartridges, see Ink cartridges checking...to 132 changing measurement units, 131 to 132 cleaning print head, 122 to 125 Control panel illustration, 17, 144 ink levels, checking, 118, 126 to 127 lights, 17, 144 messages, 144 monitoring printer, 144 restoring default settings, 131 to 132 status check, printing, 118 Control panel menus Custom Paper, ...
..., 155 Bonjour printing, 32 Borderless printing Mac OS X 10.6 & 10.5, 91 to 94 Windows, 62, 69 to 74 Buttons, control panel, 17, 144 C Cable printer, 11, 12 problems, 157 requirements, 11, 12 Canceling print jobs Mac OS X 10.6 & 10.5, 105 Windows, 85 Cartridges, see Ink cartridges checking...to 132 changing measurement units, 131 to 132 cleaning print head, 122 to 125 Control panel illustration, 17, 144 ink levels, checking, 118, 126 to 127 lights, 17, 144 messages, 144 monitoring printer, 144 restoring default settings, 131 to 132 status check, printing, 118 Control panel menus Custom Paper, ...
User's Guide
Page 168
... jobs Mac OS X 10.6 & 10.5, 105 Windows, 85 Depth of printer, 166 Diagnosing problems, 143 Dimensions of printer, 166 Documentation, how to use, 9 E Electrical specifications, 165 Energy consumption, 165 Environmental specifications, 165 ePlaten, 17 Epson accessories, 10 help, 11 media, 49 Preferred Limited Warranty Plan, 11 Error...H Head Alignment menu, 125, 126 170 Head unit (print head), checking status, 117 Heavy media, cutting, 55 to 56 Height of printer, 166 Help, Epson, 11 High Speed Copies setting, 86 High Speed setting Mac OS X 10.6 & 10.5, 96 Windows, 65 Humidity requirements, 165 I ...
... jobs Mac OS X 10.6 & 10.5, 105 Windows, 85 Depth of printer, 166 Diagnosing problems, 143 Dimensions of printer, 166 Documentation, how to use, 9 E Electrical specifications, 165 Energy consumption, 165 Environmental specifications, 165 ePlaten, 17 Epson accessories, 10 help, 11 media, 49 Preferred Limited Warranty Plan, 11 Error...H Head Alignment menu, 125, 126 170 Head unit (print head), checking status, 117 Heavy media, cutting, 55 to 56 Height of printer, 166 Help, Epson, 11 High Speed Copies setting, 86 High Speed setting Mac OS X 10.6 & 10.5, 96 Windows, 65 Humidity requirements, 165 I ...

User's Guide
Page 169
Lights, control panel, 17, 144 M Mac OS X color management, 109 to 112 system requirements, 12 uninstalling software, 163...to 105 page setup options, 91 to 94 roll paper settings, 98 to 99 Macintosh adding printer, 32 to 33 Bonjour printing, 32 installing printer driver, 30 TCP/IP printing, 33 Maintenance, 117 to 141 Maintenance menu, 124 Maintenance ...to 79 Memory, requirements, 11, 12 Index | 171 Menus Head Alignment, 125, 126 Maintenance, 124 Printer Setup, 122, 123, 124 Printer Status, 33 Test Print, 118 Messages, control panel, 144 Mirror Image setting problems, 157 Windows, 75 Monitoring...
Lights, control panel, 17, 144 M Mac OS X color management, 109 to 112 system requirements, 12 uninstalling software, 163...to 105 page setup options, 91 to 94 roll paper settings, 98 to 99 Macintosh adding printer, 32 to 33 Bonjour printing, 32 installing printer driver, 30 TCP/IP printing, 33 Maintenance, 117 to 141 Maintenance menu, 124 Maintenance ...to 79 Memory, requirements, 11, 12 Index | 171 Menus Head Alignment, 125, 126 Maintenance, 124 Printer Setup, 122, 123, 124 Printer Status, 33 Test Print, 118 Messages, control panel, 144 Mirror Image setting problems, 157 Windows, 75 Monitoring...

Warranty Statement
Page 1
You will need it to take full advantage of Mind CPD-28163 Please open this booklet and record your unique Unit ID Number. EPSON® PreferredSM Limited Warranty Program for the Epson Stylus® Pro 17-inch Wide Format Printers Priority Technical Support Toll-Free Phone Number Security and Peace of the Preferred Warranty.
You will need it to take full advantage of Mind CPD-28163 Please open this booklet and record your unique Unit ID Number. EPSON® PreferredSM Limited Warranty Program for the Epson Stylus® Pro 17-inch Wide Format Printers Priority Technical Support Toll-Free Phone Number Security and Peace of the Preferred Warranty.

Warranty Statement
Page 2
... Please review the information contained in the demanding professional graphics environment. Limited Warranty for the Epson Stylus® Pro 17-inch Wide Format Printers Welcome and Congratulations Congratulations on your Unit ID Number as described in this booklet. You'll.... Once again, congratulations and welcome to the following printer model(s) (all configurations): Epson Stylus Pro 4900. EPSON® PreferredSM Limited Warranty Program for Commercial Products." Your printer is pleased to include the Epson PreferredSM Limited Warranty Plan described in this document. This...
... Please review the information contained in the demanding professional graphics environment. Limited Warranty for the Epson Stylus® Pro 17-inch Wide Format Printers Welcome and Congratulations Congratulations on your Unit ID Number as described in this booklet. You'll.... Once again, congratulations and welcome to the following printer model(s) (all configurations): Epson Stylus Pro 4900. EPSON® PreferredSM Limited Warranty Program for Commercial Products." Your printer is pleased to include the Epson PreferredSM Limited Warranty Plan described in this document. This...

Warranty Statement
Page 4
... renewal of your expense, maintenance service (or, if the printer is currently malfunctioning, then a time and material repair) must be performed by pressing the Menu button: Menu > Printer Status > Total Prints. EPSON® PreferredSM Limited Warranty Program for the Epson Stylus® Pro 17-inch Wide Format Printers extended service for one additional year (for three years of...
... renewal of your expense, maintenance service (or, if the printer is currently malfunctioning, then a time and material repair) must be performed by pressing the Menu button: Menu > Printer Status > Total Prints. EPSON® PreferredSM Limited Warranty Program for the Epson Stylus® Pro 17-inch Wide Format Printers extended service for one additional year (for three years of...


