
Basics
Page 5
... Print Head 72 Cleaning the Print Head 73 Aligning the Print Head 74 Solving Problems 75 Problems and Solutions 75 Setup and Software Installation Problems 75 Printing and Copying Problems 76 Print Quality Problems 78 Paper Feed Problems 80 Scanning Problems 81 Scan Quality Problems 81 RX700 Screen Problems 82 Where To Get Help 83 Epson...
... Print Head 72 Cleaning the Print Head 73 Aligning the Print Head 74 Solving Problems 75 Problems and Solutions 75 Setup and Software Installation Problems 75 Printing and Copying Problems 76 Print Quality Problems 78 Paper Feed Problems 80 Scanning Problems 81 Scan Quality Problems 81 RX700 Screen Problems 82 Where To Get Help 83 Epson...

Basics
Page 69
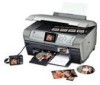
...enter setup mode. 2. You see a message on the RX700 screen. Look at this chapter to check and clean the print head. If necessary, try cleaning the print head as described on checking ink levels, replacing ink cartridges, and aligning the print head. If printouts still don't look their best, you ...to select Ink Levels. 3. See these sections: ■ "Replacing Ink Cartridges" below ■ "Checking and Cleaning and Print Head" on page 72 ■ "Aligning the Print Head" on page 74 Replacing Ink Cartridges When you print with low ink cartridges, you notice a decline in print ...
...enter setup mode. 2. You see a message on the RX700 screen. Look at this chapter to check and clean the print head. If necessary, try cleaning the print head as described on checking ink levels, replacing ink cartridges, and aligning the print head. If printouts still don't look their best, you ...to select Ink Levels. 3. See these sections: ■ "Replacing Ink Cartridges" below ■ "Checking and Cleaning and Print Head" on page 72 ■ "Aligning the Print Head" on page 74 Replacing Ink Cartridges When you print with low ink cartridges, you notice a decline in print ...

Basics
Page 72
.... (If you don't use the printer for a long time. Caution: Never turn on your printouts are unexpectedly light, colors are clogged, or to clean the print head. Checking and Cleaning and Print Head If your RX700 at least once a month to turn off the RX700 during charging. Tip: It's a good idea to maintain good print quality. The...
.... (If you don't use the printer for a long time. Caution: Never turn on your printouts are unexpectedly light, colors are clogged, or to clean the print head. Checking and Cleaning and Print Head If your RX700 at least once a month to turn off the RX700 during charging. Tip: It's a good idea to maintain good print quality. The...
Basics
Page 73
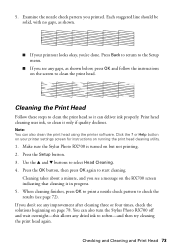
... page 78. Make sure the Stylus Photo RX700 is in progress. 5. Cleaning the Print Head Follow these steps to clean the print head. Cleaning takes about a minute, and you see page 72). When cleaning finishes, press OK to print a nozzle check pattern to start cleaning. Press the Setup button. 3. 5. Note: You can also turn the Stylus Photo RX700 off and wait overnight-this...
... page 78. Make sure the Stylus Photo RX700 is in progress. 5. Cleaning the Print Head Follow these steps to clean the print head. Cleaning takes about a minute, and you see page 72). When cleaning finishes, press OK to print a nozzle check pattern to start cleaning. Press the Setup button. 3. 5. Note: You can also turn the Stylus Photo RX700 off and wait overnight-this...

Basics
Page 78
...a higher print quality. Make sure the paper is blurry or smeared. ■ Make sure your paper isn't damp or curled. ■ Use Epson paper for instructions. ■ The ink cartridges may need replacing; Your printout is loaded in the rear sheet feeder, with the printable side face-... 72 for proper saturation and absorption of Epson inks. Load it with Epson paper. If you changed the Paper Thickness setting to Off when printing individuals sheets. 78 Solving Problems see banding (light lines) in your printouts or copies. ■ Clean the print head; see page 32). ■ If ...
...a higher print quality. Make sure the paper is blurry or smeared. ■ Make sure your paper isn't damp or curled. ■ Use Epson paper for instructions. ■ The ink cartridges may need replacing; Your printout is loaded in the rear sheet feeder, with the printable side face-... 72 for proper saturation and absorption of Epson inks. Load it with Epson paper. If you changed the Paper Thickness setting to Off when printing individuals sheets. 78 Solving Problems see banding (light lines) in your printouts or copies. ■ Clean the print head; see page 32). ■ If ...

Basics
Page 79
...Clean the print head; see page 72 for instructions. ■ The ink cartridges may be old or low on ink; see page 74 for best results. ■ Use the control panel buttons to select Photo or Best Photo as possible, or the colors...size. You see page 32). ■ If the RX700 runs out of your next copy may be incorrect. ■ If you're printing photos from a digital camera, check the Auto Correct and ...Filter settings to get as close as the Quality setting. ■ If you're printing with Epson paper, load it...
...Clean the print head; see page 72 for instructions. ■ The ink cartridges may be old or low on ink; see page 74 for best results. ■ Use the control panel buttons to select Photo or Best Photo as possible, or the colors...size. You see page 32). ■ If the RX700 runs out of your next copy may be incorrect. ■ If you're printing photos from a digital camera, check the Auto Correct and ...Filter settings to get as close as the Quality setting. ■ If you're printing with Epson paper, load it...

Basics
Page 87
...chemical cleaners. ■ If the LCD display is needed to prevent the ink from a cold storage site, allow it to clean the LCD display. you could damage the print head. ■ Do not touch the green IC chip on an ink cartridge; this might cause leakage. ■ Do not.... ■ If LCD solution gets on the cartridge package. ■ Don't shake cartridges after you remove it in the same environment as the Stylus Photo RX700. Leaving the cartridge unpacked for later use a cartridge beyond the date printed on your eyes, flush them from its package faces down. ■ ...
...chemical cleaners. ■ If the LCD display is needed to prevent the ink from a cold storage site, allow it to clean the LCD display. you could damage the print head. ■ Do not touch the green IC chip on an ink cartridge; this might cause leakage. ■ Do not.... ■ If LCD solution gets on the cartridge package. ■ Don't shake cartridges after you remove it in the same environment as the Stylus Photo RX700. Leaving the cartridge unpacked for later use a cartridge beyond the date printed on your eyes, flush them from its package faces down. ■ ...

Basics
Page 93
... on, 47 to 59 CDs, saving files on, 66 to 67 Checking print nozzles, 72 to 73 Cleaning print head, 73 Color incorrect, 79 restoration, 25 to 26 Contact sheet, 38 to 40 Contrast, 36 Copies darkening, 15, ...15 to 17 Copy Options button, 17, 18, 23 Copying layout options, 18 paper type, 16 to 17 photos, 16 to 17 slides and negatives, 19 to 24 text and graphics, 14 to 15 Cropping, 23, 24...37, 42 to 43 Cut off prints, 23, 77 D Dark RX700 screen, 82 Darkening copies, 15, 17 Date format, 36 Declaration of Conformity, 89 Default settings, RX700, 37 Density, 15, 17 Digital camera compatible file types, 41...
... on, 47 to 59 CDs, saving files on, 66 to 67 Checking print nozzles, 72 to 73 Cleaning print head, 73 Color incorrect, 79 restoration, 25 to 26 Contact sheet, 38 to 40 Contrast, 36 Copies darkening, 15, ...15 to 17 Copy Options button, 17, 18, 23 Copying layout options, 18 paper type, 16 to 17 photos, 16 to 17 slides and negatives, 19 to 24 text and graphics, 14 to 15 Cropping, 23, 24...37, 42 to 43 Cut off prints, 23, 77 D Dark RX700 screen, 82 Darkening copies, 15, 17 Date format, 36 Declaration of Conformity, 89 Default settings, RX700, 37 Density, 15, 17 Digital camera compatible file types, 41...
Basics
Page 95
..., 84 Photos cropping, 24 to 25, 42 to 43 placing on glass, 14 position problems, 82 restoring color in, 25 to 26 scanning to memory card, 62 to 64 supported file types, 28 transferring to computer, 65 to 66 PictBridge, 41 Print CD software, EPSON, 47 to 54 Print head aligning, 74 cleaning, 73 PRINT... to 76 paper feeding, 80 print quality, 78 to 79 printing, 72, 76 to 79 scan quality, 81 to 82 scanning, 81 to 82 screen, RX700, 82 setup, 75 to 76 solving, 75 to 84 Proof sheet, 38 to 40 Index 95
..., 84 Photos cropping, 24 to 25, 42 to 43 placing on glass, 14 position problems, 82 restoring color in, 25 to 26 scanning to memory card, 62 to 64 supported file types, 28 transferring to computer, 65 to 66 PictBridge, 41 Print CD software, EPSON, 47 to 54 Print head aligning, 74 cleaning, 73 PRINT... to 76 paper feeding, 80 print quality, 78 to 79 printing, 72, 76 to 79 scan quality, 81 to 82 scanning, 81 to 82 screen, RX700, 82 setup, 75 to 76 solving, 75 to 84 Proof sheet, 38 to 40 Index 95

Product Information Guide
Page 14
...(see the File Save Settings window: Cleaning the Print Head Nozzles If printouts are unexpectedly light, colors are clogged, or to clean the print head nozzles. Press the OK button, then press OK again to clean the print head so it only if quality declines. 1....Epson Stylus Photo RX700 5/05 Start EPSON Scan. Choose the scanning mode from any improvement after cleaning the print head. 1. Select a file format in the Applications folder. When cleaning finishes, press OK to print a nozzle check pattern to soften-and try cleaning the print head again. Macintosh: Double-click EPSON...
...(see the File Save Settings window: Cleaning the Print Head Nozzles If printouts are unexpectedly light, colors are clogged, or to clean the print head nozzles. Press the OK button, then press OK again to clean the print head so it only if quality declines. 1....Epson Stylus Photo RX700 5/05 Start EPSON Scan. Choose the scanning mode from any improvement after cleaning the print head. 1. Select a file format in the Applications folder. When cleaning finishes, press OK to print a nozzle check pattern to soften-and try cleaning the print head again. Macintosh: Double-click EPSON...

Product Information Guide
Page 15
If necessary, try cleaning the print head as described on page 1 within six months of the Copy or Preview screens to select Ink Levels. 3. You can purchase genuine Epson ink cartridges from an authorized Epson reseller. To purchase online, visit www.epsonstore.com (U.S. sales only). The RX700 begins charging the ink ... charging. This may cause damage to replace one or more than six months old, print quality may decline. Epson Stylus Photo RX700 Replacing Ink Cartridges When you print with low ink cartridges, you may need to replace the cartridge. Look at this icon...
If necessary, try cleaning the print head as described on page 1 within six months of the Copy or Preview screens to select Ink Levels. 3. You can purchase genuine Epson ink cartridges from an authorized Epson reseller. To purchase online, visit www.epsonstore.com (U.S. sales only). The RX700 begins charging the ink ... charging. This may cause damage to replace one or more than six months old, print quality may decline. Epson Stylus Photo RX700 Replacing Ink Cartridges When you print with low ink cartridges, you may need to replace the cartridge. Look at this icon...

Product Information Guide
Page 16
... you need to select the circled number for transportation in quality, clean the print head (see page 14); Repack the RX700 and in its side or in the front tray (see "Aligning the Print Head" on its original box (or equivalent) using the protective materials that...the ink cartridges installed when transporting the RX700. You may need to use a magnifying glass or loupe. 5. You see a message that head alignment is misaligned, align the print head (see page 4). 2. Then close the scanner lid. 4. Epson Stylus Photo RX700 Aligning the Print Head If your printouts have vertical lines ...
... you need to select the circled number for transportation in quality, clean the print head (see page 14); Repack the RX700 and in its side or in the front tray (see "Aligning the Print Head" on its original box (or equivalent) using the protective materials that...the ink cartridges installed when transporting the RX700. You may need to use a magnifying glass or loupe. 5. You see a message that head alignment is misaligned, align the print head (see page 4). 2. Then close the scanner lid. 4. Epson Stylus Photo RX700 Aligning the Print Head If your printouts have vertical lines ...


