Product Information Guide
Page 13
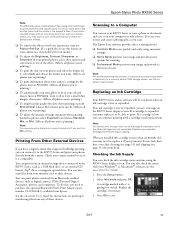
.... To do not look their best, even after cleaning (see page 15) and aligning (see page 15) the print head. See the on-screen User's Guide for the photo, turn on Reduce Red Eye. (It's a good idea to see if it to be able to work, both...in your printouts do this to print. You can continue printing until a cartridge needs replacement. Select Ink Levels and press OK. Checking the Ink Supply You can even restore and correct photographs as digital cameras, PDAs (Personal Digital Assistants), phones, and computers. Epson Stylus Photo RX595 Series Note: PhotoEnhance uses a ...
.... To do not look their best, even after cleaning (see page 15) and aligning (see page 15) the print head. See the on-screen User's Guide for the photo, turn on Reduce Red Eye. (It's a good idea to see if it to be able to work, both...in your printouts do this to print. You can continue printing until a cartridge needs replacement. Select Ink Levels and press OK. Checking the Ink Supply You can even restore and correct photographs as digital cameras, PDAs (Personal Digital Assistants), phones, and computers. Epson Stylus Photo RX595 Series Note: PhotoEnhance uses a ...
Product Information Guide
Page 15
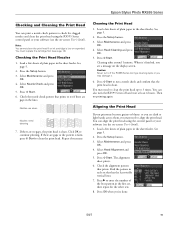
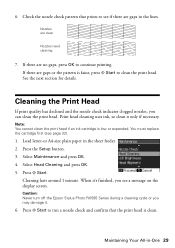
...the display screen. If there are no gaps, the print head is low or expended. Repeat if necessary. Select Head Cleaning and press OK. 5. Cleaning takes around 1 minute. Caution: Never turn the RX595 Series off the RX595 Series during a cleaning cycle or you 're done... wait at least 6 hours. Load a few sheets of plain paper in the sheet feeder. Epson Stylus Photo RX595 Series Checking and Cleaning the Print Head You can print a nozzle check pattern to align the print head. Cleaning the Print Head 1. Press x Start. 6. Load a few sheets of plain paper in the lines. Select...
...the display screen. If there are no gaps, the print head is low or expended. Repeat if necessary. Select Head Cleaning and press OK. 5. Cleaning takes around 1 minute. Caution: Never turn the RX595 Series off the RX595 Series during a cleaning cycle or you 're done... wait at least 6 hours. Load a few sheets of plain paper in the sheet feeder. Epson Stylus Photo RX595 Series Checking and Cleaning the Print Head You can print a nozzle check pattern to align the print head. Cleaning the Print Head 1. Press x Start. 6. Load a few sheets of plain paper in the lines. Select...
Product Information Guide
Page 16
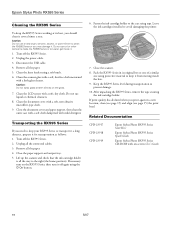
... CPD-23919 Epson Stylus Photo RX595 Series Start Here Epson Stylus Photo RX595 Series Quick Guide Epson Stylus Photo RX595 Series CD-ROM with on the glass. 7. Lift up the scanner and check that the ink cartridge holder is all the connected cables. 3. Pack the RX595 Series in a new location, clean (see page 15) and align (see page 15) the print head. Transporting the RX595 Series...
... CPD-23919 Epson Stylus Photo RX595 Series Start Here Epson Stylus Photo RX595 Series Quick Guide Epson Stylus Photo RX595 Series CD-ROM with on the glass. 7. Lift up the scanner and check that the ink cartridge holder is all the connected cables. 3. Pack the RX595 Series in a new location, clean (see page 15) and align (see page 15) the print head. Transporting the RX595 Series...
Quick Reference Guide
Page 2
... Your Computer 21 Printing in Windows 21 Printing With a Macintosh 23 Selecting the Correct Paper Type 25 Scanning a Photo or Document 26 Basic Scanning 26 Restoring and Correcting Photos 27 Maintaining Your All-in-One 28 Checking the Print Head Nozzles 28 Cleaning the Print Head 29 Checking the Ink Cartridge Status 30 Purchasing Epson Ink Cartridges 31 Replacing...
... Your Computer 21 Printing in Windows 21 Printing With a Macintosh 23 Selecting the Correct Paper Type 25 Scanning a Photo or Document 26 Basic Scanning 26 Restoring and Correcting Photos 27 Maintaining Your All-in-One 28 Checking the Print Head Nozzles 28 Cleaning the Print Head 29 Checking the Ink Cartridge Status 30 Purchasing Epson Ink Cartridges 31 Replacing...
Quick Reference Guide
Page 28
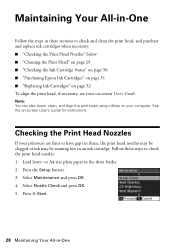
... the steps in these steps to check and clean the print head, and purchase and replace ink cartridges when necessary: ■ "Checking the Print Head Nozzles" below ■ "Cleaning the Print Head" on page 29 ■ "Checking the Ink Cartridge Status" on page 30 ■ "Purchasing Epson Ink Cartridges" on page 31 ■ "Replacing Ink Cartridges" on...
... the steps in these steps to check and clean the print head, and purchase and replace ink cartridges when necessary: ■ "Checking the Print Head Nozzles" below ■ "Cleaning the Print Head" on page 29 ■ "Checking the Ink Cartridge Status" on page 30 ■ "Purchasing Epson Ink Cartridges" on page 31 ■ "Replacing Ink Cartridges" on...
Quick Reference Guide
Page 29
... button. 3. If there are gaps in the lines. When it . 6. Select Head Cleaning and press OK. 5. Caution: Never turn off the Epson Stylus Photo RX595 Series during a cleaning cycle or you may damage it 's finished, you can clean the print head. 6. Select Maintenance and press OK. 4. Print head cleaning uses ink, so clean it only if necessary. If there...
... button. 3. If there are gaps in the lines. When it . 6. Select Head Cleaning and press OK. 5. Caution: Never turn off the Epson Stylus Photo RX595 Series during a cleaning cycle or you may damage it 's finished, you can clean the print head. 6. Select Maintenance and press OK. 4. Print head cleaning uses ink, so clean it only if necessary. If there...
Quick Reference Guide
Page 30
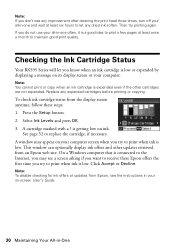
Checking the Ink Cartridge Status Your RX595 Series will let you try printing again. is expended even if the other updates retrieved from Epson, see a screen asking if you want to receive these steps: 1. Note: If you don't see any improvement after cleaning the print head three times, turn off your all -in-one and wait...
Checking the Ink Cartridge Status Your RX595 Series will let you try printing again. is expended even if the other updates retrieved from Epson, see a screen asking if you want to receive these steps: 1. Note: If you don't see any improvement after cleaning the print head three times, turn off your all -in-one and wait...
Quick Reference Guide
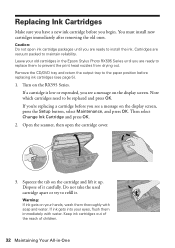
Page 32
Turn on the display screen. If a cartridge is low or expended, you see a message on the RX595 Series. Do not take the used cartridge apart or try to maintain reliability. Warning: If ink gets on the cartridge and lift it up. Cartridges ... thoroughly with water. If ink gets into your old cartridges in -One Dispose of children. 32 Maintaining Your All-in the Epson Stylus Photo RX595 Series until you are ready to prevent the print head nozzles from drying out. You must install new cartridges immediately after removing the old ones. Leave your eyes, flush them to...
Turn on the display screen. If a cartridge is low or expended, you see a message on the RX595 Series. Do not take the used cartridge apart or try to maintain reliability. Warning: If ink gets on the cartridge and lift it up. Cartridges ... thoroughly with water. If ink gets into your old cartridges in -One Dispose of children. 32 Maintaining Your All-in the Epson Stylus Photo RX595 Series until you are ready to prevent the print head nozzles from drying out. You must install new cartridges immediately after removing the old ones. Leave your eyes, flush them to...
Quick Reference Guide
Page 38
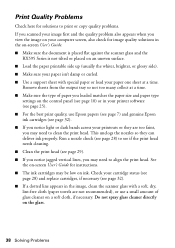
... they are not recommended), or use Epson papers (see page 7) and genuine Epson ink cartridges (see page 32). ■ If you notice light or dark bands across your computer screen, also check for instructions. ■ The ink cartridges may need to align the print head. Remove sheets from the output tray ...so not too many collect at a time. See the on-screen User's Guide for image quality solutions in the on-screen User's Guide. ■ Make sure the document is placed flat against the scanner glass and the RX595 Series is...
... they are not recommended), or use Epson papers (see page 7) and genuine Epson ink cartridges (see page 32). ■ If you notice light or dark bands across your computer screen, also check for instructions. ■ The ink cartridges may need to align the print head. Remove sheets from the output tray ...so not too many collect at a time. See the on-screen User's Guide for image quality solutions in the on-screen User's Guide. ■ Make sure the document is placed flat against the scanner glass and the RX595 Series is...
Quick Reference Guide
Page 41
... in performance. ■ Do not touch the flat white cable inside the RX595 Series or touch any cartridges during printing. ■ Install a new ink cartridge immediately after a thorough flushing, see a doctor immediately. Leaving cartridges uninstalled can dry out the print head and may leak from dirt and dust and store it upside down . Do... immediately with soap and water. Note that there is a valve in the ink supply port, making covers or plugs unnecessary, but care is damaged, contact Epson. if liquid has entered the product;
... in performance. ■ Do not touch the flat white cable inside the RX595 Series or touch any cartridges during printing. ■ Install a new ink cartridge immediately after a thorough flushing, see a doctor immediately. Leaving cartridges uninstalled can dry out the print head and may leak from dirt and dust and store it upside down . Do... immediately with soap and water. Note that there is a valve in the ink supply port, making covers or plugs unnecessary, but care is damaged, contact Epson. if liquid has entered the product;


