
User Guide
Page 3
... Note 7 Important Safety Instructions 7 Setting up the product 7 Choosing a place for the product 8 Using the product 9 Handling ink cartridges 9 Notice for CD/DVD discs 10 Concerning incidental loss arising out of this product 11 About usage limitation 11 Warnings, Cautions, and Notes 11 Chapter 1 ...Using Your Software Adding the product 13 Overview of EPSON Total Disc Maker 13 EPSON Total Disc Maker 13 EPSON Total Disc Monitor 13 EPSON Total Disc Setup 14 Using EPSON Total Disc Maker 14 Starting EPSON Total Disc Maker 14 Overview of Printer Driver 14 Accessing the...
... Note 7 Important Safety Instructions 7 Setting up the product 7 Choosing a place for the product 8 Using the product 9 Handling ink cartridges 9 Notice for CD/DVD discs 10 Concerning incidental loss arising out of this product 11 About usage limitation 11 Warnings, Cautions, and Notes 11 Chapter 1 ...Using Your Software Adding the product 13 Overview of EPSON Total Disc Maker 13 EPSON Total Disc Maker 13 EPSON Total Disc Monitor 13 EPSON Total Disc Setup 14 Using EPSON Total Disc Maker 14 Starting EPSON Total Disc Maker 14 Overview of Printer Driver 14 Accessing the...

User Guide
Page 4
... labels 37 Publishing discs 38 Batch Mode 40 Loading CDs/DVDs 40 Making disc settings and creating labels 44 Publishing discs 44 Taking Out Discs 49 Canceling Publishing 50 Chapter 3 Replacing Ink Cartridges Checking the Ink Cartridge Status 51 Precautions on Ink Cartridge Replacement 52 Replacing an Ink Cartridge 53 Chapter 4 Maintaining Your Product Checking the Print Head ...61 Cleaning the interior of the product 62 Cleaning the filter 63 Transporting Your Product 64 Chapter 5 Troubleshooting Diagnosing the Problem 66 Error indicators 66 EPSON Total Disc Monitor 73 Contents 4
... labels 37 Publishing discs 38 Batch Mode 40 Loading CDs/DVDs 40 Making disc settings and creating labels 44 Publishing discs 44 Taking Out Discs 49 Canceling Publishing 50 Chapter 3 Replacing Ink Cartridges Checking the Ink Cartridge Status 51 Precautions on Ink Cartridge Replacement 52 Replacing an Ink Cartridge 53 Chapter 4 Maintaining Your Product Checking the Print Head ...61 Cleaning the interior of the product 62 Cleaning the filter 63 Transporting Your Product 64 Chapter 5 Troubleshooting Diagnosing the Problem 66 Error indicators 66 EPSON Total Disc Monitor 73 Contents 4

User Guide
Page 5
...margins 78 Printout has a slight slant 78 Printed side is smeared or scuffed 78 Printing is too slow 78 Ink adheres to the recording surface 79 Disc or the CD/DVD Tray Does Not Feed Correctly 79 Disc does not feed 79 Multiple discs feed 80 Disc jams 80 Writing ...Where To Get Help Contacting Customer Support 84 Before Contacting Epson 84 Help for Users in the United States and Canada 84 Help for Users in the Europe (EMEA 85 Appendix B Product Information Product Parts and Control Panel Functions 86 Product Parts 86 Control Panel 88 Ink and Disc 89 Ink cartridges 89 Contents 5
...margins 78 Printout has a slight slant 78 Printed side is smeared or scuffed 78 Printing is too slow 78 Ink adheres to the recording surface 79 Disc or the CD/DVD Tray Does Not Feed Correctly 79 Disc does not feed 79 Multiple discs feed 80 Disc jams 80 Writing ...Where To Get Help Contacting Customer Support 84 Before Contacting Epson 84 Help for Users in the United States and Canada 84 Help for Users in the Europe (EMEA 85 Appendix B Product Information Product Parts and Control Panel Functions 86 Product Parts 86 Control Panel 88 Ink and Disc 89 Ink cartridges 89 Contents 5

User Guide
Page 6
Discs 90 System Requirements 90 For using the product 90 Technical Specifications 91 Disc 91 Ink cartridges 93 Mechanical 94 Electrical 94 Environmental 95 Standards and approvals 95 Interface 95 Lifetime 96 Index Contents 6
Discs 90 System Requirements 90 For using the product 90 Technical Specifications 91 Disc 91 Ink cartridges 93 Mechanical 94 Electrical 94 Environmental 95 Standards and approvals 95 Interface 95 Lifetime 96 Index Contents 6

User Guide
Page 9
... not insert objects in the product. ❏ Take care not to the outlet until the power light stops flashing. ❏ Leave the ink cartridges installed. however, this does not cause any harm to trap your fingers when closing the disc cover. ❏ The product uses galvanized sheet...Notice and Safety Instructions 9 Using the product Observe the following when handling the ink cartridges: ❏ Keep ink cartridges out of the reach of the product. ❏ Do not place any drink or liquid on the cartridge; Do not unplug the product or turn the product off the power to...
... not insert objects in the product. ❏ Take care not to the outlet until the power light stops flashing. ❏ Leave the ink cartridges installed. however, this does not cause any harm to trap your fingers when closing the disc cover. ❏ The product uses galvanized sheet...Notice and Safety Instructions 9 Using the product Observe the following when handling the ink cartridges: ❏ Keep ink cartridges out of the reach of the product. ❏ Do not place any drink or liquid on the cartridge; Do not unplug the product or turn the product off the power to...

User Guide
Page 10
... but the ink may stain items that the cartridge may not be conducted to warm up of the data on the side of static or electrical noise -Incorrect usage -Malfunction or repair -Damage due to natural disaster Epson does not hold any responsibility for CD/DVD discs Before using... it to make sure the functionality. Also, back up at room temperature for later use, protect the ink supply area from a cold storage site, allow it . ❏ Store ink cartridges in the same environment as the ink cartridge status,...
... but the ink may stain items that the cartridge may not be conducted to warm up of the data on the side of static or electrical noise -Incorrect usage -Malfunction or repair -Damage due to natural disaster Epson does not hold any responsibility for CD/DVD discs Before using... it to make sure the functionality. Also, back up at room temperature for later use, protect the ink supply area from a cold storage site, allow it . ❏ Store ink cartridges in the same environment as the ink cartridge status,...

User Guide
Page 51
... start a job. If non-genuine ink cartridges are installed, the ink cartridge status may not be displayed. ❏ When an ink cartridge is running low, the status is broken, incompatible with an ink cartridge supported by the product. Chapter 3 Replacing Ink Cartridges Checking the Ink Cartridge Status Note: ❏ Epson cannot guarantee the quality or reliability of the ink cartridges installed in the product is...
... start a job. If non-genuine ink cartridges are installed, the ink cartridge status may not be displayed. ❏ When an ink cartridge is running low, the status is broken, incompatible with an ink cartridge supported by the product. Chapter 3 Replacing Ink Cartridges Checking the Ink Cartridge Status Note: ❏ Epson cannot guarantee the quality or reliability of the ink cartridges installed in the product is...
User Guide
Page 52
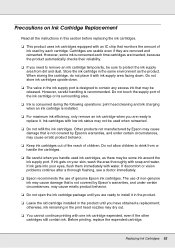
... may be released. The use of ink used ink cartridges, as the product. Replacing Ink Cartridges 52 otherwise, ink remaining in the ink supply port is installed. ❏ For maximum ink efficiency, only remove an ink cartridge when you are inserted, because the product automatically checks their reliability. ❏ If you handle used by Epson's warranties, and under certain circumstances, may...
... may be released. The use of ink used ink cartridges, as the product. Replacing Ink Cartridges 52 otherwise, ink remaining in the ink supply port is installed. ❏ For maximum ink efficiency, only remove an ink cartridge when you are inserted, because the product automatically checks their reliability. ❏ If you handle used by Epson's warranties, and under certain circumstances, may...

User Guide
Page 53
... and the actions you are ready to replace it in more of covers may cause the ink to re-load, resulting in the product. Opening of the ink being consumed. Replacing an Ink Cartridge Note: Do not open ink cartridge cover while loading ink (power light is on, but the instructions are the same for all the...
... and the actions you are ready to replace it in more of covers may cause the ink to re-load, resulting in the product. Opening of the ink being consumed. Replacing an Ink Cartridge Note: Do not open ink cartridge cover while loading ink (power light is on, but the instructions are the same for all the...

User Guide
Page 54
... EPSON Total Disc Monitor" on page 73. 4. Dispose of it is low, you may continue to use it until it properly. 5. Remove the new ink cartridge from the package. Push the expended cartridge so the cartridge is slightly pushed out. (If the ink in the cartridge is low, it is indicated by a flashing ink cartridge light.) Note: If an ink cartridge...
... EPSON Total Disc Monitor" on page 73. 4. Dispose of it is low, you may continue to use it until it properly. 5. Remove the new ink cartridge from the package. Push the expended cartridge so the cartridge is slightly pushed out. (If the ink in the cartridge is low, it is indicated by a flashing ink cartridge light.) Note: If an ink cartridge...

User Guide
Page 55
Place the new ink cartridge into place. Then push the ink cartridge until it clicks into the slot. Replacing Ink Cartridges 55 c Caution: ❏ Do not touch the green IC chip on the side of the cartridge. This can damage the ink cartridge. ❏ Always install an ink cartridge immediately after removing the old cartridge. Other products not manufactured by Epson's warranties, and under...
Place the new ink cartridge into place. Then push the ink cartridge until it clicks into the slot. Replacing Ink Cartridges 55 c Caution: ❏ Do not touch the green IC chip on the side of the cartridge. This can damage the ink cartridge. ❏ Always install an ink cartridge immediately after removing the old cartridge. Other products not manufactured by Epson's warranties, and under...

User Guide
Page 56
7. Replacing Ink Cartridges 56 When you are finished replacing cartridges, close the ink cartridge cover.
7. Replacing Ink Cartridges 56 When you are finished replacing cartridges, close the ink cartridge cover.

User Guide
Page 58
Replace the appropriate ink cartridge first. for example, if the printout is blurry or the color is incorrect or ...using the Head Cleaning utility in the printer driver or from your computer using the buttons. This saves ink. ❏ When ink is low you cannot clean the print head. You can clean the print head from the product by ...that the nozzles are missing, you may not be able to clean the print head. Maintaining Your Product 58 When ink is expended you may be able IncaseofHigh-endINJLewFP:,Duespeempoadretsl. Note: ❏ Clean the print head only if print quality...
Replace the appropriate ink cartridge first. for example, if the printout is blurry or the color is incorrect or ...using the Head Cleaning utility in the printer driver or from your computer using the buttons. This saves ink. ❏ When ink is low you cannot clean the print head. You can clean the print head from the product by ...that the nozzles are missing, you may not be able to clean the print head. Maintaining Your Product 58 When ink is expended you may be able IncaseofHigh-endINJLewFP:,Duespeempoadretsl. Note: ❏ Clean the print head only if print quality...

User Guide
Page 59
...10063; If print quality has not improved after repeating this procedure about four times, turn off and wait for at least one of your ink cartridges may be old or damaged and may need to clean the print head using the Head Cleaning utility. 1. Then run the nozzle check ... six hours. Using the Head Cleaning utility Follow the steps below to be replaced. & See "Replacing an Ink Cartridge" on page 53. ❏ If print quality remains a problem after replacing the ink cartridges, contact your dealer. Click the Utility tab, then click the Head Cleaning button. 5. Make sure that no...
...10063; If print quality has not improved after repeating this procedure about four times, turn off and wait for at least one of your ink cartridges may be old or damaged and may need to clean the print head using the Head Cleaning utility. 1. Then run the nozzle check ... six hours. Using the Head Cleaning utility Follow the steps below to be replaced. & See "Replacing an Ink Cartridge" on page 53. ❏ If print quality remains a problem after replacing the ink cartridges, contact your dealer. Click the Utility tab, then click the Head Cleaning button. 5. Make sure that no...

User Guide
Page 60
... begins flashing. power light is closed . 3. Note: ❏ If print quality has not improved after replacing the ink cartridges, contact your dealer. Doing so may be replaced. & See "Replacing an Ink Cartridge" on page 53. ❏ If print quality remains a problem after repeating this problem by using the Print Head... necessary. ❏ If the print quality still has not improved, at least six hours. Make sure the product is inserted in your ink cartridges may be old or damaged and may need to be able to solve this procedure about four times, turn off and wait for three ...
... begins flashing. power light is closed . 3. Note: ❏ If print quality has not improved after replacing the ink cartridges, contact your dealer. Doing so may be replaced. & See "Replacing an Ink Cartridge" on page 53. ❏ If print quality remains a problem after repeating this problem by using the Print Head... necessary. ❏ If the print quality still has not improved, at least six hours. Make sure the product is inserted in your ink cartridges may be old or damaged and may need to be able to solve this procedure about four times, turn off and wait for three ...

User Guide
Page 64
... the filters back in position. 6. Be sure to close the ink cartridge cover. 5. w Warning: The product is heavy, so have two people lift the product. Remove all discs from the cartridges. ❏ Leave the ink cartridges installed. Transporting Your Product If you need to transport your product... 2. Secure them with tape, then close the filter covers. Secure the ink cartridges with tape. Removing the cartridges can dry out the print head and may leak from the stackers. 4. 5. Open the ink cartridge cover. Close the disc cover and Stacker 4 tray. Tighten the screws to...
... the filters back in position. 6. Be sure to close the ink cartridge cover. 5. w Warning: The product is heavy, so have two people lift the product. Remove all discs from the cartridges. ❏ Leave the ink cartridges installed. Transporting Your Product If you need to transport your product... 2. Secure them with tape, then close the filter covers. Secure the ink cartridges with tape. Removing the cartridges can dry out the print head and may leak from the stackers. 4. 5. Open the ink cartridge cover. Close the disc cover and Stacker 4 tray. Tighten the screws to...

User Guide
Page 67
.../Remedies Stacker 1234 Disc pick up error Turn off , : flashing, : flashing fast Error associated with cover Power Busy Lights Error Ink Conditions/Remedies Stacker 1234 Disc cover or ink cartridge cover open Close covers. Also, check that the discs are loosely arranged in the stacker. Troubleshooting 67 : on, : off the product and remove.... If the same error occurs frequently, contact your dealer. Multiple feed error Remove all discs from the tray. Job is paused since disc cover or ink cartridge cover was opened while processing the job Wait for the job to the product.
.../Remedies Stacker 1234 Disc pick up error Turn off , : flashing, : flashing fast Error associated with cover Power Busy Lights Error Ink Conditions/Remedies Stacker 1234 Disc cover or ink cartridge cover open Close covers. Also, check that the discs are loosely arranged in the stacker. Troubleshooting 67 : on, : off the product and remove.... If the same error occurs frequently, contact your dealer. Multiple feed error Remove all discs from the tray. Job is paused since disc cover or ink cartridge cover was opened while processing the job Wait for the job to the product.

User Guide
Page 70
Incorrectly installed ink cartridge Reinsert the ink cartridge. Ink cartridge not fully inserted All ink lights are all fully inserted. See "Checking the Ink Cartridge Status" on page 82. Troubleshooting 70 See "The ink light is flashing or is nearly expended, check the ink cartridge status. Check ink cartridges and make sure they are on. To determine which cartridge is on after you replace the cartridge" on page 51. Error associated with ink Power Busy Lights Error Ink Conditions/Remedies Stacker 1234 Ink low Obtain a replacement ink cartridge.
Incorrectly installed ink cartridge Reinsert the ink cartridge. Ink cartridge not fully inserted All ink lights are all fully inserted. See "Checking the Ink Cartridge Status" on page 82. Troubleshooting 70 See "The ink light is flashing or is nearly expended, check the ink cartridge status. Check ink cartridges and make sure they are on. To determine which cartridge is on after you replace the cartridge" on page 51. Error associated with ink Power Busy Lights Error Ink Conditions/Remedies Stacker 1234 Ink low Obtain a replacement ink cartridge.

User Guide
Page 74
Click the caption under the illustration that best resembles your printout. Troubleshooting 74 When you access EPSON Total Disc Monitor, the following window appears: EPSON Total Disc Monitor provides the following information: ❏ Job list: You can cancel, pause, and restart unfinished jobs....you can check a list of jobs (up to 1000 for Unfinished Job and 50 for better publishing. ❏ Ink Cartridge Status: This provides a graphic display of the ink cartridge status. ❏ Drive, Printer, Stacker Status: This provides a graphic display of the drives, printer, and stacker status...
Click the caption under the illustration that best resembles your printout. Troubleshooting 74 When you access EPSON Total Disc Monitor, the following window appears: EPSON Total Disc Monitor provides the following information: ❏ Job list: You can cancel, pause, and restart unfinished jobs....you can check a list of jobs (up to 1000 for Unfinished Job and 50 for better publishing. ❏ Ink Cartridge Status: This provides a graphic display of the ink cartridge status. ❏ Drive, Printer, Stacker Status: This provides a graphic display of the drives, printer, and stacker status...

User Guide
Page 75
Good sample Good sample "Horizontal banding" on page 75 "Vertical misalignment" on page 76 "Horizontal banding" on page 75 "Vertical misalignment" on page 76 "Incorrect or missing colors" on page 76 "Blurry or smeared printout" on page 77 Horizontal banding ❏ Make sure the printable side of the disc is face up in the Stacker. ❏ Run the Head Cleaning utility to clear any clogged ink nozzles. & See "Cleaning the Print Head" on page 58. ❏ Use ink cartridges within six months after opening the packages. Troubleshooting 75
Good sample Good sample "Horizontal banding" on page 75 "Vertical misalignment" on page 76 "Horizontal banding" on page 75 "Vertical misalignment" on page 76 "Incorrect or missing colors" on page 76 "Blurry or smeared printout" on page 77 Horizontal banding ❏ Make sure the printable side of the disc is face up in the Stacker. ❏ Run the Head Cleaning utility to clear any clogged ink nozzles. & See "Cleaning the Print Head" on page 58. ❏ Use ink cartridges within six months after opening the packages. Troubleshooting 75


