
User Manual
Page 32
.... 4. Note the firmware version displayed. Click Download. Press the d button until Firmware Version is turned on, connected to your printer is displayed, then press OK. Updating the firmware Before updating your printer's firmware, make sure your computer or network, and that the LCD screen shows the READY status. 1. Checking the current firmware version 1. Press the d button again until Printer Status is highlighted, then press OK. 3. Visit the support page for a new version of firmware on the...
.... 4. Note the firmware version displayed. Click Download. Press the d button until Firmware Version is turned on, connected to your printer is displayed, then press OK. Updating the firmware Before updating your printer's firmware, make sure your computer or network, and that the LCD screen shows the READY status. 1. Checking the current firmware version 1. Press the d button again until Printer Status is highlighted, then press OK. 3. Visit the support page for a new version of firmware on the...
User Manual
Page 4
...Color Controls - Windows 97 Multi-Page Printing Options - Windows 100 Checking Print Status - Windows 102 Saving, Sharing, and Customizing the Printer Settings 102 Saving and Sharing Print Settings - Windows 96 Reduce/Enlarge Options - Windows 107 Changing the Language of the Printer Software Screens 108 Changing Automatic Update Options 110 Printing with Windows ...78 Selecting Basic Print Settings - Windows 97 Selecting Additional Settings - Windows 78 Paper Configuration Options - Windows 87 Using Layout Manager - OS X 118 4 Attaching the Roll Core to the Auto...
...Color Controls - Windows 97 Multi-Page Printing Options - Windows 100 Checking Print Status - Windows 102 Saving, Sharing, and Customizing the Printer Settings 102 Saving and Sharing Print Settings - Windows 96 Reduce/Enlarge Options - Windows 107 Changing the Language of the Printer Software Screens 108 Changing Automatic Update Options 110 Printing with Windows ...78 Selecting Basic Print Settings - Windows 97 Selecting Additional Settings - Windows 78 Paper Configuration Options - Windows 87 Using Layout Manager - OS X 118 4 Attaching the Roll Core to the Auto...
User Manual
Page 5
...128 Using the Control Panel Menus...130 Accessing the Printer's Menus ...130 Maintenance Menu Settings...130 Paper Menu Settings...132 Setup Menu Settings ...136 Replacing Ink Cartridges ...145 Checking Ink and Maintenance Box Status With Windows 145 Checking Cartridge Status with OS X 146 Purchase Epson Ink Cartridges and Maintenance Boxes 147 Ink Cartridge and Maintenance Box Part Numbers 147 Removing and Installing Ink Cartridges 148 Replacing Maintenance Boxes...152 Adjusting Print Quality...154 Print Head Maintenance...154 Print Head Nozzle Check...154 Checking the Nozzles Using the...
...128 Using the Control Panel Menus...130 Accessing the Printer's Menus ...130 Maintenance Menu Settings...130 Paper Menu Settings...132 Setup Menu Settings ...136 Replacing Ink Cartridges ...145 Checking Ink and Maintenance Box Status With Windows 145 Checking Cartridge Status with OS X 146 Purchase Epson Ink Cartridges and Maintenance Boxes 147 Ink Cartridge and Maintenance Box Part Numbers 147 Removing and Installing Ink Cartridges 148 Replacing Maintenance Boxes...152 Adjusting Print Quality...154 Print Head Maintenance...154 Print Head Nozzle Check...154 Checking the Nozzles Using the...

User Manual
Page 24
... Available Epson Papers Related tasks Removing Roll Paper 24 Note: Store roll paper on the LCD screen: • If the paper settings are installed). To avoid indenting or creasing the paper, remove it from accumulating inside the printer, always keep the roll paper cover closed unless you are loading or unloading media. 16. Never store roll paper on the prints. 14. Close the roll paper cover. Press the OK button. Note...
... Available Epson Papers Related tasks Removing Roll Paper 24 Note: Store roll paper on the LCD screen: • If the paper settings are installed). To avoid indenting or creasing the paper, remove it from accumulating inside the printer, always keep the roll paper cover closed unless you are loading or unloading media. 16. Never store roll paper on the prints. 14. Close the roll paper cover. Press the OK button. Note...

User Manual
Page 27
Related references Paper Menu Settings Setup Menu Settings Removing Roll Paper When you finish printing on roll paper, you are not using the optional Auto Take-Up Reel, the paper rewinds automatically. 27 If Roll Paper Remaining is printed. Select Remove Paper and press the OK button. If you should remove it from the printer to On, the barcode and paper information is set to avoid indenting or creasing the paper. 1. Open the roll paper cover. 2. Press the load/remove paper button. 3.
Related references Paper Menu Settings Setup Menu Settings Removing Roll Paper When you finish printing on roll paper, you are not using the optional Auto Take-Up Reel, the paper rewinds automatically. 27 If Roll Paper Remaining is printed. Select Remove Paper and press the OK button. If you should remove it from the printer to On, the barcode and paper information is set to avoid indenting or creasing the paper. 1. Open the roll paper cover. 2. Press the load/remove paper button. 3.
User Manual
Page 130
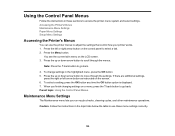
... control panel to go back. 4. To change settings in the highlighted menu, press the OK button. 5. When you run nozzle checks, cleaning cycles, and other maintenance operations. Caution: Follow the instructions in the topic links below the table to adjust the settings that control how your printer works. 1. Press the up or down arrow button to move through the menus. Accessing the Printer's Menus Maintenance Menu Settings Paper Menu Settings Setup Menu Settings Accessing the Printer's Menus You can use the printer...
... control panel to go back. 4. To change settings in the highlighted menu, press the OK button. 5. When you run nozzle checks, cleaning cycles, and other maintenance operations. Caution: Follow the instructions in the topic links below the table to adjust the settings that control how your printer works. 1. Press the up or down arrow button to move through the menus. Accessing the Printer's Menus Maintenance Menu Settings Paper Menu Settings Setup Menu Settings Accessing the Printer's Menus You can use the printer...

User Manual
Page 147
...) or epson.ca (Canadian sales). Ink Cartridge and Maintenance Box Part Numbers Parent topic: Replacing Ink Cartridges Ink Cartridge and Maintenance Box Part Numbers Use these part numbers when you order or purchase a new maintenance box or ink cartridges. Other brands of opening the package. For print quality, a variable amount of ink remains in the cartridge after the "replace cartridge" indicator comes on images printed, print settings, paper type, frequency of use up a cartridge within 6 months of ink cartridges and ink supplies are designed for printer setup and not...
...) or epson.ca (Canadian sales). Ink Cartridge and Maintenance Box Part Numbers Parent topic: Replacing Ink Cartridges Ink Cartridge and Maintenance Box Part Numbers Use these part numbers when you order or purchase a new maintenance box or ink cartridges. Other brands of opening the package. For print quality, a variable amount of ink remains in the cartridge after the "replace cartridge" indicator comes on images printed, print settings, paper type, frequency of use up a cartridge within 6 months of ink cartridges and ink supplies are designed for printer setup and not...

User Manual
Page 181
... may need to replace the cutter. 1. Then turn the printer off and back on the LCD screen, select Cancel and clean the print head manually. Select the Maintenance tab 3. Press the OK button. Press the Menu button. 4. Close the front cover. 19. 18. When the print head cleaning is complete, turn the printer off . Parent topic: Maintenance Replacing the Cutter If you notice that your paper does cut cleanly, you see an error message...
... may need to replace the cutter. 1. Then turn the printer off and back on the LCD screen, select Cancel and clean the print head manually. Select the Maintenance tab 3. Press the OK button. Press the Menu button. 4. Close the front cover. 19. 18. When the print head cleaning is complete, turn the printer off . Parent topic: Maintenance Replacing the Cutter If you notice that your paper does cut cleanly, you see an error message...

User Manual
Page 187
.... replace ink cartridge. The print head nozzles are still clogged even after running automatic head cleaning. Remove the Ink cartridge cannot be • Check that is approved for use in the ink cartridge. If the message persists, insert a new ink cartridge. Insert again or cartridge, leave it for four hours or more at room temperature, and reinstall it. Product Status Messages Solving Printer Problems Solving Printing Problems Solving Paper Problems Solving Print Quality Problems Where to problems you have a problem. Cleaning Error Clogged...
.... replace ink cartridge. The print head nozzles are still clogged even after running automatic head cleaning. Remove the Ink cartridge cannot be • Check that is approved for use in the ink cartridge. If the message persists, insert a new ink cartridge. Insert again or cartridge, leave it for four hours or more at room temperature, and reinstall it. Product Status Messages Solving Printer Problems Solving Printing Problems Solving Paper Problems Solving Print Quality Problems Where to problems you have a problem. Cleaning Error Clogged...
User Manual
Page 189
LCD screen message Paper Sensor Error Loaded paper or print out has a problem. F/W Install Error Firmware update failed. Command Error Check driver settings. Turn off the printer, wait for support. Reel Unit Error Check Auto Take-up Reel Unit cable and restart printer. If this error appears at any other time, make sure that the Platen Gap setting on the LCD screen is set to direct, bright light (such as direct sunlight) while performing an automatic print head alignment. • Check that the printer supports the loaded media. If this error appears while...
LCD screen message Paper Sensor Error Loaded paper or print out has a problem. F/W Install Error Firmware update failed. Command Error Check driver settings. Turn off the printer, wait for support. Reel Unit Error Check Auto Take-up Reel Unit cable and restart printer. If this error appears at any other time, make sure that the Platen Gap setting on the LCD screen is set to direct, bright light (such as direct sunlight) while performing an automatic print head alignment. • Check that the printer supports the loaded media. If this error appears while...
User Manual
Page 192
... part. (maintenance request code) Call For Service A call for support and provide them with the displayed service code. Cleaning is displayed on . When a call for service is set to solve the problem. Turn the printer on all nozzles. Refer to the manual to find out how to Off. Maintenance Request A part used in the Administrator menu. Parent topic: Solving Problems Related concepts Print Head Nozzle Check Print Head Cleaning Related references Print Quality Options - LCD screen message Condition/solution Paper Feed Sensor Error...
... part. (maintenance request code) Call For Service A call for support and provide them with the displayed service code. Cleaning is displayed on . When a call for service is set to solve the problem. Turn the printer on all nozzles. Refer to the manual to find out how to Off. Maintenance Request A part used in the Administrator menu. Parent topic: Solving Problems Related concepts Print Head Nozzle Check Print Head Cleaning Related references Print Quality Options - LCD screen message Condition/solution Paper Feed Sensor Error...

User Manual
Page 194
... your network. If it still does not print, connect your printer directly to your computer instead of the interface cable to see if the LED for your network does not assign IP addresses using TCP/IP, make sure it is recognized correctly on or flashing. If you have not selected Save only from the Hard Disk Unit menu in the printer driver. • Make sure the USB cable length...
... your network. If it still does not print, connect your printer directly to your computer instead of the interface cable to see if the LED for your network does not assign IP addresses using TCP/IP, make sure it is recognized correctly on or flashing. If you have not selected Save only from the Hard Disk Unit menu in the printer driver. • Make sure the USB cable length...
User Manual
Page 201
... solutions: • Clean the print head and print the check pattern again. Replace expired cartridges with new ones. 201 Turn the printer on the package (within six months of the print head nozzles are using genuine Epson ink cartridges. For best results, use a stronger print head cleaning level. • If the printer has not been used for a long time, nozzles may be dried and clogged. If cleaning the print head several times does not solve the problem, use ink cartridges before the...
... solutions: • Clean the print head and print the check pattern again. Replace expired cartridges with new ones. 201 Turn the printer on the package (within six months of the print head nozzles are using genuine Epson ink cartridges. For best results, use a stronger print head cleaning level. • If the printer has not been used for a long time, nozzles may be dried and clogged. If cleaning the print head several times does not solve the problem, use ink cartridges before the...

User Manual
Page 202
...are low on ink. • Enable color management in the software application or in the printer driver. • If you selected in the printer driver. • Check the paper feed sensor. Windows Output Resolution Settings - OS X Advanced Color Settings - Windows Color Management Options - Replace any cartridges that you are printing on the LCD screen. Because the leading edge is in the printer. Windows 202 Parent topic: Solving Print Quality Problems Related concepts Print Head Nozzle Check Print Head Cleaning Print Head Alignment Purchase Epson Ink Cartridges and Maintenance...
...are low on ink. • Enable color management in the software application or in the printer driver. • If you selected in the printer driver. • Check the paper feed sensor. Windows Output Resolution Settings - OS X Advanced Color Settings - Windows Color Management Options - Replace any cartridges that you are printing on the LCD screen. Because the leading edge is in the printer. Windows 202 Parent topic: Solving Print Quality Problems Related concepts Print Head Nozzle Check Print Head Cleaning Print Head Alignment Purchase Epson Ink Cartridges and Maintenance...

User Manual
Page 204
... loaded in the printer driver. 204 Parent topic: Solving Print Quality Problems Related references Paper Menu Settings Setup Menu Settings Related tasks Creating Paper Configurations Cleaning Around the Print Head Margins Appear in Borderless Prints If borderless prints still have stored the paper according to the manufacturer's specifications. • Check that the paper you are using supports borderless printing. • If you are using roll paper, change the Adjust Cut Position setting. Parent topic: Solving Print Quality Problems Related references Maintenance Menu Settings Paper...
... loaded in the printer driver. 204 Parent topic: Solving Print Quality Problems Related references Paper Menu Settings Setup Menu Settings Related tasks Creating Paper Configurations Cleaning Around the Print Head Margins Appear in Borderless Prints If borderless prints still have stored the paper according to the manufacturer's specifications. • Check that the paper you are using supports borderless printing. • If you are using roll paper, change the Adjust Cut Position setting. Parent topic: Solving Print Quality Problems Related references Maintenance Menu Settings Paper...
User Manual
Page 205
...) 377-6611, 6 AM to common problems. You can purchase genuine Epson ink, paper, and accessories from an Epson authorized reseller. Note: For help using any other software on the installation, configuration, and operation of professional printing products through Friday. OS X Selecting Paper Configuration Settings - Visit Epson's U.S. Purchase Supplies and Accessories You can download drivers, firmware, and documentation, get FAQs and troubleshooting advice, or e-mail Epson with the toll-free number, call (562) 276-1305...
...) 377-6611, 6 AM to common problems. You can purchase genuine Epson ink, paper, and accessories from an Epson authorized reseller. Note: For help using any other software on the installation, configuration, and operation of professional printing products through Friday. OS X Selecting Paper Configuration Settings - Visit Epson's U.S. Purchase Supplies and Accessories You can download drivers, firmware, and documentation, get FAQs and troubleshooting advice, or e-mail Epson with the toll-free number, call (562) 276-1305...

User Manual
Page 216
... beyond its side, or turn off the product using the product for sufficient ventilation. Adjust only those controls that are covered by hand; It will not be using the power button, and wait until the power light stops flashing before unplugging the product or cutting off power to the electrical outlet. • If you will not operate properly if it upside down; otherwise ink may cause...
... beyond its side, or turn off the product using the product for sufficient ventilation. Adjust only those controls that are covered by hand; It will not be using the power button, and wait until the power light stops flashing before unplugging the product or cutting off power to the electrical outlet. • If you will not operate properly if it upside down; otherwise ink may cause...

User Manual
Page 224
... COVERED CODE WILL MEET YOUR REQUIREMENTS, THAT THE OPERATION OF THE COVERED CODE WILL BE UNINTERRUPTED OR ERROR-FREE, OR THAT DEFECTS IN THE COVERED CODE WILL BE CORRECTED. Modifications and/or Larger Works may require additional patent licenses from time to one other patent rights, express or implied, are offered by You alone, and You hereby agree to use of the Covered Code...
... COVERED CODE WILL MEET YOUR REQUIREMENTS, THAT THE OPERATION OF THE COVERED CODE WILL BE UNINTERRUPTED OR ERROR-FREE, OR THAT DEFECTS IN THE COVERED CODE WILL BE CORRECTED. Modifications and/or Larger Works may require additional patent licenses from time to one other patent rights, express or implied, are offered by You alone, and You hereby agree to use of the Covered Code...

Quick Reference
Page 8
... message, from accumulating inside the printer, always keep the roll paper cover closed unless you should cover the entire printer (even when printing). When the printer is turned on or roll paper is loaded in the printer, the barcode is scanned, the media type is automatically set up to 44 inches (112 cm) for the SureColor P10000, or 64 inches (163 cm) for print head maintenance. Press the Menu button. 3. Using roll paper | 7 Using roll paper...
... message, from accumulating inside the printer, always keep the roll paper cover closed unless you should cover the entire printer (even when printing). When the printer is turned on or roll paper is loaded in the printer, the barcode is scanned, the media type is automatically set up to 44 inches (112 cm) for the SureColor P10000, or 64 inches (163 cm) for print head maintenance. Press the Menu button. 3. Using roll paper | 7 Using roll paper...

Quick Reference
Page 13
... print on cut sheets; Make sure the printer is turned on its thickness: • For media 31 mil (0.8 mm) or thinner, see the section below. • For media thicker than 31 mil (0.8 mm), see page 14. Press the M button, press the d or u button to 44 inches (112 cm). How you load cut sheets Make sure you load the paper depends on and the roll paper cover is removed...
... print on cut sheets; Make sure the printer is turned on its thickness: • For media 31 mil (0.8 mm) or thinner, see the section below. • For media thicker than 31 mil (0.8 mm), see page 14. Press the M button, press the d or u button to 44 inches (112 cm). How you load cut sheets Make sure you load the paper depends on and the roll paper cover is removed...


