
Technical Brief (Impact Printers)
Page 5
... : 10s Input Buffer : ON Auto Tear off : OFF Auto Line Feed : OFF Control Code : ESC/P 0 slash : OFF Buzzer : ON Roll Paper : OFF F1 : Execute F10: Previous F2 : Quit CR : Select item F3 : Default F4 : Change Port Printer Status Monitor Utility The Printer Status... utility that allows you to easily change the printer's default settings. Start UP Utility Ver. 1.22 Copyright (C) SEIKO EPSON CORP. 1992 Printer: FX-2180 Mode: ESC/P Port: LPT1 Font : Roman Pitch : 10CPI Print Quality : LQ Character Table : PC 437 Continuous Rear : 11 inch Continuous Rear : 8.5mm ...
... : 10s Input Buffer : ON Auto Tear off : OFF Auto Line Feed : OFF Control Code : ESC/P 0 slash : OFF Buzzer : ON Roll Paper : OFF F1 : Execute F10: Previous F2 : Quit CR : Select item F3 : Default F4 : Change Port Printer Status Monitor Utility The Printer Status... utility that allows you to easily change the printer's default settings. Start UP Utility Ver. 1.22 Copyright (C) SEIKO EPSON CORP. 1992 Printer: FX-2180 Mode: ESC/P Port: LPT1 Font : Roman Pitch : 10CPI Print Quality : LQ Character Table : PC 437 Continuous Rear : 11 inch Continuous Rear : 8.5mm ...

Product Information Guide
Page 1
MATRIX PRINTER 1 Printer Specifications 1 Printing Print method: Print speed: X-pin impact dot matrix Quality Draft I 6 10 7 10 8 10 Input buffer: Optional fonts: Characters: Paper Paper width: Paper Length: 8 KB/l KB / (DIP switch selectable) LQ Epson Courier LQ Epson Prestige LQ Epson Script LQ Epson OCR-B LQ Epson OCR-A LQ Epson Orator LQ Epson Orator-S 96 standard ASCII character set (including italic characters) 15 international character sets Epson Extended Graphics character set (100...
MATRIX PRINTER 1 Printer Specifications 1 Printing Print method: Print speed: X-pin impact dot matrix Quality Draft I 6 10 7 10 8 10 Input buffer: Optional fonts: Characters: Paper Paper width: Paper Length: 8 KB/l KB / (DIP switch selectable) LQ Epson Courier LQ Epson Prestige LQ Epson Script LQ Epson OCR-B LQ Epson OCR-A LQ Epson Orator LQ Epson Orator-S 96 standard ASCII character set (including italic characters) 15 international character sets Epson Extended Graphics character set (100...

Product Information Guide
Page 2
... at up to 3 sheets including the original. Friction Push tractor Cut sheet feeder (optional) Pull tractor (optional) Ribbon: Life expectancy of Epson interfaces that are compatible with its long side horizontal. Note: Label printing is only available at up to 55 HZ Storage: Up to 0....10 Mohms between AC power line and chassis Can withstand 1.25 kV rms applied for the parallel interface. Pin Printers Total thickness must not exceed 0.01 inches (0.25 mm). MATRIX PRINTER 0.51 inches (13 mm) or more (both sides) when the 4 to 9.5 inch (101 mm to 15 lb per sheet. LQ - 510...
... at up to 3 sheets including the original. Friction Push tractor Cut sheet feeder (optional) Pull tractor (optional) Ribbon: Life expectancy of Epson interfaces that are compatible with its long side horizontal. Note: Label printing is only available at up to 55 HZ Storage: Up to 0....10 Mohms between AC power line and chassis Can withstand 1.25 kV rms applied for the parallel interface. Pin Printers Total thickness must not exceed 0.01 inches (0.25 mm). MATRIX PRINTER 0.51 inches (13 mm) or more (both sides) when the 4 to 9.5 inch (101 mm to 15 lb per sheet. LQ - 510...

Product Information Guide
Page 3
...printing. READY (green) On when the printer IS ready to resume printing. CONDENSED This button is being enabled or disabled, the on line/off line status, and the receipt of their I I I II ]I N E ..-+ FEED indicator lights show the selected font. LQ-510-3 See Selecting Typestyles rlater in the condensed...the eight character sets shown above, the seven international character sets that the printer can be selected with a software command: ESC R. For more information, see the command summary 8 Japan 9 Norway 10 Denmark II 11 Spain II 12 Latin America 13 Korea 64 Legal The...
...printing. READY (green) On when the printer IS ready to resume printing. CONDENSED This button is being enabled or disabled, the on line/off line status, and the receipt of their I I I II ]I N E ..-+ FEED indicator lights show the selected font. LQ-510-3 See Selecting Typestyles rlater in the condensed...the eight character sets shown above, the seven international character sets that the printer can be selected with a software command: ESC R. For more information, see the command summary 8 Japan 9 Norway 10 Denmark II 11 Spain II 12 Latin America 13 Korea 64 Legal The...

Product Information Guide
Page 4
... button or the FORM FEED button while turning on the data dump mode. Description Page 7 07 Beeper 9-12 8 08 Backspace 9-20 9 09 Tab Horizontally 9-21 10 0A Line Feed 9-14 11 OB Tab Vertically 9-17 12 0C Form Feed 9-13 13 0D Carriage Return 9-12 14 0E Select Double-wide Mode... Feed. 9-16 75 4B Select Single-density Graphics Mode 9-38 76 4C Select Double-density Graphics Mode 9-38 77 4 D Select 12 CPI 9-24 LQ-510-4 5/1/89 24 - When the printer is on line, the ON LINE light is already loaded. Micro-adjustment: By pressing the FORM FEED button immediately after loading paper or...
... button or the FORM FEED button while turning on the data dump mode. Description Page 7 07 Beeper 9-12 8 08 Backspace 9-20 9 09 Tab Horizontally 9-21 10 0A Line Feed 9-14 11 OB Tab Vertically 9-17 12 0C Form Feed 9-13 13 0D Carriage Return 9-12 14 0E Select Double-wide Mode... Feed. 9-16 75 4B Select Single-density Graphics Mode 9-38 76 4C Select Double-density Graphics Mode 9-38 77 4 D Select 12 CPI 9-24 LQ-510-4 5/1/89 24 - When the printer is on line, the ON LINE light is already loaded. Micro-adjustment: By pressing the FORM FEED button immediately after loading paper or...

Product Information Guide
Page 5
...54 Cancel Superscript/Subscript Mode 9-30 85 55 Turn Unidirectional Mode o n / o f f 9-10 87 57 Turn Double-wide Mode On/Off 9-27 89 59 Select High-speed Double-density Graphics...high Mode on/off 9-28 120 78 Select Letter Quality or Draft . . . 9-22 Italic Character Table CODE 0 1 2 3 4 5 6 7 8 9 A B C D E F LQ - 510 DOT - C ,~L\l:iffJ)~=* D -=M]~liV;'-)a~ E . >N -n - MATRIX PRINTER Epson Extended Graphics Character Table 0 oe P ' pCEi L*az ! 1AQaqtizi ATat 2 " 2 B R b r C f 6 TTrL 3 k3CScsi6iltLn< 4 $4DTdtC6Rj--L[ 5 BZSEUeu66AftyaJ 6 CGFVfviialtrp+ 7 ' ...
...54 Cancel Superscript/Subscript Mode 9-30 85 55 Turn Unidirectional Mode o n / o f f 9-10 87 57 Turn Double-wide Mode On/Off 9-27 89 59 Select High-speed Double-density Graphics...high Mode on/off 9-28 120 78 Select Letter Quality or Draft . . . 9-22 Italic Character Table CODE 0 1 2 3 4 5 6 7 8 9 A B C D E F LQ - 510 DOT - C ,~L\l:iffJ)~=* D -=M]~liV;'-)a~ E . >N -n - MATRIX PRINTER Epson Extended Graphics Character Table 0 oe P ' pCEi L*az ! 1AQaqtizi ATat 2 " 2 B R b r C f 6 TTrL 3 k3CScsi6iltLn< 4 $4DTdtC6Rj--L[ 5 BZSEUeu66AftyaJ 6 CGFVfviialtrp+ 7 ' ...
Product Support Bulletin(s)
Page 3
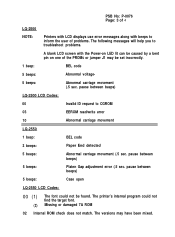
... jumper J1 may have been mixed. pause between beeps) 5 beeps: Case open LQ-2550 LCD Codes: 00 (1) (2) The font could not find the target font. PSB No: P-0076 Page: 3 of 4 LQ-2500 NOTE: Printers with LCD displays use error messages along with beeps to inform the user of problems.... The following messages will help you to CGROM 03 EEROM read/write error 10 Abnormal carriage movement LQ-2550 1 beep: BEL code 3 beeps: Paper End ...
... jumper J1 may have been mixed. pause between beeps) 5 beeps: Case open LQ-2550 LCD Codes: 00 (1) (2) The font could not find the target font. PSB No: P-0076 Page: 3 of 4 LQ-2500 NOTE: Printers with LCD displays use error messages along with beeps to inform the user of problems.... The following messages will help you to CGROM 03 EEROM read/write error 10 Abnormal carriage movement LQ-2550 1 beep: BEL code 3 beeps: Paper End ...
Product Support Bulletin(s)
Page 4
...0076 Page: 4 of failure are: a. Both of the LOAD/EJECT switch, this error condition will occur. Errors 0,2, 3, 10, and 20 may cause errors 10 or 20. CR home condition not detected at power up b. An undefined op-code was detected. Both features were added to ...printer back on TIB LQ2550-005. Incorrect jumper settings on the ROMA board may require a repair, adjustment or replacement. Since the initial reading upon loading a single sheet paper, the paper has skewed. Physical obstruction such as a jammed ribbon 11 Skewed paper detect error. Four possible areas of 4 LQ...
...0076 Page: 4 of failure are: a. Both of the LOAD/EJECT switch, this error condition will occur. Errors 0,2, 3, 10, and 20 may cause errors 10 or 20. CR home condition not detected at power up b. An undefined op-code was detected. Both features were added to ...printer back on TIB LQ2550-005. Incorrect jumper settings on the ROMA board may require a repair, adjustment or replacement. Since the initial reading upon loading a single sheet paper, the paper has skewed. Physical obstruction such as a jammed ribbon 11 Skewed paper detect error. Four possible areas of 4 LQ...

User Manual
Page 4
...This Manual 4 Application Notes 5 Where to Get Help 6 Chapter 1 Setting Up the Printer 1-1 Unpacking the Printer 1-2 Choosing a Place for the Printer 1-4 Assembling the Printer 1-6 Testing the Printer 1-13 Connecting the Printer to Your Computer 1-22 Setting Up Your Application Software 1-25 Chapter 2 Paper Handling ... and Single Sheets 2-13 Printing on Special Paper 2-20 Chapter 3 Using the Printer 3-1 Operating the Control Panel 3-2 Setting the DIP Switches 3-6 Page Length 3-10 Skip Over Perforation 3-11 Adjusting the Loading Position 3-12 Using Short Tear-Off ...
...This Manual 4 Application Notes 5 Where to Get Help 6 Chapter 1 Setting Up the Printer 1-1 Unpacking the Printer 1-2 Choosing a Place for the Printer 1-4 Assembling the Printer 1-6 Testing the Printer 1-13 Connecting the Printer to Your Computer 1-22 Setting Up Your Application Software 1-25 Chapter 2 Paper Handling ... and Single Sheets 2-13 Printing on Special Paper 2-20 Chapter 3 Using the Printer 3-1 Operating the Control Panel 3-2 Setting the DIP Switches 3-6 Page Length 3-10 Skip Over Perforation 3-11 Adjusting the Loading Position 3-12 Using Short Tear-Off ...

User Manual
Page 5
... 4-1 Enhancing Your Printing 4-2 Graphics 4-9 User-defined Characters 4-20 Chapter 5 Using the Printer Options 5-1 The Cut Sheet Feeder 5-2 The Pull Tractor 5-17 The Multi-Font Module 5-28 The Interface ...34 Chapter 6 Maintenance 6-1 Cleaning the Printer 6-2 Replacing the Ribbon 6-4 Transporting the Printer 6-10 Chapter 7 Troubleshooting 7-1 Problems and Solutions 7-2 Power Supply 7-4 P r i n t i n g 7-5 Paper Handling 7-14 Options 7-24 Chapter 8 Technical Specifications 8-1 Printer Specifications 8-2 Interface Specifications 8-9 Option Specifications ...
... 4-1 Enhancing Your Printing 4-2 Graphics 4-9 User-defined Characters 4-20 Chapter 5 Using the Printer Options 5-1 The Cut Sheet Feeder 5-2 The Pull Tractor 5-17 The Multi-Font Module 5-28 The Interface ...34 Chapter 6 Maintenance 6-1 Cleaning the Printer 6-2 Replacing the Ribbon 6-4 Transporting the Printer 6-10 Chapter 7 Troubleshooting 7-1 Problems and Solutions 7-2 Power Supply 7-4 P r i n t i n g 7-5 Paper Handling 7-14 Options 7-24 Chapter 8 Technical Specifications 8-1 Printer Specifications 8-2 Interface Specifications 8-9 Option Specifications ...

User Manual
Page 14
Chapter 1 Setting Up the Printer Unpacking the Printer 1-2 Checking the Parts 1-2 Choosing a Place for the Printer 1-4 Assembling the Printer 1-6 Installing the Platen Knob 1-6 Installing the Ribbon Cartridge 1-7 Attaching the Paper Guide 1-10 Testing the Printer 1-13 Plugging in the Printer 1-13 Running the Self Test 1-14 Checking the Operation 1-21 Connecting the Printer to Your Computer 1-22 The Parallel Interface 1-22 Setting Up Your Application Software 1-25 Choosing From a Menu 1-25 Setting Up the Printer 1-1
Chapter 1 Setting Up the Printer Unpacking the Printer 1-2 Checking the Parts 1-2 Choosing a Place for the Printer 1-4 Assembling the Printer 1-6 Installing the Platen Knob 1-6 Installing the Ribbon Cartridge 1-7 Attaching the Paper Guide 1-10 Testing the Printer 1-13 Plugging in the Printer 1-13 Running the Self Test 1-14 Checking the Operation 1-21 Connecting the Printer to Your Computer 1-22 The Parallel Interface 1-22 Setting Up Your Application Software 1-25 Choosing From a Menu 1-25 Setting Up the Printer 1-1

User Manual
Page 23
Assembling Printer 6. Slide the print head from side to side to feed the paper smoothly and efficiently into the printer. Also check that the ribbon is not twisted or creased. 7. Attaching the Paper Guide When you use single sheets, the paper guide helps to make sure it moves smoothly. Attach the paper guide using the following procedure. 1-10 Setting Up the Printer Close the paper tension unit cover.
Assembling Printer 6. Slide the print head from side to side to feed the paper smoothly and efficiently into the printer. Also check that the ribbon is not twisted or creased. 7. Attaching the Paper Guide When you use single sheets, the paper guide helps to make sure it moves smoothly. Attach the paper guide using the following procedure. 1-10 Setting Up the Printer Close the paper tension unit cover.

User Manual
Page 41
This option automatically inserts a new sheet and can accommodate single sheets with a width of your printing on single sheets, you may find it more details, see Chapter 5. Loading Paper 1. For more convenient to install the optional cut sheet feeder. Using Single Sheets Your printer can hold up to 150 pages. If you do most of 7.2 inches or 182 mm to the single-sheet position. 2-2 Paper Handling Push the paper release lever back to 10 inches or 254 mm.
This option automatically inserts a new sheet and can accommodate single sheets with a width of your printing on single sheets, you may find it more details, see Chapter 5. Loading Paper 1. For more convenient to install the optional cut sheet feeder. Using Single Sheets Your printer can hold up to 150 pages. If you do most of 7.2 inches or 182 mm to the single-sheet position. 2-2 Paper Handling Push the paper release lever back to 10 inches or 254 mm.

User Manual
Page 45
...supply with the paper loaded in the tractor so that the paper feeds smoothly into your LQ-510 printer is the position of positioning your paper supply. Three ways of your printer and continuous paper supply are shown below. Using Continuous Paper The push tractor built into... the printer. 2-6 Paper Handling Positioning Your Continuous Paper Supply An important consideration for achieving smooth and trouble-free paper feeding is remarkably easy to 10 inches or 254...
...supply with the paper loaded in the tractor so that the paper feeds smoothly into your LQ-510 printer is the position of positioning your paper supply. Three ways of your printer and continuous paper supply are shown below. Using Continuous Paper The push tractor built into... the printer. 2-6 Paper Handling Positioning Your Continuous Paper Supply An important consideration for achieving smooth and trouble-free paper feeding is remarkably easy to 10 inches or 254...

User Manual
Page 67
Chapter 3 Using the Printer Operating the Control Panel 3-2 Setting the DIP Switches 3-6 Changing a DIP Switch Setting 3-6 The DIP Switch Tables 3-7 The DIP Switch Functions 3-9 Page Length 3-10 Skip Over Perforation 3-11 Adjusting the Loading Position 3-12 The Loading Position 3-12 Using Micro-adjustment 3-13 Using Short Tear-off 3-14 Adjusting the Tear-off Position 3-15 Selecting Typestyles 3-17 Character Fonts 3-18 Condensed Mode 3-19 Selecting an International Character Set 3-20 Choosing a Character Table 3-22 Using the Data Dump Mode 3-24 Using the Printer 3-1
Chapter 3 Using the Printer Operating the Control Panel 3-2 Setting the DIP Switches 3-6 Changing a DIP Switch Setting 3-6 The DIP Switch Tables 3-7 The DIP Switch Functions 3-9 Page Length 3-10 Skip Over Perforation 3-11 Adjusting the Loading Position 3-12 The Loading Position 3-12 Using Micro-adjustment 3-13 Using Short Tear-off 3-14 Adjusting the Tear-off Position 3-15 Selecting Typestyles 3-17 Character Fonts 3-18 Condensed Mode 3-19 Selecting an International Character Set 3-20 Choosing a Character Table 3-22 Using the Data Dump Mode 3-24 Using the Printer 3-1

User Manual
Page 73
... capacity 2-6 Graphics print direction 2-7 Character spacing 2-8 ON OFF 12 inches 11 inches On Off On Off On Off 8KB 1 KB* Bidirect. Unidirect. Page 3-10 3-9 3-11 3-9 3-9 3-9 3-8 Using the Printer 3-7 The DIP Switch Tables The tables below show the default or factory settings. The shaded areas show the settings for use of user-defined...
... capacity 2-6 Graphics print direction 2-7 Character spacing 2-8 ON OFF 12 inches 11 inches On Off On Off On Off 8KB 1 KB* Bidirect. Unidirect. Page 3-10 3-9 3-11 3-9 3-9 3-9 3-8 Using the Printer 3-7 The DIP Switch Tables The tables below show the default or factory settings. The shaded areas show the settings for use of user-defined...

User Manual
Page 74
Setting the DIP Switches Table 1 International character sets Country USA France Germany UK Denmark Sweden Italy Spain SW 1-1 SW 1-2 SW 1-3 ON ON ON ON ON OFF ON OFF ON ON OFF OFF OFF ON ON OFF ON OFF OFF OFF ON OFF OFF OFF Table 2 Font selection Font Roman Sans Serif Slot Draft SW 1-4 SW 1-5 OFF OFF ON OFF OFF ON ON ON Table 3 Character spacing Spacing 10 cpi 12 cpi 15 cpi Proportional SW 2-7 SW 2-8 OFF OFF ON OFF OFF ON ON ON cpi: characters per inch. 3-8 Using the Printer
Setting the DIP Switches Table 1 International character sets Country USA France Germany UK Denmark Sweden Italy Spain SW 1-1 SW 1-2 SW 1-3 ON ON ON ON ON OFF ON OFF ON ON OFF OFF OFF ON ON OFF ON OFF OFF OFF ON OFF OFF OFF Table 2 Font selection Font Roman Sans Serif Slot Draft SW 1-4 SW 1-5 OFF OFF ON OFF OFF ON ON ON Table 3 Character spacing Spacing 10 cpi 12 cpi 15 cpi Proportional SW 2-7 SW 2-8 OFF OFF ON OFF OFF ON ON ON cpi: characters per inch. 3-8 Using the Printer

User Manual
Page 76
See the Command Summary in Chapter 9 for details. 3-10 Using the Printer Be sure to set using . Other page lengths can be set the page length to 11 inches, or 27.94 cm. When it is on, the page length is set to match the paper you are using the commands ESC C and ESC C 0. Page Length When the setting of DIP switch 2-1 is off, the page length is 12 inches, or 30.48 cm.
See the Command Summary in Chapter 9 for details. 3-10 Using the Printer Be sure to set using . Other page lengths can be set the page length to 11 inches, or 27.94 cm. When it is on, the page length is set to match the paper you are using the commands ESC C and ESC C 0. Page Length When the setting of DIP switch 2-1 is off, the page length is 12 inches, or 30.48 cm.

User Manual
Page 85
... printing. Selecting Typestyles Condensed Mode You can combine the condensed mode with condensed 10 and 12 cpi. Hence, condensed printing is 10 CPI printing. The following printout compares normal 10 and 12 cpi with 10 and 12 cpi printing, but not proportional and 15 cpi. This is condensed 12 CPI printing. ...on a page. To turn off the condensed mode, press the button again. The condensed 10 cpi is 17 cpi, and the condensed 12 cpi is 12 CPI printing. This is 20 cpi. Using the Printer 3-19 In the condensed mode, characters are approximately 60 percent of the width of printed ...
... printing. Selecting Typestyles Condensed Mode You can combine the condensed mode with condensed 10 and 12 cpi. Hence, condensed printing is 10 CPI printing. The following printout compares normal 10 and 12 cpi with 10 and 12 cpi printing, but not proportional and 15 cpi. This is condensed 12 CPI printing. ...on a page. To turn off the condensed mode, press the button again. The condensed 10 cpi is 17 cpi, and the condensed 12 cpi is 12 CPI printing. This is 20 cpi. Using the Printer 3-19 In the condensed mode, characters are approximately 60 percent of the width of printed ...

User Manual
Page 87
For more information, see the Command Summary in Chapter 9. Country 8 Japan 9 Norway 10 Denmark II 11 Spain II 12 Latin America 13 Korea 64 Legal ASCII code hex 23 24 40 5B 5C 5D 5E 60 7B 7C 7D 7E Using the Printer 3-21 Selecting an International Character Set In addition to the eight character sets shown above, the seven international character sets that follow can be selected with a software command: ESC R.
For more information, see the Command Summary in Chapter 9. Country 8 Japan 9 Norway 10 Denmark II 11 Spain II 12 Latin America 13 Korea 64 Legal ASCII code hex 23 24 40 5B 5C 5D 5E 60 7B 7C 7D 7E Using the Printer 3-21 Selecting an International Character Set In addition to the eight character sets shown above, the seven international character sets that follow can be selected with a software command: ESC R.


