
Reference Guide
Page 5
... and utility problems 109 Communication errors 110 Chapter 7 Cleaning and Transporting the Printer Cleaning the Printer 113 Cleaning the inside of the printer 113 Removing spilled toner 115 Cleaning the printer case 116 Transporting the Printer 117 Appendix A Technical Specifications Paper 119 Specifications 119 Printer 121 General 121 Environmental 122 Safety approvals 122 Mechanical 123 Electrical 123...
... and utility problems 109 Communication errors 110 Chapter 7 Cleaning and Transporting the Printer Cleaning the Printer 113 Cleaning the inside of the printer 113 Removing spilled toner 115 Cleaning the printer case 116 Transporting the Printer 117 Appendix A Technical Specifications Paper 119 Specifications 119 Printer 121 General 121 Environmental 122 Safety approvals 122 Mechanical 123 Electrical 123...

Reference Guide
Page 10
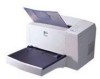
Getting Started 10 otherwise, print quality will decline. ❏ Do not turn the cartridge upside down or stand it on its ends. ❏ When handling the cartridge, always place it on a clean, smooth surface. ❏ Do not attempt to modify the cartridge or take it in your eyes. ❏ When removing the developer cartridge, never touch the developing roller under the flap; It cannot be refilled. ❏ Avoid touching the toner or getting it apart.
Getting Started 10 otherwise, print quality will decline. ❏ Do not turn the cartridge upside down or stand it on its ends. ❏ When handling the cartridge, always place it on a clean, smooth surface. ❏ Do not attempt to modify the cartridge or take it in your eyes. ❏ When removing the developer cartridge, never touch the developing roller under the flap; It cannot be refilled. ❏ Avoid touching the toner or getting it apart.
Reference Guide
Page 16
... works by your computer. The main features are described below. Toner Save mode To reduce the amount of laser printers. You'll appreciate the professional print quality produced by smoothing out the jagged edges of diagonal and curved lines in EPSON's advanced line of toner used in Microsoft® Windows® Me, 98, 95, 2000...
... works by your computer. The main features are described below. Toner Save mode To reduce the amount of laser printers. You'll appreciate the professional print quality produced by smoothing out the jagged edges of diagonal and curved lines in EPSON's advanced line of toner used in Microsoft® Windows® Me, 98, 95, 2000...
Reference Guide
Page 17
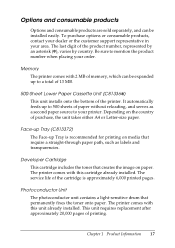
...products, contact your dealer or the customer support representative in your order. Developer Cartridge This cartridge includes the toner that permanently fixes the toner onto paper. The printer comes with this unit already installed. Chapter 1 Product Information 17 Be sure to 500 sheets of the...size paper. Photoconductor Unit The photoconductor unit contains a light-sensitive drum that creates the image on the country of the printer. Memory The printer comes with this cartridge already installed. Face-up Tray (C813372) The Face-up to mention the product number when placing ...
...products, contact your dealer or the customer support representative in your order. Developer Cartridge This cartridge includes the toner that permanently fixes the toner onto paper. The printer comes with this unit already installed. Chapter 1 Product Information 17 Be sure to 500 sheets of the...size paper. Photoconductor Unit The photoconductor unit contains a light-sensitive drum that creates the image on the country of the printer. Memory The printer comes with this cartridge already installed. Face-up Tray (C813372) The Face-up to mention the product number when placing ...
Reference Guide
Page 34
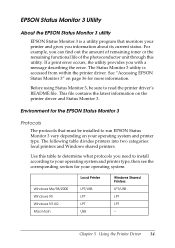
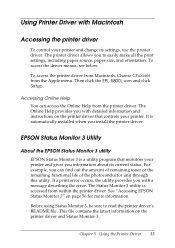
... LPT -- Before using Status Monitor 3, be installed to read the printer driver's README file. EPSON Status Monitor 3 Utility About the EPSON Status Monitor 3 utility EPSON Status Monitor 3 is accessed from within the printer driver. For example, you can find out the amount of remaining toner or the remaining functional life of the photoconductor unit through this...
... LPT -- Before using Status Monitor 3, be installed to read the printer driver's README file. EPSON Status Monitor 3 Utility About the EPSON Status Monitor 3 utility EPSON Status Monitor 3 is accessed from within the printer driver. For example, you can find out the amount of remaining toner or the remaining functional life of the photoconductor unit through this...

Reference Guide
Page 39
Photoconductor Unit Indicates the remaining functional life of remaining toner. Toner: Indicates the amount of Life: the photoconductor unit. The toner icon flashes if toner is installed. Chapter 3 Using the Printer Driver 39 Information for the optional 500-Sheet Lower Paper Cassette Unit is displayed only if this option is low (10 percent or less). Paper: Displays the paper size and the approximate amount of paper remaining in the paper source.
Photoconductor Unit Indicates the remaining functional life of remaining toner. Toner: Indicates the amount of Life: the photoconductor unit. The toner icon flashes if toner is installed. Chapter 3 Using the Printer Driver 39 Information for the optional 500-Sheet Lower Paper Cassette Unit is displayed only if this option is low (10 percent or less). Paper: Displays the paper size and the approximate amount of paper remaining in the paper source.
Reference Guide
Page 55
... printer driver. See "Accessing EPSON Status Monitor 3" on the printer driver and Status Monitor 3. The Status Monitor 3 utility is automatically installed when you install the printer driver. Chapter 3 Using the Printer Driver 55 To access the printer driver from Macintosh, Choose Chooser from the printer driver. Accessing Online Help You can find out the amount of remaining toner...
... printer driver. See "Accessing EPSON Status Monitor 3" on the printer driver and Status Monitor 3. The Status Monitor 3 utility is automatically installed when you install the printer driver. Chapter 3 Using the Printer Driver 55 To access the printer driver from Macintosh, Choose Chooser from the printer driver. Accessing Online Help You can find out the amount of remaining toner...

Reference Guide
Page 58
Photoconductor Unit Indicates the remaining functional life of remaining toner. Chapter 3 Using the Printer Driver 58 The toner icon flashes if toner is low (10 percent or less). The Monitor Setup dialog box appears. Default button: Restores default settings. Cancel button: Cancels any changes. OK button: Saves ... To make specific monitoring settings, click the Monitor Setup button when you wish to select the types of error that you start the status monitor. Toner: Indicates the amount of Life: the photoconductor unit.
Photoconductor Unit Indicates the remaining functional life of remaining toner. Chapter 3 Using the Printer Driver 58 The toner icon flashes if toner is low (10 percent or less). The Monitor Setup dialog box appears. Default button: Restores default settings. Cancel button: Cancels any changes. OK button: Saves ... To make specific monitoring settings, click the Monitor Setup button when you wish to select the types of error that you start the status monitor. Toner: Indicates the amount of Life: the photoconductor unit.

Reference Guide
Page 78
Chapter 5 Replacing Consumables 78 Hold the cartridge by the handle and pull it with a clean, dry, lint-free cloth or with a vacuum-cleaning device. 5. If toner is marked CAUTION Hot Surface Avoid Contact. If the printer has been in use, the fuser may be very hot. c Caution: Be careful not to spill any remaining toner from the used developer cartridge properly. Dispose of the printer. 4. w Warning: Do not touch the fuser, which is spilled inside the printer, clean it straight up and out of the used developer cartridge.
Chapter 5 Replacing Consumables 78 Hold the cartridge by the handle and pull it with a clean, dry, lint-free cloth or with a vacuum-cleaning device. 5. If toner is marked CAUTION Hot Surface Avoid Contact. If the printer has been in use, the fuser may be very hot. c Caution: Be careful not to spill any remaining toner from the used developer cartridge properly. Dispose of the printer. 4. w Warning: Do not touch the fuser, which is spilled inside the printer, clean it straight up and out of the used developer cartridge.

Reference Guide
Page 79
c Caution: Never touch the developing roller under the flap; Remove the new developer cartridge from front to back to distribute the toner evenly. 7. While holding the cartridge horizontally, gently shake it a few times from side to side and then from its bag. Chapter 5 Replacing Consumables 79 otherwise, print quality may decline. 6. Remove the protective tape seal from the developer cartridge completely.
c Caution: Never touch the developing roller under the flap; Remove the new developer cartridge from front to back to distribute the toner evenly. 7. While holding the cartridge horizontally, gently shake it a few times from side to side and then from its bag. Chapter 5 Replacing Consumables 79 otherwise, print quality may decline. 6. Remove the protective tape seal from the developer cartridge completely.

Reference Guide
Page 81
10. Click the Toner Level Clear button. Chapter 5 Replacing Consumables 81 The toner clear dialog box is displayed. When you turn on the printer, access the Printer Settings dialog box in the printer in the Optional Settings tab of the printer driver in Windows, or click the Setup button in the Chooser dialog box, and click the Printer Settings button in the dialog box that appears. If the Status Monitor 3 window displays a warning message, click the Consumable Details button in Macintosh, then click the Toner Level Clear button in Macintosh.
10. Click the Toner Level Clear button. Chapter 5 Replacing Consumables 81 The toner clear dialog box is displayed. When you turn on the printer, access the Printer Settings dialog box in the printer in the Optional Settings tab of the printer driver in Windows, or click the Setup button in the Chooser dialog box, and click the Printer Settings button in the dialog box that appears. If the Status Monitor 3 window displays a warning message, click the Consumable Details button in Macintosh, then click the Toner Level Clear button in Macintosh.

Reference Guide
Page 82
...cartridge, you may damage the printer. 4. Make sure the printer is lowered. 3. Make sure the output tray at the top of the printer and lifting the cover up all the way. 11. c Caution: You must completely open the printer cover to reset the toner level counter. Chapter 5 Replacing... Consumables 82 Replacing the Photoconductor Unit 1. Remove the developer cartridge. Open the printer cover by pressing the latch button on page 113. Click OK to ...
...cartridge, you may damage the printer. 4. Make sure the printer is lowered. 3. Make sure the output tray at the top of the printer and lifting the cover up all the way. 11. c Caution: You must completely open the printer cover to reset the toner level counter. Chapter 5 Replacing... Consumables 82 Replacing the Photoconductor Unit 1. Remove the developer cartridge. Open the printer cover by pressing the latch button on page 113. Click OK to ...
Reference Guide
Page 102
...choosing paper. Smooth, high-quality copier paper is dark or dirty Lighten the Density setting in the printer driver. See "Specifications" on page 119 for instructions. There may need to distribute the toner evenly, then reinstall it gently from side to side and then from front to back to replace ...the photoconductor unit. You may be using a clean, dry, lint-free cloth. Remove the cartridge and shake it . Turn off the printer and clean the paper path ...
...choosing paper. Smooth, high-quality copier paper is dark or dirty Lighten the Density setting in the printer driver. See "Specifications" on page 119 for instructions. There may need to distribute the toner evenly, then reinstall it gently from side to side and then from front to back to replace ...the photoconductor unit. You may be using a clean, dry, lint-free cloth. Remove the cartridge and shake it . Turn off the printer and clean the paper path ...

Reference Guide
Page 103
... the paper path inside the printer using a soft, dry, lint-free cloth. Remove the cartridge and shake it gently from side to side and then from front to back to distribute the toner evenly, then reinstall it . Uneven image density ❏ Your paper may be a problem with ... may be moist or damp. Chapter 6 Troubleshooting 103 For more information, see "Replacing the Developer Cartridge" on page 77. Clean the internal printer components by printing three pages with the developer cartridge. See "Replacing the Photoconductor Unit" on page 82 for instructions. Black or white bands appear...
... the paper path inside the printer using a soft, dry, lint-free cloth. Remove the cartridge and shake it gently from side to side and then from front to back to distribute the toner evenly, then reinstall it . Uneven image density ❏ Your paper may be a problem with ... may be moist or damp. Chapter 6 Troubleshooting 103 For more information, see "Replacing the Developer Cartridge" on page 77. Clean the internal printer components by printing three pages with the developer cartridge. See "Replacing the Photoconductor Unit" on page 82 for instructions. Black or white bands appear...

Reference Guide
Page 104
... with only one character per page. See "Specifications" on page 119 for best results. Clean the internal printer components by the paper. Toner smudges Your paper may be moist or damp. If the surface of your printer. See "Specifications" on page 119 for best results. Do not store paper in a humid or damp...
... with only one character per page. See "Specifications" on page 119 for best results. Clean the internal printer components by the paper. Toner smudges Your paper may be moist or damp. If the surface of your printer. See "Specifications" on page 119 for best results. Do not store paper in a humid or damp...
Reference Guide
Page 105
... correctly installed, see Chapter 5, "Replacing Consumables." Turn off the Toner Save mode using the EPSON Status Monitor 3 utility. The higher the moisture content of the paper, the lighter the printed output. Turn off the printer and contact your interface cable. Darken the Density setting in a ... shake it gently from side to side to replace the developer cartridge. Chapter 6 Troubleshooting 105 Completely blank pages Check the toner status using the printer driver. The printed image is light or faint Your paper may be moist or damp. For instructions, see "Replacing the...
... correctly installed, see Chapter 5, "Replacing Consumables." Turn off the Toner Save mode using the EPSON Status Monitor 3 utility. The higher the moisture content of the paper, the lighter the printed output. Turn off the printer and contact your interface cable. Darken the Density setting in a ... shake it gently from side to side to replace the developer cartridge. Chapter 6 Troubleshooting 105 Completely blank pages Check the toner status using the printer driver. The printed image is light or faint Your paper may be moist or damp. For instructions, see "Replacing the...

Reference Guide
Page 106
Non-printed side of the page is marked by a CAUTION Hot Surface Avoid Contact label. w Warning: Opening the printer exposes the fuser, which is dirty Toner may be very hot. The image is too dark Lighten the Density setting in use, the fuser may have spilled onto the paper feed path. ...Remove the developer cartridge and the photoconductor unit and then clean the paper path inside the printer using a clean, dry, lint...
Non-printed side of the page is marked by a CAUTION Hot Surface Avoid Contact label. w Warning: Opening the printer exposes the fuser, which is dirty Toner may be very hot. The image is too dark Lighten the Density setting in use, the fuser may have spilled onto the paper feed path. ...Remove the developer cartridge and the photoconductor unit and then clean the paper path inside the printer using a clean, dry, lint...

Reference Guide
Page 112
Chapter 7 Cleaning and Transporting the Printer Cleaning the Printer 113 Cleaning the inside of the printer 113 Removing spilled toner 115 Cleaning the printer case 116 Transporting the Printer 117 Chapter 7 Cleaning and Transporting the Printer 112
Chapter 7 Cleaning and Transporting the Printer Cleaning the Printer 113 Cleaning the inside of the printer 113 Removing spilled toner 115 Cleaning the printer case 116 Transporting the Printer 117 Chapter 7 Cleaning and Transporting the Printer 112

Reference Guide
Page 115
..., lint-free cloth. Chapter 7 Cleaning and Transporting the Printer 115 Do not use it . Removing spilled toner If toner spills inside of toner is present, carefully wipe out the inside the printer, do not use the printer until you spill toner on spilled toner. If only a small amount of toner is present, use a small vacuum-cleaning device (available from...
..., lint-free cloth. Chapter 7 Cleaning and Transporting the Printer 115 Do not use it . Removing spilled toner If toner spills inside of toner is present, carefully wipe out the inside the printer, do not use the printer until you spill toner on spilled toner. If only a small amount of toner is present, use a small vacuum-cleaning device (available from...

Reference Guide
Page 135
...rotation angles of characters in the barcode character string, such as it appears on inputting and formatting barcodes Please note the following printer driver settings: Print Quality Toner Save mode Zoom Options 600 dpi Off Unchecked 6. Appendix B Working with Fonts 135 Select Print from the File menu, ...use features in your application which enlarge or reduce the size of 90°, 180° and 270°. ❏ Turn off your EPSON printer and click Properties. Click OK to print the barcode. Notes on the screen, but it cannot be printed as inappropriate data, the barcode...
...rotation angles of characters in the barcode character string, such as it appears on inputting and formatting barcodes Please note the following printer driver settings: Print Quality Toner Save mode Zoom Options 600 dpi Off Unchecked 6. Appendix B Working with Fonts 135 Select Print from the File menu, ...use features in your application which enlarge or reduce the size of 90°, 180° and 270°. ❏ Turn off your EPSON printer and click Properties. Click OK to print the barcode. Notes on the screen, but it cannot be printed as inappropriate data, the barcode...


