Product Brochure
Page 2
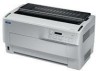
... push tractors/paper paths: automatic back-out and loading; Epson Connection is a trademark of Seiko Epson Corporation. automatic paper thickness adjustment; automatic paper width detection; Printer Specifications Printing Method 9-pin impact dot matrix Print Direction...epson.com. ** Field upgrade of Flash ROM to be done by Epson authorized service centers Epson DFX-9000 C11C605001 S015384 C12C800381 C815071 8502 C823051 C823071 C823121 C823141 C823151 C823452 C12C823912 Description Epson DFX-9000 printer Epson DFX-9000 ribbon cartridge Pull tractor unit Perforation cutter Printer...
... push tractors/paper paths: automatic back-out and loading; Epson Connection is a trademark of Seiko Epson Corporation. automatic paper thickness adjustment; automatic paper width detection; Printer Specifications Printing Method 9-pin impact dot matrix Print Direction...epson.com. ** Field upgrade of Flash ROM to be done by Epson authorized service centers Epson DFX-9000 C11C605001 S015384 C12C800381 C815071 8502 C823051 C823071 C823121 C823141 C823151 C823452 C12C823912 Description Epson DFX-9000 printer Epson DFX-9000 ribbon cartridge Pull tractor unit Perforation cutter Printer...

Reference Guide
Page 3
..., Cautions, and Notes 7 Hot Parts Caution Symbol 7 Important Safety Instructions 7 When setting up the printer 8 When maintaining the printer 9 When handling the paper 10 When operating the printer 10 ENERGY STAR Compliance 11 Chapter 2 Paper Handling Using the Two-Tractor System 13 Positioning the paper supply 14 Supported paper types 15 Loading Paper Onto...
..., Cautions, and Notes 7 Hot Parts Caution Symbol 7 Important Safety Instructions 7 When setting up the printer 8 When maintaining the printer 9 When handling the paper 10 When operating the printer 10 ENERGY STAR Compliance 11 Chapter 2 Paper Handling Using the Two-Tractor System 13 Positioning the paper supply 14 Supported paper types 15 Loading Paper Onto...

Reference Guide
Page 5
Chapter 5 Problem Solving Diagnosing the Problem 101 Using the Error Indicators 101 EPSON Status Monitor 3 103 Printing a Self Test 103 Printing a Hex Dump 104 Problems and Solutions 106 Power supply problems 107 Paper loading or feeding ...Printout 123 Restoring the Printer's Default Settings 125 Where To Get Help 125 Chapter 6 Options and Consumables Ribbon Cartridge 127 Replacing the Ribbon Cartridge 127 Using the Pull Tractor 133 Installing the pull tractor 133 Using the pull tractor with the front tractor 136 Using the pull tractor with the rear tractor 140 Removing the pull...
Chapter 5 Problem Solving Diagnosing the Problem 101 Using the Error Indicators 101 EPSON Status Monitor 3 103 Printing a Self Test 103 Printing a Hex Dump 104 Problems and Solutions 106 Power supply problems 107 Paper loading or feeding ...Printout 123 Restoring the Printer's Default Settings 125 Where To Get Help 125 Chapter 6 Options and Consumables Ribbon Cartridge 127 Replacing the Ribbon Cartridge 127 Using the Pull Tractor 133 Installing the pull tractor 133 Using the pull tractor with the front tractor 136 Using the pull tractor with the rear tractor 140 Removing the pull...

Reference Guide
Page 13
... 2 When using your paper, check that it matches the specifications described in SelecType mode. Chapter 2 Paper Handling 2 Using the Two-Tractor System 2 Your printer's paper handling system consists of the paper loaded when the platen gap setting is from 76.2 mm (3 inches) to 419.1 mm... from 101.6 mm (4 inches) to the thickness of a front push 2 tractor and a rear push tractor. Both tractors are easy to load and operate, and both accommodate a wide variety of paper types, including labels and multi-part forms. 2 The printer automatically adjusts to 406.4 mm 2 (16 inches).
... 2 When using your paper, check that it matches the specifications described in SelecType mode. Chapter 2 Paper Handling 2 Using the Two-Tractor System 2 Your printer's paper handling system consists of the paper loaded when the platen gap setting is from 76.2 mm (3 inches) to 419.1 mm... from 101.6 mm (4 inches) to the thickness of a front push 2 tractor and a rear push tractor. Both tractors are easy to load and operate, and both accommodate a wide variety of paper types, including labels and multi-part forms. 2 The printer automatically adjusts to 406.4 mm 2 (16 inches).

Reference Guide
Page 14
Placing the paper on the same level as the printer (or higher) may cause a paper jam. ❏ Make sure that your paper supply with the rear tractor's paper supply. 14 Paper Handling Positioning the paper supply You can load continuous paper from the front, be sure to place the paper ...lower than the table or stand supporting the printer. front tractor rear tractor both tractors Note: ❏ When loading paper from both the front and the rear, so be sure to leave enough room around the...
Placing the paper on the same level as the printer (or higher) may cause a paper jam. ❏ Make sure that your paper supply with the rear tractor's paper supply. 14 Paper Handling Positioning the paper supply You can load continuous paper from the front, be sure to place the paper ...lower than the table or stand supporting the printer. front tractor rear tractor both tractors Note: ❏ When loading paper from both the front and the rear, so be sure to leave enough room around the...

Reference Guide
Page 15
Open the printer's front cover by lifting up the bottom edge until it locks in place, as shown below. 2 2 2 2 2 Paper Handling 15 Supported paper types 2 You can use the following types of continuous paper with either the front or rear tractor: ❏ Single-sheet continuous paper ❏ Multi-part continuous paper 2 ❏ Labels on continuous paper ❏ Continuous forms with labels 2 ❏ Overlapping multi-part forms 2 Loading Paper Onto the Front Tractor 2 Follow these steps to load paper onto the front tractor: 2 1.
Open the printer's front cover by lifting up the bottom edge until it locks in place, as shown below. 2 2 2 2 2 Paper Handling 15 Supported paper types 2 You can use the following types of continuous paper with either the front or rear tractor: ❏ Single-sheet continuous paper ❏ Multi-part continuous paper 2 ❏ Labels on continuous paper ❏ Continuous forms with labels 2 ❏ Overlapping multi-part forms 2 Loading Paper Onto the Front Tractor 2 Follow these steps to load paper onto the front tractor: 2 1.

Reference Guide
Page 16
2. Release the sprocket lock levers on the scale. Position the left sprockets by pushing up the sprocket lock lever. arrow mark 16 Paper Handling sprocket lock lever c Caution: Do not try to the left of the arrow mark on both the right and left sprocket so that the sprocket pins are to pull on or remove the elastic cord from the tractor. 3. Lock it into place by pulling each lever down.
2. Release the sprocket lock levers on the scale. Position the left sprockets by pushing up the sprocket lock lever. arrow mark 16 Paper Handling sprocket lock lever c Caution: Do not try to the left of the arrow mark on both the right and left sprocket so that the sprocket pins are to pull on or remove the elastic cord from the tractor. 3. Lock it into place by pulling each lever down.

Reference Guide
Page 17
4. Now slide the right sprocket to approximately match the width of your paper. (Do not lock it in place yet.) 2 2 2 5. Slide the two paper supports so that they are spaced evenly between the two sprockets. 2 2 2 paper supports 2 Note: To use paper that is less than four inches wide, remove the paper 2 supports by pulling them off the tractor. 2 2 2 Paper Handling 17
4. Now slide the right sprocket to approximately match the width of your paper. (Do not lock it in place yet.) 2 2 2 5. Slide the two paper supports so that they are spaced evenly between the two sprockets. 2 2 2 paper supports 2 Note: To use paper that is less than four inches wide, remove the paper 2 supports by pulling them off the tractor. 2 2 2 Paper Handling 17

Reference Guide
Page 20
... may seriously damage the mechanism. 10. Turn on which tractor was selected when the printer was turned off last. 20 Paper Handling Also, either the front or rear tractor arrow on the Tractor Select indicator lights up, depending on the printer. always pull it out slightly before closing. ❏ ...Before turning on the printer, be absolutely sure you have removed all protective materials. (See the...
... may seriously damage the mechanism. 10. Turn on which tractor was selected when the printer was turned off last. 20 Paper Handling Also, either the front or rear tractor arrow on the Tractor Select indicator lights up, depending on the printer. always pull it out slightly before closing. ❏ ...Before turning on the printer, be absolutely sure you have removed all protective materials. (See the...

Reference Guide
Page 21
... light is now loaded to green. See "Adjusting the Paper Position" on the page, you can adjust the paper 2 position. When the printer switches tractors, it looks like the printing will start too high or low on page 28 for instructions. 2 2 2 2 Paper Handling 21 2 If it also loads... the paper automatically. 2 The Tractor Select indicator changes to the top-of-form position. The paper is red, press the Front/Rear 2 button to switch to load the paper. 11...
... light is now loaded to green. See "Adjusting the Paper Position" on the page, you can adjust the paper 2 position. When the printer switches tractors, it looks like the printing will start too high or low on page 28 for instructions. 2 2 2 2 Paper Handling 21 2 If it also loads... the paper automatically. 2 The Tractor Select indicator changes to the top-of-form position. The paper is red, press the Front/Rear 2 button to switch to load the paper. 11...

Reference Guide
Page 22
Loading Paper Onto the Rear Tractor Follow the steps below to load paper onto the rear tractor. (You do not need to remove the paper from the front tractor first.) 1. back flap 22 Paper Handling Open the flap at the bottom. Open the printer's back cover. 2.
Loading Paper Onto the Rear Tractor Follow the steps below to load paper onto the rear tractor. (You do not need to remove the paper from the front tractor first.) 1. back flap 22 Paper Handling Open the flap at the bottom. Open the printer's back cover. 2.

Reference Guide
Page 23
Lock it in place by pulling each lever forward. 2 sprocket lock lever 2 2 2 c Caution: Do not try to 2 the right of the arrow mark on or remove the elastic cord from the tractor. 2 4. 3. Position the right sprocket so that the sprocket pins are to pull on the scale. Release the sprocket lock levers on the rear tractor's right and left sprockets by pushing the sprocket lock lever back. 2 2 2 arrow mark 2 2 Paper Handling 23
Lock it in place by pulling each lever forward. 2 sprocket lock lever 2 2 2 c Caution: Do not try to 2 the right of the arrow mark on or remove the elastic cord from the tractor. 2 4. 3. Position the right sprocket so that the sprocket pins are to pull on the scale. Release the sprocket lock levers on the rear tractor's right and left sprockets by pushing the sprocket lock lever back. 2 2 2 arrow mark 2 2 Paper Handling 23

Reference Guide
Page 27
... also loads the paper automatically. 2 Paper Handling 27 Turn on the printer. 2 2 2 You hear the print head move to the rear tractor. Check the Tractor Select indicator to see which tractor is selected. 2 If the rear tractor arrow light is red, press the LF/FF Load button to load the paper....front 2 2 If the front tractor arrow light is red, press the Front/Rear 2 button to switch to the left and Ready appears on which tractor was selected when the printer was turned off last. 2 12. Either the front or rear tractor arrow on the Tractor Select indicator lights up, depending...
... also loads the paper automatically. 2 Paper Handling 27 Turn on the printer. 2 2 2 You hear the print head move to the rear tractor. Check the Tractor Select indicator to see which tractor is selected. 2 If the rear tractor arrow light is red, press the LF/FF Load button to load the paper....front 2 2 If the front tractor arrow light is red, press the Front/Rear 2 button to switch to the left and Ready appears on which tractor was selected when the printer was turned off last. 2 12. Either the front or rear tractor arrow on the Tractor Select indicator lights up, depending...

Reference Guide
Page 28
The Tractor Select indicator changes to the top-of-form position. The printer then remembers the new top-of Form buttons. Note: The printing position (based on the top-of -form position as well as the printing position ... Handling If it looks like the printing will start too high or low on the page by your software. When you use the optional pull tractor, you can adjust the top-of -form position) is now loaded to green. The paper is controlled by using the Micro Feed, and Top of...
The Tractor Select indicator changes to the top-of-form position. The printer then remembers the new top-of Form buttons. Note: The printing position (based on the top-of -form position as well as the printing position ... Handling If it looks like the printing will start too high or low on the page by your software. When you use the optional pull tractor, you can adjust the top-of -form position) is now loaded to green. The paper is controlled by using the Micro Feed, and Top of...

Reference Guide
Page 29
...; When you want to permanently change the top-of-form position, you load paper, switch tractors, or turn off the printer. 2 You can adjust the top-of-form position either 2 permanently or temporarily depending on how you use the Micro Feedu button only; The default setting ... it determines where the printing begins on each page. do not enter the top-of the paper. Never feed labels backward through the printer. 2 Paper Handling 29 The printer remembers the temporary top-of-form position until the 2 next time you enter the top-of-form mode using the Micro Feed buttons...
...; When you want to permanently change the top-of-form position, you load paper, switch tractors, or turn off the printer. 2 You can adjust the top-of-form position either 2 permanently or temporarily depending on how you use the Micro Feedu button only; The default setting ... it determines where the printing begins on each page. do not enter the top-of the paper. Never feed labels backward through the printer. 2 Paper Handling 29 The printer remembers the temporary top-of-form position until the 2 next time you enter the top-of-form mode using the Micro Feed buttons...

Reference Guide
Page 30
... the Top of Form button to enter top-of -form position. This position is based on . 4. Then close the top cover. 30 Paper Handling The printer beeps once, and the Top of Form light turns on the first printable line of -form position. If your software inserts a top margin of five... print. Press the Top of Form button again to the desired top-of -form mode. Make sure the printer is selected (the corresponding tractor arrow should be lit). 2. The "A" on and the desired tractor is turned on the ribbon protector shows you where the bottom edge of your first line of -form position...
... the Top of Form button to enter top-of -form position. This position is based on . 4. Then close the top cover. 30 Paper Handling The printer beeps once, and the Top of Form light turns on the first printable line of -form position. If your software inserts a top margin of five... print. Press the Top of Form button again to the desired top-of -form mode. Make sure the printer is selected (the corresponding tractor arrow should be lit). 2. The "A" on and the desired tractor is turned on the ribbon protector shows you where the bottom edge of your first line of -form position...

Reference Guide
Page 31
... of the page so that you are printing on the page, press the Pause button to move the printing position, you load paper, switch tractors, or turn off the backing sheet and cause a paper jam. 2 3. When you reach the text that it down to stop printing.... 2 labels, continuous forms with labels, or overlapping multi-part forms, use the optional pull tractor, you cannot adjust the loading position.) Adjusting the printing position 2 You may easily peel off the printer. Paper Handling 31 Use the Micro Feed buttons to adjust the position where 2 you are ...
... of the page so that you are printing on the page, press the Pause button to move the printing position, you load paper, switch tractors, or turn off the backing sheet and cause a paper jam. 2 3. When you reach the text that it down to stop printing.... 2 labels, continuous forms with labels, or overlapping multi-part forms, use the optional pull tractor, you cannot adjust the loading position.) Adjusting the printing position 2 You may easily peel off the printer. Paper Handling 31 Use the Micro Feed buttons to adjust the position where 2 you are ...

Reference Guide
Page 32
... position number) ❏ Label paper PG (Label paper PG position number) 32 Paper Handling By defining the position of the label, you tell the printer where it needs to raise the print head to standard printing) you can define the label size and location using the Forms w/labels setting in... accommodate the greater thickness as described on page 96 to define the page length, if necessary, for the paper loaded on the front or rear tractor). First use Default-setting mode as it prints over the label. Adjusting the label position To adjust the printing position for labels (for example, ...
... position number) ❏ Label paper PG (Label paper PG position number) 32 Paper Handling By defining the position of the label, you tell the printer where it needs to raise the print head to standard printing) you can define the label size and location using the Forms w/labels setting in... accommodate the greater thickness as described on page 96 to define the page length, if necessary, for the paper loaded on the front or rear tractor). First use Default-setting mode as it prints over the label. Adjusting the label position To adjust the printing position for labels (for example, ...

Reference Guide
Page 33
...the perforation is in tear-off mode, you can use the tear-off feature to advance continuous paper on the push tractor to the tear-off edge of the printer. The printer remembers this new tear-off position. 2 c Caution: Never use the tear-off feature to reverse feed labels, overlapping...the micro-feed feature. Tear off edge and the Tear Off light comes on page 34 for instructions. 2 3. When you resume printing, the printer automatically feeds paper back to the loading position. 2 This feature lets you save paper that would normally be lost between documents. 2 If the ...
...the perforation is in tear-off mode, you can use the tear-off feature to advance continuous paper on the push tractor to the tear-off edge of the printer. The printer remembers this new tear-off position. 2 c Caution: Never use the tear-off feature to reverse feed labels, overlapping...the micro-feed feature. Tear off edge and the Tear Off light comes on page 34 for instructions. 2 3. When you resume printing, the printer automatically feeds paper back to the loading position. 2 This feature lets you save paper that would normally be lost between documents. 2 If the ...

Reference Guide
Page 34
Turn on the top part of the printer's top cover). Press the Tear Off button to the printer's tear-off mode. This exposes the printer's tear-off edge, follow these steps: 1. The Tear Off light comes on and the printer feeds the paper's perforation to enter the tear-off edge. 34 Paper Handling Open the paper separator cover (the flap on the printer and select the desired tractor. 2. Adjusting the tear-off position If the paper's perforation is not aligned with the tear-off edge. 3.
Turn on the top part of the printer's top cover). Press the Tear Off button to the printer's tear-off mode. This exposes the printer's tear-off edge, follow these steps: 1. The Tear Off light comes on and the printer feeds the paper's perforation to enter the tear-off edge. 34 Paper Handling Open the paper separator cover (the flap on the printer and select the desired tractor. 2. Adjusting the tear-off position If the paper's perforation is not aligned with the tear-off edge. 3.
