User Manual
Page 2
...cause interference levels which exceed the limits established by the FCC for damages resulting from the U.S. Apex is available from the use of a non-shielded printer interface cable to this printer will not occur in a particular installation. Copyright © 1987 by any liability assumed for...interference to radio and television reception. While every precaution has been taken in Subpart J of part 15 of this book, Seiko Epson Corporation assumes no guarantee that interference will invalidate the FCC Certification of FCC Rules, which can be reproduced, stored in a retrieval...
...cause interference levels which exceed the limits established by the FCC for damages resulting from the U.S. Apex is available from the use of a non-shielded printer interface cable to this printer will not occur in a particular installation. Copyright © 1987 by any liability assumed for...interference to radio and television reception. While every precaution has been taken in Subpart J of part 15 of this book, Seiko Epson Corporation assumes no guarantee that interference will invalidate the FCC Certification of FCC Rules, which can be reproduced, stored in a retrieval...

User Manual
Page 3
Contents Introduction 1 Apex80 Features 1 About This Manual 2 Where to Get Help 2 Chapter 1 Setting Up Identifying Printer Parts 1-1 Selecting a Place for the Printer 1-2 Installing the Paper Feed Knob 1-3 Installing the Ribbon 1-3 Replacing the Ribbon 1-6 Plugging in the Printer 1-7 Using Continuous-feed Paper 1-7 Using Single-sheet Paper 1-15 Operating the Control Panel 1-19 Connecting the Apex80...
Contents Introduction 1 Apex80 Features 1 About This Manual 2 Where to Get Help 2 Chapter 1 Setting Up Identifying Printer Parts 1-1 Selecting a Place for the Printer 1-2 Installing the Paper Feed Knob 1-3 Installing the Ribbon 1-3 Replacing the Ribbon 1-6 Plugging in the Printer 1-7 Using Continuous-feed Paper 1-7 Using Single-sheet Paper 1-15 Operating the Control Panel 1-19 Connecting the Apex80...

User Manual
Page 4
Chapter 4 Apex80 Printer Features Quality and Fonts 4-1 Print Size and Character Width 4-2 Special Effects and Emphasis 4-3 Using Different Character Sets 4-4 Page Layout and Other ... Pin Labels 6-3 Graphics Commands 6-4 Simple Graphics Programming 6-6 Density Varieties 6-8 Designing Your Own Graphics 6-10 Appendix A Command Summary Commands in Numerical Order Printer Operation Data Control Vertical/Horizontal Motion Overall Printing Style Print Size and Character Width Print Enhancement Word Processing Character Sets Userdefined Characters Graphics A-4 A-7 A-10 A-...
Chapter 4 Apex80 Printer Features Quality and Fonts 4-1 Print Size and Character Width 4-2 Special Effects and Emphasis 4-3 Using Different Character Sets 4-4 Page Layout and Other ... Pin Labels 6-3 Graphics Commands 6-4 Simple Graphics Programming 6-6 Density Varieties 6-8 Designing Your Own Graphics 6-10 Appendix A Command Summary Commands in Numerical Order Printer Operation Data Control Vertical/Horizontal Motion Overall Printing Style Print Size and Character Width Print Enhancement Word Processing Character Sets Userdefined Characters Graphics A-4 A-7 A-10 A-...

User Manual
Page 5
Appendix C Problem Solving and Maintenance Problem/Solution Summary C-1 beeper Error Warnings C-4 Data Dump Mode C-4 Coding Solutions C-6 Solutions for Specific Systems C-7 Maintaining Your Printer C-9 Appendix D Defaults and DIP Switches Default and Initialization Settings D-1 DIP Switch Settings D-2 International Character Sets D-3 Appendix E Choosing and Setting Up Optional Interfaces Compatible Interfaces E-1 Choosing ...
Appendix C Problem Solving and Maintenance Problem/Solution Summary C-1 beeper Error Warnings C-4 Data Dump Mode C-4 Coding Solutions C-6 Solutions for Specific Systems C-7 Maintaining Your Printer C-9 Appendix D Defaults and DIP Switches Default and Initialization Settings D-1 DIP Switch Settings D-2 International Character Sets D-3 Appendix E Choosing and Setting Up Optional Interfaces Compatible Interfaces E-1 Choosing ...

User Manual
Page 6
.... l Near Letter Quality (NLQ) mode for quick printing. l A variety of typestyles with high quality printing and advanced features. l The Epson Character Graphics set, which includes character graphics that are used on IBM® and compatible computers as well as international characters used by IBM software.... l Easy paper loading. Apex80 Features In addition to the high performance and reliability you can switch to expect from Epson printers, the Apex80 offers the following: l Draft mode for top quality printing. The speed of two NLQ fonts-Roman or Sans Serif. ...
.... l Near Letter Quality (NLQ) mode for quick printing. l A variety of typestyles with high quality printing and advanced features. l The Epson Character Graphics set, which includes character graphics that are used on IBM® and compatible computers as well as international characters used by IBM software.... l Easy paper loading. Apex80 Features In addition to the high performance and reliability you can switch to expect from Epson printers, the Apex80 offers the following: l Draft mode for top quality printing. The speed of two NLQ fonts-Roman or Sans Serif. ...

User Manual
Page 7
...call the toll-free Epson number: 1-800-421-5426. About This Manual Chapter 1 gives you step-by-step instructions on solving problems. Inside the back of your new printer, and Chapters 2 through 6 cover the basic and advanced functions. Where to use any of the printer's commands, and some... advice on setting up your nearest Epson Service Center. To purchase accessories such as ribbons and option ...
...call the toll-free Epson number: 1-800-421-5426. About This Manual Chapter 1 gives you step-by-step instructions on solving problems. Inside the back of your new printer, and Chapters 2 through 6 cover the basic and advanced functions. Where to use any of the printer's commands, and some... advice on setting up your nearest Epson Service Center. To purchase accessories such as ribbons and option ...

User Manual
Page 8
In addition to this chapter. Printer parts *Note: The tractor unit for your Apex80 printer, simply follow the steps in this manual, the printer box should contain the items shown in Figure 1-1.* The paper feed knob is packed into an indentation in the white foam material. Setting Up 1-1 Identifying Printer Parts First, see that you have all the parts you need. Figure 1-1. Chapter 1 Setting Up To set up your printer may be preinstalled.
In addition to this chapter. Printer parts *Note: The tractor unit for your Apex80 printer, simply follow the steps in this manual, the printer box should contain the items shown in Figure 1-1.* The paper feed knob is packed into an indentation in the white foam material. Setting Up 1-1 Identifying Printer Parts First, see that you have all the parts you need. Figure 1-1. Chapter 1 Setting Up To set up your printer may be preinstalled.

User Manual
Page 9
...to the items in the box, you need and whether or not you require a special interface. Make sure that it is placing the printer close to your printer and computer away from direct sunlight, excessive heat, moisture, and dust. You may also need an interface board, which cable you need a... proper shielded cable to connect the printer to a heater or other heat source. l Avoid using electrical outlets that can tell you which is not close enough to use an adapter plug.
...to the items in the box, you need and whether or not you require a special interface. Make sure that it is placing the printer close to your printer and computer away from direct sunlight, excessive heat, moisture, and dust. You may also need an interface board, which cable you need a... proper shielded cable to connect the printer to a heater or other heat source. l Avoid using electrical outlets that can tell you which is not close enough to use an adapter plug.

User Manual
Page 10
Insert the knob into an indentation in until it is flush with the printer case. Gently rotate the knob until it fits over the shaft. Figure I-2. Setting Up 1-3 Paper...Locate the paper feed knob, which is packed into the hole on the right side of the printer, as shown in setting it up is enclosed in a cartridge that you have decided where to locate your Apex80... printer, the first step in Figure 1-2. Installing the Paper Feed Knob Now that makes ribbon installation and replacement...
Insert the knob into an indentation in until it is flush with the printer case. Gently rotate the knob until it fits over the shaft. Figure I-2. Setting Up 1-3 Paper...Locate the paper feed knob, which is packed into the hole on the right side of the printer, as shown in setting it up is enclosed in a cartridge that you have decided where to locate your Apex80... printer, the first step in Figure 1-2. Installing the Paper Feed Knob Now that makes ribbon installation and replacement...

User Manual
Page 11
...becomes hot during use. Grasp the ribbon cartridge by lifting the handles. Remove the lid at the front of the printer will not get in Figure 1-3. Also, if you move the print head because moving the print head when the ...power is on may damage your printer. Move the print head by hand to the center of the printer so that the other parts of the printer by its handle and hold the cartridge so that ...the exposed strip of ribbon is shown in your printer, be off when you 've been using your way. 3. To install the ribbon, follow ...
...becomes hot during use. Grasp the ribbon cartridge by lifting the handles. Remove the lid at the front of the printer will not get in Figure 1-3. Also, if you move the print head because moving the print head when the ...power is on may damage your printer. Move the print head by hand to the center of the printer so that the other parts of the printer by its handle and hold the cartridge so that ...the exposed strip of ribbon is shown in your printer, be off when you 've been using your way. 3. To install the ribbon, follow ...

User Manual
Page 12
... to tighten the ribbon. As you turn the knob, see that the ribbon slips down until the cartridge snaps into the slots located inside the printer in Figure 1-5. Ribbon cartridge installation 5.
... to tighten the ribbon. As you turn the knob, see that the ribbon slips down until the cartridge snaps into the slots located inside the printer in Figure 1-5. Ribbon cartridge installation 5.
User Manual
Page 13
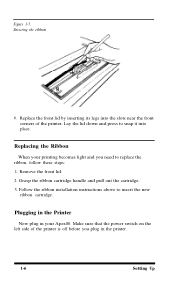
... lid by inserting its legs into place. Follow the ribbon installation instructions above to snap it into the slots near the front corners of the printer is off before you need to replace the ribbon, follow these steps: 1. Remove the front lid. 2. Make sure that the power switch on the left... side of the printer. Replacing the Ribbon When your printing becomes light and you plug in your Apex80. Lay the lid down and press to insert the new ribbon...
... lid by inserting its legs into place. Follow the ribbon installation instructions above to snap it into the slots near the front corners of the printer is off before you need to replace the ribbon, follow these steps: 1. Remove the front lid. 2. Make sure that the power switch on the left... side of the printer. Replacing the Ribbon When your printing becomes light and you plug in your Apex80. Lay the lid down and press to insert the new ribbon...

User Manual
Page 14
... into the slots along the sides (continuous-feed paper). Store the cover in a safe place while you plan to use the flat edge of the printer and snapping it into place. (See Figure 1-7.) Then see the instructions later in this chapter for the Apex80 allows you remove the tractor unit. If... unit slot cover, which can only be loaded when the tractor unit is removed. It may help to use of continuous-feed paper with your printer with pin feed holes along the top edge of the back of a screwdriver, as shown in Figure 1-6.
... into the slots along the sides (continuous-feed paper). Store the cover in a safe place while you plan to use the flat edge of the printer and snapping it into place. (See Figure 1-7.) Then see the instructions later in this chapter for the Apex80 allows you remove the tractor unit. If... unit slot cover, which can only be loaded when the tractor unit is removed. It may help to use of continuous-feed paper with your printer with pin feed holes along the top edge of the back of a screwdriver, as shown in Figure 1-6.

User Manual
Page 15
Figure 1-6. Removing the tractor unit slot cover 3 Fit the paper rest into the slots along the top edge of the back of the printer and snap it into place. See Figure 1-7. Setting UP 1-8
Figure 1-6. Removing the tractor unit slot cover 3 Fit the paper rest into the slots along the top edge of the back of the printer and snap it into place. See Figure 1-7. Setting UP 1-8

User Manual
Page 17
... installed, load continuous-feed paper as follows: 1. Remove the front lid of the printer. See Figure 1-9. Loading continuous-feed paper Once the tractor unit is turned off whenever you move the print head. Figure 1-9. Tilt the tractor back so ... that the rear notches fit over these pegs. Move the print head to touch it unless you 've been using the printer, the print head may be turned off . 2. Remember, the printer must be hot. Also, if you let it cool for a few minutes. 1-10 Setting Up In each tractor slot, located...
... installed, load continuous-feed paper as follows: 1. Remove the front lid of the printer. See Figure 1-9. Loading continuous-feed paper Once the tractor unit is turned off whenever you move the print head. Figure 1-9. Tilt the tractor back so ... that the rear notches fit over these pegs. Move the print head to touch it unless you 've been using the printer, the print head may be turned off . 2. Remember, the printer must be hot. Also, if you let it cool for a few minutes. 1-10 Setting Up In each tractor slot, located...

User Manual
Page 21
... now be set the top of form position. If you later find that your top of the next page. Now replace the front lid. The printer with continuous-feed paper When you are in Figure 1-15. When the legs are ready to the top of form setting is correct. 1-14 Setting... Up Follow these steps: 1. Your printer should rest atop the paper entering the printer, separating it to move to set up as shown in the slots, lean the guide all the way back. Setting top of...
... now be set the top of form position. If you later find that your top of the next page. Now replace the front lid. The printer with continuous-feed paper When you are in Figure 1-15. When the legs are ready to the top of form setting is correct. 1-14 Setting... Up Follow these steps: 1. Your printer should rest atop the paper entering the printer, separating it to move to set up as shown in the slots, lean the guide all the way back. Setting top of...

User Manual
Page 22
... the unit. 4. If the tractor unit is forward, and remove the paper. 6. Remove the front lid. 2. Then lay the paper over the front of the printer so you to remove the tractor unit before you until it by installing the paper guide in the correct position to begin the next document... gently lift up the front end. Before you load single-sheet paper, you to advance the paper one sheet. This enables you must prepare the printer by following those instructions, you finish printing a document, push the ON/OFF LINE button to put the...
... the unit. 4. If the tractor unit is forward, and remove the paper. 6. Remove the front lid. 2. Then lay the paper over the front of the printer so you to remove the tractor unit before you until it by installing the paper guide in the correct position to begin the next document... gently lift up the front end. Before you load single-sheet paper, you to advance the paper one sheet. This enables you must prepare the printer by following those instructions, you finish printing a document, push the ON/OFF LINE button to put the...

User Manual
Page 23
Installing the paper guide Install the paper guide as shown in Figure 1-16. Installing the paper guide 1-16 Setting Up Then insert the legs of the guide into the slots on the back of each edge guide into place. 2. Hold the paper guide so that it is in Figure 1-13. If you have not already done so, install the edge guides on the paper guide by hooking the tab on either side of the paper guide, as shown in an upright position. Figure 1-16. Snap the bottom of each guide over the top of the printer behind the paper slot, as follows: 1.
Installing the paper guide Install the paper guide as shown in Figure 1-16. Installing the paper guide 1-16 Setting Up Then insert the legs of the guide into the slots on the back of each edge guide into place. 2. Hold the paper guide so that it is in Figure 1-13. If you have not already done so, install the edge guides on the paper guide by hooking the tab on either side of the paper guide, as shown in an upright position. Figure 1-16. Snap the bottom of each guide over the top of the printer behind the paper slot, as follows: 1.

User Manual
Page 24
... to fit the sire of the left side of the paper. 5. Setting Up 1-17 Align the left edge guide with the guide mark on the printer. 3. Turn on the paper guide. Push back the paper release lever. (See Figure 1-16.) The single-arrow icon behind the lever marks the position the...
... to fit the sire of the left side of the paper. 5. Setting Up 1-17 Align the left edge guide with the guide mark on the printer. 3. Turn on the paper guide. Push back the paper release lever. (See Figure 1-16.) The single-arrow icon behind the lever marks the position the...

User Manual
Page 25
... front lid is crooked and needs to be reloaded, pull the paper release lever forward, pull out the paper, push the lever back, turn the printer off, and reload by beginning again at step 1 in place whenever you print. (Always snap the lid shut when replacing the lid.) The front lid... paper against the platen, 8. The paper is ready to the top of the page. 7. Figure 1-18. Push the ON/OFF LINE button so that the printer is automatically loaded to accept data. Apex80 ready for automatic paper loading 6.
... front lid is crooked and needs to be reloaded, pull the paper release lever forward, pull out the paper, push the lever back, turn the printer off, and reload by beginning again at step 1 in place whenever you print. (Always snap the lid shut when replacing the lid.) The front lid... paper against the platen, 8. The paper is ready to the top of the page. 7. Figure 1-18. Push the ON/OFF LINE button so that the printer is automatically loaded to accept data. Apex80 ready for automatic paper loading 6.


