Basics
Page 37
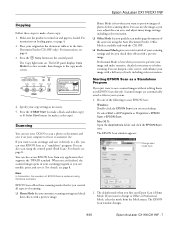
... other color images. Fine (Text) For documents containing black text only. If not, press the Copy button. 2. S. Follow these steps to enter the Copy mode. 2. Make sure the product is higher quality (600 dpi). (High Quality) 1. Selecting Document Type You can specify the size of paper you loaded in the MP tray or the optional paper cassette unit. Removes moiré patterns, sharpens the outline, and removes the backgrounds. Customizing Copy Settings 37...
... other color images. Fine (Text) For documents containing black text only. If not, press the Copy button. 2. S. Follow these steps to enter the Copy mode. 2. Make sure the product is higher quality (600 dpi). (High Quality) 1. Selecting Document Type You can specify the size of paper you loaded in the MP tray or the optional paper cassette unit. Removes moiré patterns, sharpens the outline, and removes the backgrounds. Customizing Copy Settings 37...

Basics
Page 66
... document, and close your Start Here sheet. 2. Scan modes Automatic scan Manual scan Available settings File Format File Format Paper Size Items PDF, TIFF, JPG PDF, TIFF, JPG A4, B5, Letter, Legal Scanning Follow these steps to select a file format. 6. Turn on the CX11N. When you need to select your computer screen. Press the u or d button to cancel scanning, press the y Cancel button. 66 Scanning EPSON Scan starts scanning.
... document, and close your Start Here sheet. 2. Scan modes Automatic scan Manual scan Available settings File Format File Format Paper Size Items PDF, TIFF, JPG PDF, TIFF, JPG A4, B5, Letter, Legal Scanning Follow these steps to select a file format. 6. Turn on the CX11N. When you need to select your computer screen. Press the u or d button to cancel scanning, press the y Cancel button. 66 Scanning EPSON Scan starts scanning.
Basics
Page 72
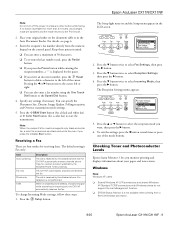
... of black toner left in the toner cartridge Remaining service life of the photoconductor unit Total number of pages printed by the CX11N Total number of color pages printed by the CX11N Total number of black and white pages printed by the CX11N 1 Appears only when the network interface board is installed 2 Display only Tray Menu This menu lets you specify the size and type of paper you loaded in the MP tray and the type of paper in the standard and optional paper cassettes. 72 Using the Control Panel Item Status Sheet Network Status Sheet...
... of black toner left in the toner cartridge Remaining service life of the photoconductor unit Total number of pages printed by the CX11N Total number of color pages printed by the CX11N Total number of black and white pages printed by the CX11N 1 Appears only when the network interface board is installed 2 Display only Tray Menu This menu lets you specify the size and type of paper you loaded in the MP tray and the type of paper in the standard and optional paper cassettes. 72 Using the Control Panel Item Status Sheet Network Status Sheet...
Basics
Page 74
... factory settings. Resets the fuser unit service life counter after you have replaced the fuser unit. 74 Using the Control Panel Restores the printer settings to reset when there is a problem with a print job and you cancel printing and reset the printer settings. See page 83. Item Clear Warning Clear All Warnings Reset Restart Unit Factory Settings Change toner C/M/Y/K Reset Fuser Counter Description Clears every warning message, except for the Time Setting. Restarts the printer. Moves the selected toner cartridge into position so that appear on the LCD screen. The letters...
... factory settings. Resets the fuser unit service life counter after you have replaced the fuser unit. 74 Using the Control Panel Restores the printer settings to reset when there is a problem with a print job and you cancel printing and reset the printer settings. See page 83. Item Clear Warning Clear All Warnings Reset Restart Unit Factory Settings Change toner C/M/Y/K Reset Fuser Counter Description Clears every warning message, except for the Time Setting. Restarts the printer. Moves the selected toner cartridge into position so that appear on the LCD screen. The letters...
Basics
Page 76
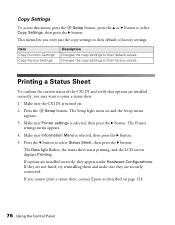
...that options are installed correctly, they are securely connected. The Setup light turns on . 2. Make sure Printer settings is selected, then press the r button. 5. The Data light flashes, the status sheet starts printing, and the LCD screen displays Printing. This menu lets you cannot print a status sheet, contact Epson as described on page 128. 76 Using the Control Panel Press the d button to select Copy Settings, then press the r button. If options are installed correctly, you may want to their default values. Changes the copy settings to print a status sheet. 1. Make...
...that options are installed correctly, they are securely connected. The Setup light turns on . 2. Make sure Printer settings is selected, then press the r button. 5. The Data light flashes, the status sheet starts printing, and the LCD screen displays Printing. This menu lets you cannot print a status sheet, contact Epson as described on page 128. 76 Using the Control Panel Press the d button to select Copy Settings, then press the r button. If options are installed correctly, you may want to their default values. Changes the copy settings to print a status sheet. 1. Make...
Basics
Page 81
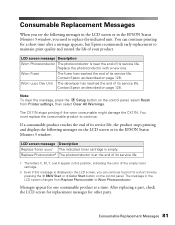
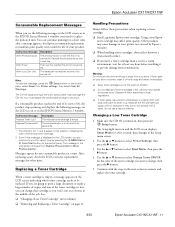
... its service life. The CX11N stops printing if the worn consumable might damage the CX11N. You must replace the consumable product to replace the indicated unit. Messages appear for a short time by pressing the x B&W Start or x Color Start button on page 128. LCD screen message Description Replace Toner uuuu1 The indicated toner cartridge is at a time. Consumable Replacement Messages When you see the following messages on the control panel, select Reset from Replace Photocondctr to maintain print quality and...
... its service life. The CX11N stops printing if the worn consumable might damage the CX11N. You must replace the consumable product to replace the indicated unit. Messages appear for a short time by pressing the x B&W Start or x Color Start button on page 128. LCD screen message Description Replace Toner uuuu1 The indicated toner cartridge is at a time. Consumable Replacement Messages When you see the following messages on the control panel, select Reset from Replace Photocondctr to maintain print quality and...
Basics
Page 100
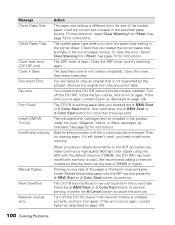
... paper size and type in the current paper source. Turn off the CX11N, check if the network module is not closed completely. If the error occurs again, contact Epson as described on page 128. 100 Solving Problems Wait for a few minutes until the current copy job is open error (CX11NF only) Cover X Open Document Error Fax error Form Feed Install C/M/Y/K TnrCart Insufficient memory Action The paper size setting is finished in the product. If it securely. Manual Duplex...
... paper size and type in the current paper source. Turn off the CX11N, check if the network module is not closed completely. If the error occurs again, contact Epson as described on page 128. 100 Solving Problems Wait for a few minutes until the current copy job is open error (CX11NF only) Cover X Open Document Error Fax error Form Feed Install C/M/Y/K TnrCart Insufficient memory Action The paper size setting is finished in the product. If it securely. Manual Duplex...

Basics
Page 102
...'t work, contact Epson as described on the Consumables Info Settings window. Make sure the switch is turned on and plug another electrical device into the outlet to the not turn on CX11N and the electrical outlet, and turn it back on page 128. See page 129 for connecting instructions. • Your application software is garbled • The interface cable may be using the interface cable with the correct specifications. Printing Problems Operation Problems Problem Solution The Print light...
...'t work, contact Epson as described on the Consumables Info Settings window. Make sure the switch is turned on and plug another electrical device into the outlet to the not turn on CX11N and the electrical outlet, and turn it back on page 128. See page 129 for connecting instructions. • Your application software is garbled • The interface cable may be using the interface cable with the correct specifications. Printing Problems Operation Problems Problem Solution The Print light...
Basics
Page 108
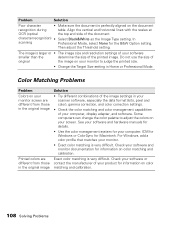
... color palette to judge the printed size. • Change the Target Size setting in your scanner software, especially the data format (bits, pixel and color), gamma correction, and color correction settings. • Check the color matching and color management capabilities of original the image on your monitor to adjust the colors on color matching and calibration. character recognition) • Select Black&White as the Image Type setting. Align the vertical and horizontal lines...
... color palette to judge the printed size. • Change the Target Size setting in your scanner software, especially the data format (bits, pixel and color), gamma correction, and color correction settings. • Check the color matching and color management capabilities of original the image on your monitor to adjust the colors on color matching and calibration. character recognition) • Select Black&White as the Image Type setting. Align the vertical and horizontal lines...
Basics
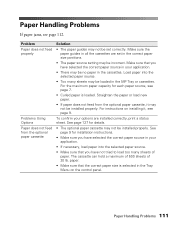
Page 111
... paper guides in the Tray Menu on installing it may not be incorrect. Make sure that you have not tried to load too many sheets may be installed properly. For instructions on the control panel. See page 127 for each paper source, see page 7. • Curled paper is selected in all the cassettes are installed correctly, print a status sheet. Problem Paper does not feed properly Problems Using Options Paper does not feed from the optional paper cassette, it , see page 112. paper...
... paper guides in the Tray Menu on installing it may not be incorrect. Make sure that you have not tried to load too many sheets may be installed properly. For instructions on the control panel. See page 127 for each paper source, see page 7. • Curled paper is selected in all the cassettes are installed correctly, print a status sheet. Problem Paper does not feed properly Problems Using Options Paper does not feed from the optional paper cassette, it , see page 112. paper...

Basics
Page 135
... United States Users 1. The REN is part of devices that is provided with the applicable FCC Part 68 rules and requirements adopted by the telephone company. The telephone company may make necessary modifications to party line service is available for repair or warranty information, please contact Epson America, Inc. 800-556-6025. The Telephone Consumer Protection Act of each transmitted page...
... United States Users 1. The REN is part of devices that is provided with the applicable FCC Part 68 rules and requirements adopted by the telephone company. The telephone company may make necessary modifications to party line service is available for repair or warranty information, please contact Epson America, Inc. 800-556-6025. The Telephone Consumer Protection Act of each transmitted page...
Basics
Page 142
... images ...........51 Printer cable 129 cleaning (print head 93 information 71 Printer settings menu Information 71 paper source settings 72 printer information 71 Reset 74 Setup 73 Tray 72 Printer status (Macintosh 32 Printer status (Windows 30 Printing canceling 77 canceling (Macintosh 33 canceling (Windows 32 controlling 26 Epson Status Monitor 29 in Macintosh 23 to 28 in Windows 19 to 23 network (Macintosh) .....33 to 34 problems 102 settings (Macintosh 26 settings (Windows 21 142 Index Problems color matching 108 copy quality 109 copying 109 EPSON Scan 106 paper...
... images ...........51 Printer cable 129 cleaning (print head 93 information 71 Printer settings menu Information 71 paper source settings 72 printer information 71 Reset 74 Setup 73 Tray 72 Printer status (Macintosh 32 Printer status (Windows 30 Printing canceling 77 canceling (Macintosh 33 canceling (Windows 32 controlling 26 Epson Status Monitor 29 in Macintosh 23 to 28 in Windows 19 to 23 network (Macintosh) .....33 to 34 problems 102 settings (Macintosh 26 settings (Windows 21 142 Index Problems color matching 108 copy quality 109 copying 109 EPSON Scan 106 paper...
Product Information Guide
Page 3
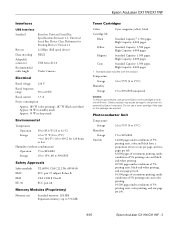
...576 MB Toner Cartridges Colors Cyan, magenta, yellow, black Cartridge life Black Standard Capacity1: 1,500 pages, High Capacity: 4,000 pages Yellow Standard Capacity: 1,500 pages, High Capacity: 4,000 pages Magenta Standard Capacity: 1,500 pages, High Capacity: 4,000 pages Cyan Standard Capacity: 1,500 pages, High Capacity: 4,000 pages 1 Standard black included with the product. Do not use genuine Epson toner cartridges and do not refill them. Epson AcuLaser CX11N/CX11NF Interfaces USB Interface Standard Bit rate Data encoding Adaptable connector Recommended cable length Based...
...576 MB Toner Cartridges Colors Cyan, magenta, yellow, black Cartridge life Black Standard Capacity1: 1,500 pages, High Capacity: 4,000 pages Yellow Standard Capacity: 1,500 pages, High Capacity: 4,000 pages Magenta Standard Capacity: 1,500 pages, High Capacity: 4,000 pages Cyan Standard Capacity: 1,500 pages, High Capacity: 4,000 pages 1 Standard black included with the product. Do not use genuine Epson toner cartridges and do not refill them. Epson AcuLaser CX11N/CX11NF Interfaces USB Interface Standard Bit rate Data encoding Adaptable connector Recommended cable length Based...
Product Information Guide
Page 4
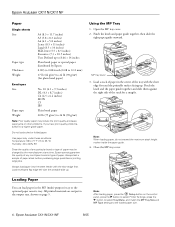
... printable side up . Open the MP tray cover. 2. Do not load curled or folded paper. Using the MP Tray 1. Note: After loading paper, press the Setup button on the control panel, press the r button to select Printer Settings, press the d button to select Tray Menu, and match the MP Tray Size and MP Type settings to the output tray, shown on page 5. Epson AcuLaser CX11N/CX11NF Paper Single sheets Size Paper type Thickness Weight A4 (8.3 × 11.7 inches) A5 (5.8 × 8.3 inches) A6 (4.1 × 5.8 inches) Letter (8.5 ×...
... printable side up . Open the MP tray cover. 2. Do not load curled or folded paper. Using the MP Tray 1. Note: After loading paper, press the Setup button on the control panel, press the r button to select Printer Settings, press the d button to select Tray Menu, and match the MP Tray Size and MP Type settings to the output tray, shown on page 5. Epson AcuLaser CX11N/CX11NF Paper Single sheets Size Paper type Thickness Weight A4 (8.3 × 11.7 inches) A5 (5.8 × 8.3 inches) A6 (4.1 × 5.8 inches) Letter (8.5 ×...
Product Information Guide
Page 7
... size using Windows examples. The Copy light turns on. The LCD panel displays Copy Mode for a few seconds, then changes to make a color copy). Specify your copy settings as files in your image and make a basic copy: 1. Press the x B&W Start (to make a black-and-white copy) or x Color Start button (to the copy mode screen. 4. For details, see page 4. 2. Note: In this section, the operation of EPSON Scan is available only with the CX11NF. ❏ Professional Mode gives you total control...
... size using Windows examples. The Copy light turns on. The LCD panel displays Copy Mode for a few seconds, then changes to make a color copy). Specify your copy settings as files in your image and make a basic copy: 1. Press the x B&W Start (to make a black-and-white copy) or x Color Start button (to the copy mode screen. 4. For details, see page 4. 2. Note: In this section, the operation of EPSON Scan is available only with the CX11NF. ❏ Professional Mode gives you total control...

Product Information Guide
Page 8
.... Scan modes Automatic scan Available settings File Format Items PDF, TIFF, JPG Scan modes Manual scan Available settings File Format Paper Size Items PDF, TIFF, JPG A4, B5, Letter, Legal Scanning Follow these steps to select the product. Place your EPSON AL-CX11. Select your scanning program, scan your document, and close your computer. Press the x B&W Start or x Color Start button on the CX11N. Make sure the...
.... Scan modes Automatic scan Available settings File Format Items PDF, TIFF, JPG Scan modes Manual scan Available settings File Format Paper Size Items PDF, TIFF, JPG A4, B5, Letter, Legal Scanning Follow these steps to select the product. Place your EPSON AL-CX11. Select your scanning program, scan your document, and close your computer. Press the x B&W Start or x Color Start button on the CX11N. Make sure the...
Product Information Guide
Page 9
... r button. Place your paper and toner status. Pressing the l or r button moves the cursor left of the mode buttons. You can also enter a fax number using the One Touch Dial button or the Speed Dial button. 4. Windows Note: Windows XP users ❏ Shared Windows XP LPR connections and shared Windows XP Standard TCP/IP connections with Windows clients do not support the Job Management function. ❏ EPSON Status Monitor 3 is displayed for receiving faxes. Epson AcuLaser CX11N/CX11NF...
... r button. Place your paper and toner status. Pressing the l or r button moves the cursor left of the mode buttons. You can also enter a fax number using the One Touch Dial button or the Speed Dial button. 4. Windows Note: Windows XP users ❏ Shared Windows XP LPR connections and shared Windows XP Standard TCP/IP connections with Windows clients do not support the Job Management function. ❏ EPSON Status Monitor 3 is displayed for receiving faxes. Epson AcuLaser CX11N/CX11NF...
Product Information Guide
Page 11
...Note: To clear the message, press the Setup button on page 12 Handling Precautions Always follow these precautions when replacing a toner cartridge: ❏ Install a genuine Epson toner cartridge. Changing a Low Toner Cartridge 1. Use the u or d button to replace the indicated unit. The fuser has reached the end of its service life, the product stops printing and displays the following messages in the LCD screen or in the EPSON Status Monitor 3 window, you move a toner cartridge from Printer settings, then select Clear All Warnings. The CX11N stops printing if the...
...Note: To clear the message, press the Setup button on page 12 Handling Precautions Always follow these precautions when replacing a toner cartridge: ❏ Install a genuine Epson toner cartridge. Changing a Low Toner Cartridge 1. Use the u or d button to replace the indicated unit. The fuser has reached the end of its service life, the product stops printing and displays the following messages in the LCD screen or in the EPSON Status Monitor 3 window, you move a toner cartridge from Printer settings, then select Clear All Warnings. The CX11N stops printing if the...
Start Here Card
Page 2
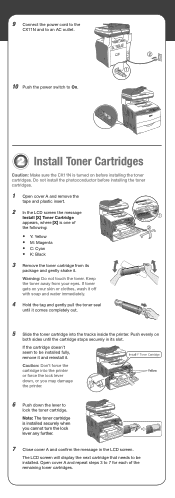
Warning: Do not touch the toner. The LCD screen will display the next cartridge that needs to be installed. If toner gets on before installing the toner cartridges. 1 Open cover A and remove the tape and plastic insert. 2 In the LCD screen the message Install [X] Toner Cartridge appears, where [X] is one of the remaining toner cartridges. Caution: Don't force the cartridge into the tracks inside the printer. 9 Connect the power cord to the CX11N and...
Warning: Do not touch the toner. The LCD screen will display the next cartridge that needs to be installed. If toner gets on before installing the toner cartridges. 1 Open cover A and remove the tape and plastic insert. 2 In the LCD screen the message Install [X] Toner Cartridge appears, where [X] is one of the remaining toner cartridges. Caution: Don't force the cartridge into the tracks inside the printer. 9 Connect the power cord to the CX11N and...
Start Here Card
Page 8
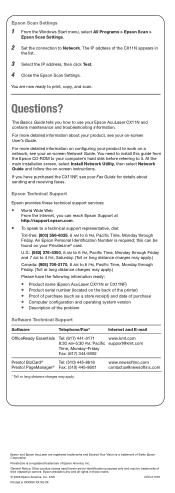
... address of their respective owners. Epson Technical Support Epson provides these technical support services: • World Wide Web From the Internet, you have the following information ready: • Product name (Epson AcuLaser CX11N or CX11NF) • Product serial number (located on your Epson AcuLaser CX11N and contains maintenance and troubleshooting information. Questions? For more detailed information on configuring your on-screen Network Guide. Epson Scan Settings 1 From the Windows Start menu, select All Programs > Epson Scan > Epson Scan Settings. 2 Set...
... address of their respective owners. Epson Technical Support Epson provides these technical support services: • World Wide Web From the Internet, you have the following information ready: • Product name (Epson AcuLaser CX11N or CX11NF) • Product serial number (located on your Epson AcuLaser CX11N and contains maintenance and troubleshooting information. Questions? For more detailed information on configuring your on-screen Network Guide. Epson Scan Settings 1 From the Windows Start menu, select All Programs > Epson Scan > Epson Scan Settings. 2 Set...


