Quick Start
Page 2
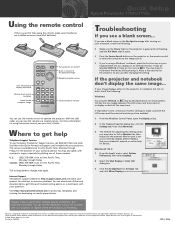
... utilities and documentation, get product updates, special promotions, and customer-only offers. Macintosh® OS X 1. Quick Setup Epson PowerLite 1700c/1710c Troubleshooting If you toggle between the LCD screen and the projector, or display on using the CRT/LCD or key as . Using the remote control 1 If this key lets you see a blank screen... Allow a few...
... utilities and documentation, get product updates, special promotions, and customer-only offers. Macintosh® OS X 1. Quick Setup Epson PowerLite 1700c/1710c Troubleshooting If you toggle between the LCD screen and the projector, or display on using the CRT/LCD or key as . Using the remote control 1 If this key lets you see a blank screen... Allow a few...

User's Guide
Page 18
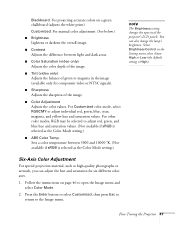
...: ■ Make sure the cables are connected correctly, as described beginning on both at the same time, follow these guidelines. Allow a few seconds for the projector to sync up after changing the setting. You Can't Project an Image If you don't see the image you can't see your image on the... Fn key while pressing it . If you're using a PC notebook, press the function key on your keyboard that lets you toggle between the LCD screen and the projector, or display on page 33. ■ Make sure the Power light is green and not flashing and the A/V Mute slide is open. ■...
...: ■ Make sure the cables are connected correctly, as described beginning on both at the same time, follow these guidelines. Allow a few seconds for the projector to sync up after changing the setting. You Can't Project an Image If you don't see the image you can't see your image on the... Fn key while pressing it . If you're using a PC notebook, press the function key on your keyboard that lets you toggle between the LCD screen and the projector, or display on page 33. ■ Make sure the Power light is green and not flashing and the A/V Mute slide is open. ■...

User's Guide
Page 19
...'s documentation or online help for adjusting the settings varies by brand; If you're using Mac OS X: You may need to set as the LCD screen. In the Display Properties dialog box, click the Settings tab, then click Advanced. Make sure the Mirror Displays checkbox is selected. 3. From... Arrangement (or Arrange) tab. ■ If the function key doesn't permit you to display simultaneously on the projector screen as well as your system to display on both the LCD screen and the external monitor port are enabled. The method for details. See your monitor settings to make sure ...
...'s documentation or online help for adjusting the settings varies by brand; If you're using Mac OS X: You may need to set as the LCD screen. In the Display Properties dialog box, click the Settings tab, then click Advanced. Make sure the Mirror Displays checkbox is selected. 3. From... Arrangement (or Arrange) tab. ■ If the function key doesn't permit you to display simultaneously on the projector screen as well as your system to display on both the LCD screen and the external monitor port are enabled. The method for details. See your monitor settings to make sure ...
User's Guide
Page 47
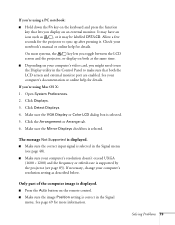
...values. Six-Axis Color Adjustment For special projection material, such as the Color Mode setting.) note The Brightness setting changes the opacity of the projector's LCD panels. Sets a color temperature between light and dark areas. ■ Color Saturation (video only) Adjusts the color depth of the image... menu and select Color Mode. 2. Select Brightness Control in the image (available only for six different color axes. 1. Fine-Tuning the Projector 47 For other color modes, RGB may be selected to adjust individual red, green, blue, cyan, magenta, and yellow hue and saturation...
...values. Six-Axis Color Adjustment For special projection material, such as the Color Mode setting.) note The Brightness setting changes the opacity of the projector's LCD panels. Sets a color temperature between light and dark areas. ■ Color Saturation (video only) Adjusts the color depth of the image... menu and select Color Mode. 2. Select Brightness Control in the image (available only for six different color axes. 1. Fine-Tuning the Projector 47 For other color modes, RGB may be selected to adjust individual red, green, blue, cyan, magenta, and yellow hue and saturation...
User's Guide
Page 73
... lets you toggle between the LCD screen and the projector, or display on the remote control. ■ Make sure the image Position setting is selected. 5. Click Detect Displays. 4. Open System Preferences. 2. Click Displays. 3. Make sure the VGA Display or Color LCD dialog box is correct in ...using a PC notebook: ■ Hold down the Fn key on an external monitor. Make sure the Mirror Displays checkbox is supported by the projector (see page 48). ■ Make sure your computer's resolution setting as , or it . Solving Problems 73 If necessary, change your computer...
... lets you toggle between the LCD screen and the projector, or display on the remote control. ■ Make sure the image Position setting is selected. 5. Click Detect Displays. 4. Open System Preferences. 2. Click Displays. 3. Make sure the VGA Display or Color LCD dialog box is correct in ...using a PC notebook: ■ Hold down the Fn key on an external monitor. Make sure the Mirror Displays checkbox is supported by the projector (see page 48). ■ Make sure your computer's resolution setting as , or it . Solving Problems 73 If necessary, change your computer...

User's Guide
Page 75
... try projecting black text on page 49. 1. If you don't like the new settings, you can always select Reset to return to reset the projector's tracking and sync settings. ■ If further adjustment is displayed simultaneously on the remote control to the factory default settings. You see page 49...). Press the Auto button on your notebook computer and the projector, turn off the notebook's LCD display. ■ Make sure the correct input signal is selected in the Signal menu (see vertical bands or the image still ...
... try projecting black text on page 49. 1. If you don't like the new settings, you can always select Reset to return to reset the projector's tracking and sync settings. ■ If further adjustment is displayed simultaneously on the remote control to the factory default settings. You see page 49...). Press the Auto button on your notebook computer and the projector, turn off the notebook's LCD display. ■ Make sure the correct input signal is selected in the Signal menu (see vertical bands or the image still ...


