Dell™ Technology Guide
Page 39
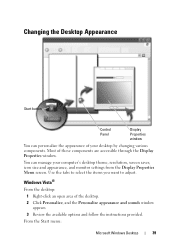
Most of the desktop. 2 Click Personalize, and the Personalize appearance and sounds window appears. 3 Review the available options and follow the instructions provided. From the Start menu: Microsoft Windows Desktop 39 You can personalize the appearance of your computer's desktop ...
Most of the desktop. 2 Click Personalize, and the Personalize appearance and sounds window appears. 3 Review the available options and follow the instructions provided. From the Start menu: Microsoft Windows Desktop 39 You can personalize the appearance of your computer's desktop ...
Dell™ Technology Guide
Page 40
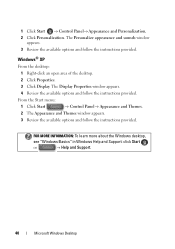
... provided. 1 Click Start → Control Panel→ Appearance and Personalization. 2 Click Personalization. The Display Properties window appears. 4 Review the available options and follow the instructions provided. Windows® XP From the desktop: 1 Right-click an open area of the desktop. 2 Click Properties. 3 Click Display. FOR MORE INFORMATION: ... Windows Desktop From the Start menu: 1 Click Start → Control Panel→ Appearance and Themes. 2 The Appearance and Themes window appears. 3 Review the available options and follow the instructions provided.
... provided. 1 Click Start → Control Panel→ Appearance and Personalization. 2 Click Personalization. The Display Properties window appears. 4 Review the available options and follow the instructions provided. Windows® XP From the desktop: 1 Right-click an open area of the desktop. 2 Click Properties. 3 Click Display. FOR MORE INFORMATION: ... Windows Desktop From the Start menu: 1 Click Start → Control Panel→ Appearance and Themes. 2 The Appearance and Themes window appears. 3 Review the available options and follow the instructions provided.
Dell™ Technology Guide
Page 89
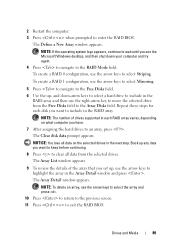
The Define a New Array window appears. The Array Detail window appears. The Clear disk data prompt appears. The Array List window appears. 9 To review the details of drives supported in the next step. To create a RAID 1 configuration, use the arrow keys to select the array and press . 10 Press ...
The Define a New Array window appears. The Array Detail window appears. The Clear disk data prompt appears. The Array List window appears. 9 To review the details of drives supported in the next step. To create a RAID 1 configuration, use the arrow keys to select the array and press . 10 Press ...
Dell™ Technology Guide
Page 130
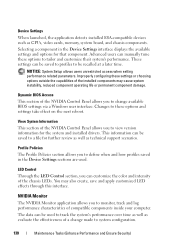
... view version information for that component. View System Information This section of the NVIDIA Control Panel allows you to change made to a file for further review as well as evaluate the effectiveness of the installed components may also create, save and apply customized LED effects through this interface. Device Settings When...
... view version information for that component. View System Information This section of the NVIDIA Control Panel allows you to change made to a file for further review as well as evaluate the effectiveness of the installed components may also create, save and apply customized LED effects through this interface. Device Settings When...

Dell™ Technology Guide
Page 183
..., see the following topics in Windows Help and Support: click Start or → Help and Support: • "Remove spyware from the Dell web page. The filter redirects you are not perfect and may block valid e-mail messages. FOR MORE INFORMATION: To learn more selective settings....be from phishers by other customers if you to the Internet Options Advanced tab to easily exchange or return items. Read store ratings or reviews by turning on the Automatic Website Check. 3 Click Phishing Filter Settings. Protect yourself from a reputable business. You can include chain letters ...
..., see the following topics in Windows Help and Support: click Start or → Help and Support: • "Remove spyware from the Dell web page. The filter redirects you are not perfect and may block valid e-mail messages. FOR MORE INFORMATION: To learn more selective settings....be from phishers by other customers if you to the Internet Options Advanced tab to easily exchange or return items. Read store ratings or reviews by turning on the Automatic Website Check. 3 Click Phishing Filter Settings. Protect yourself from a reputable business. You can include chain letters ...
Dell™ Technology Guide
Page 195
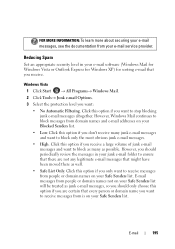
...to block messages from domain names and e-mail addresses on your Safe Senders list will be treated as junk e-mail messages, so you should periodically review the messages in your Safe Senders list. Click this option if you want to block only the most obvious junk e-mail messages. • High... e-mail messages that you want to receive messages from is on your e-mail software (Windows Mail for Windows Vista or Outlook Express for Windows XP) for sorting e-mail that might have been moved there as possible. FOR MORE INFORMATION: To learn more about securing your e-mail messages, see...
...to block messages from domain names and e-mail addresses on your Safe Senders list will be treated as junk e-mail messages, so you should periodically review the messages in your Safe Senders list. Click this option if you want to block only the most obvious junk e-mail messages. • High... e-mail messages that you want to receive messages from is on your e-mail software (Windows Mail for Windows Vista or Outlook Express for Windows XP) for sorting e-mail that might have been moved there as possible. FOR MORE INFORMATION: To learn more about securing your e-mail messages, see...
Dell™ Technology Guide
Page 271
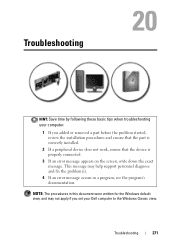
This message may not apply if you added or removed a part before the problem started, review the installation procedures and ensure that the part is correctly installed. 2 If a peripheral device does not work, ensure that the device is properly connected. 3 If ... message occurs in a program, see the program's documentation. Troubleshooting HINT: Save time by following these basic tips when troubleshooting your computer. 1 If you set your Dell computer to the Windows Classic view.
This message may not apply if you added or removed a part before the problem started, review the installation procedures and ensure that the part is correctly installed. 2 If a peripheral device does not work, ensure that the device is properly connected. 3 If ... message occurs in a program, see the program's documentation. Troubleshooting HINT: Save time by following these basic tips when troubleshooting your computer. 1 If you set your Dell computer to the Windows Classic view.
Dell™ Technology Guide
Page 281
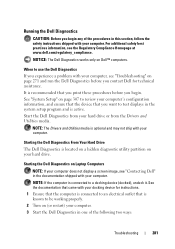
...Setup" on page 307 to review your docking device for technical assistance. Starting the Dell Diagnostics From Your Hard Drive The Dell Diagnostics is recommended that came with your computer's configuration information, and ensure that the device that you contact Dell for instructions. 1 Ensure that ... NOTE: The Drivers and Utilities media is connected to use the Dell Diagnostics If you experience a problem with your computer. Starting the Dell Diagnostics on (or restart) your computer. 3 Start the Dell Diagnostics in one of the procedures in the documentation shipped with your ...
...Setup" on page 307 to review your docking device for technical assistance. Starting the Dell Diagnostics From Your Hard Drive The Dell Diagnostics is recommended that came with your computer's configuration information, and ensure that the device that you contact Dell for instructions. 1 Ensure that ... NOTE: The Drivers and Utilities media is connected to use the Dell Diagnostics If you experience a problem with your computer. Starting the Dell Diagnostics on (or restart) your computer. 3 Start the Dell Diagnostics in one of the procedures in the documentation shipped with your ...
Dell™ Technology Guide
Page 311
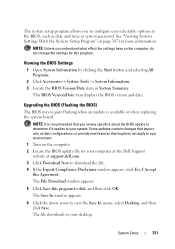
..., such as date and time or system password. Some updates contain changes that impact only certain configurations, or provide new features that you review specifics about the BIOS update to determine if it applies to download the file. 4 If the Export Compliance Disclaimer window appears, click Yes... "Viewing System Settings With the System Setup Program" on the computer. 2 Locate the BIOS update file for your computer at the Dell Support website at support.dell.com. 3 Click Download Now to your environment. 1 Turn on page 307 for this Agreement. System Setup 311 Upgrading the BIOS ...
..., such as date and time or system password. Some updates contain changes that impact only certain configurations, or provide new features that you review specifics about the BIOS update to determine if it applies to download the file. 4 If the Export Compliance Disclaimer window appears, click Yes... "Viewing System Settings With the System Setup Program" on the computer. 2 Locate the BIOS update file for your computer at the Dell Support website at support.dell.com. 3 Click Download Now to your environment. 1 Turn on page 307 for this Agreement. System Setup 311 Upgrading the BIOS ...

Quick Reference Guide
Page 27
... to monitor, track, and log performance characteristics of compatible components inside your computer. Profile Policies The Profile Policies section allows you to a file for further review and also for technical support scenarios. NVIDIA Monitor The NVIDIA Monitor application allows you to monitor, graph, and log. • Set reporting intervals and performance...
... to monitor, track, and log performance characteristics of compatible components inside your computer. Profile Policies The Profile Policies section allows you to a file for further review and also for technical support scenarios. NVIDIA Monitor The NVIDIA Monitor application allows you to monitor, graph, and log. • Set reporting intervals and performance...
Quick Reference Guide
Page 49
..., Currency and Keyboard Method, and then click Next. 6 On the Windows Vista Installation page, click Install Now. 7 Review the terms and click I accept the license terms to do not reinstall Windows Vista unless a Dell technical support representative instructs you want to install Windows window, click New. 13 When prompted to select the...
..., Currency and Keyboard Method, and then click Next. 6 On the Windows Vista Installation page, click Install Now. 7 Review the terms and click I accept the license terms to do not reinstall Windows Vista unless a Dell technical support representative instructs you want to install Windows window, click New. 13 When prompted to select the...
Quick Reference Guide
Page 50
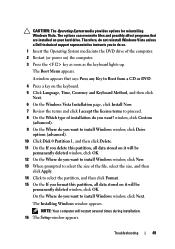
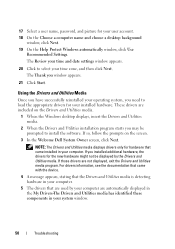
...My Drivers-The Drivers and Utilities media has identified these components in your installed hardware. These drivers are included on the screen. 3 In the Welcome Dell System Owner screen, click Next. The Thank you installed additional hardware, the drivers for your computer are not displayed, exit the Drivers and Utilities ... Drivers and Utilities media. 17 Select a user name, password, and picture for the new hardware might not be prompted to install the software. The Review your time and date settings window appears. 20 Click to select your system window. 50 Troubleshooting
...My Drivers-The Drivers and Utilities media has identified these components in your installed hardware. These drivers are included on the screen. 3 In the Welcome Dell System Owner screen, click Next. The Thank you installed additional hardware, the drivers for your computer are not displayed, exit the Drivers and Utilities ... Drivers and Utilities media. 17 Select a user name, password, and picture for the new hardware might not be prompted to install the software. The Review your time and date settings window appears. 20 Click to select your system window. 50 Troubleshooting


